


Alexander McQueen Ivory/Black Clutch, $1,850
Photo Credit: Polyvore/Matchesfashion.com
It was actually inspired by this McQueen clutch. There’s also this one, too.
Sometimes, I look at things…and certain techniques used (as oppose to the actual item) jump out at me. I loved the stitched look in this clutch, and automatically thought of the black lanyard I have in my stash. I also thought back to the techniques I used in this Fur & Ribbon Scarf and Lanyard Double Chain Bracelet. I ended up weaving the lanyard like I did with the ribbon in the scarf, but connecting two of those weaves together like I did in the bracelet.
Check out how I did it after the jump!


Supplies:
– Envelope clutch (I actually got mine off of Ebay)
– Ruler (It helped a lot that the one I was used is clear)
– Washable marker (I used Crayola) & a paper towel
– Scissors
– Super glue / E6000
– Large roll of lanyard plastic lacing
– Focal piece / pendant
– Clear nail polish (optional)
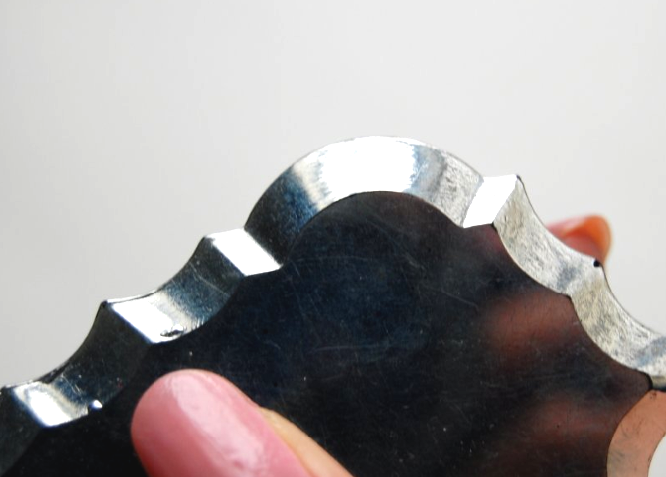
This is actually from a chandelier. I found it at a thrift store a couple years ago; I made it into a necklace, but didn’t wear it too often since it was so heavy. So I’m glad I was able to repurpose (again) for this project! I love the detailed cut along the edge.

1) With the washable marker, draw three lines along the edge of the top flap, on one side. The length will obviously depend on the size of your clutch; each line was roughly 7 inches. Notice how I positioned them slightly diagonal.

2) Make the lines about 1 centimeter apart.

3) If you mess up, you can always dampen the paper towel with some water and gently wipe away the marker.

4) When your lines are set, carefully cut along the lines. It might help to pierce the material at first, then cut.


You’ll end up with the two leather strips that lanyard will be wrapped around. The bottom (closest to the edge) and the top (farther from the edge).

5) When all the lines are cut, wipe away the marker.

6) Cut a strand of lanyard, roughly 12-15 x the length of one line. So in my case, I multiplied 7 inches by 15. I This should be more than enough, but it’s better to have too much than too little!

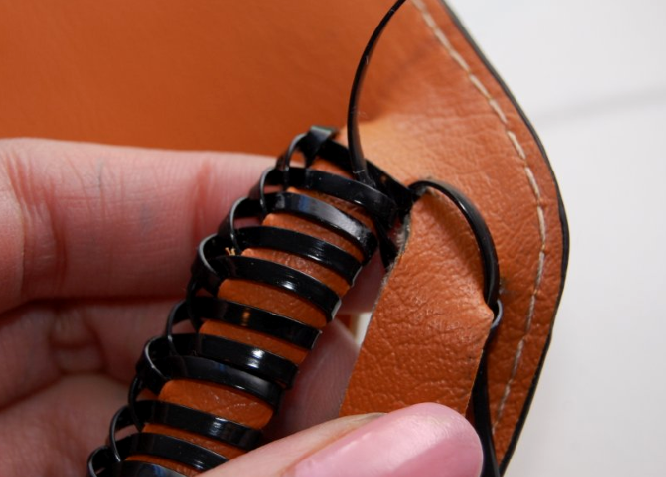
7) Fold the lanyard and half, then fold it around the strip closest to the edge. Make sure there’s an equal amount on either side.

8) Fold the bottom strand over the top strand, then under the leather strip.

9) Bring it back over the leather strip, so that both strands are now facing the same side. Basically repeat Step 8 over again; bring the “new” first strand over the second, and under the leather.

10) Fold it back over, and keep repeating…


…until you reach the end.

11) Tie it off with a few tight knots, and cut off some (but not all) of the excess just so the strands don’t get in your way.

12) Cut another strand of lanyard, same length as before (length of line multiplied by 12-15). Slip the strand through the first stitch, again making sure it’s folded perfectly in half.

13) Place the bottom strand under the leather strip, and the top over the leather strip.

14) Start weaving the lanyard the same way you did in Steps 8/9. Bottom strip folds over the top, and goes back under the leather strip.
15) Except this time, before folding that strand back over the leather, weave it through the next consecutive available stitch.

Then back over the leather.

Continue the entire way down, making sure to connect both sides by weaving the lanyard through the other stitches.


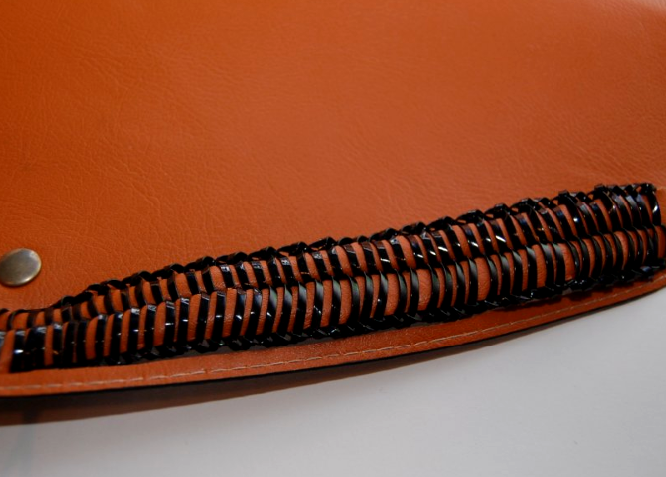
It might look a bit wonky and weighed down, but this is normal.

16) Tie off the ends.

16) Repeat on the other side, making sure to MEASURE to make sure everything is symmetrical and even. For example, if the lines that you cut started an inch from either side edge, make sure the lines on the other side are also an inch from the edge. I was a little off in the center, but that’s where the focal piece will be going anyway (thankfully!).

I finished off all ends by tying the strands in knots, and securing them with some clear nail polish.
17) Glue the focal piece/pendant to the center of the clutch. Let dry overnight.

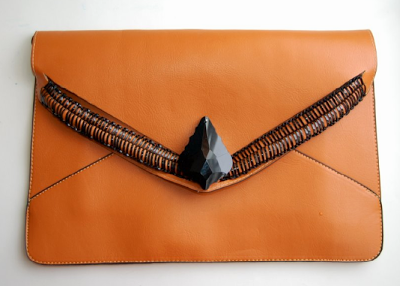
My clutch came with a strap, so it could easily be turn into a purse. I think it’s something a little different, and a fun way to dress up an otherwise plain or thrifted clutch. I’m pretty happy with it, and I especially love how it’s a new and more mature way to use lanyard.
