


Supplies:
– Thin Waxed Linen Cord (or any other type of thin cord)
– Jewelry clasp, at least 2 jump rings and 2 crimp beads
– 16 Beads (I used beads that are known as “E” beads, from Michael’s)
Just be sure that the holes are big enough to fit two strands of cord!
– Scissors & 3-in-1 Jewelry Pliers (not shown)

1) Cut a long piece of cord, 8 times the length of your wrist.


3) It might help to tape the cord down while you work. Slide one bead onto one strand (2nd photo). Take the other strand and insert it through the bottom side of the hole (as indicated by the arrow in the 2nd photo) and through the bead. Tighten and pull both strands straight, and you should end up with the 3rd photo.

4) Slide two beads onto one strand of the cord (1st photo). Insert the other strand through the bottom side and through the bead (indicated by the arrow in the 1st photo) and tighten/pull. You’ll the end up with the 2nd photo. Repeat again, with three beads (3rd photo).

5) Slide four beads onto one of the strands, and thread the other strand through (1st photo). You’ll end up with the 2nd photo above, the widest part of the diamond.

6) Continue repeating the same technique, with three beads, and then again with two.

7) And the one last time, with one bead.

8) Slide a crimp bead onto one of the strands.

9) Take the end of that strand and carefully thread it back through the crimp bead, so that a small loop forms.

10) Flatten the crimp bead with the flat portion of the jewelry pliers.

11) Repeat Steps 8-10 on the other strand. Insert a jump ring through both of the loops, and then attach to a jewelry clasp.

12) If you’d like, tie another knot between the beaded diamond and the clasp, just as you did in the first half.
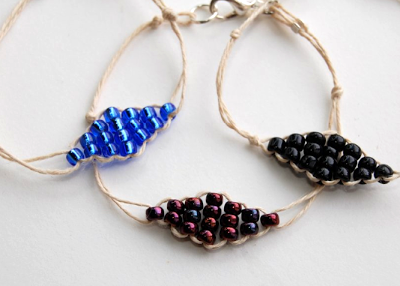
Your bracelet is all done!


I made three different kinds so far, and am planning on making more soon. Possibly alternating rows of the diamond with different colors?


Hope you enjoyed this simple and sweet bracelet DIY! Happy weekend.