

Sometimes, simpler is better. And I have to say, this project oozes simplicity. I love how dainty yet unique this ring is; the supplies are extremely accessible, too. What’s not to love?
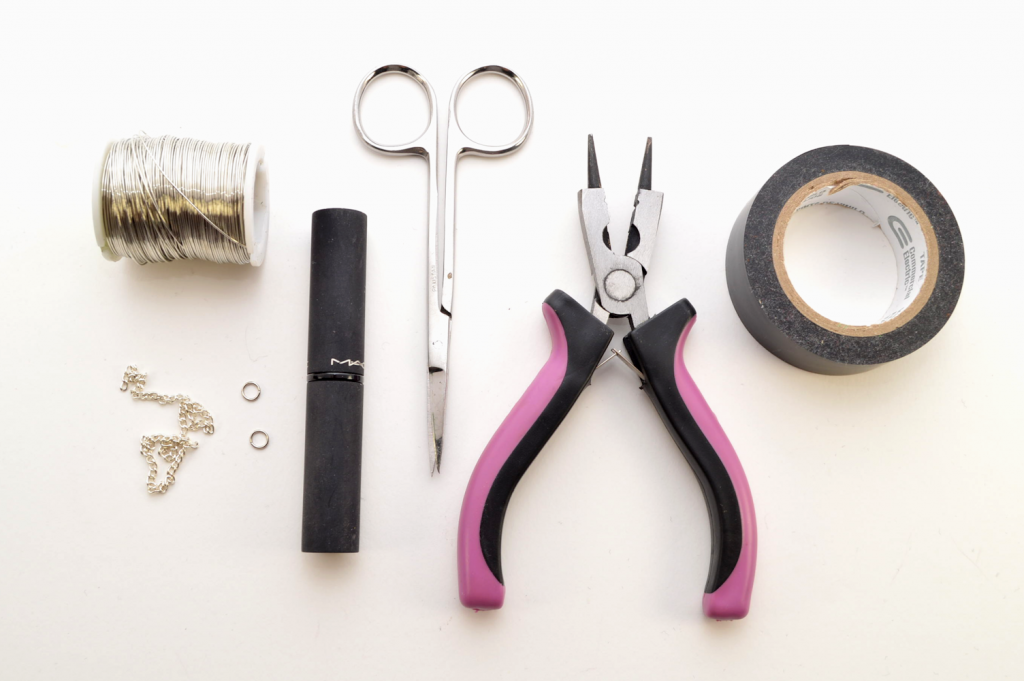
Supplies:
– Jewelry Wire
– Thin Chain (3 inches/7.5 centimeters)
– 4mm Jump Rings (2)
– Scissors
– 3-in-1 Jewelry Pliers
– Thin Cylindrical Item (such as lipstick, nail polish bottle handle, etc.)
– Tape

1) Cut a strand of wire measuring about 20 inches (50.8 centimeters).
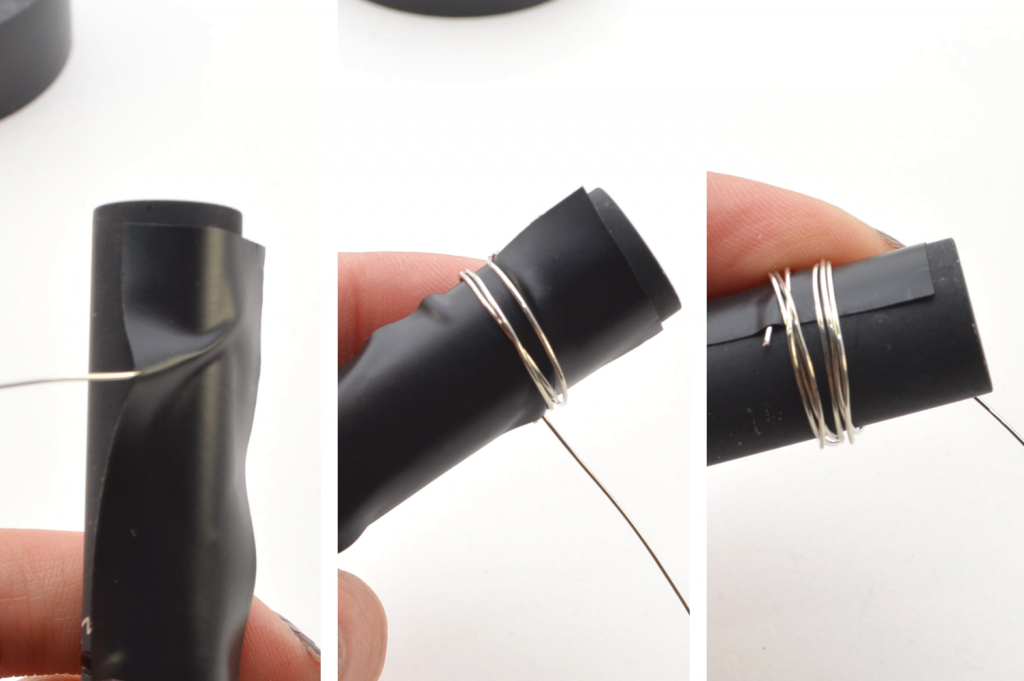
2) Tape the end of the wire to the lipstick/cylindrical item. Begin tightly wrapping around, keeping the wire close to itself. Wrap around 6-7 times.
3) Carefully remove the wire from the lipstick.
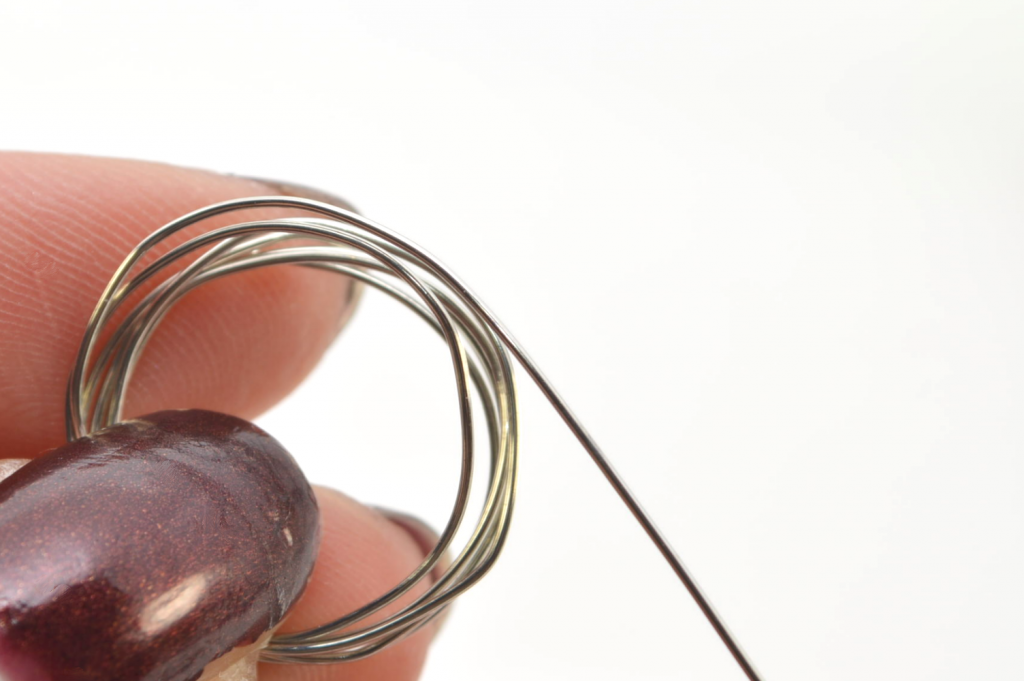
At this point, you can adjust the wire to determine the size of the ring. To make it fit more like a midi ring, pull the ends and adjust the circle to make it smaller. To make it fit like a normal ring, let it loosen up a bit before continuing. You can always slip the wire onto your finger to see how it will fit beforehand.
4) Tightly wrap the remaining wire around itself, about 4-5 times. It’s a good idea to do this near the first end of the wire (ie: the end that was originally taped down) so that the circle doesn’t unravel.
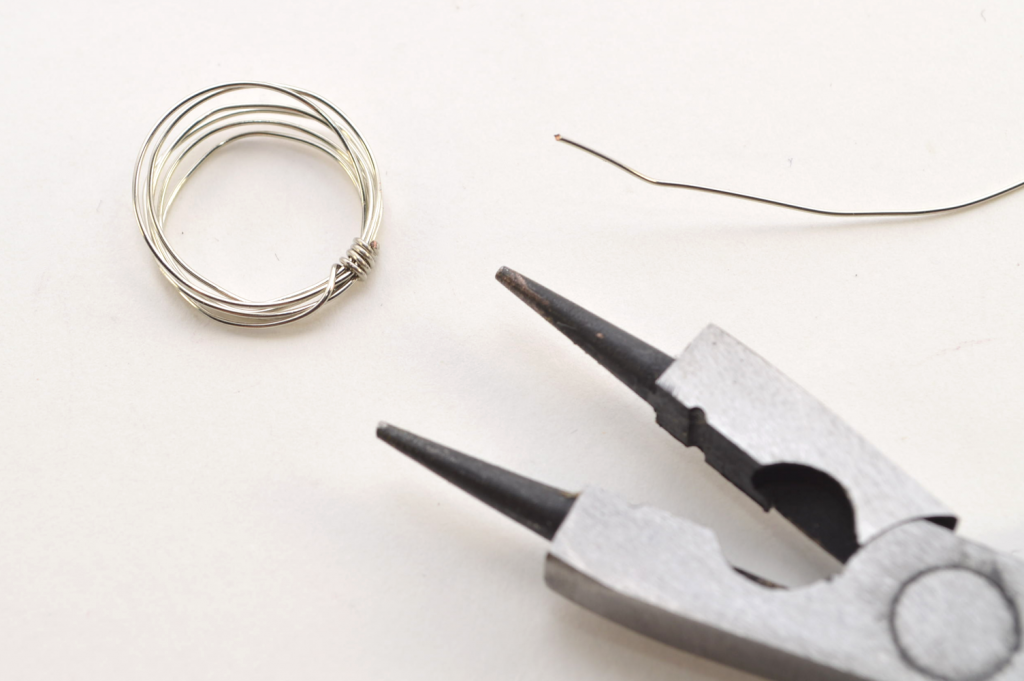
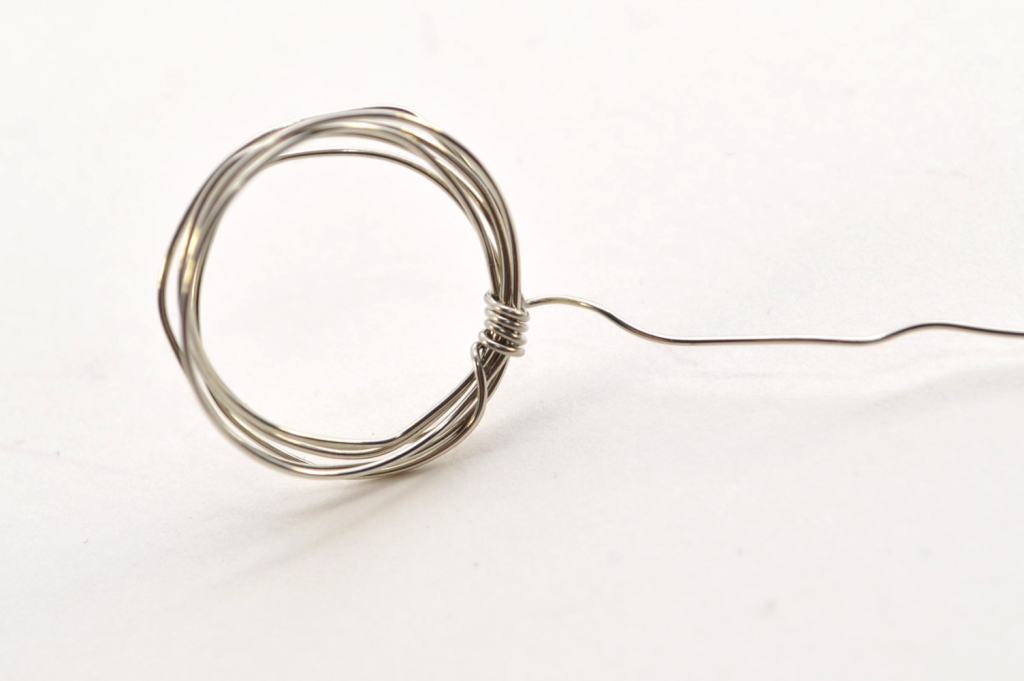
5) Trim away the excess using the scissors or cutting portion of the pliers. You can use the flat portion of the pliers to push down the end of the wire.

6) Cut two strands of wire measuring about 4.5 inches (11.4 centimeters long).

7) Carefully tie both strands around the circle. Pull tightly, but leave a little gap in the knot. The jump ring will eventually be inserted here.

8) Wrap around a few times.
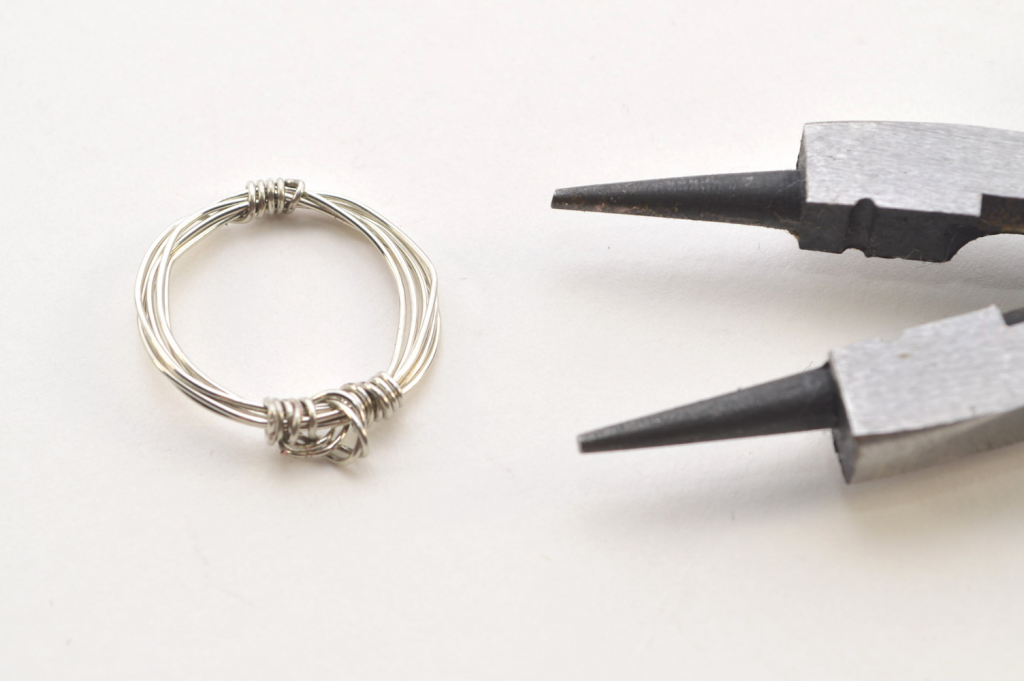
9) Trim away the excess thread using the scissors or cutting portion of the pliers. Again, you can use the flat portion to secure the wire ends.
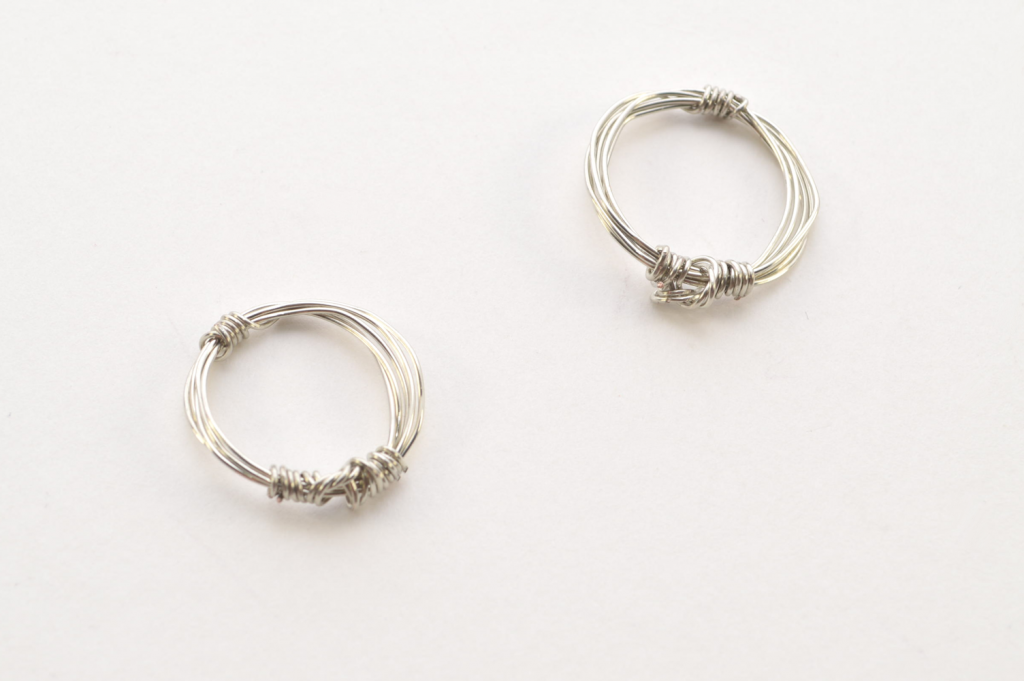
10) Repeat Steps 1-9 to create a second ring.
11) Try them on!

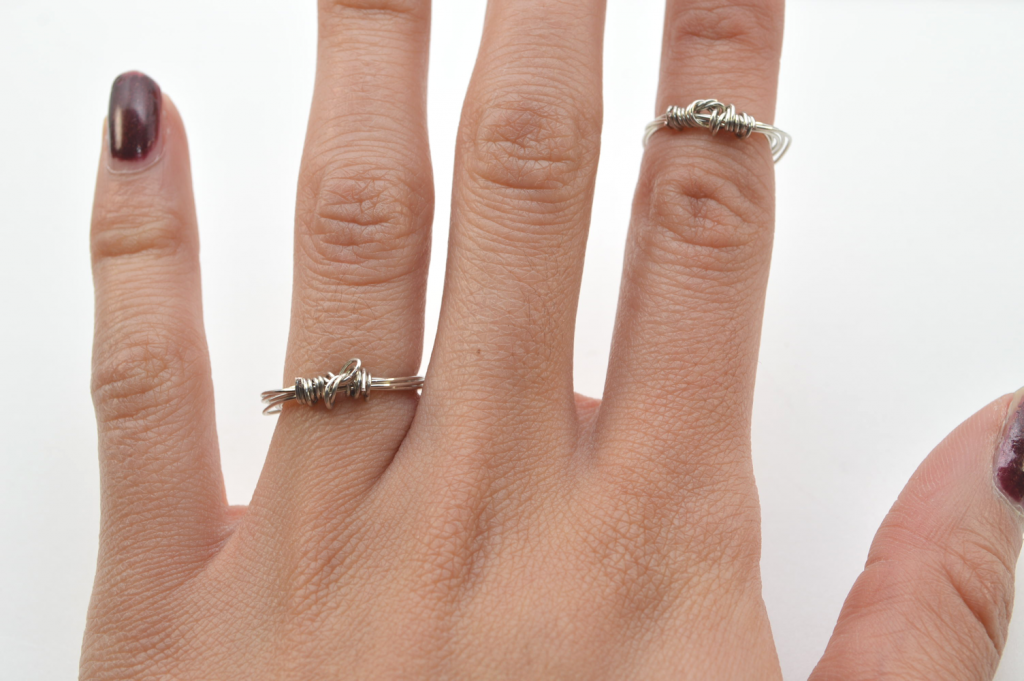
12) Add a 4mm jump ring to the knot of one ring and attach the chain. Connect the other end of the chain to the second ring with another jump ring.
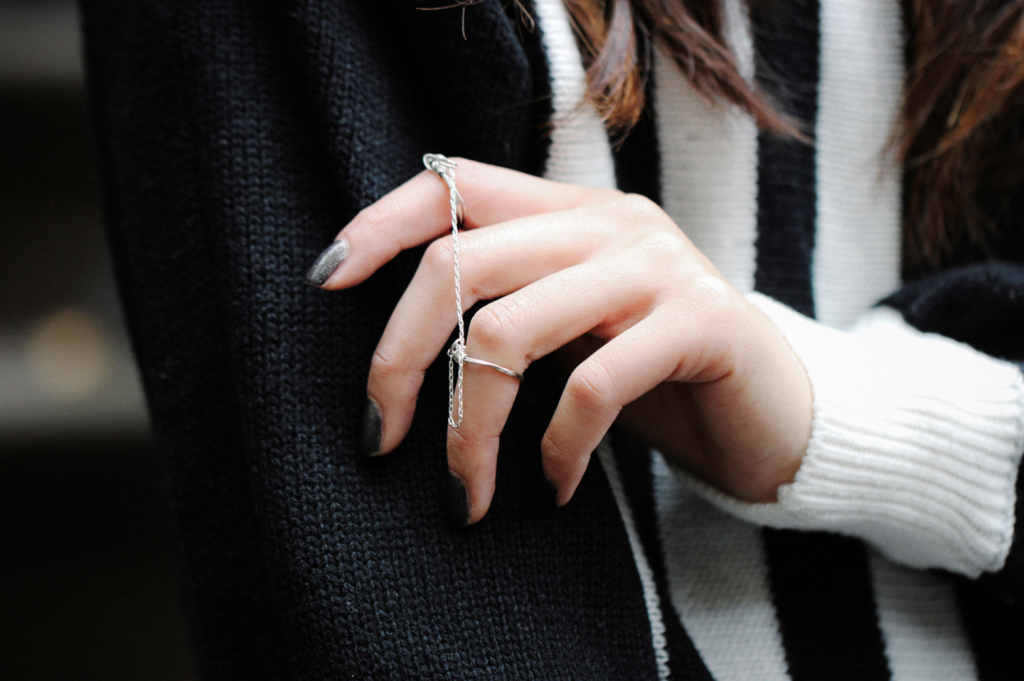
Love the way it falls when worn. Hope you love it!
Tutorial Images: Kirsten Nunez
Styled Photos: Haruka Sakaguchi (The Denizen Co.)