

 *EDITED 2/9/11 with reader suggestions!*
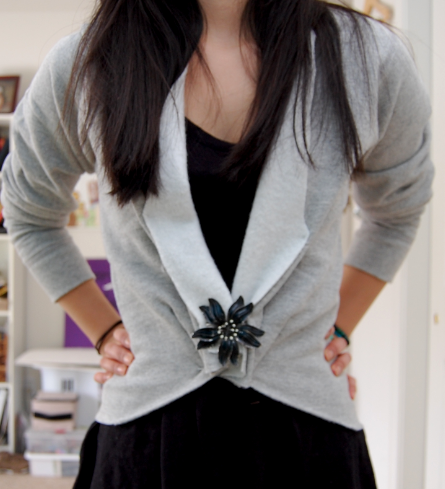
So, I made this sweatshirt (slash cardigan slash blazer?) kind of on a whim. Didn’t plan it up, improvised and made it up as I went along. Let’s hope it makes sense. By all means, if you decide to make this – improvise the heck out of it and see what works best for you !
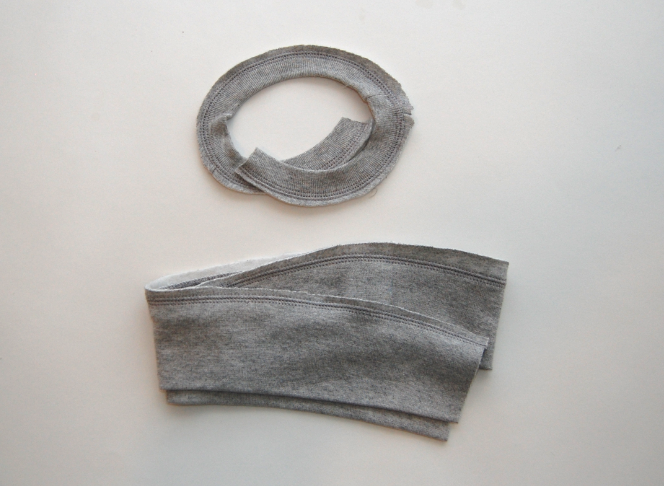
ALSO – save two of the scraps leftover from this project. I’ll indicate what pieces to save. DIY’s using those leftovers coming soon 😉
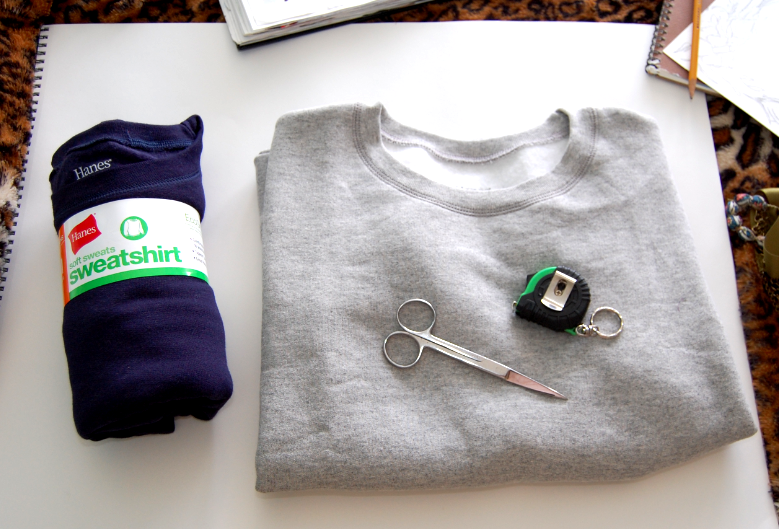
 Supplies:
– Crewneck sweatshirt. Hanes is about $5. *
– A good pair of scissors
– Measuring tape
– Hot glue gun…BUT preferably thread/sewing needles
– Vintage brooch (possibly)
*I used a size Medium. I think, because of the nature of the finished product, a small would have worked better for me. For reference – I’m pretty small, about 5’2″, and usually wear a size small or medium (but usually a medium for comfort’s sake). Given that information, you can hopefully gauge what size sweater you can work with. Just remember that these crewnecks are not fitted to begin with.
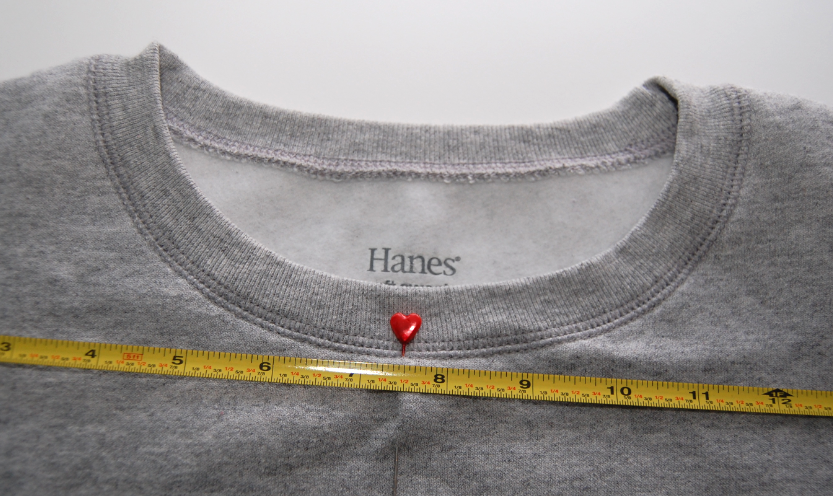 1) Measure the exact halfway point across your sweater.
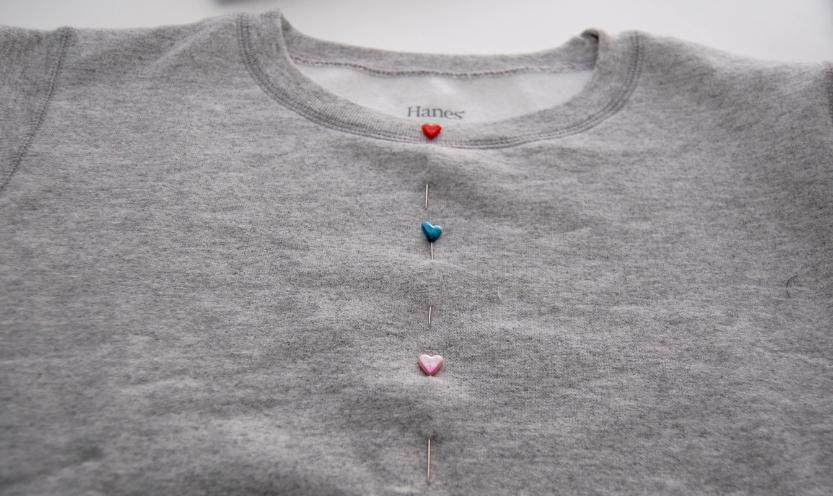 Use some pins if you’d like; you’ll be cutting straight down the middle.
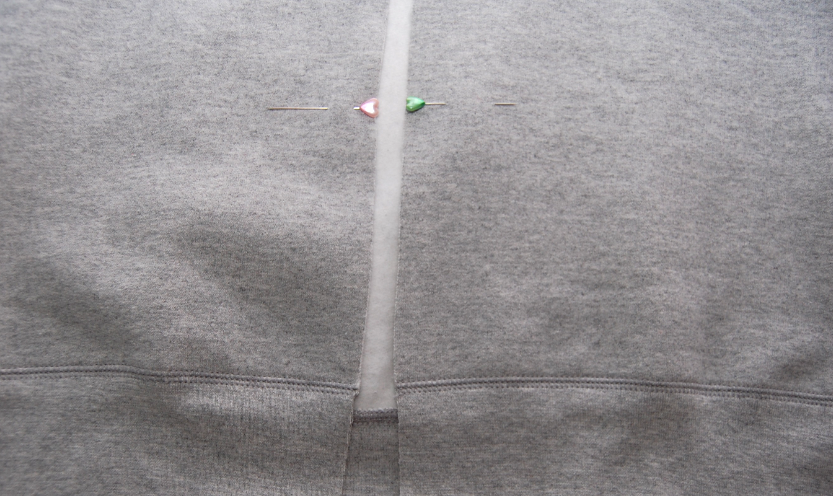 2) Choose a point several inches from the bottom; this is where the diagonal fall of the top will start. I measured about 8 inches up from the bottom and pinned these points.
 3) Cut off the bottom, right above the seam. (Save the bottom piece!)
 4) Place pins in a diagonal line from the point you measured earlier to the bottom left and right corners of the sweater.
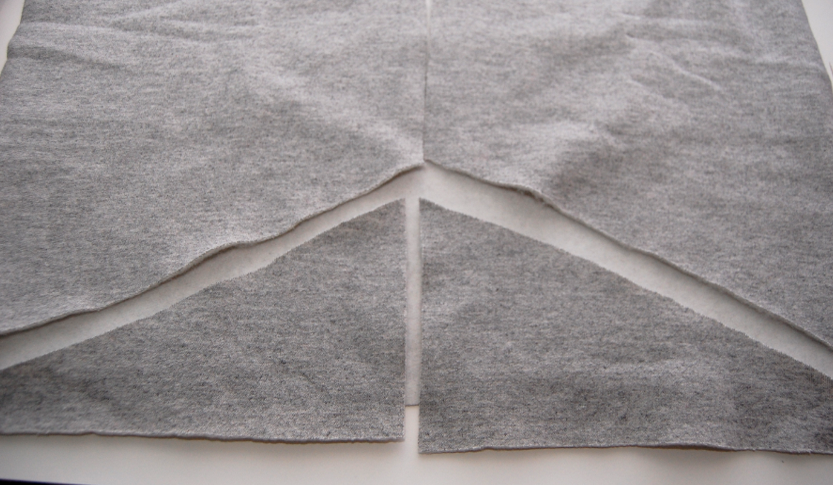 5) Cut along the pins. ONLY the FRONT/TOP layer.
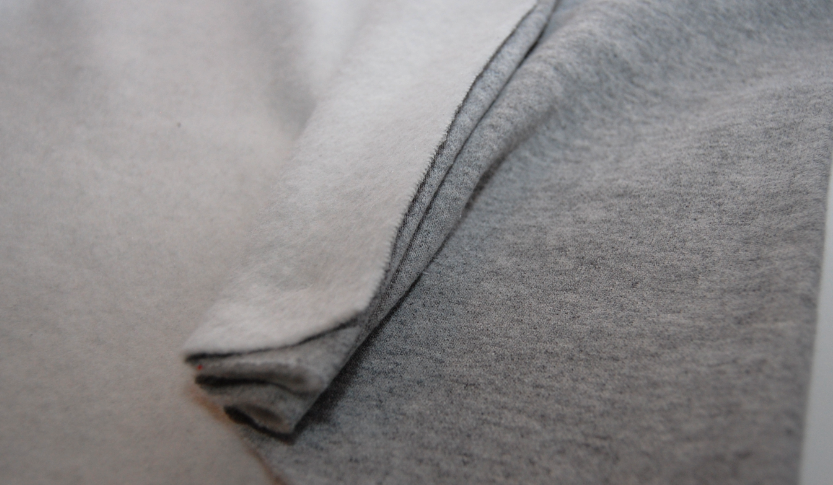
 6) Going back to the vertical slit you made in the middle of the sweater – accordian fold both sides so that there about 3 or 4 folds. Pin this and carefully try it on. You will most likely have to readjust the folds for a better fit, several times.
 For me – I made 3 folds, tried it on, sewed the folds down, tried it on again, then made a deeper/diagonal 4th fold to give it some shape. Then sewed this fold down.
 EDIT: I’d really recommend using a needle and thread to secure everything together; it will hold up much better than hot glue. I used hot glue the first time around since I was just playing around with the idea of making a sweatshirt into a blazer, but a needle and thread would be a much better choice!
Figuring out the folds be a little tricky, as can trying to get the sweater to have a fitted – well – fit to it. Just keep trying it on and re-pinning until you get it right.
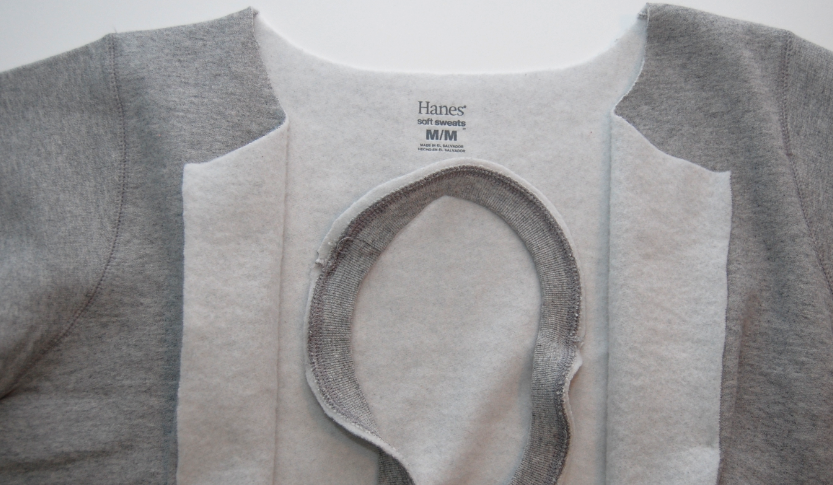 8) Cut off the collar right along the seam. (Save this, too!!)
 9) Line some pins in a diagonal line on the upper most part of the collar. Repeat on the other side.
 10) Cut along the pins…
11) Aaaand you’re all done. I used a brooch as a closure, but this can be a little tricky since there’s so many layers of fabric. I’m sure you can figure out something, though!
*Check the comments for some great closure suggestions by Aureolis!

For a DIY that I didn’t actually plan out, I think it turned out okay. If you decide to make this, feel free to share some tips, tricks or suggestions.
Check back soon for two mini DIY’s with the leftovers!
(Don’t forget to follow me on Twitter and become a fan of S&P on Facebook)
xo,
kirsten