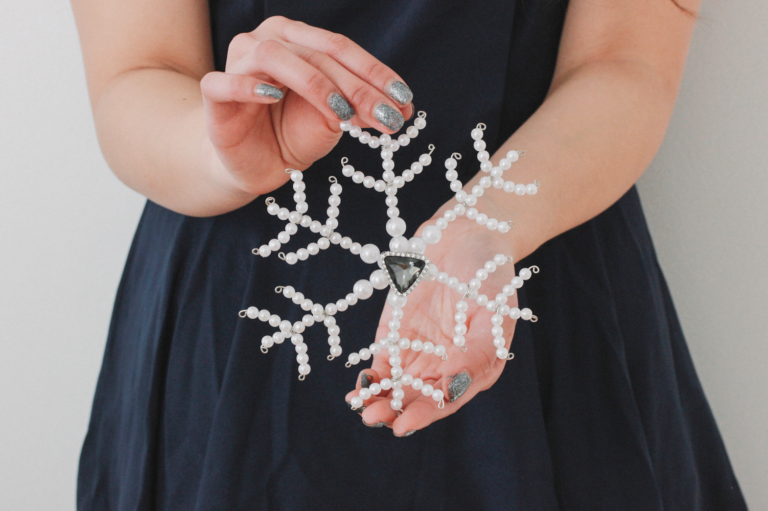
Can you believe the first day of winter is right around the corner? While I’m more of a summer & autumn lady, I love the whimsical elements of the season. I recently whipped up a few pearl snowflakes using materials I already had on hand. The supplies are quite standard; it’s all about the technique and placement. I actually started to make this project last year, but didn’t get a chance to perfect the method. This year, I finally finished it! Keep reading to see how I made it:
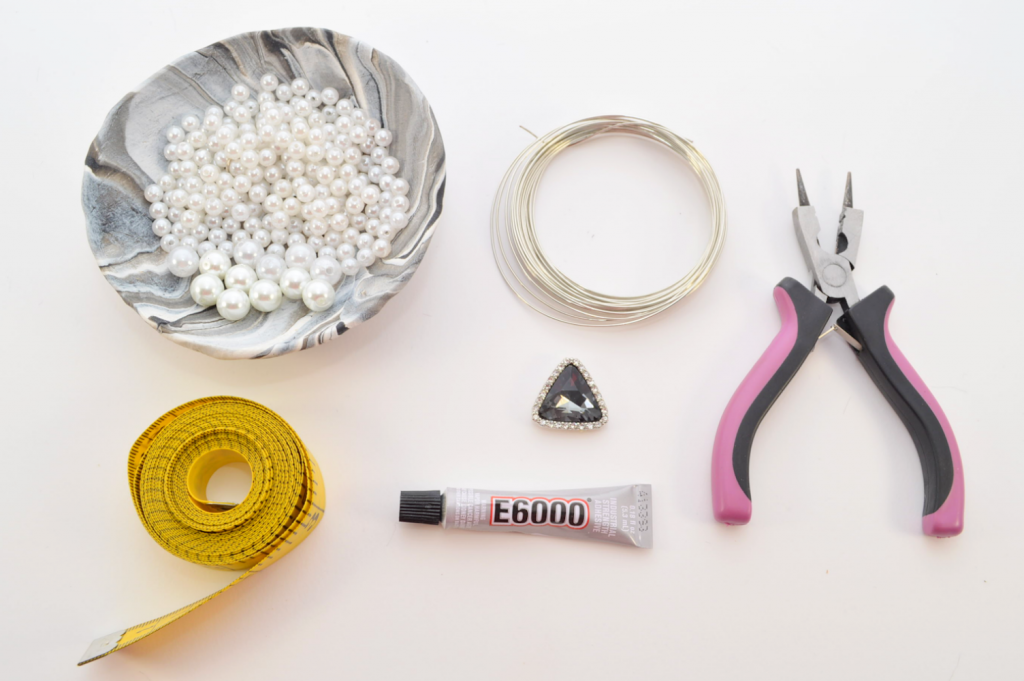
Supplies:
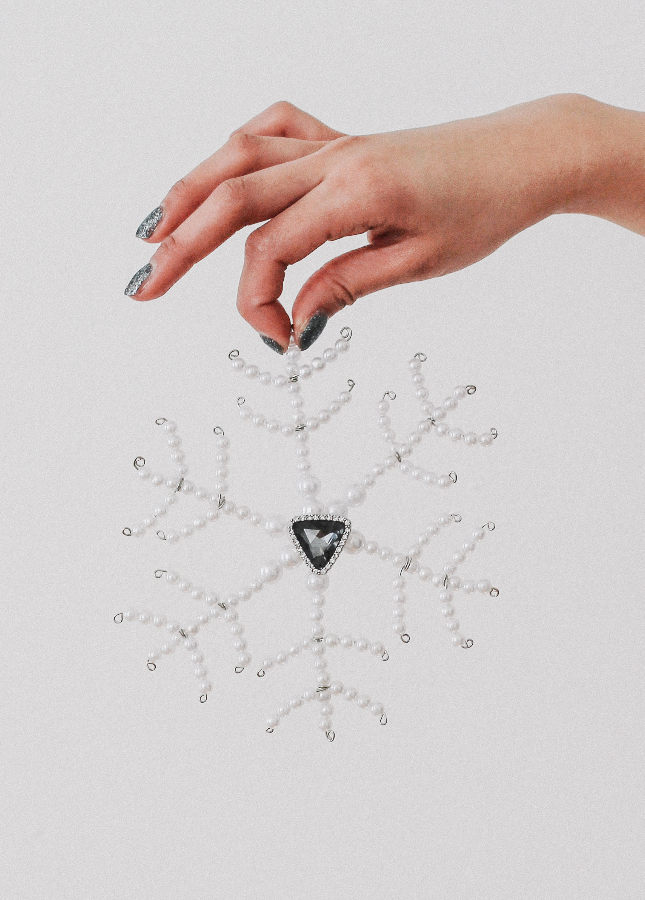
– Small/5mm Pearls (150) & Large/8mm Pearls (12)*
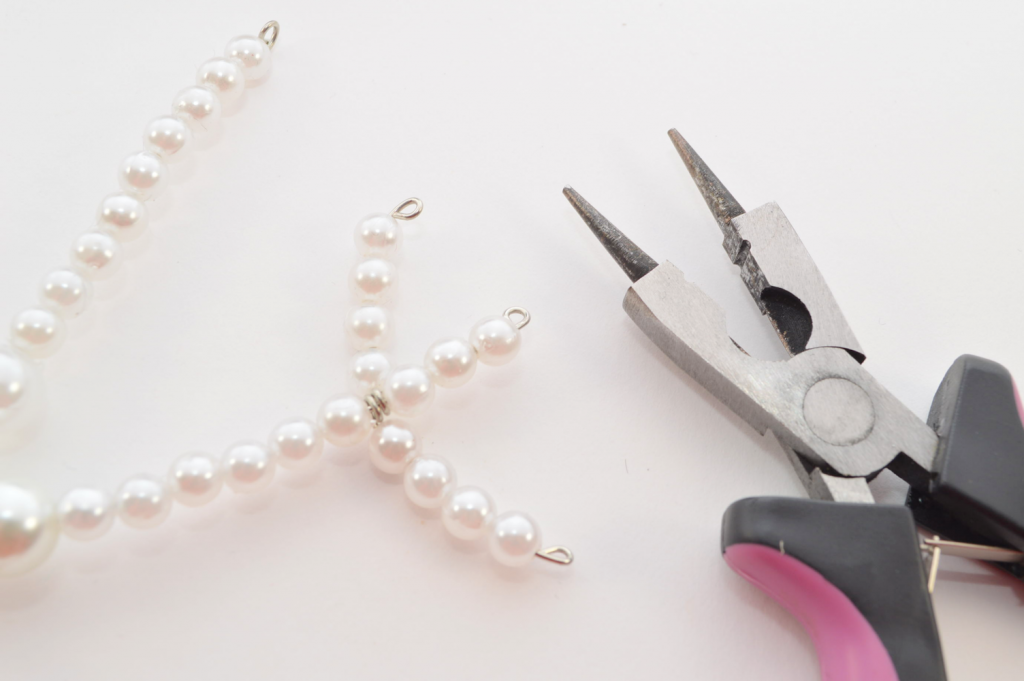
– Jewelry Wire (20 Gauge)
– 3-in-1 Jewelry Pliers
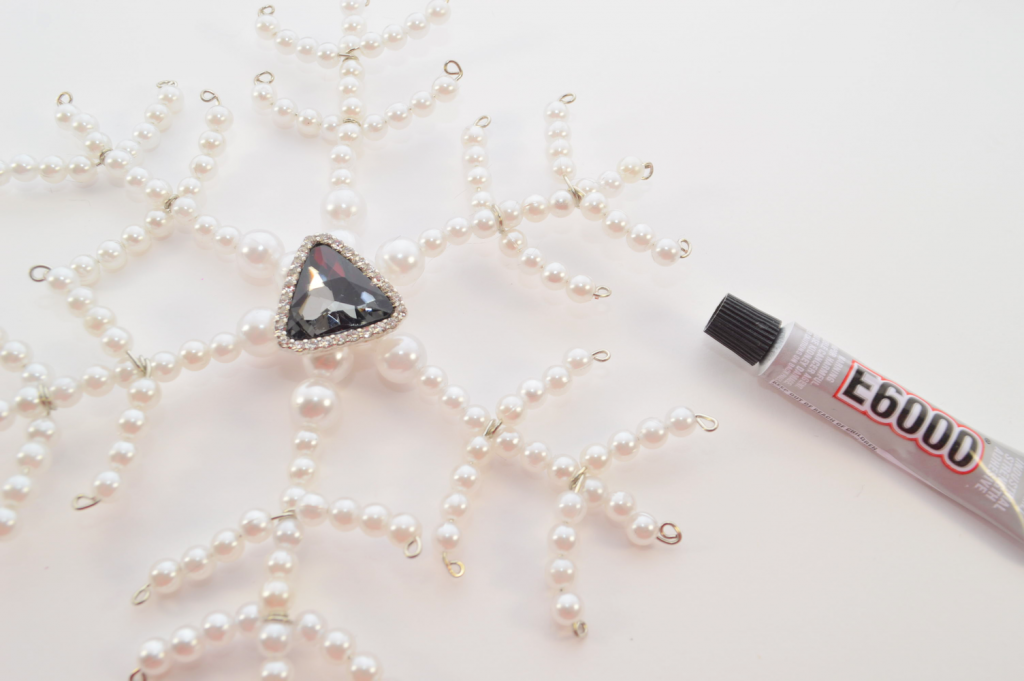
– Rhinestone Flat Back or Old Earring Stud
– Strong Craft Glue (such as E6000)
– Measuring Tape
* If you decide to use different sized pearls, keep in mind that the wire measurements may change. As always, I’d recommend using more than you think you need just to be safe. It’s always easier to take away than add back, after all.
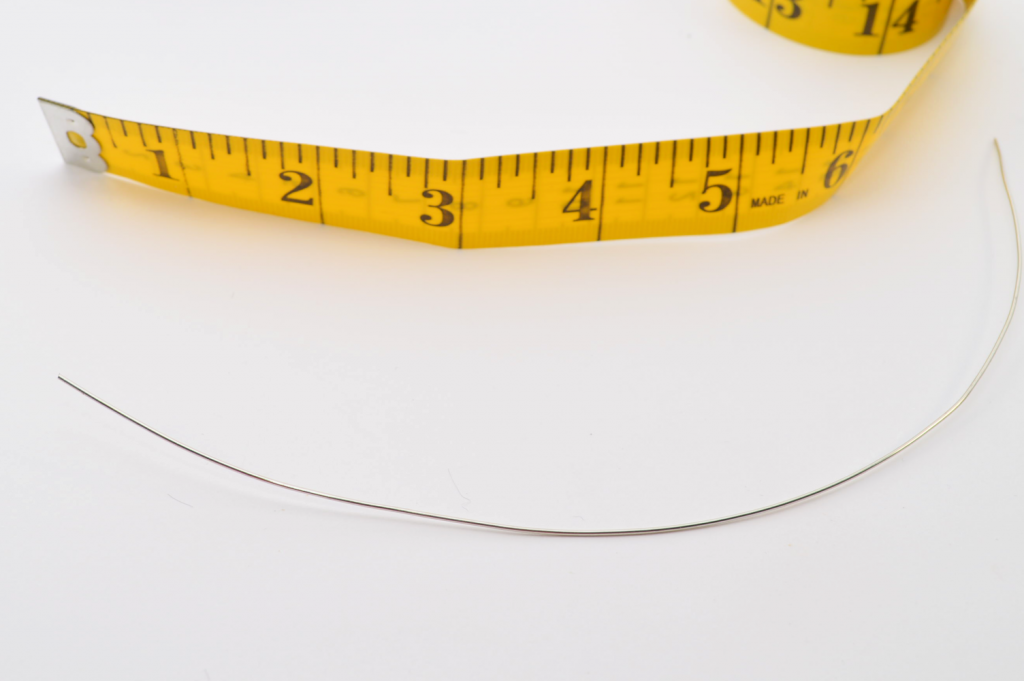
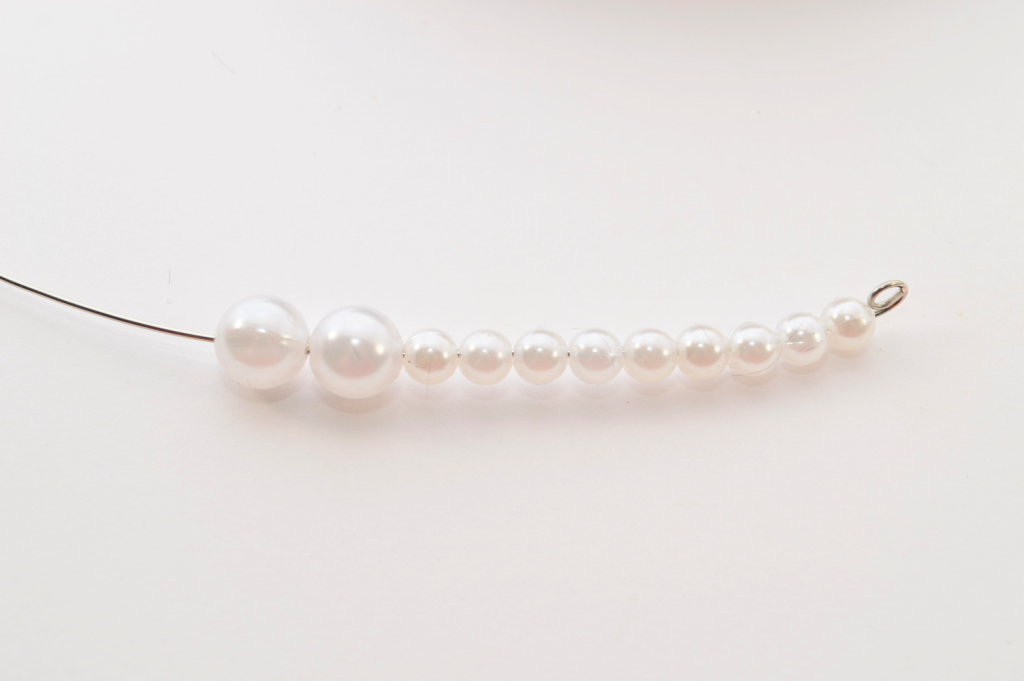
1) Measure and cut 8 inches (20.3 centimeters) of wire.
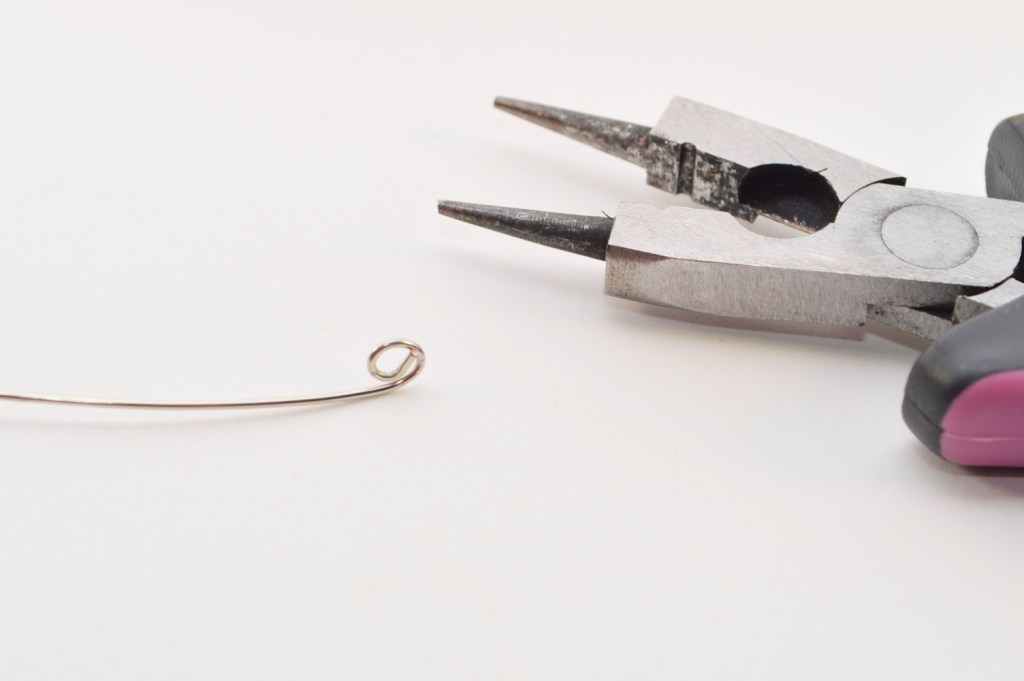
2) Using the flat portion of the jewelry pliers, twist the end into a spiral.
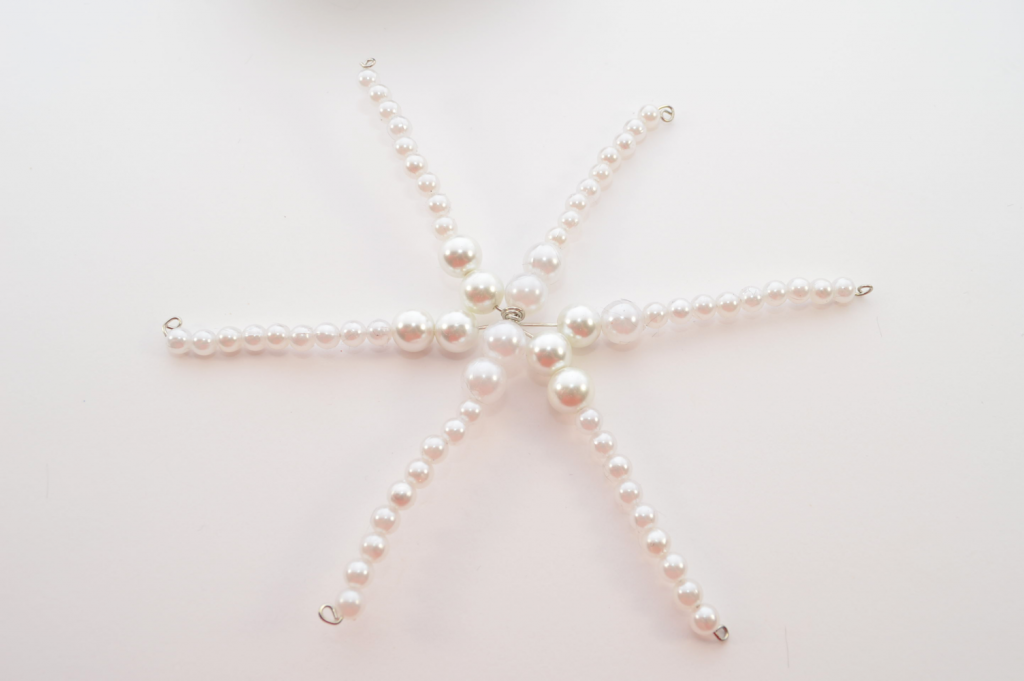
3) Add 9 small pearls and 2 large pearls. Each stem of the snowflake will consist of this sequence, and the center of the snowflake will be right under those 2 large pearls. But for now, just keep adding pearls.
4) Add 2 large pearls and 9 small pearls.
5) Cut the wire, leaving about 1/2 inch (1.27 centimeters). Twist the end as you did in the beginning.
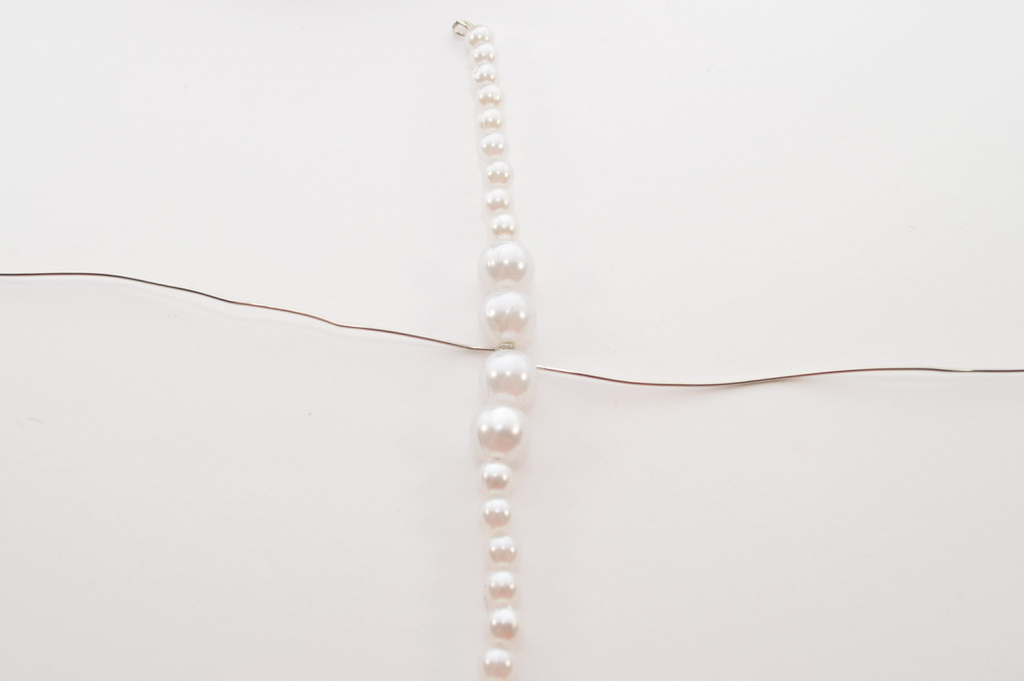
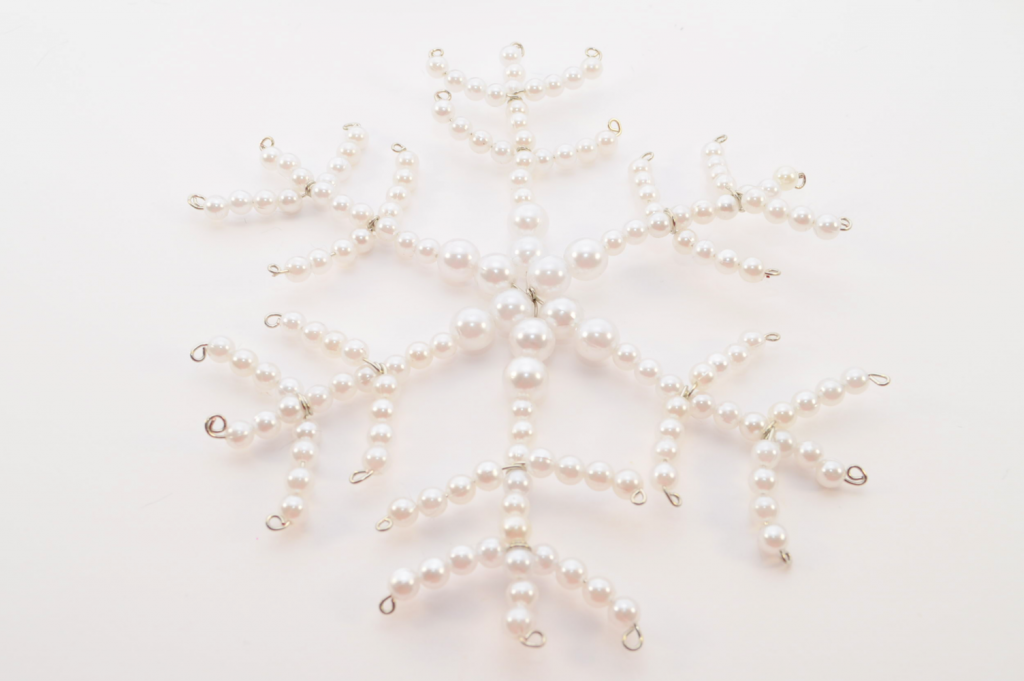
6) Take another 8-inch strand of wire and twist it around the middle, twice. The “middle” would be the spot in between the 2 center large pearls, the spot that I mentioned in Step 3.
7) Add one stem’s worth of pearls: 2 large pearls first, followed by 9 small pearls.
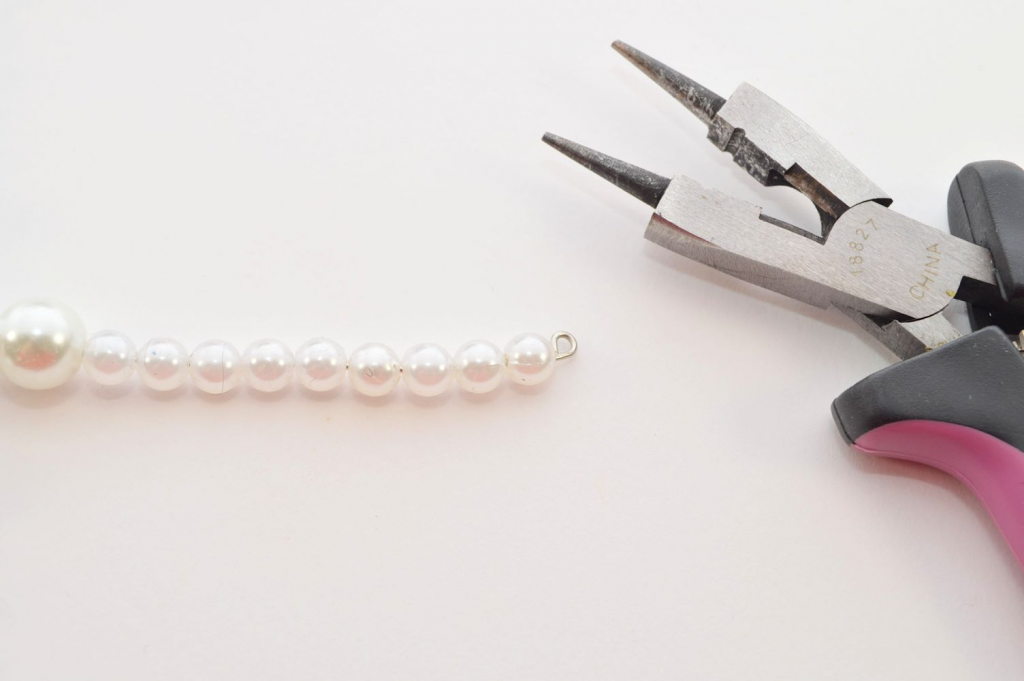
8) Trim and twist off accordingly.
9) Repeat on the other side.
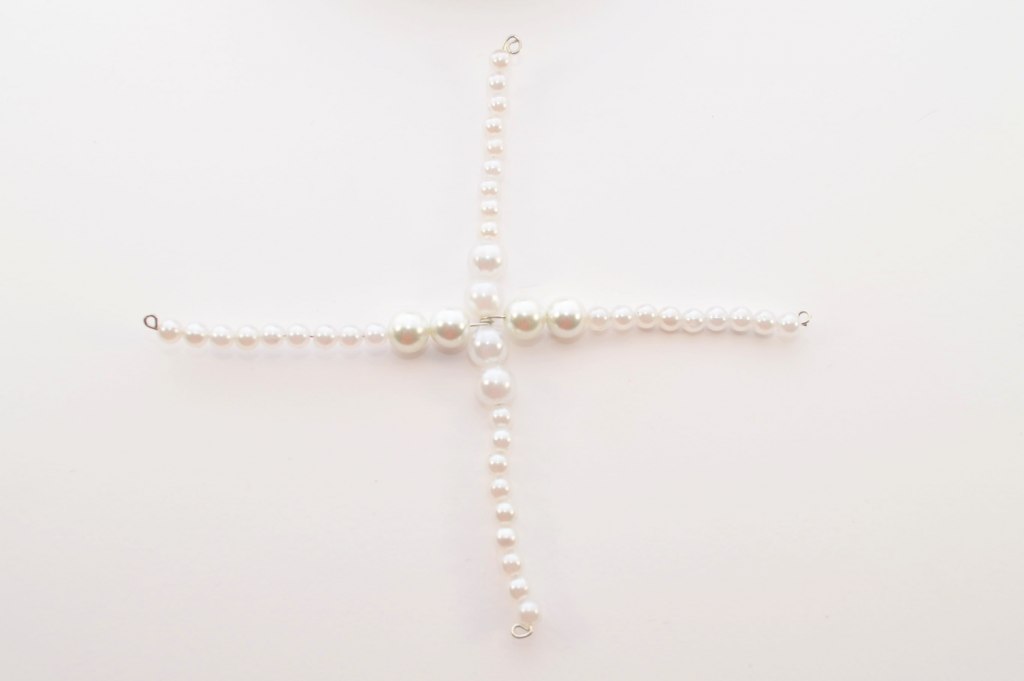
10) Add another 8-inch strand of wire around the center, placing it diagonally. The stems might seem uneven right now, but you will be able to adjust everything else later on.
11) Repeat Steps 7-9.
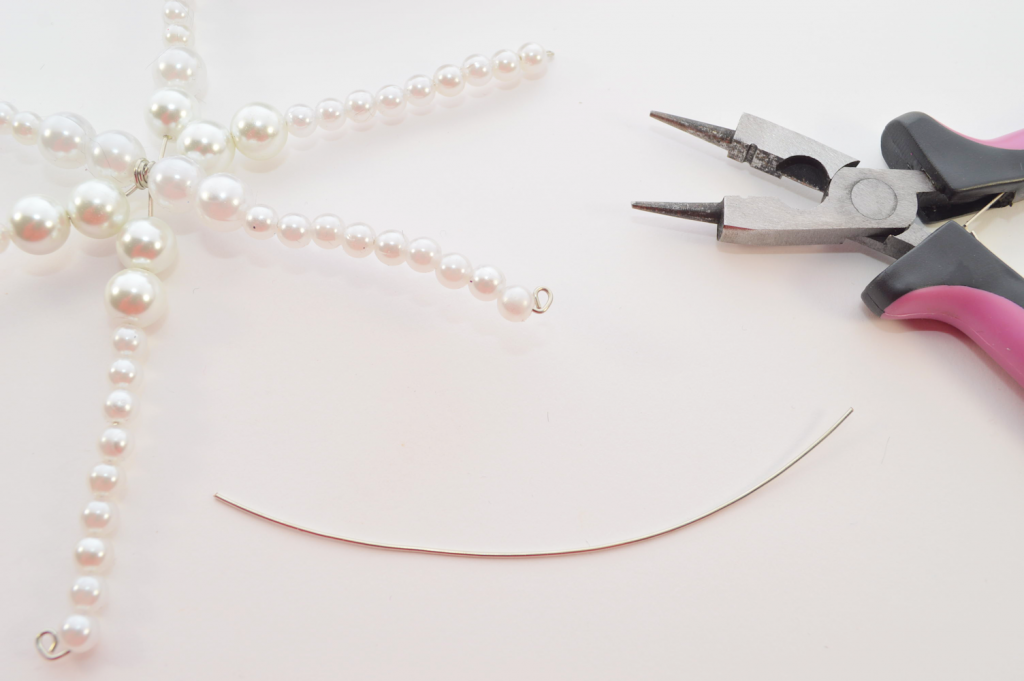
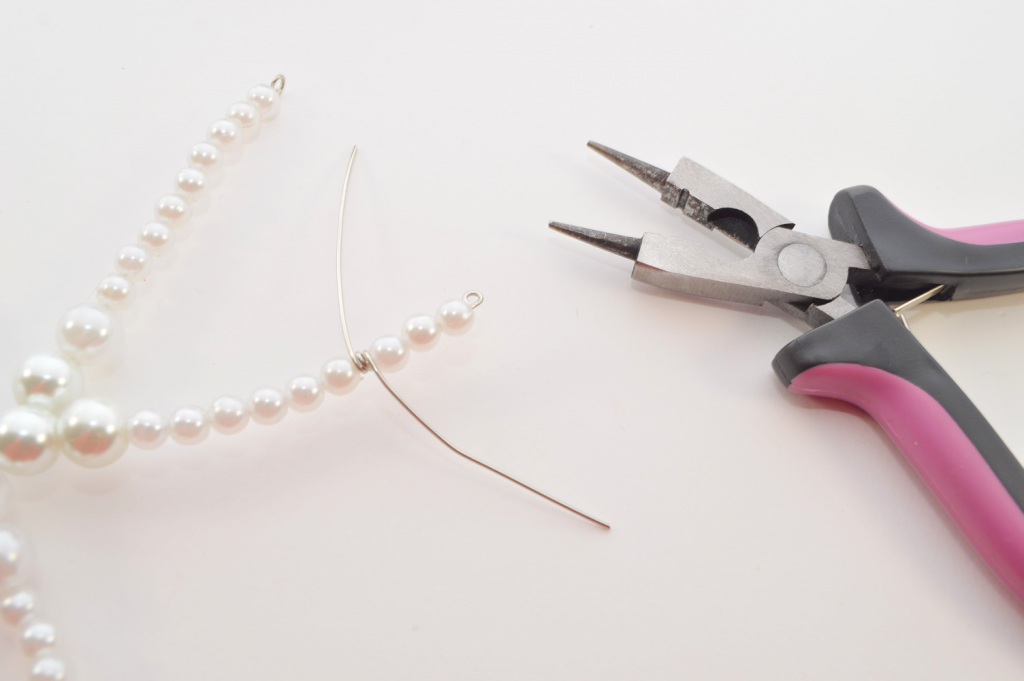
12) Cut a 4-inch (10.16 centimeter) strand of wire.
13) Choose a stem to start with. Twist around twice, 3 pearls down.
14) Add 4 small pearls. Trim the wire if needed and twist the end.
15) Repeat on the other side.
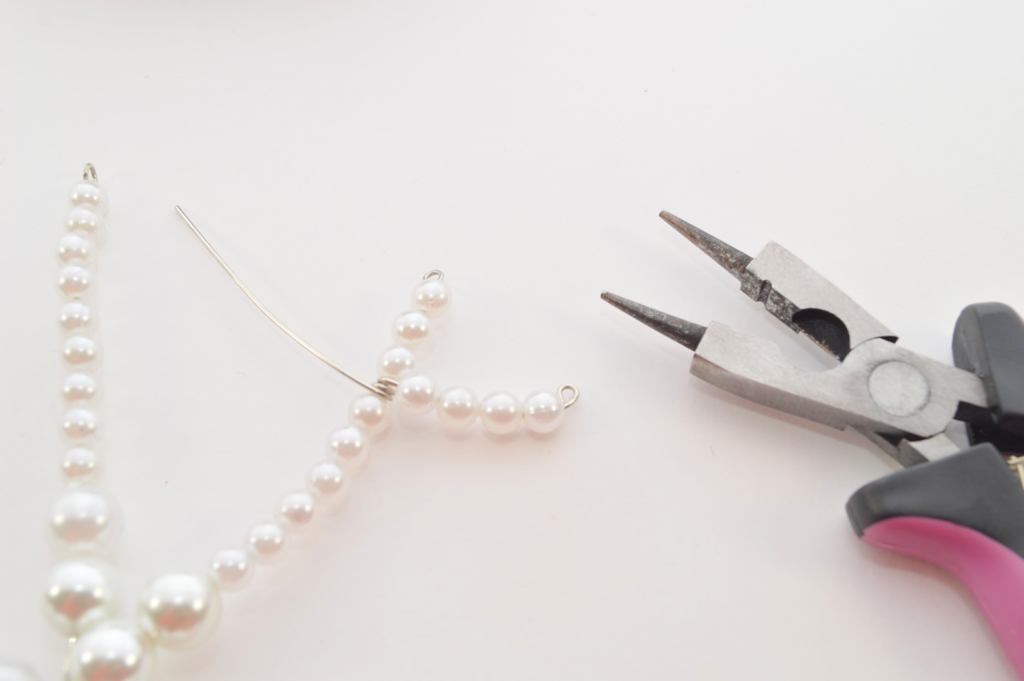
16) Repeat Steps 12-15 another 3 pearls down.
17) Repeat and repeat (and repeat) until every stem is completed. You can then adjust the stems so that they fit comfortably next to each other.
18) If you’d like, glue an embellishment to the center for extra sparkle. I used an old gem earring stud; I had removed the backing with heavy duty pliers beforehand.
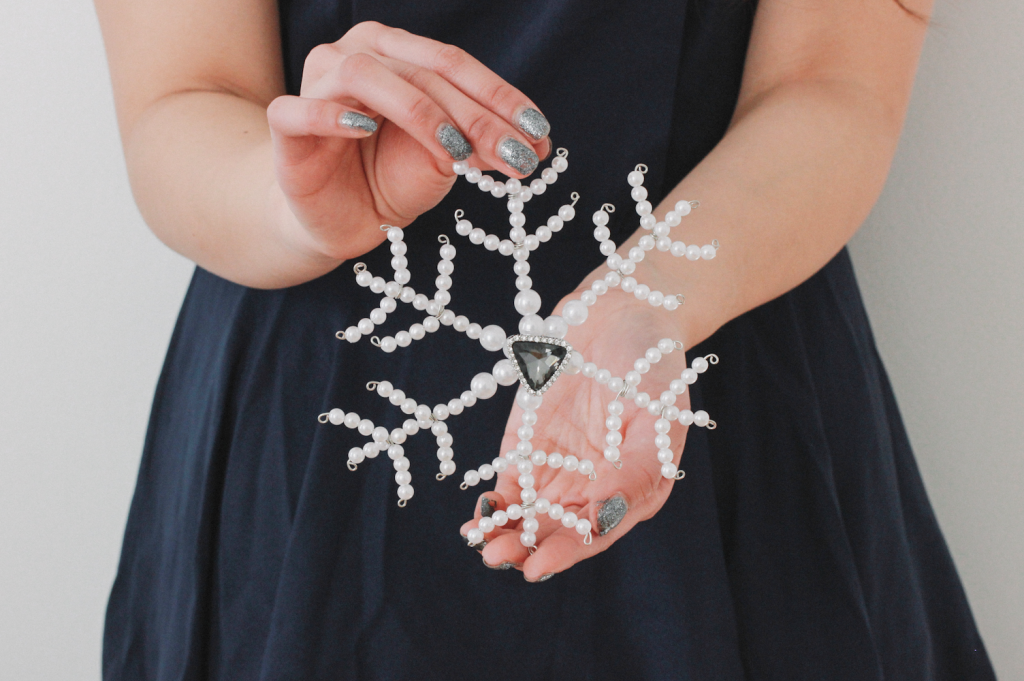
You can use your pearl snowflake as a large ornament by adding a strand of thread or wire. Another alternative is to use it as simple table decor or as a gift topper.