
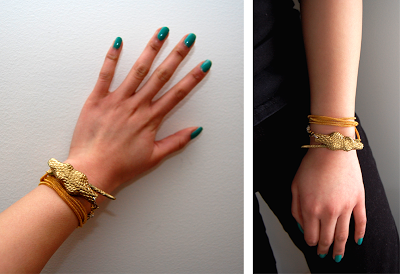
If you’re into accessories of any kind, I’m sure you’ve noticed the snake trend going on in rings, bracelets, necklaces, etc. It’s been around for a while, so I kind of wish I thought of this earlier – but it wouldn’t hurt to make it anyway. This bracelet was inspired by the pieces below…

Theo Fennel Alias Oxidised Silver Mamba Torc Cuff (Silver) – $1,300, Harrods.com


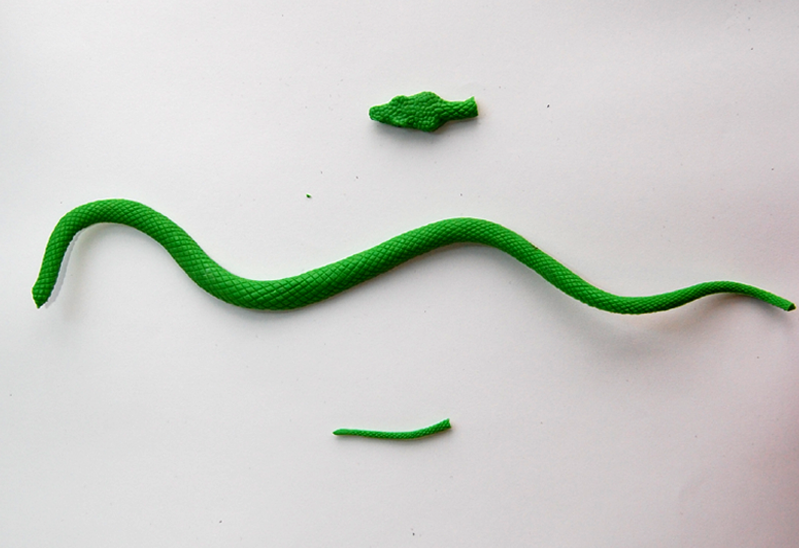
– Rubber snake (Mine was $1)
– Metallic spray paint (not shown)
– Paintbrush & acrylic paint of the same color, optional
– E6000/super glue
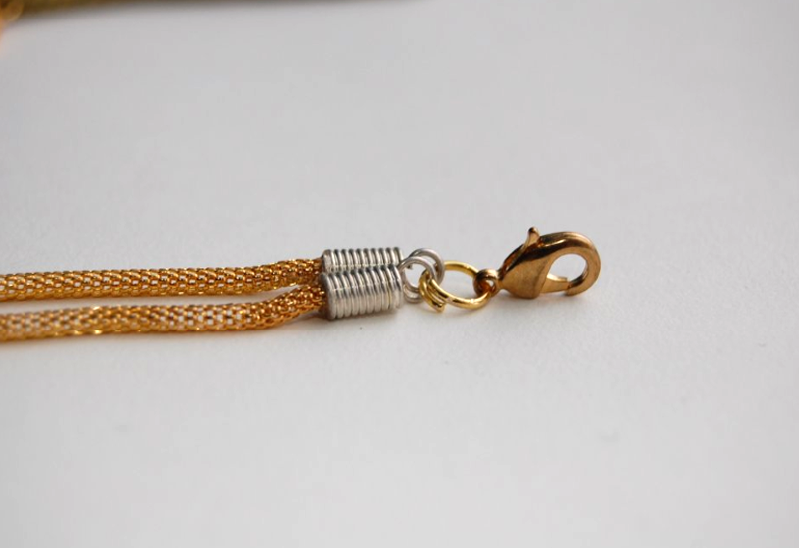
– Snake chain (appropriately named!) *
– Rhinestone flatbacks, optional
– 2 coiled leather crimps
– Several jump rings, at least one big one
– Jewelry clasp
– Jewelry pliers & scissors
*My bracelet wraps around my wrist 3 times. My wrist measurement is 6.5 inches, and I used roughly 32 inches of chain (or 16 inches when folded in half). Since the snake head overlaps the tail, the entire snake component of the bracelet is 2.25 inches (aka the entire length of the tail) You can use my measurements to adjust accordingly, depending on the measurement of your wrist.


EDIT: A reader commented on the Facebook page suggesting red rhinestones for the eyes, which would be pretty cool. I do have some colored rhinestones, but they’re all way too big for the eyes. I also then realized that rhinestones along the top of the head would look pretty sweet. I think I might do that to mine!

I don’t even own any snake jewelry, but I love this DIY because of the materials, more so than the actual concept. It uses something completely random and unexpected (and maybe slightly strange). As I said on Twitter and Facebook – when I uploaded a cell phone shot of the rubber snake & scissors – I really pushed the crazy button with this one. But it was totally worth it, in my opinion 😉
I also want to say thank you (x 100000) to everyone who said congratulations on the About.com job and/or the CNN feature! I tried to thank everyone individually, but there’s been so many comments and tweets, I may have missed a few. But you know that I totally appreciate the support; I’m really excited for everything.
xo,
kirsten