
Admittedly , my mind works in weird ways. A couple months ago, I came across this Shattered Metal Dress on Nasty Gal. The metal pieces on the dress automatically made me think of broken CD’s…for some weird reason! After a few minutes of mulling it over, I thought about spray painting them, and then the idea snowballed to embellishing a purse. Luckily enough, I already had all of the supplies – and recently, I was able to finally cross this one off the list.

What I love about this DIY is that the crackled look totally wasn’t planned – but actually works, and creates the look of metal even more so than I had envisioned. If not metal, then definitely some kind of interesting material. I posted a picture of the spray painted CD shards on Instagram and asked my followers to guess what they were…I got everything from glass to faux croc pieces to paper/plastic plates. Even crackle nail polish!

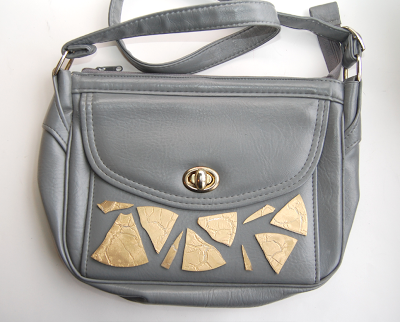
In the end, these metallic bits are really just broken CD’s – which I’m sure all of you have a ton of laying around. This project is great for dressing up an old purse, such as this gray one that I snagged at Goodwill for a few dollars.
My original plan was to glue them to the top flap, but changed my mind last minute. Obviously, this will differ for you depending on the purse you have. Keep reading to see how I made it ! —


Supplies:
– Thrifted purse (with flat sides!)
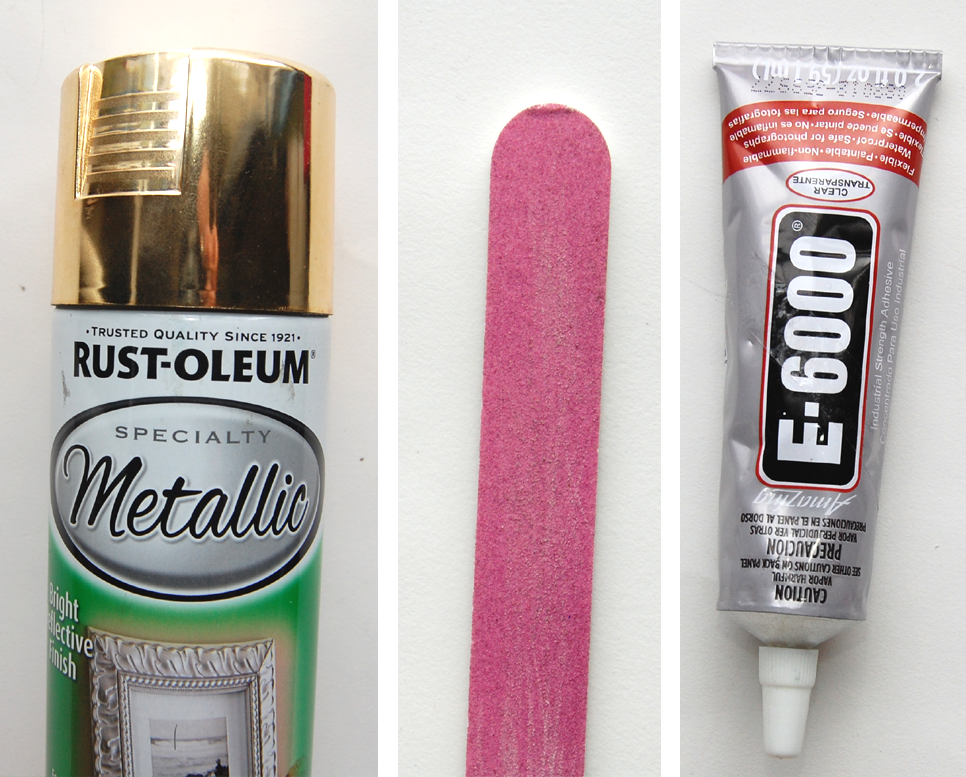
– Metallic spray paint
– Thick nail file (an old one is fine)
– Strong craft glue/E-6000
– Plastic sandwich bag
– Old CD’s
(2 was more than enough for me. Use more for larger purses.)
– Old magazines/newspaper
– The outdoors!
– Hammer (optional/if necessary/not shown)
– Metallic spray paint
– Thick nail file (an old one is fine)
– Strong craft glue/E-6000
– Plastic sandwich bag
– Old CD’s
(2 was more than enough for me. Use more for larger purses.)
– Old magazines/newspaper
– The outdoors!
– Hammer (optional/if necessary/not shown)

1) Place the CD’s into the plastic bag.

2) Close the ziplock bag, and carefully break the each CD. I simply took the CD with two hands and snapped them in half, then broke the larger pieces even further.BE VERY CAREFUL with this! If you can’t seem to break the CD with your own two hands, don’t strain yourself. Try taking a hammer to them on your driveway or sidewalk instead. Or ask someone else to break them a few times.

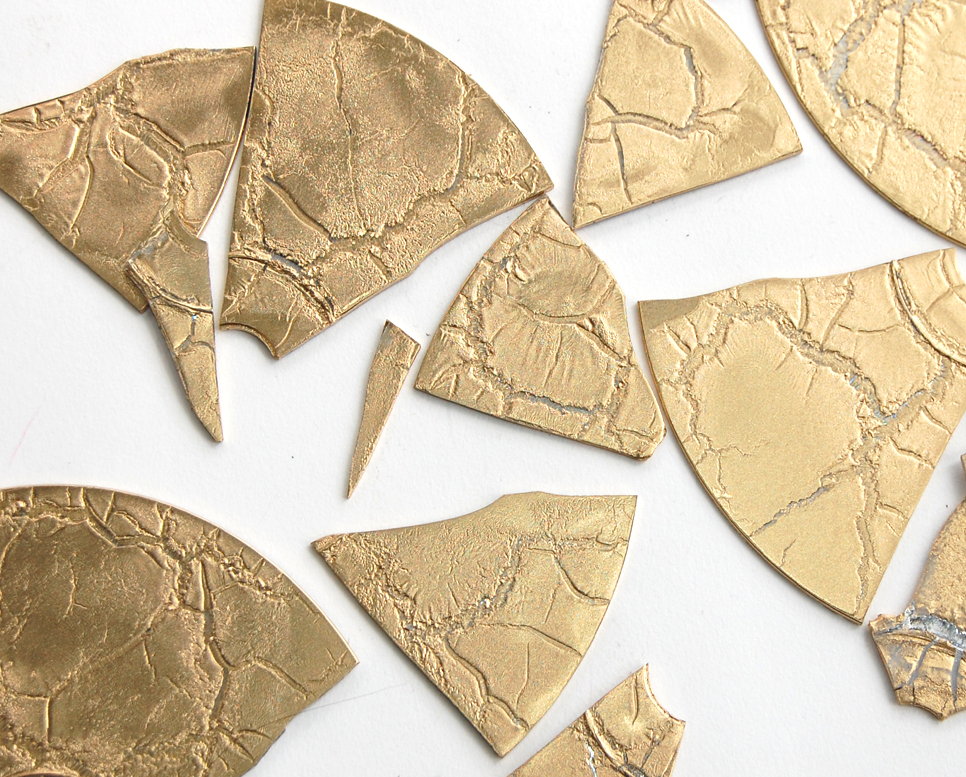
3) After breaking the CD’s a couple times, I ended up with this.
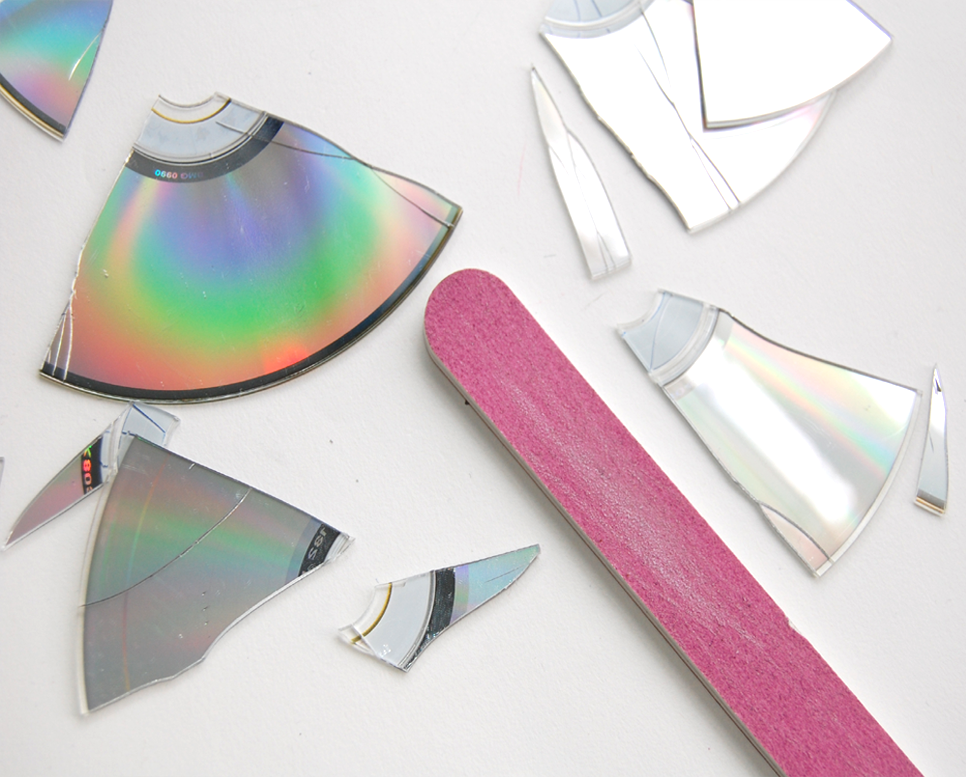
4) If there are any sharp edges, file them down with the nail file. When I did this, there was only one piece that had a bent sharp edge that definitely needed some filing down. Otherwise, most of the pieces were fairly blunt.
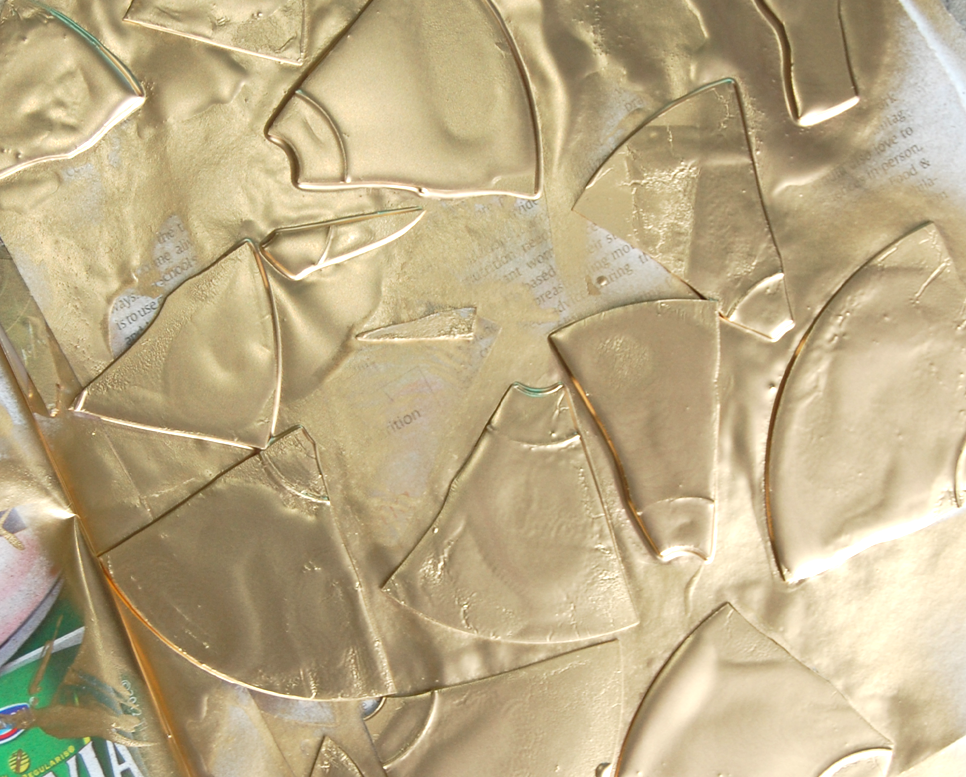
5) Lay the CD shards on top of magazines/newspaper, outside. Spray paint the pieces until they are completely covered. I held the can a little closer than suggested by the can, which I think may have had something to do with the pooling of paint and therefore the “crackling” look (which isn’t a bad thing – this ended up being way cooler looking than I had planned!)(If you’re wondering, I sprayed the BACK side of the CD pieces. In other words, the graphic on the CD was facing down.)
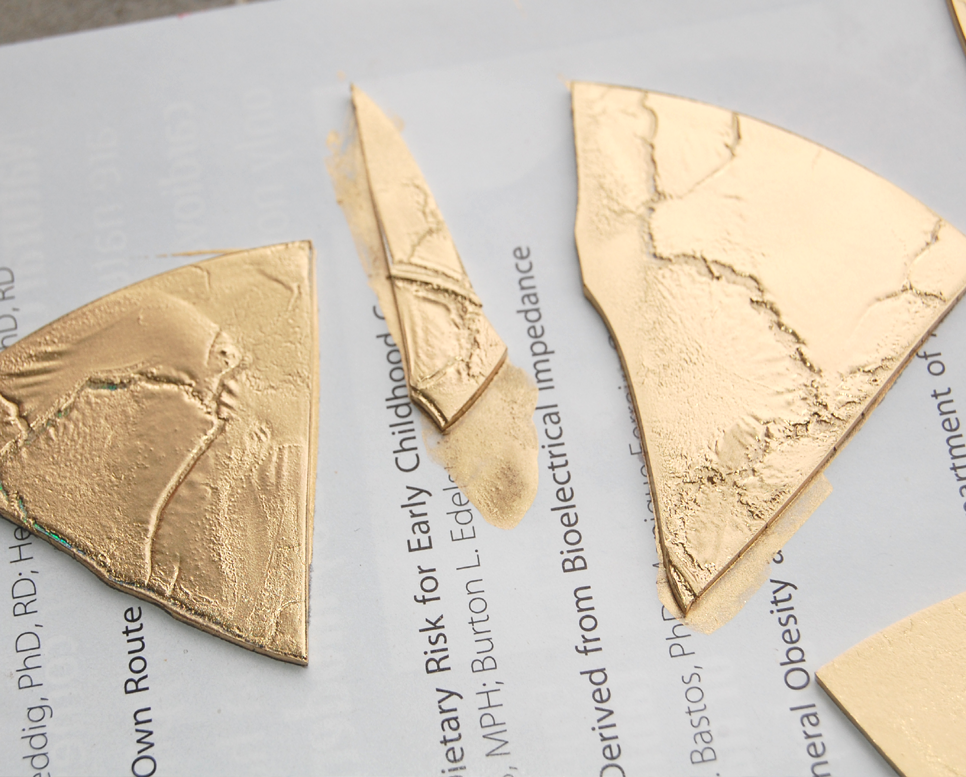

6) So this is the interesting part…the paint will most likely crackle and settle like above. I’m not exactly sure why this happens – but the crackled look happened pretty quickly after I sprayed the pieces. I’m thinking it has something to do with the slippery surface of the CD (again, the underside, not the graphic printed side).
7) Let the pieces dry completely. I’d recommend letting them sit overnight.

8) Determine the placement and position of the pieces. I decided to use a variety of sizes.
8) Glue.

Let dry.
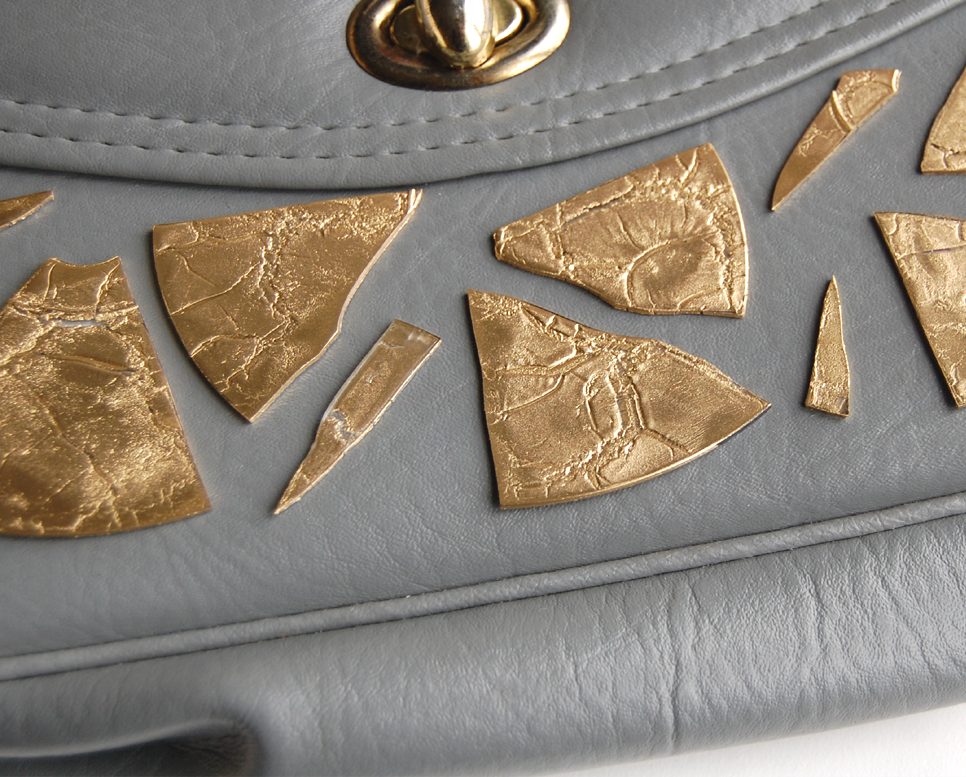

Between the metallic finish and the way the pieces are cut, I’d say this could probably pass as shattered metal.
In the mean time, I hope everyone in New York and New Jersey (and the surrounding areas) are holding up okay. The New York City skyline is pretty much pitch black…so crazy! It’ll be a little while before things get back to normal, but I just hope everyone is doing okay.