

My original intention was to share this project last week (see: Sparkle & Fade) but like
many creative tasks, it’s not unlikely to run into a bump or two. I
would rather take my time and do something right – instead of rushing it
– so I decided to wait until the beginning of the next week (today, Tuesday!) to post this DIY. Hope you enjoy it!
many creative tasks, it’s not unlikely to run into a bump or two. I
would rather take my time and do something right – instead of rushing it
– so I decided to wait until the beginning of the next week (today, Tuesday!) to post this DIY. Hope you enjoy it!
I’ve
been on a glitter binge lately, and I think the holidays are to blame
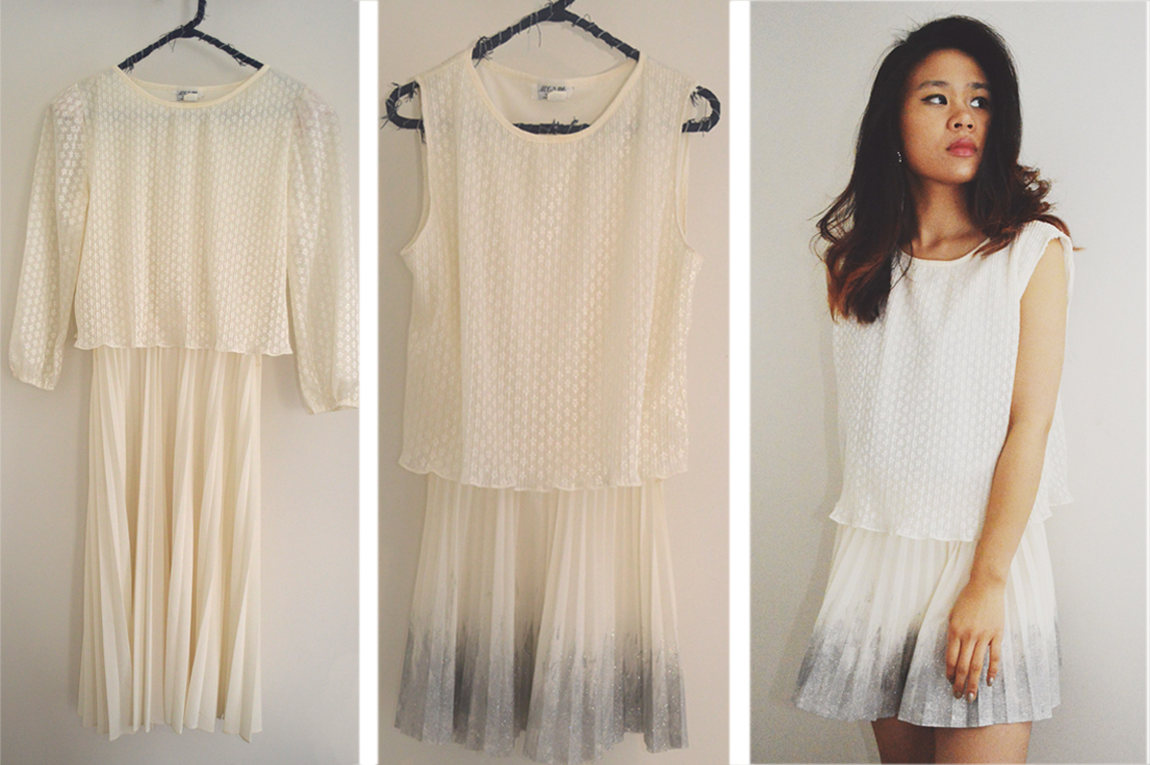
(or thank). I recently thrifted a cream colored dress made of beautiful textured fabric. It cost me $8.49 at Goodwill. I couldn’t help but notice the hidden
potential, so I decided to throw some sparkle into the mix. A
glitter holiday fashion DIY? Sold.
been on a glitter binge lately, and I think the holidays are to blame
(or thank). I recently thrifted a cream colored dress made of beautiful textured fabric. It cost me $8.49 at Goodwill. I couldn’t help but notice the hidden
potential, so I decided to throw some sparkle into the mix. A
glitter holiday fashion DIY? Sold.
This
post features one tutorial, but has a another project in the “back
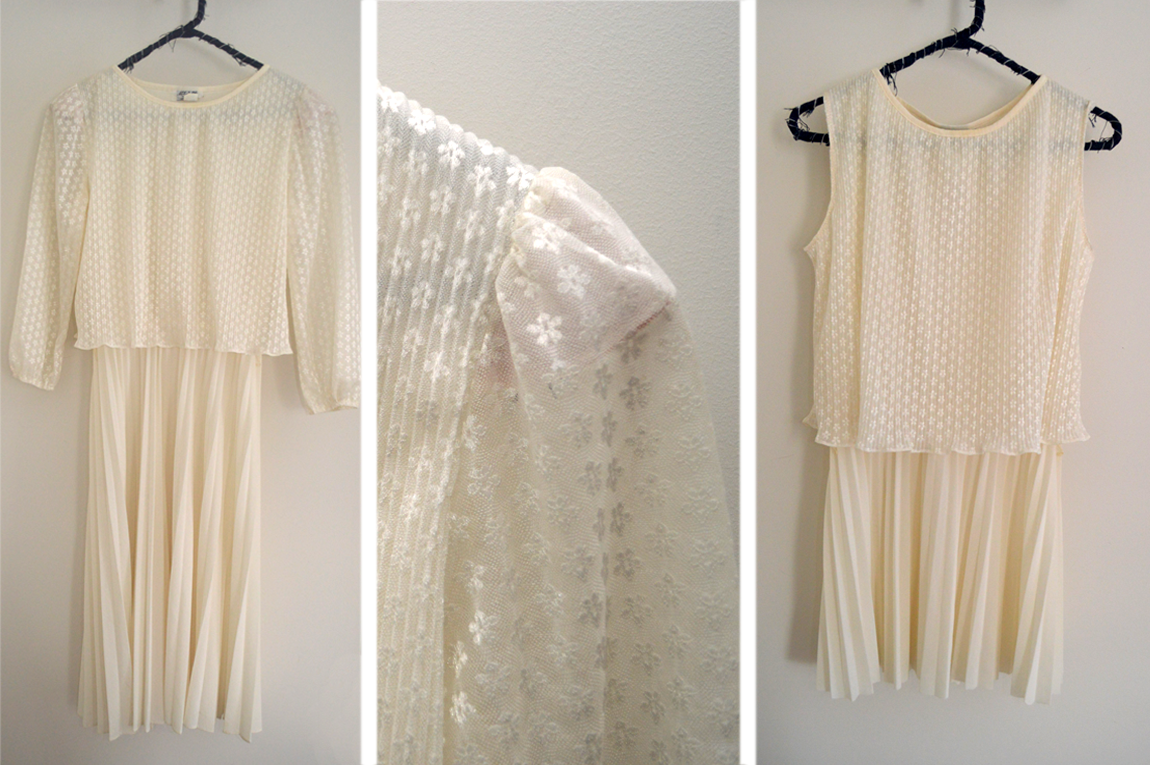
story”. Since the original dress was so long and outdated, I chopped off
a good 10 inches from the bottom then gutted the shoulder pads and cut
off the sleeves. At the arm holes, I folded the fabric in twice to
create a clean hem. I sewed twice around the edge of each arm hole. Even
without the glitter, the dress already looked gorgeous! I loved the combination of the textured fabric and pleats. To see how I
added the glitter fade, check out the how-to after the jump:
Look at that glitter!
Supplies:
– Dress
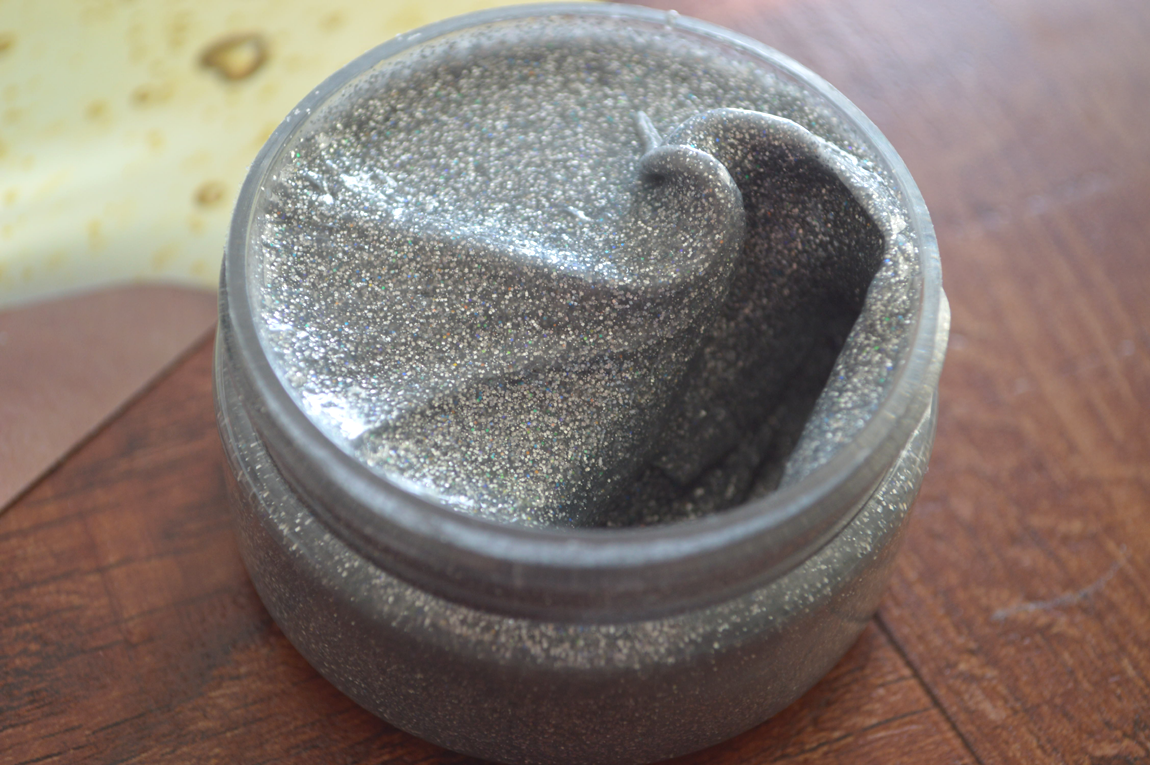
– Glitter Fabric Paint…lots of it!
(I used Tulip Fashion Glitter Shimmer Fabric Paint in Silver)
*** 1 jar is shown, but I actually ended up using 1 full jar + 1/2 of another second jar ***
– Not Shown: Wide Foam Paint Brush, Old Magazines/Plastic Bags, Popsicle Stick/Ruler
– Glitter Fabric Paint…lots of it!
(I used Tulip Fashion Glitter Shimmer Fabric Paint in Silver)
*** 1 jar is shown, but I actually ended up using 1 full jar + 1/2 of another second jar ***
– Not Shown: Wide Foam Paint Brush, Old Magazines/Plastic Bags, Popsicle Stick/Ruler
I bought my jars of Tulip Fashion Glitter Shimmer Fabric Paint at Michael’s. It’s also available at Jo-Ann Fabric and Craft Stores. This was my first time using this product, and I have to say – I’m in love! It’s such a perfect way to apply glitter to fabric, without the mess. The formula is so super saturated in glitter, it’s tempting to just add it to everything.
Note:
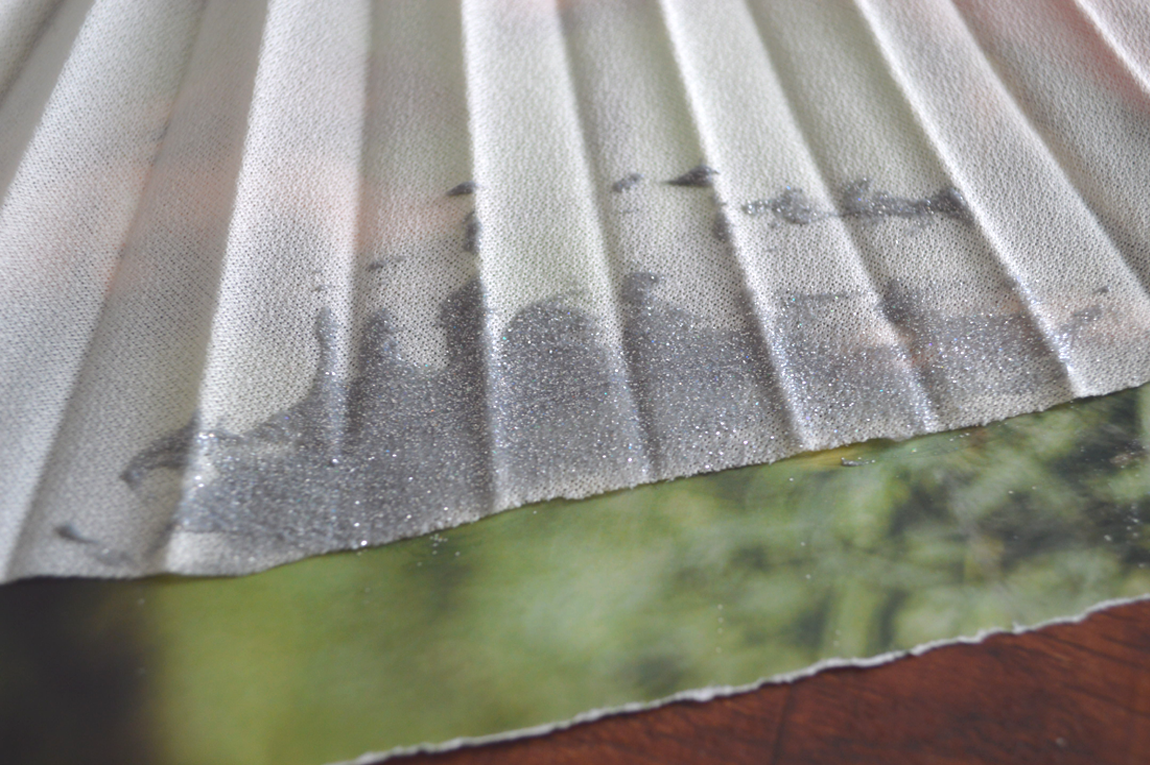
If you’re using a pleated dress like I did, keep in mind that the glitter fabric paint will harden the fabric. This means that if you spread out the pleats in order to apply the paint, you may have to “refold” the pleats when the paint dries. Just something to keep in mind!
If you’re using a pleated dress like I did, keep in mind that the glitter fabric paint will harden the fabric. This means that if you spread out the pleats in order to apply the paint, you may have to “refold” the pleats when the paint dries. Just something to keep in mind!
1) Lay the dress on a flat surface. Spread apart the fabric so you can evenly apply the glitter fabric paint across the bottom. Place magazine pages or plastic bags underneath the fabric to protect your surface – I would actually recommend plastic bags. When the paint dries, the pages might stick…and who wants paper stuck on the inside of their dress?
Using the foam brush, apply a liberal amount of glitter fabric paint across the bottom. Working in small intervals would be the best bet.
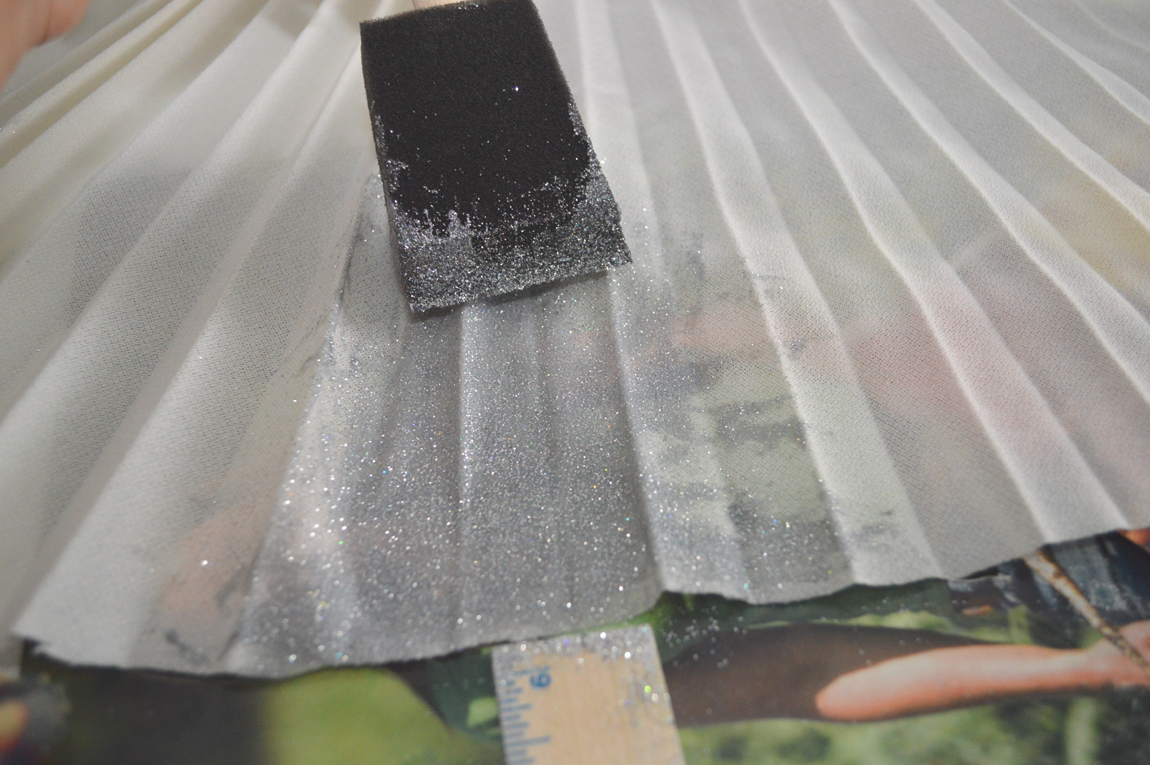
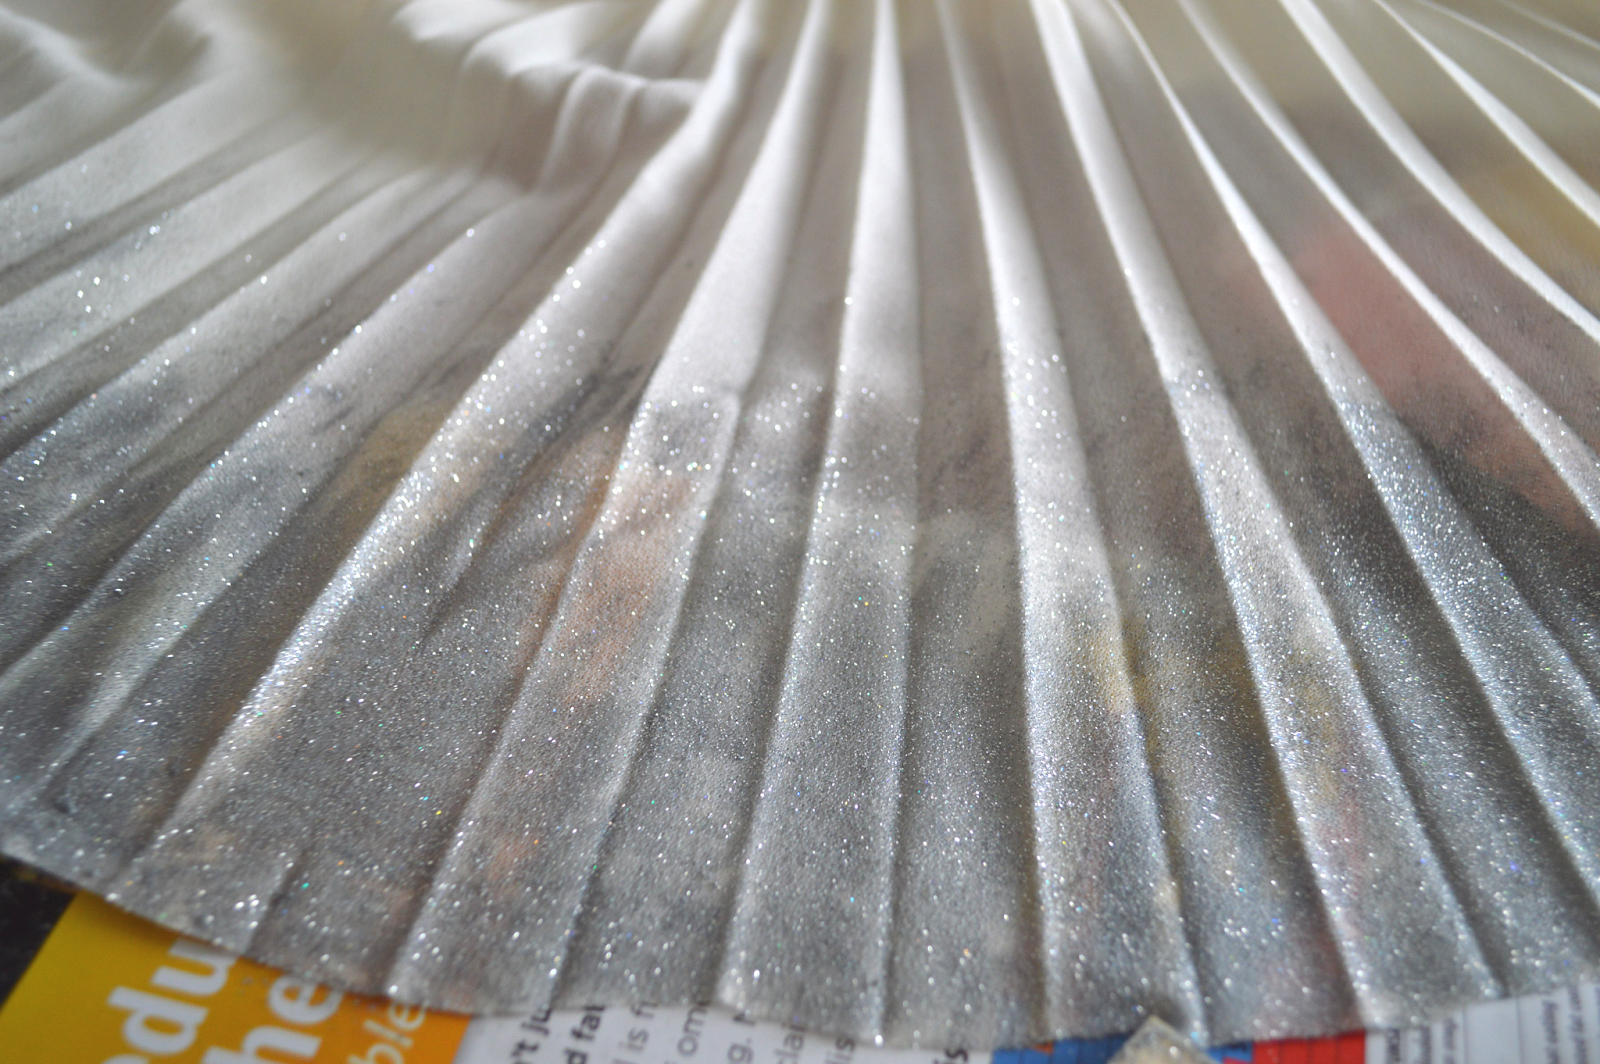
2) Don’t go for more paint – instead, take the brush and drag the paint up. Decrease the pressure as you do so; this will result in specks of glitter at the very top. This is also what will create that “glitter fade” look.
With your other hand, use the wooden ruler/popsicle stick to hold down the bottom of the dress while you spread the paint upwards. This will act as an anchor, and will ensure that your hands don’t get covered in sticky glitter.

3) Continue along the bottom of the dress. Once the entire side is done, let dry completely.
4) Turn the dress over and repeat on the other side/remaining areas.
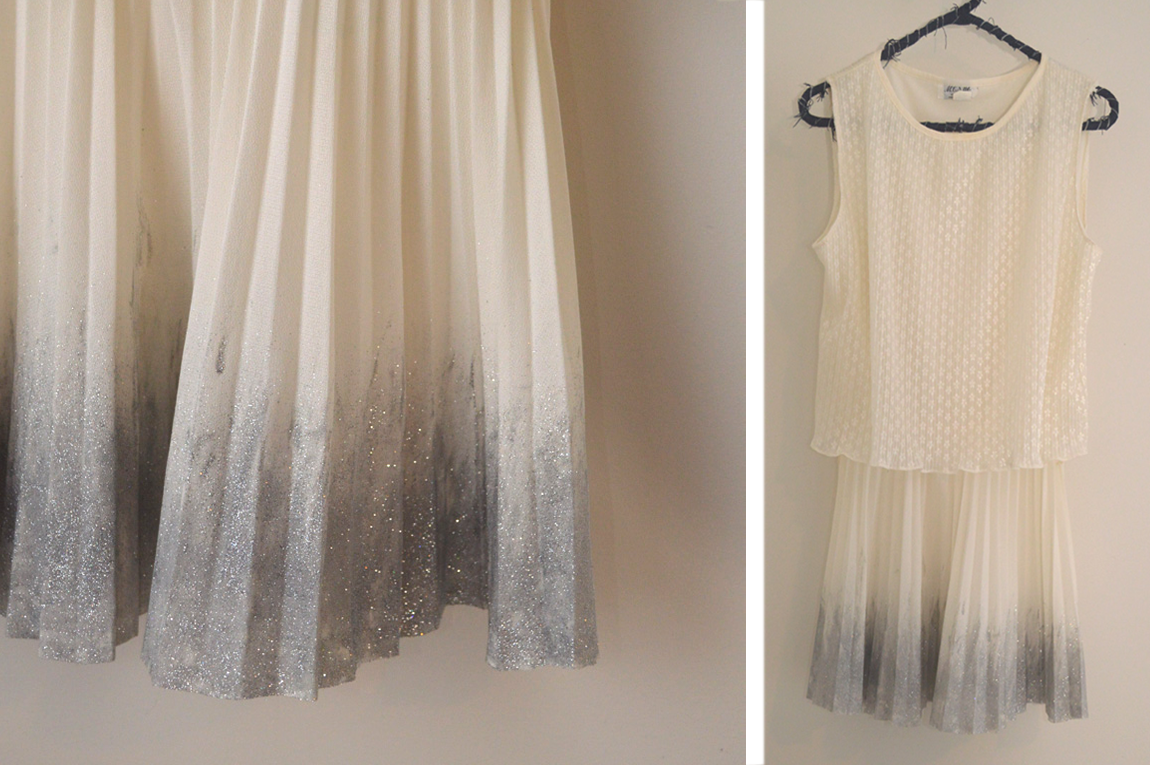
Don’t focus too hard on making the glitter fade perfectly perfect. The irregularity is what will make it more natural looking, as if it was dipped into glitter. That’s what I love about this project…the fade of sparkles along the bottom.
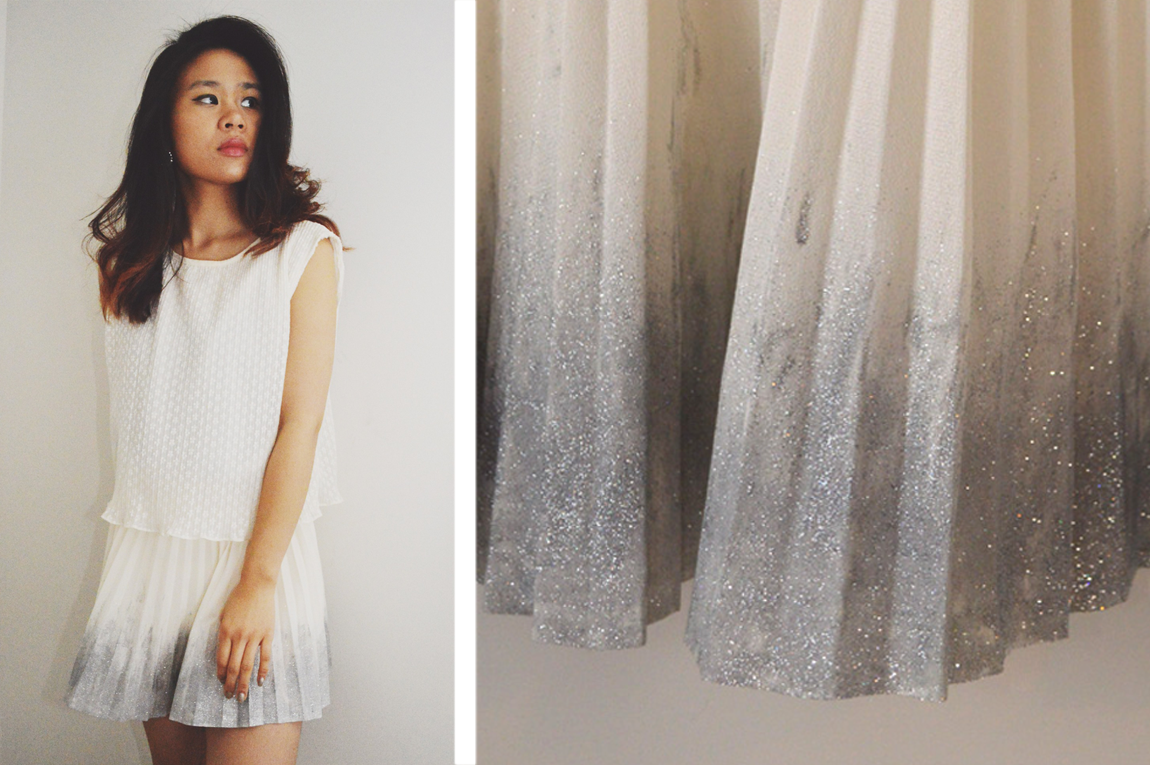
Tomorrow is Christmas – looks like I found the perfect chance to break in this dress!
Xo, Kirsten