

Fact: I used to despise spiders. It doesn’t help that I’ve had so many strange (and gross) encounters with them during my childhood. Yet, somewhere along the line, I warmed up to spiders. And while I’m not exactly trying to hang around with a bunch of eight-legged bugs, I can appreciate their complex nature. So, in full Halloween spirit, I played around with some copper wire to create dainty spider web decor. I love the organic shape of this project; it’s not perfectly symmetrical, which is also the point. This can be used as a wall hanging or in place of a wreath. Plus, can we just talk about this copper wire? I’m kind of in love.
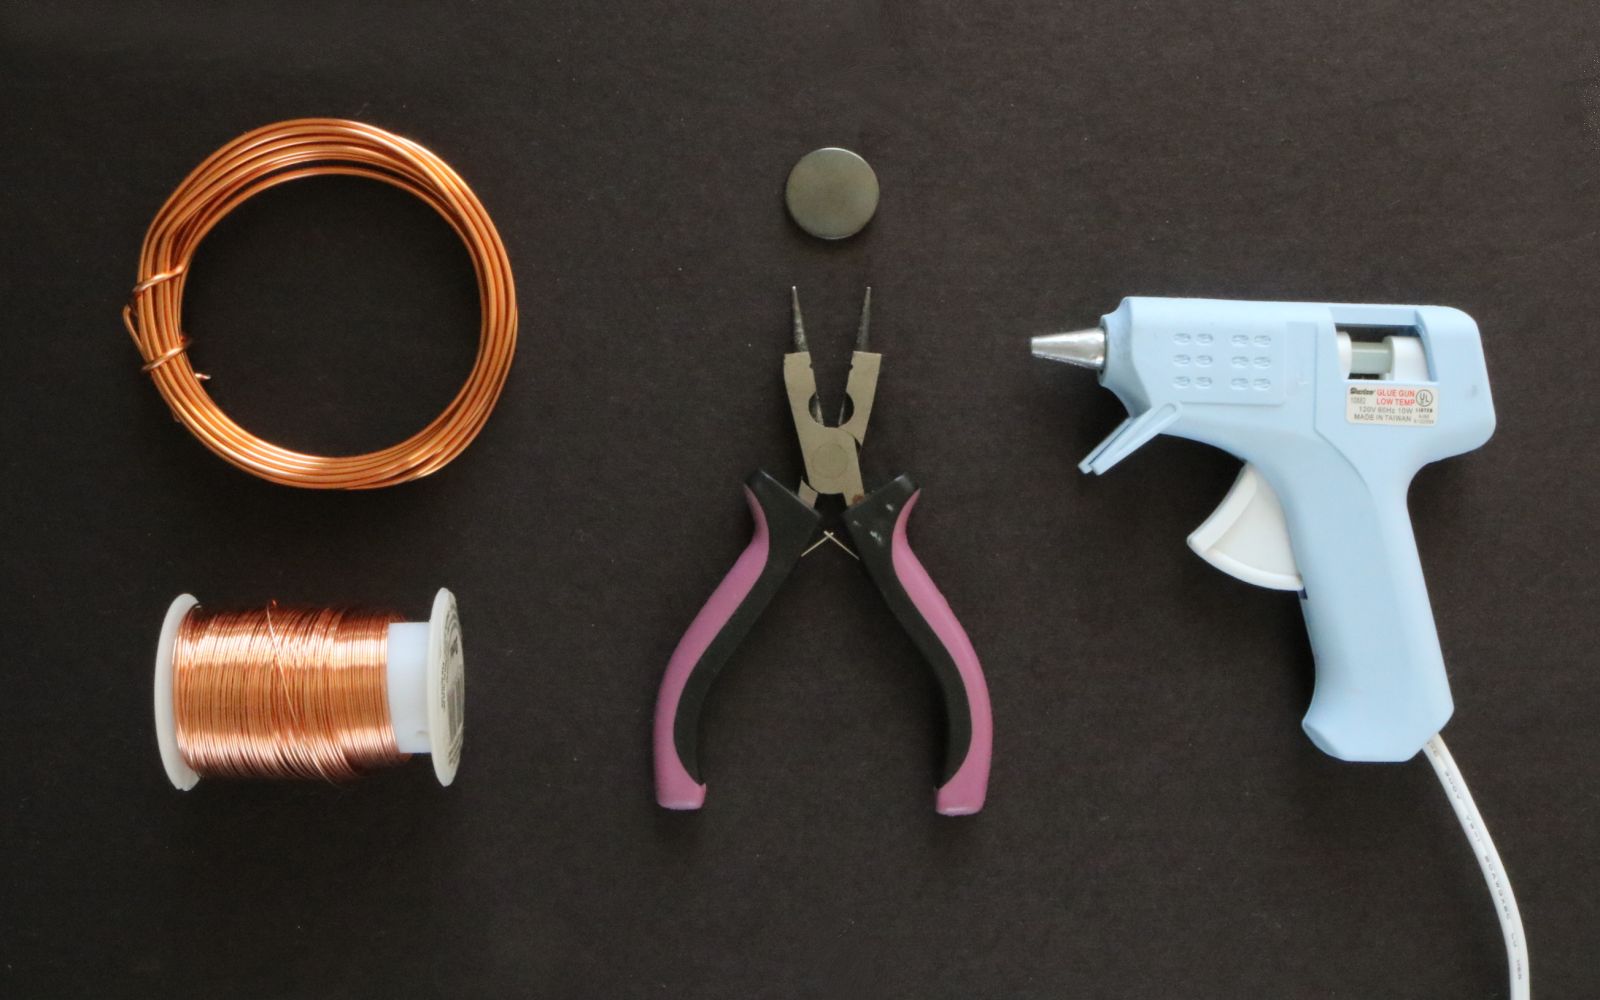
Supplies:
- 12 gauge copper wire
- 24 gauge copper wire
- Metal or plastic button, flat back, embellishment, etc. (2)*
- 3-in-1 jewelry pliers
- Hot glue gun
* At least one of these pieces should be perfectly flat and sturdy. This is where the base of the “web” will be adhered to; I used a metal button cover (?) as the base. I found a bunch of these at a creative reuse/scrap center, so I’m not even entirely sure what it is. Regardless, you could totally use a metal washer or flat circle pendant for this part.
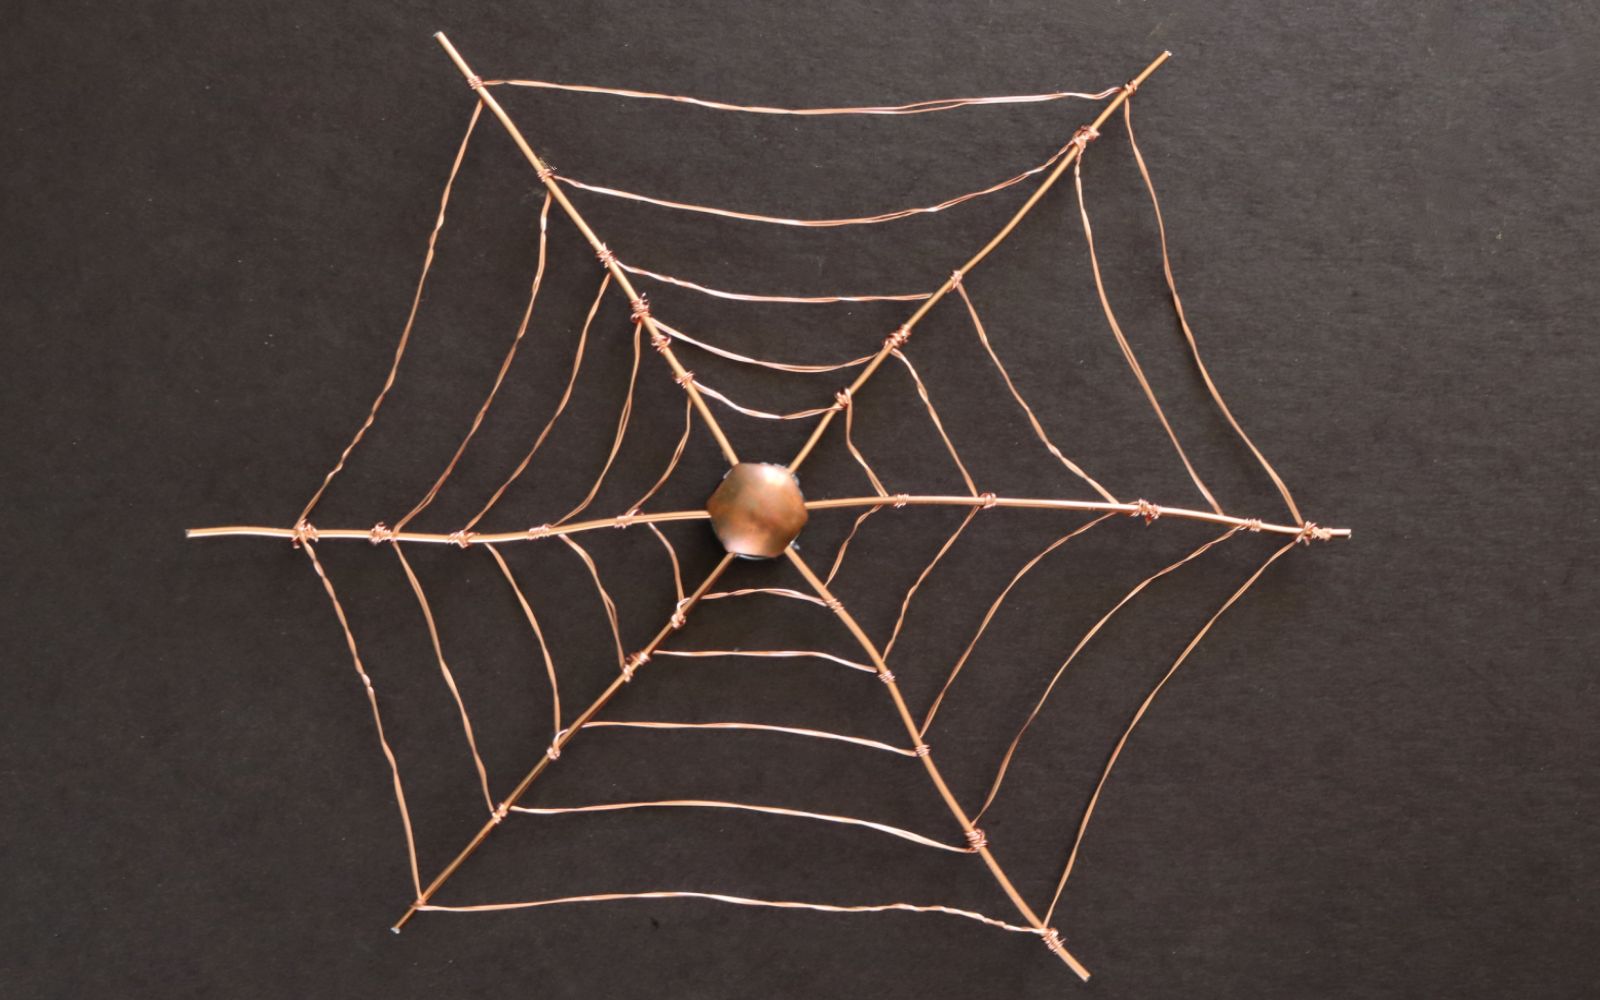
Later on, I ended up using a blank copper stamping to cover up the hot glue mess. This is why it wasn’t photographed in the original supply photo. You can use anything for this! Ideas include buttons, pendants, or even clay.
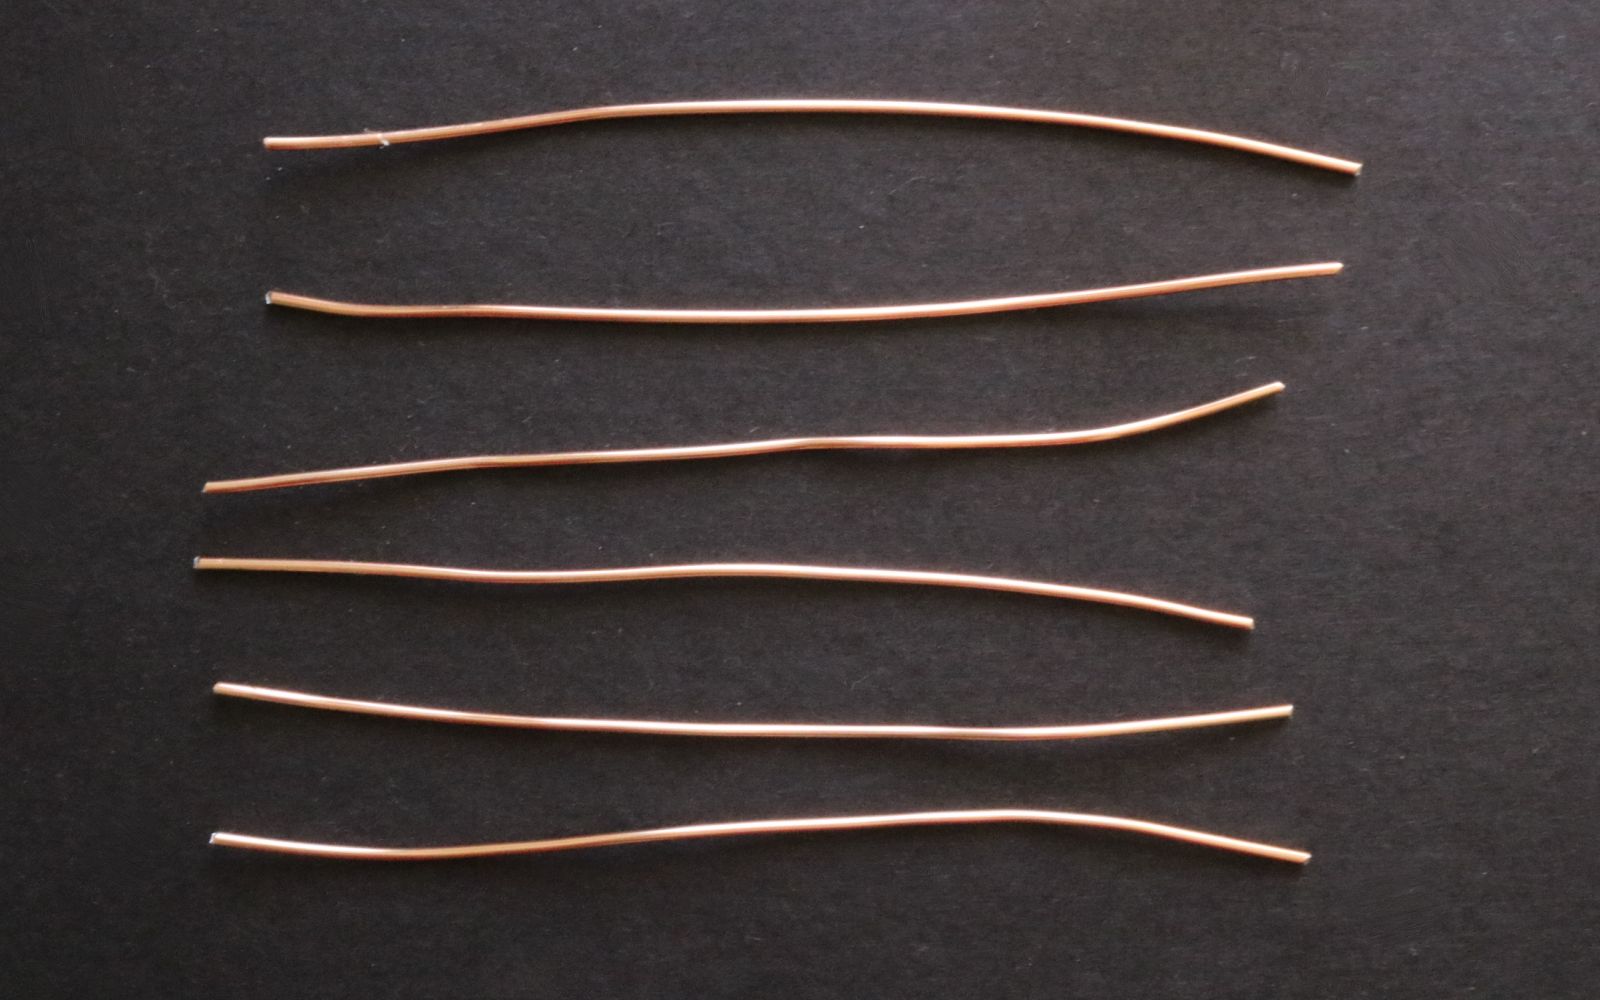
1. Cut six strands of 12-gauge wire measuring about 8 inches each.
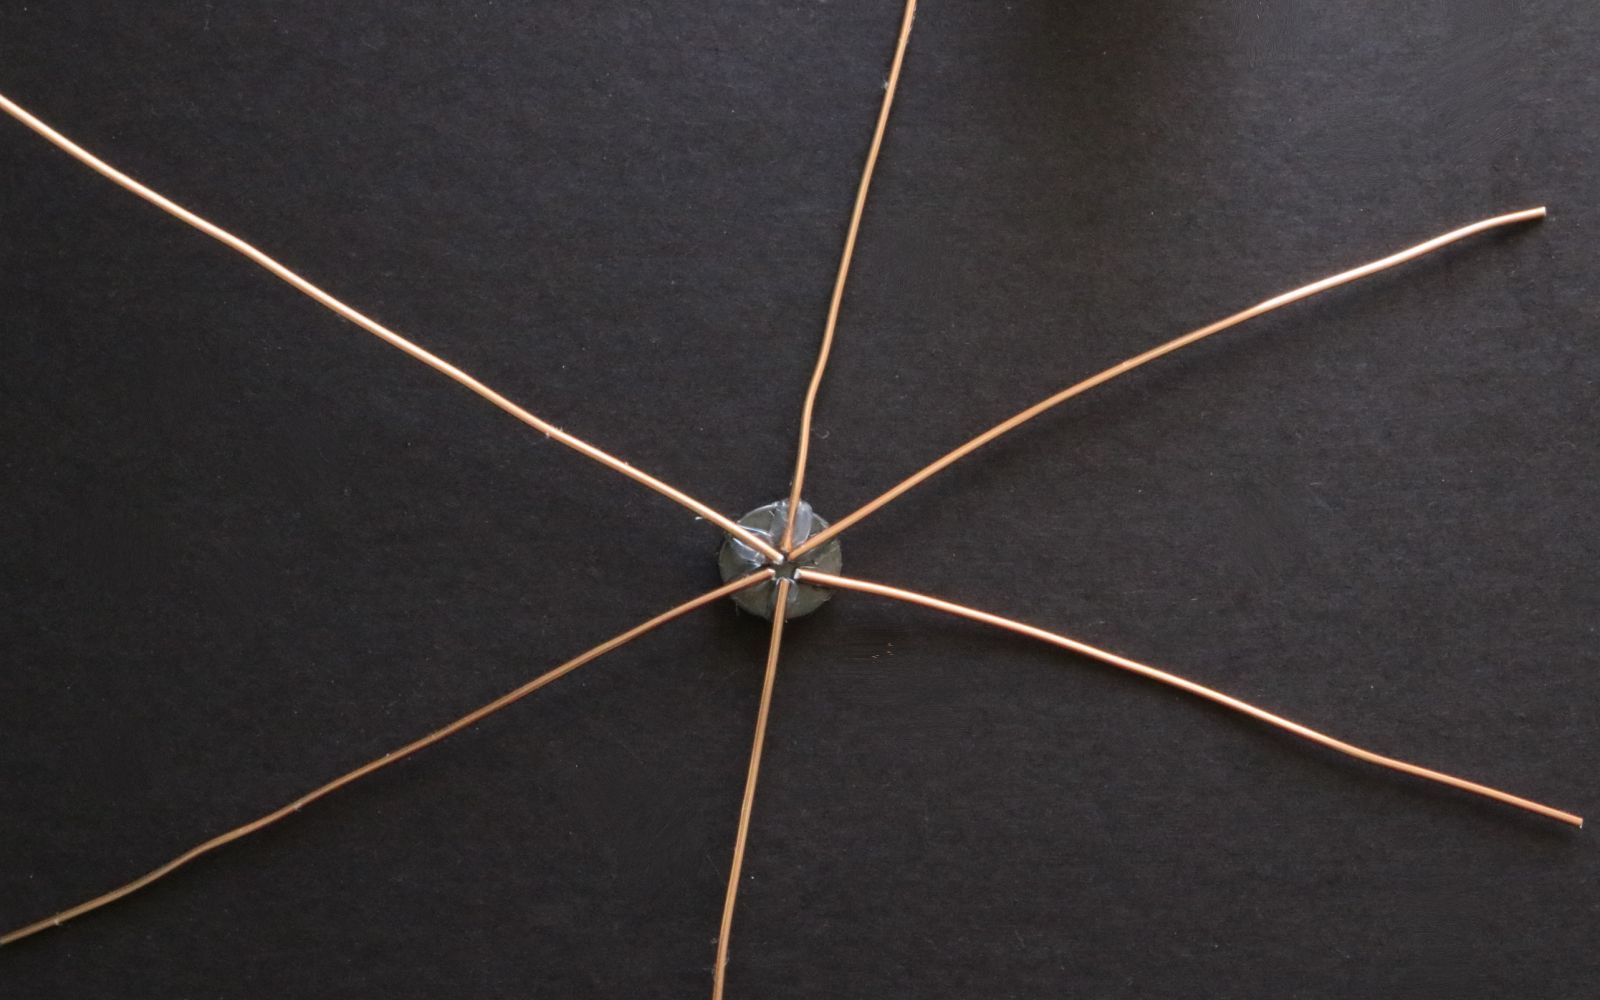
2. Hot glue the wire to the flat button/metal piece. Try your best to adhere them at equal intervals. Don’t worry if it isn’t perfect, though! This is exactly what will create that organic, rustic look.
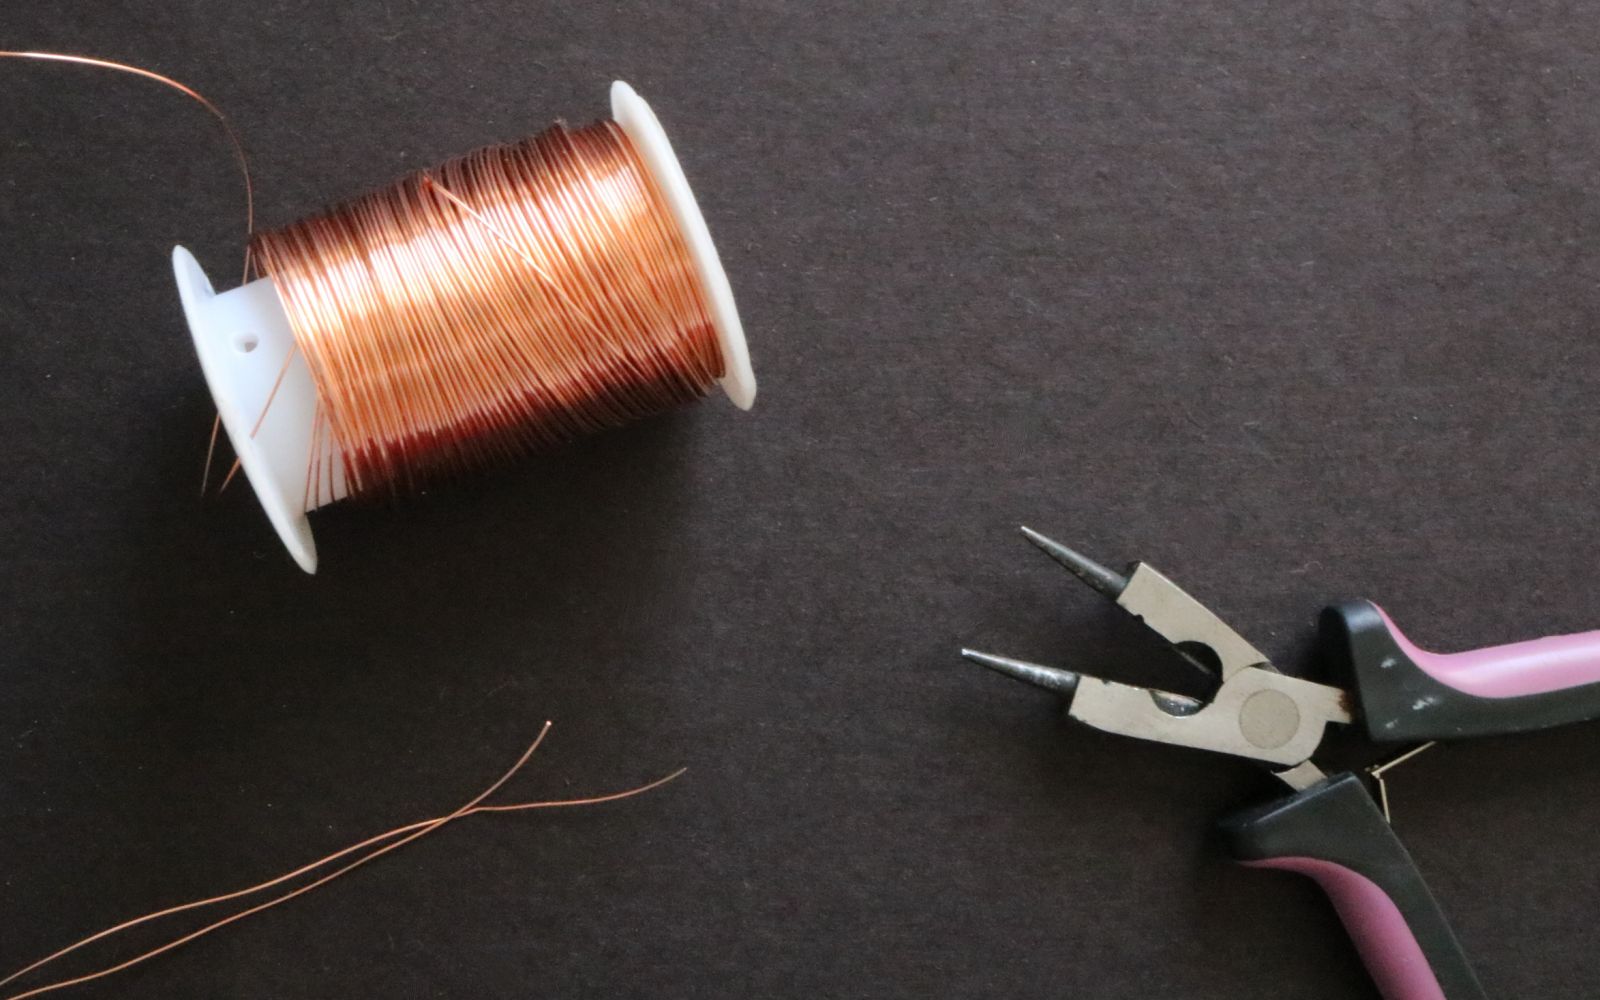
3. Cut a super long strand of 24-gauge wire. I started out with 25 inches. Fold in half.
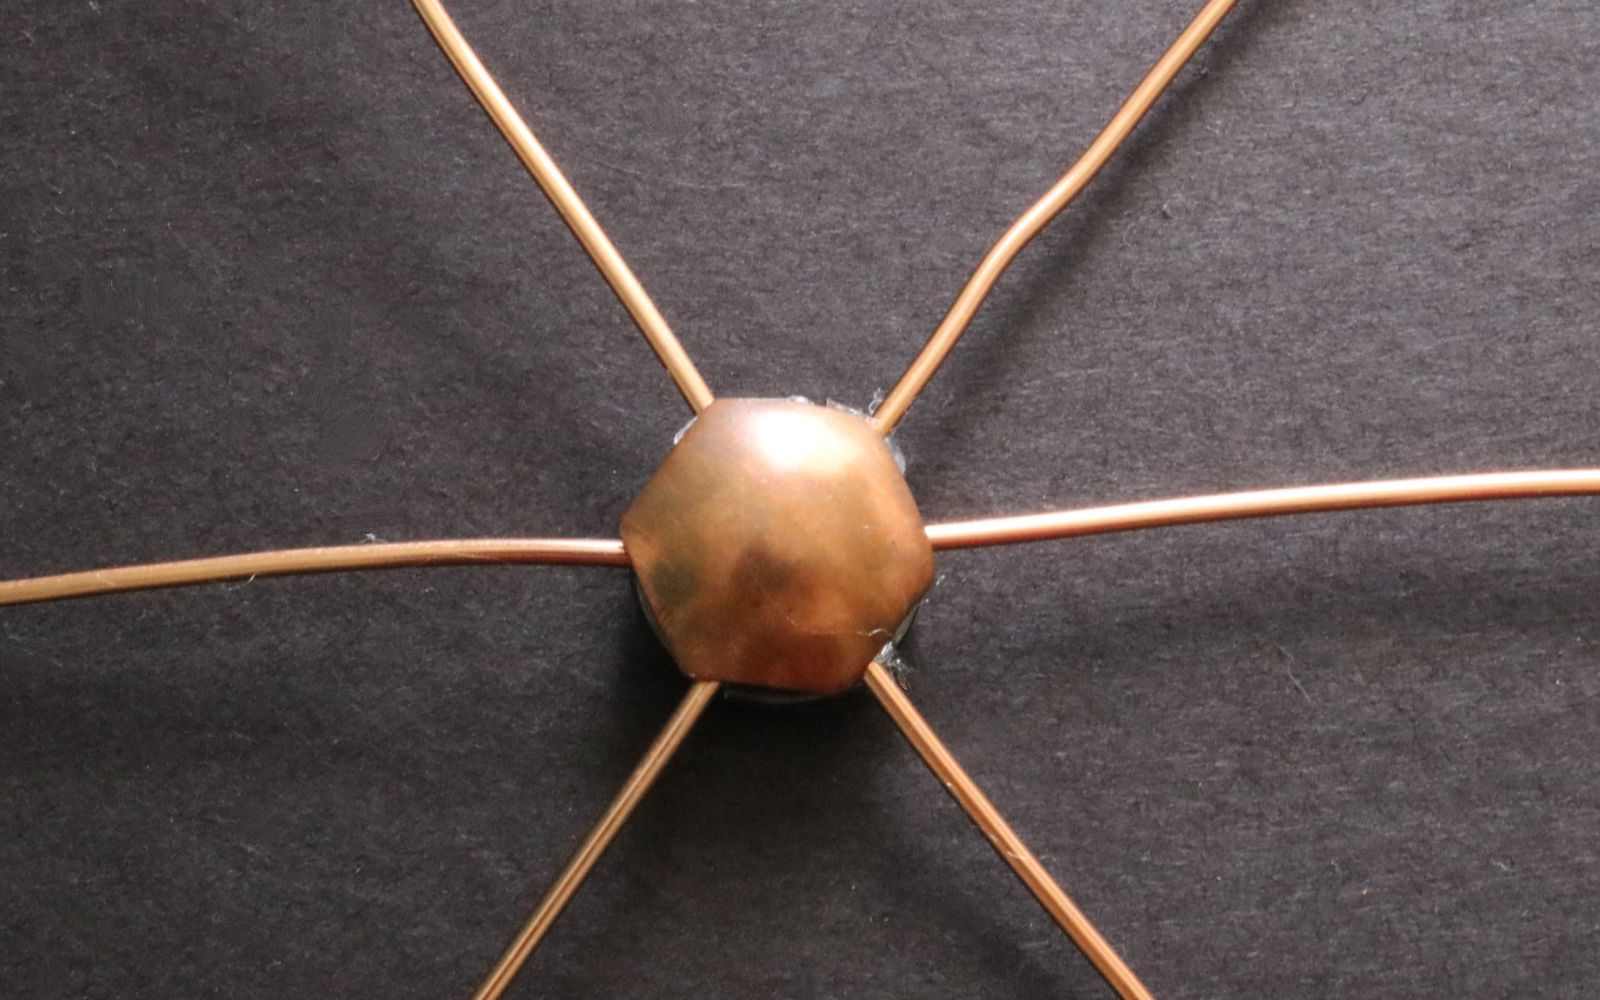
4. If you’d like, cover up the hot glue craziness with another embellishment, button, metal stamping, etc.
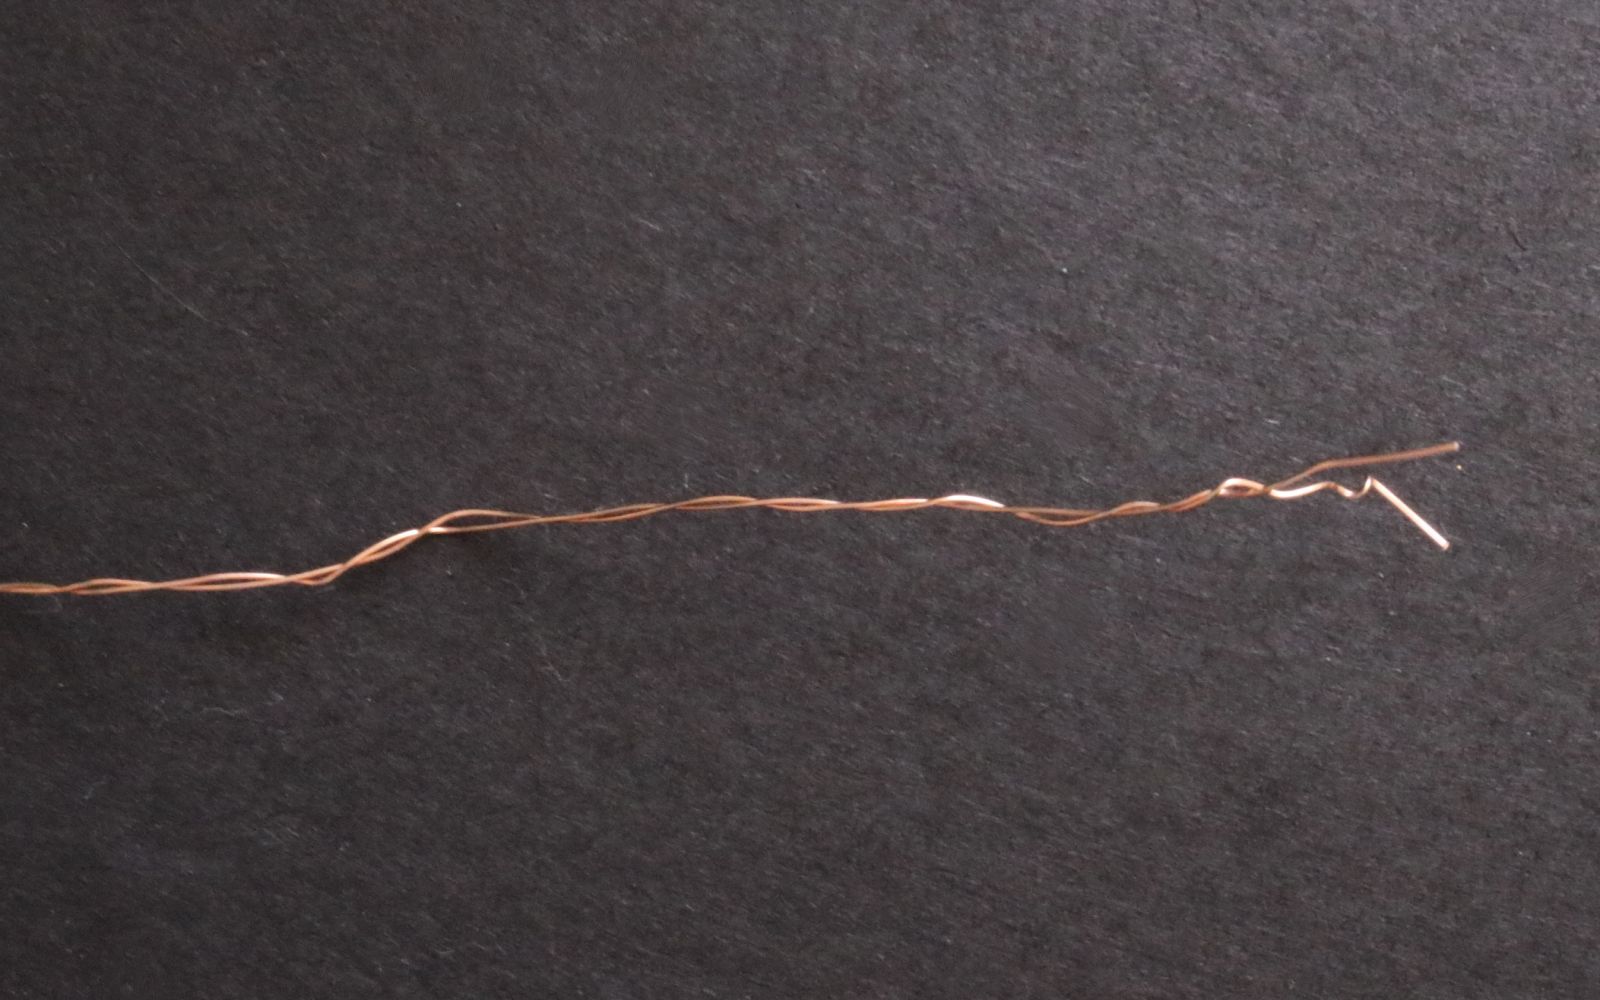
5. Twist the strands together.
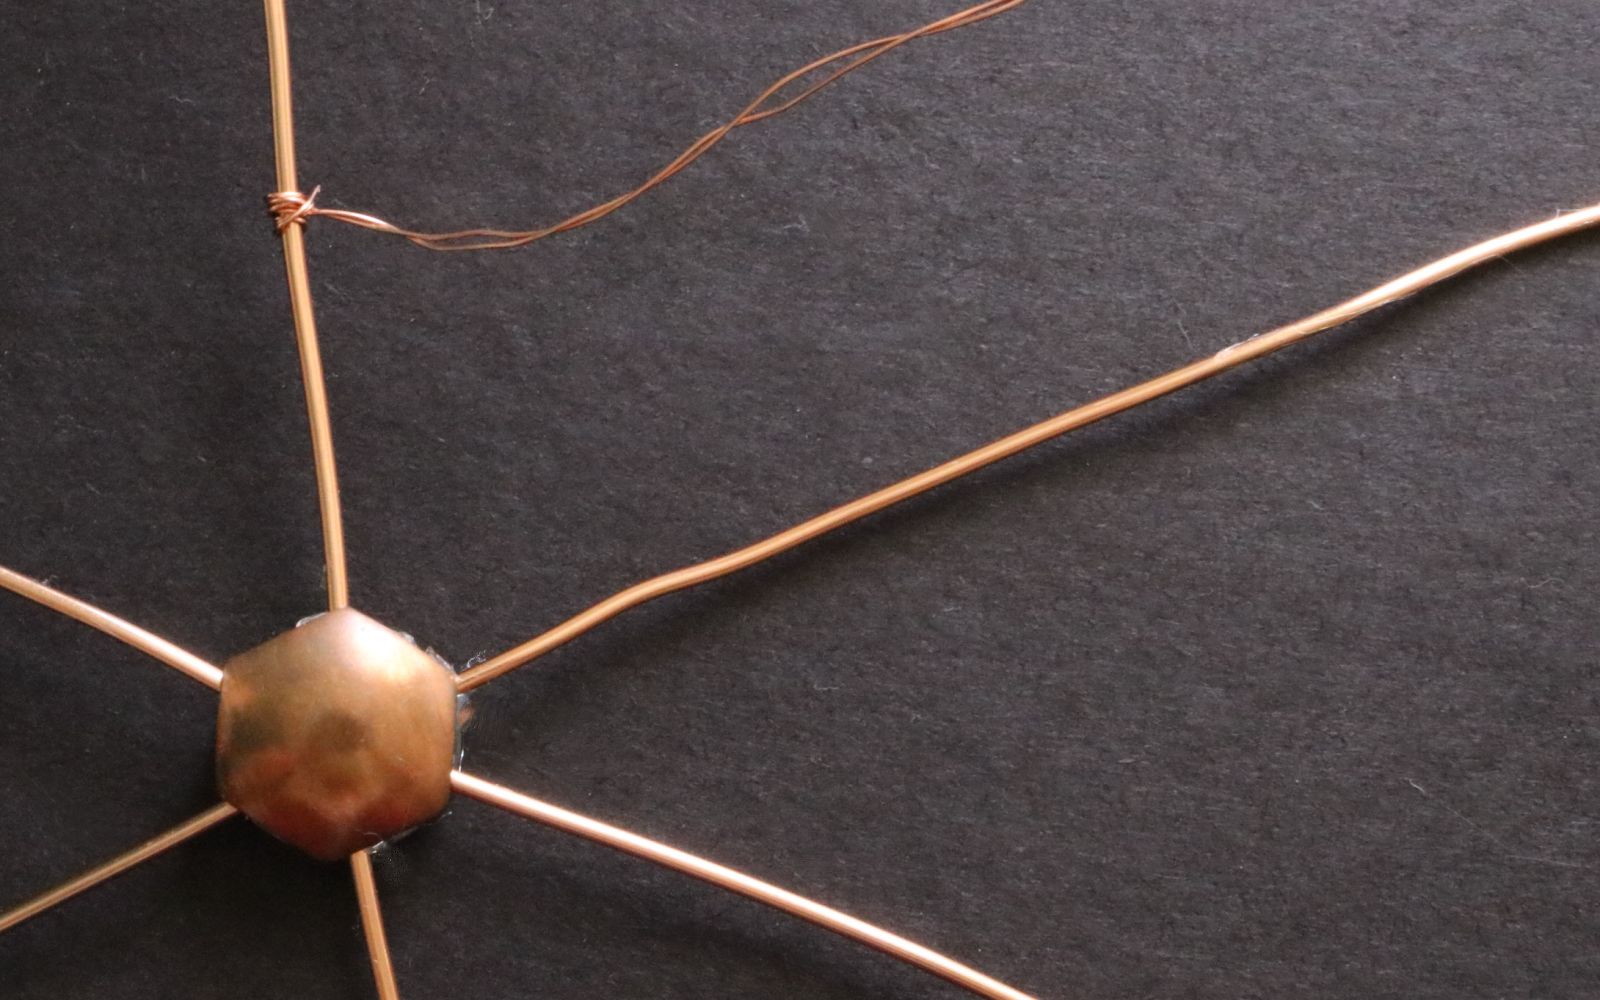
6. Tightly wrap the wire around one of the 12-gauge strands. Make sure the twisted wire in between has a bit of a curve. Otherwise, if you pull too tightly and it lies straight, it won’t create that natural spiderweb look.
7. Tightly wrap around the adjacent strand.
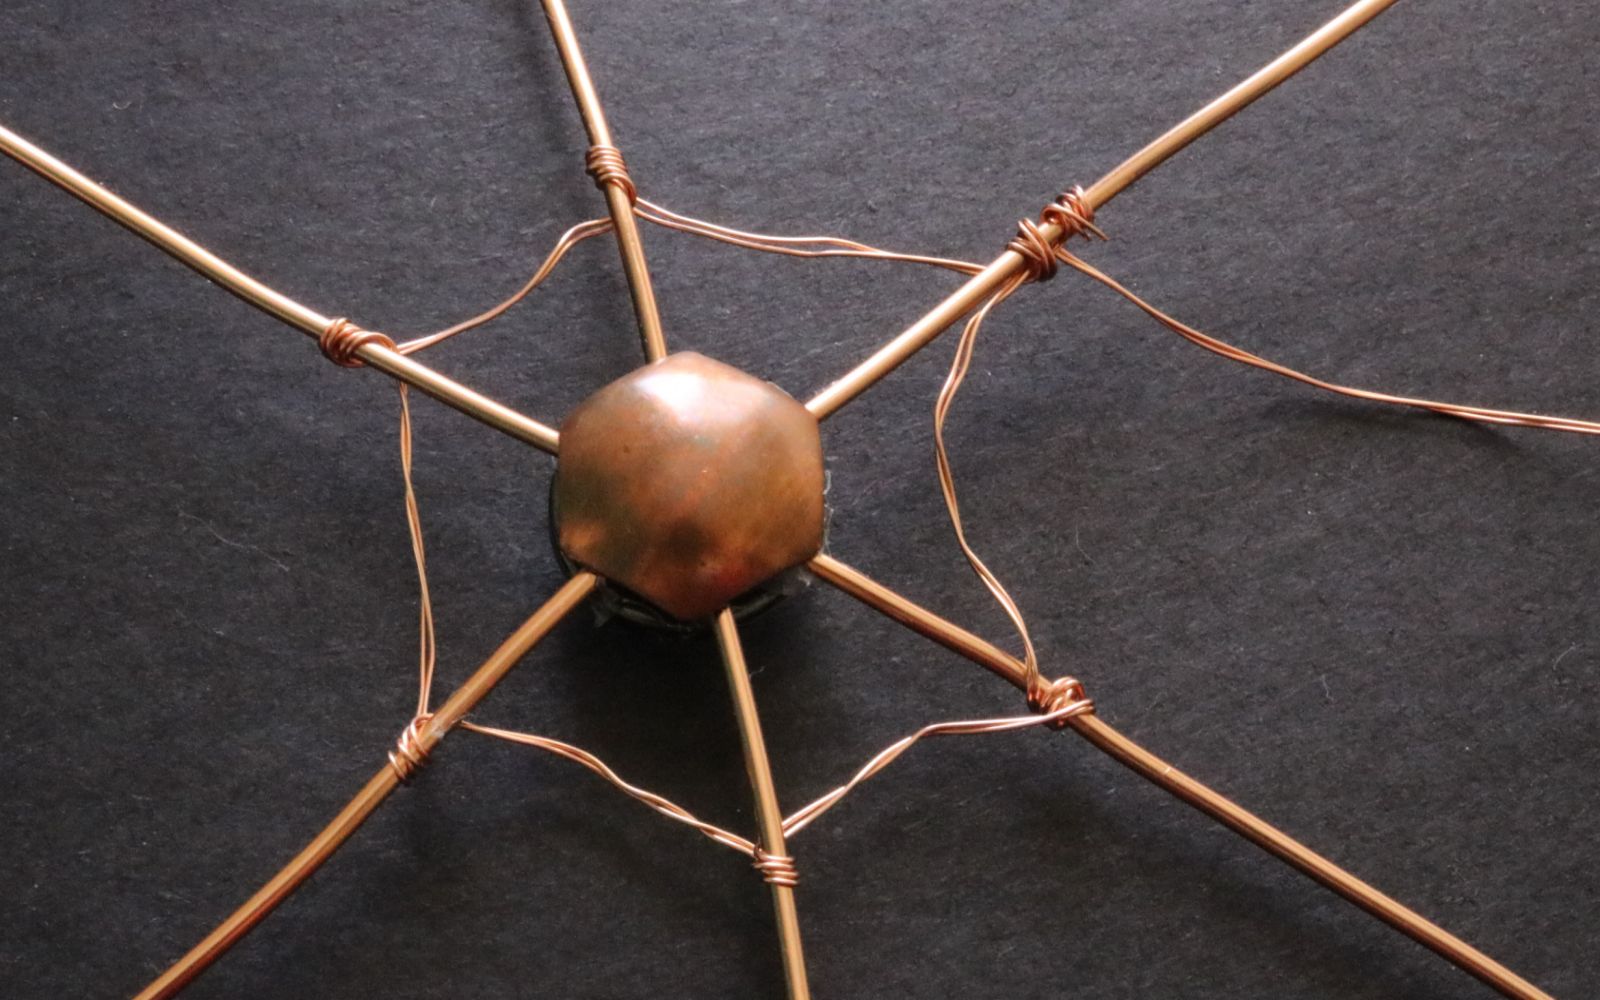
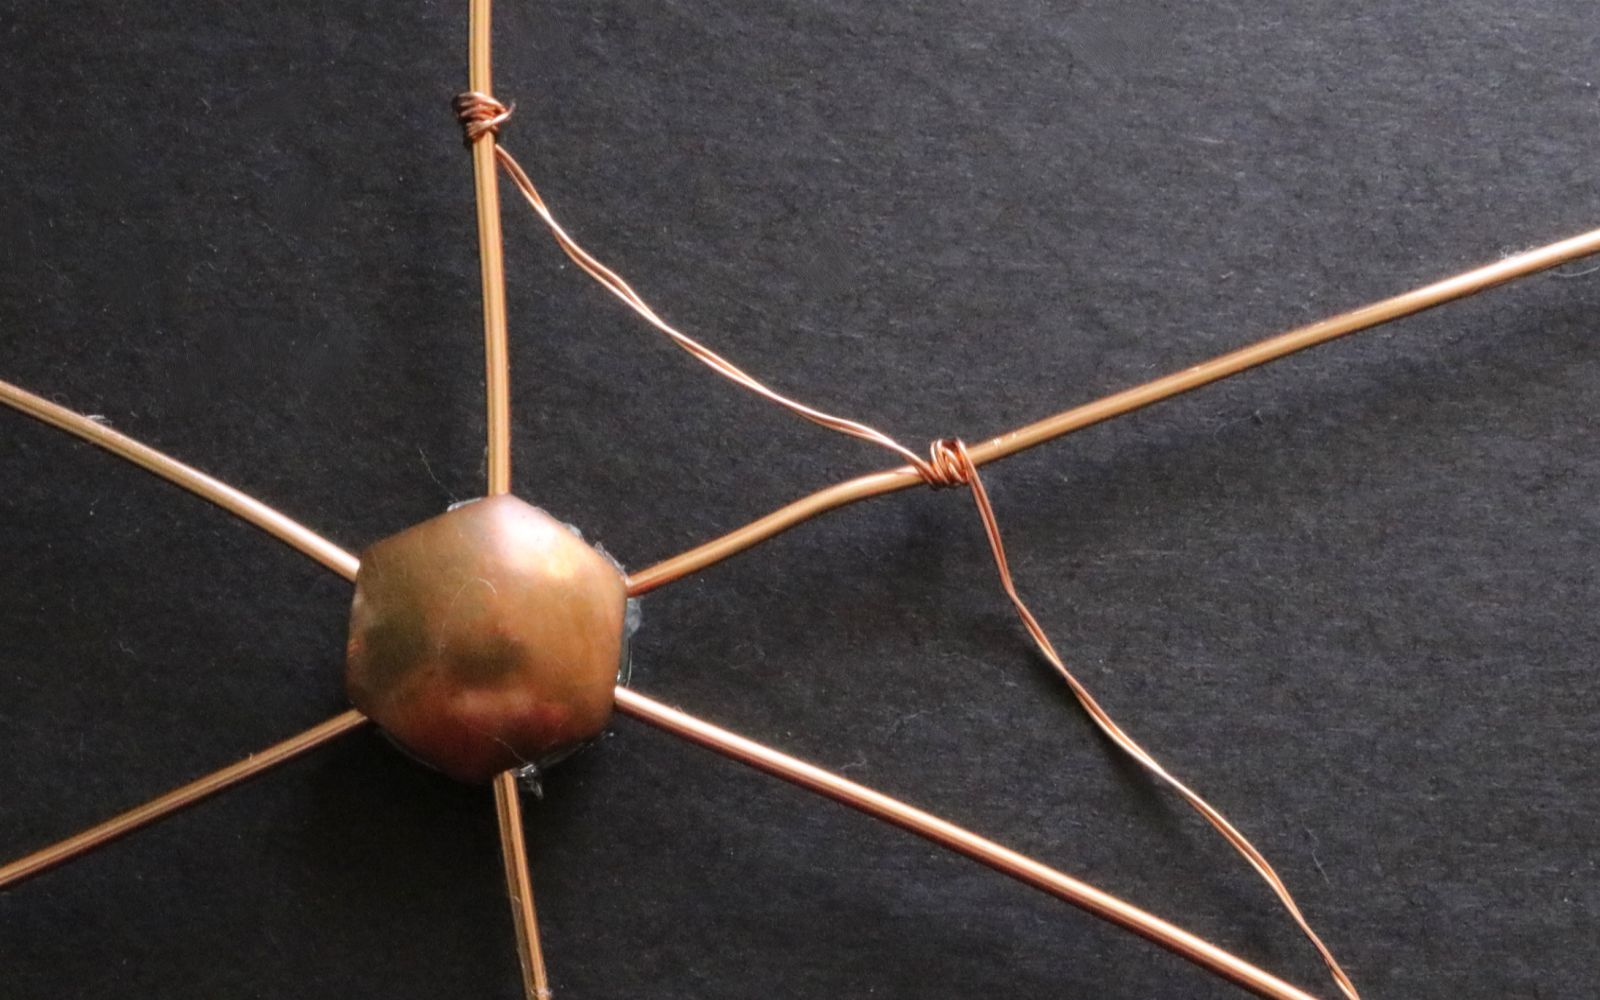
8. Continue working around the web until you reach the spot where you started. Give it a good, tight wrap around and cut the excess wire.
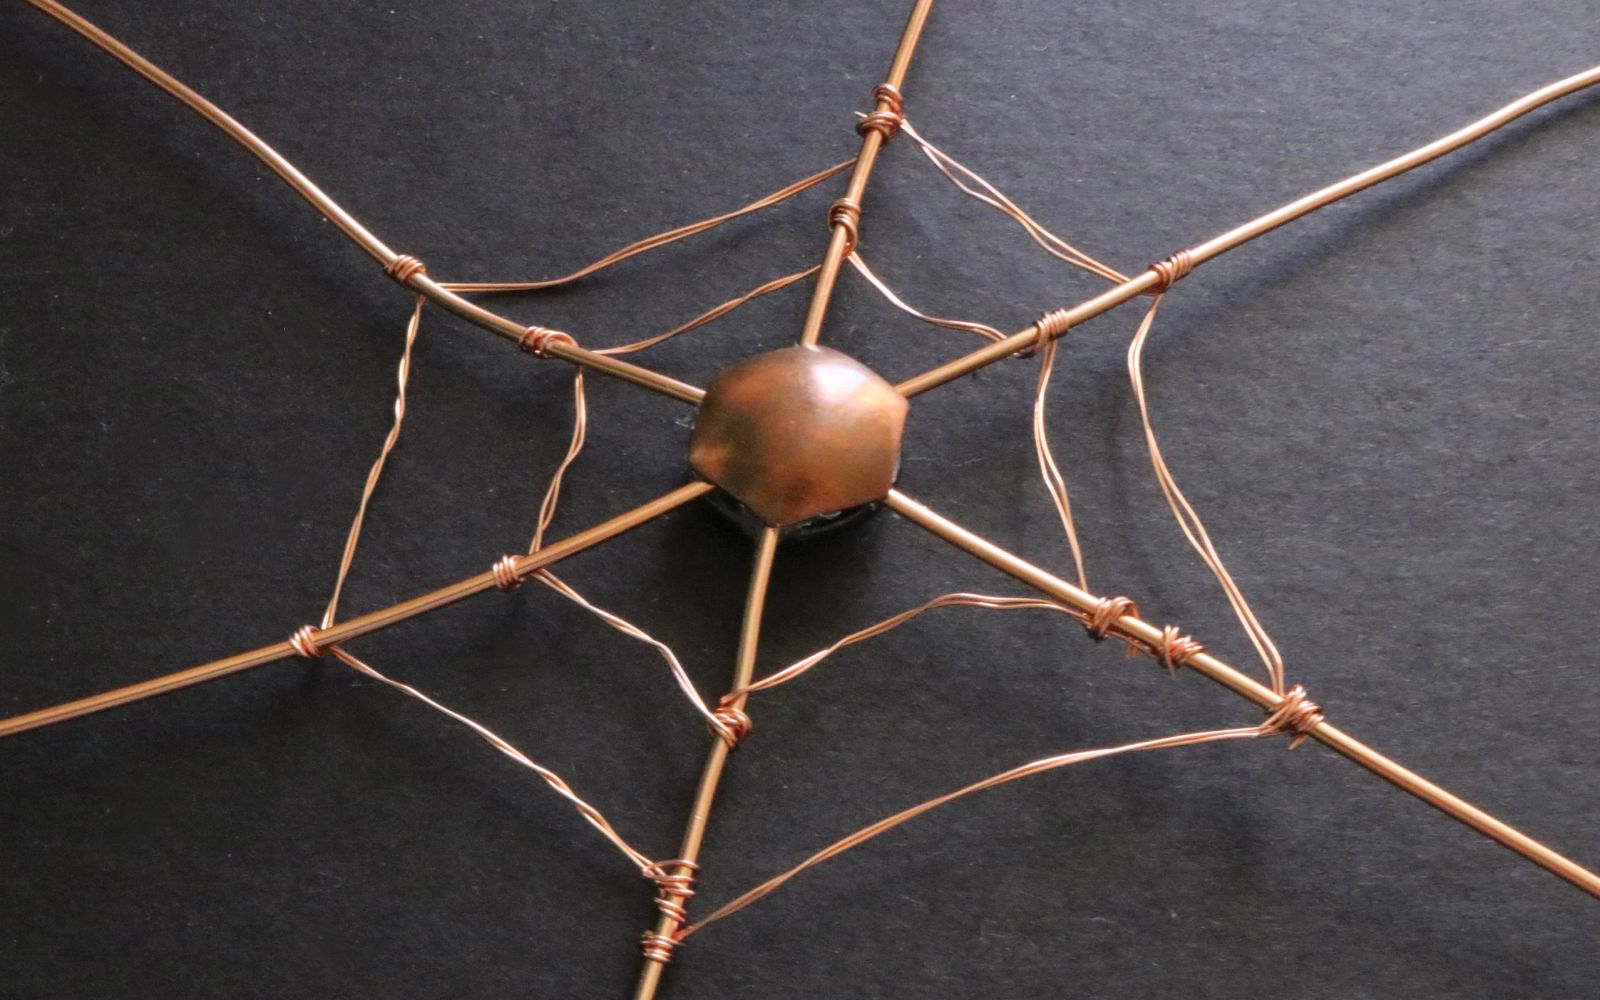
9. Cut another long strand of 24 gauge wire, fold, and twist. Weave another “layer” around the first one you just created.
10. Continue working your way outward. If you run out of wire while weaving a layer, simply wrap it (tightly!) and trim the excess. Bring in another strand, wrap it around the spot where you left of, and continue along.
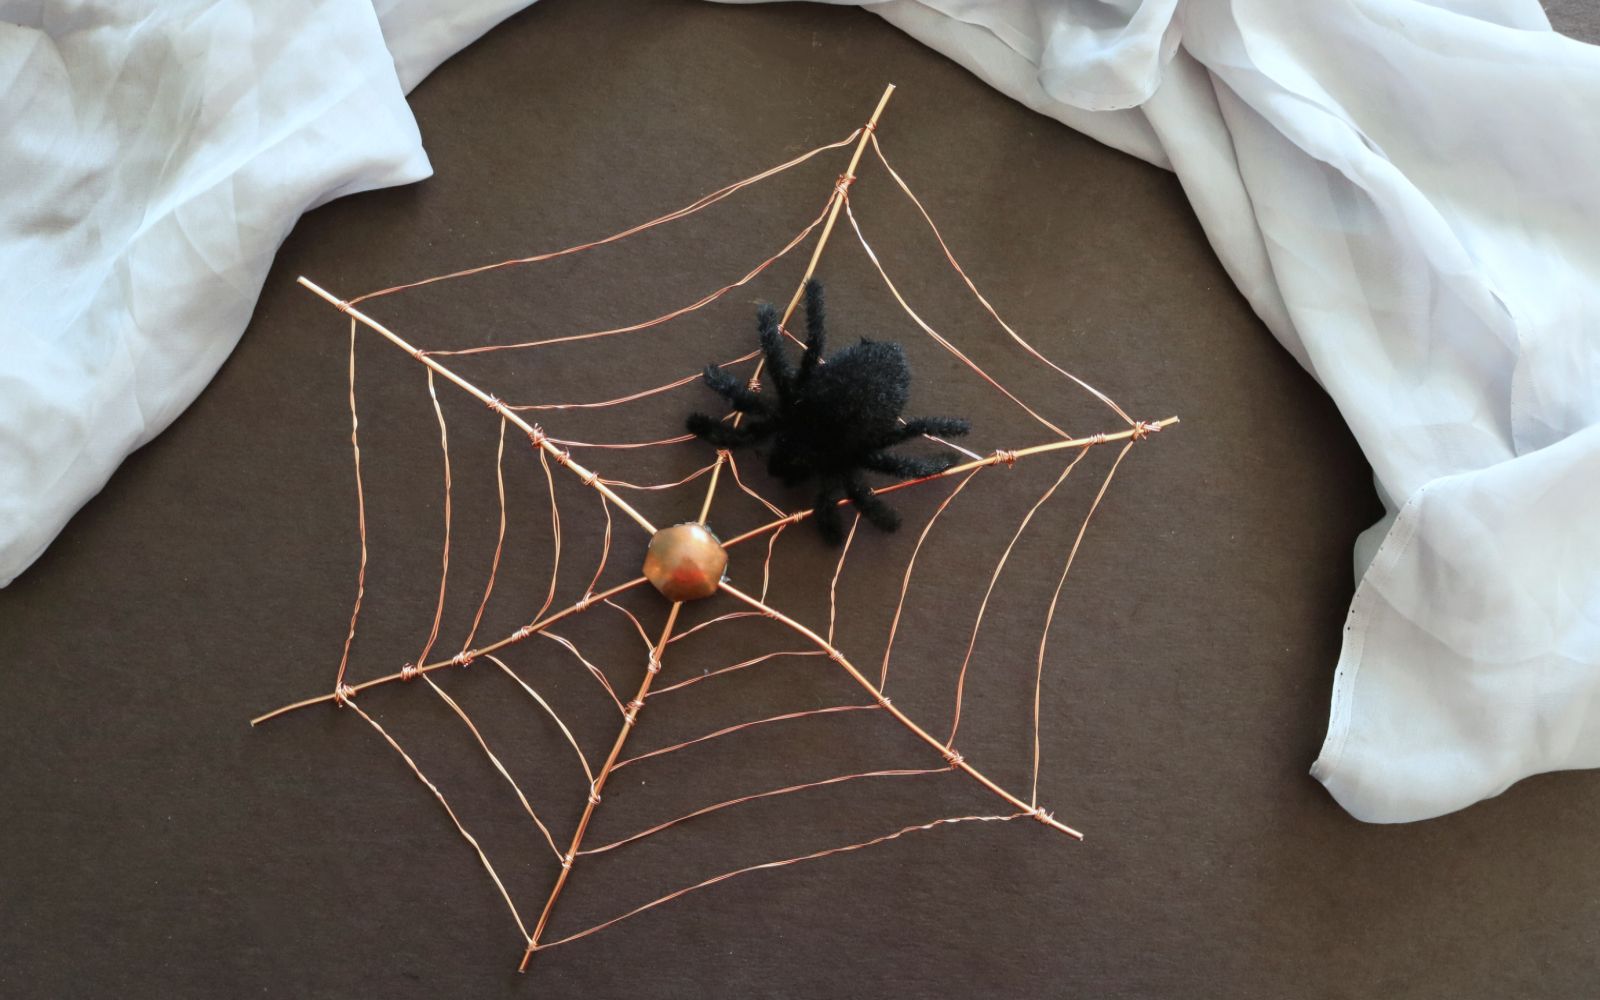
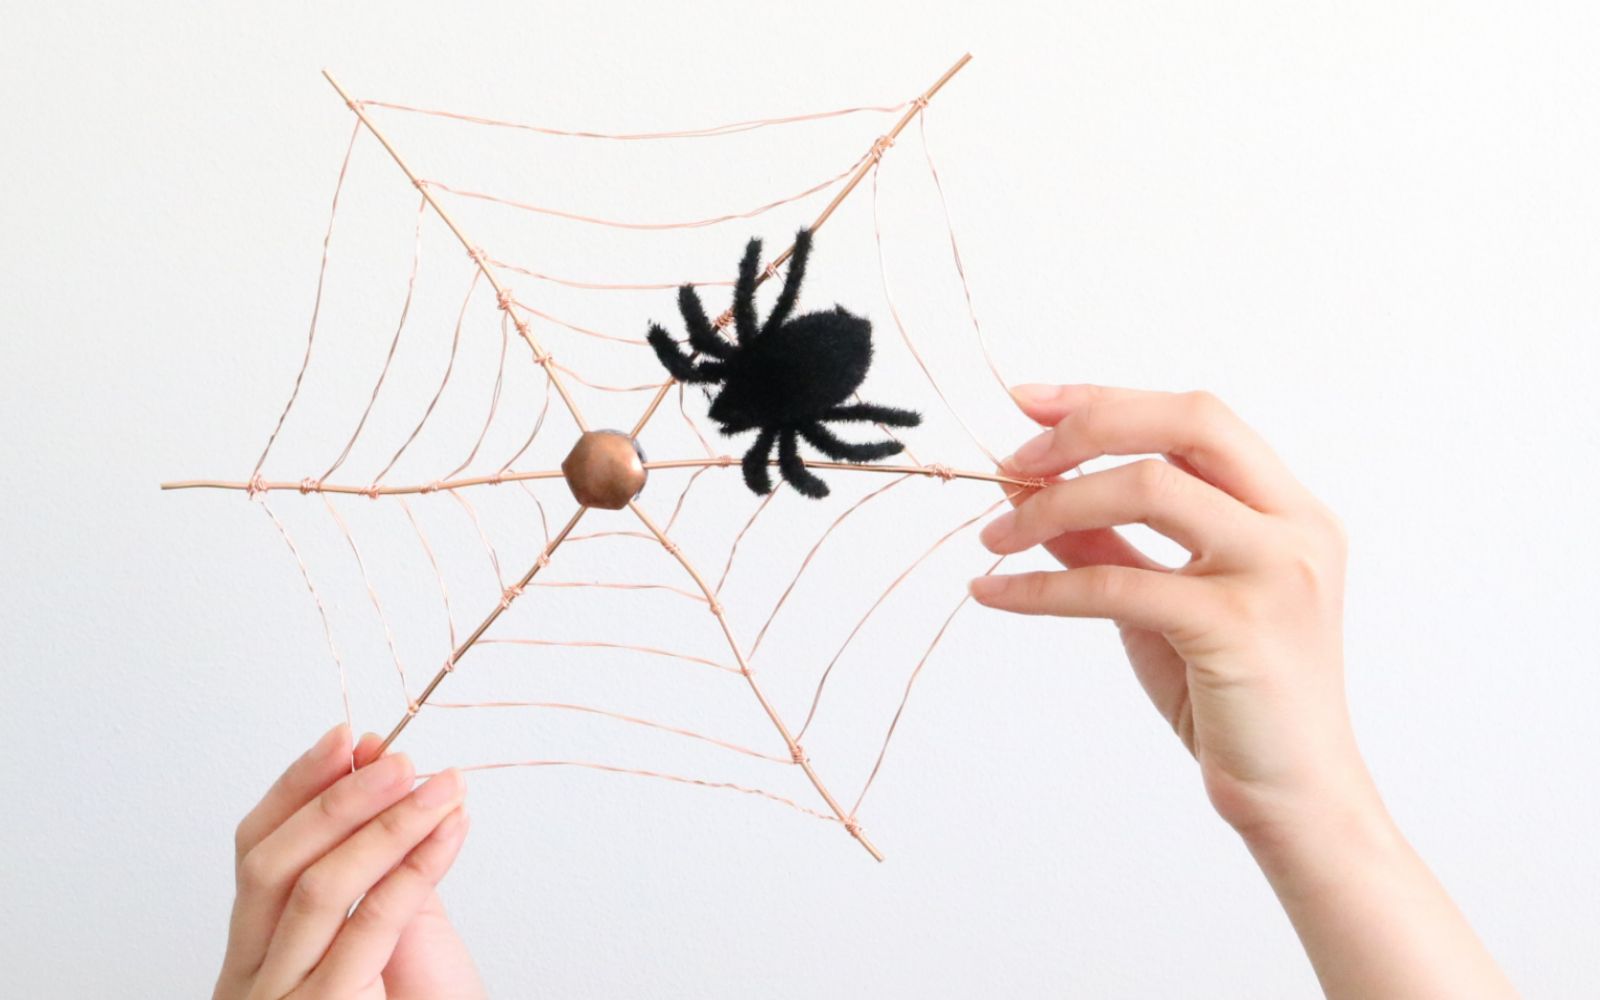
Add a clip-on spider for good measure. I picked this guy up at Michaels.

I love the uneven daintiness of the web. There’s a good chance my walls will be rocking this all year round, even after Halloween is over… minus the faux spider, though.
A rose gold one would be amazing.
xx K