
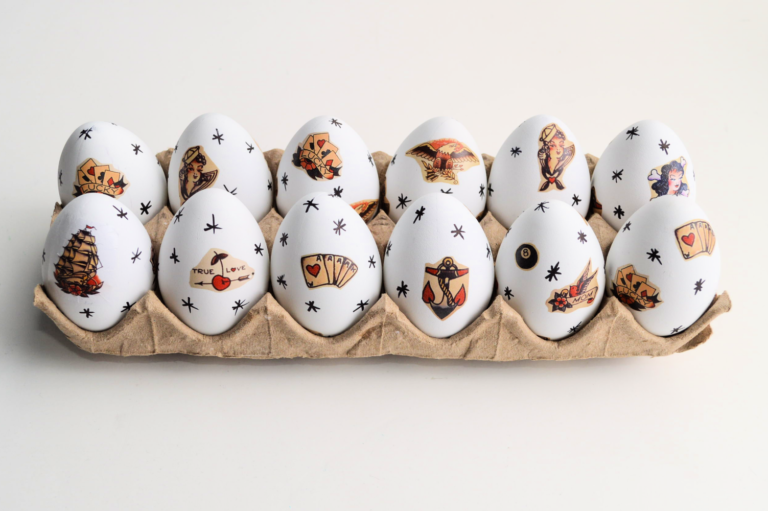
Long-time readers and followers know that I adore unconventional, off-beat ideas. This project is no exception! With Easter (already) less than a month away, the egg tutorials have been rolling out left and right. I actually thought of this last year, but too late into spring — so this year, I’m sharing this well in advance.
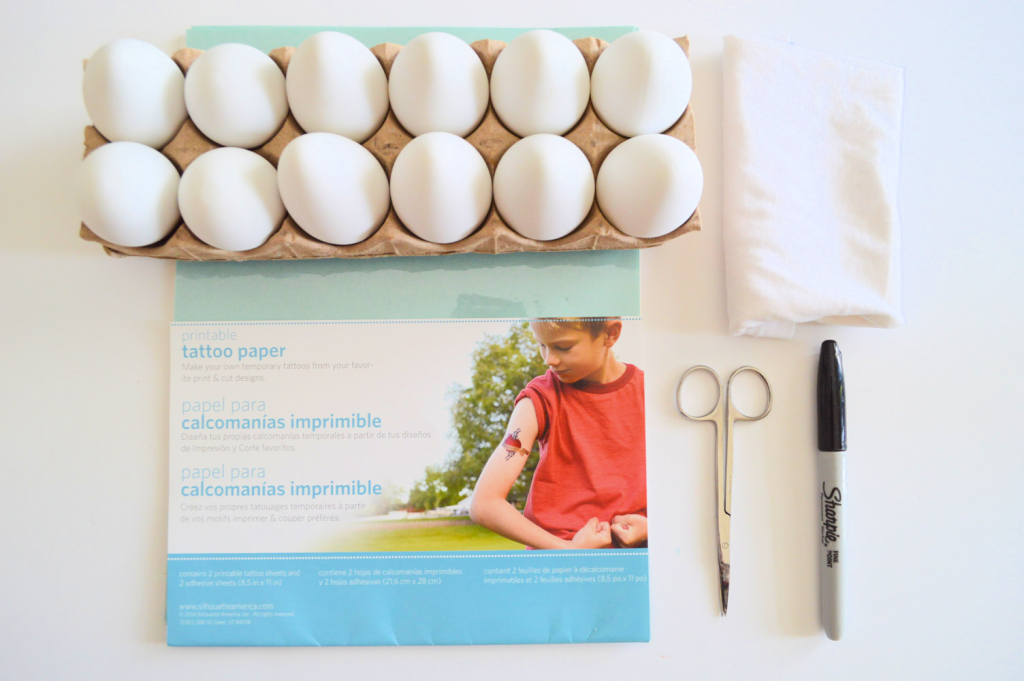
Supplies:
- Faux Eggs
- Printable temporary tattoo paper
- Inkjet printer
- Cloth or towel
- Scissors
- Black permanent marker
- Water* I used a pack of 12 white faux eggs that I purchased last year, but brown eggs would work great to keep that traditional parchment look.
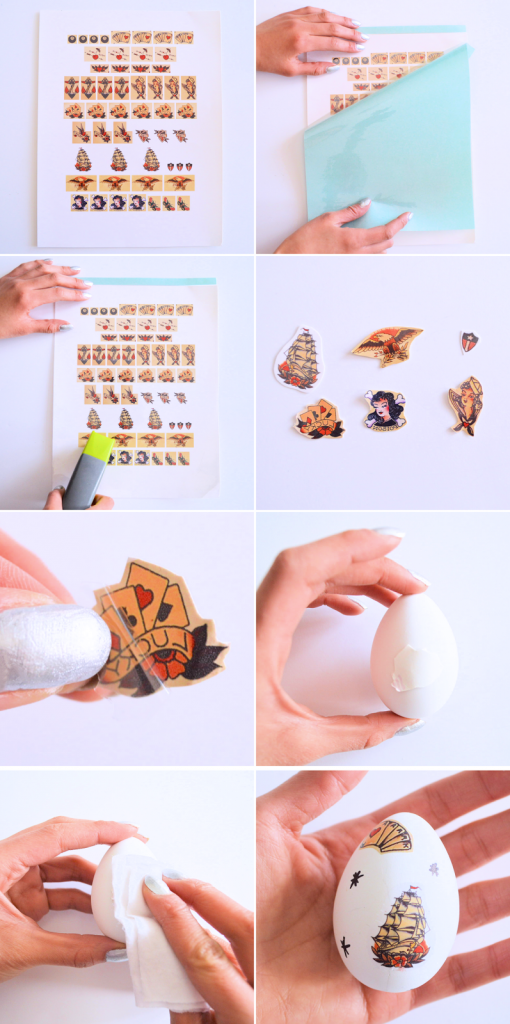
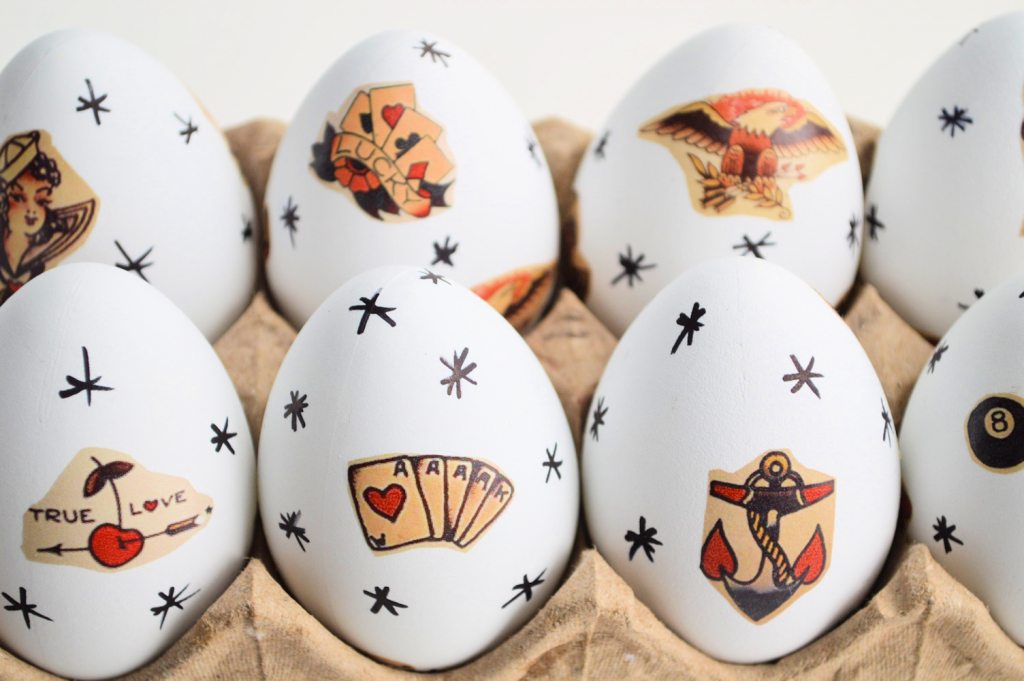
1. Print a sheet of Sailor Jerry images onto the temporary tattoo paper. Make sure you’re familiar with the way your printer works; the images must be printed on the glossy side of the paper.
I simply pulled off images from the web and cropped out the parchment background as much as possible. Then, I pasted them in a Microsoft Word document and re-sized each one. The final size of each “tattoo” is up to you; feel free to print the same image in a variety of sizes to see what you like best. (Remember, printing out these tattoo images is for personal use only!)
2. Peel off the backing from the adhesive sheet, and carefully place on top of the images. Tip: Line up the corners, then slowly pressing the adhesive and pulling the backing away.
3. Smooth out any air bubbles with a hard object, such as an old credit card or stapler.
4. Cut out the images.
5. Peel away the plastic backing. The adhesive will have stuck to the image.
6. Stick onto the egg.
7. Wet with a damp towel or cloth, adding pressure.
8. Once it’s ready to be peeled away, the paper will easily slide off. Continue with the remaining images and add some stars with a black marker.

Repeat, repeat, and repeat some more.
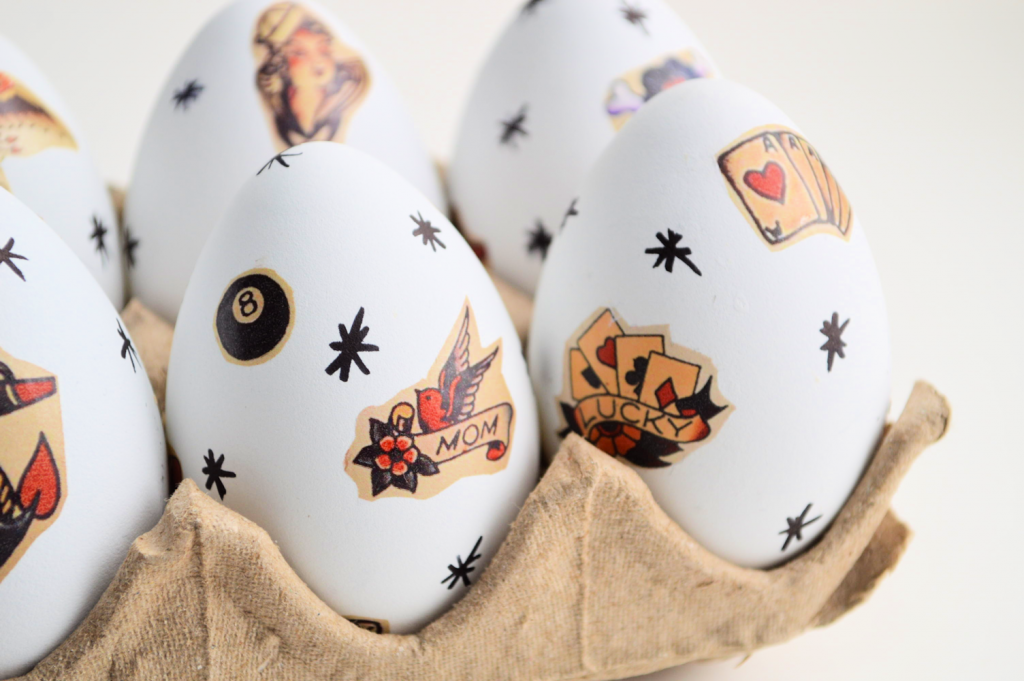


Happy spring crafting!
xx K