
There’s something about flowers that never (ever) gets old. Maybe it’s their timeless beauty or symbolism of new life. Or maybe it’s the way they exude an unspoken personality that doesn’t need words. Or maybe it’s all of the above. I’ll go with that.
Whatever it is, my appreciation for flowers and foliage has increased over the years. I even took my first ever flower arrangement class recently, featuring edible flowers (!!). It was taught by the lovely Lorena of Home Sweet Flowers. You can check out the bouquet I made, right here.
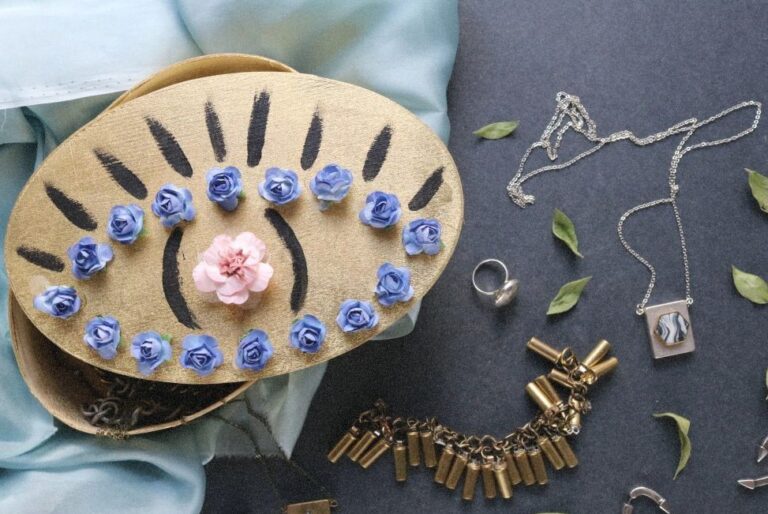
So, when Paper Mart asked me to create a project using their supplies, I was immediately drawn to their selection of paper flowers. The end result? A floral eye trinket box, featuring a few of my favorite things: flowers, jewelry, and home decor.
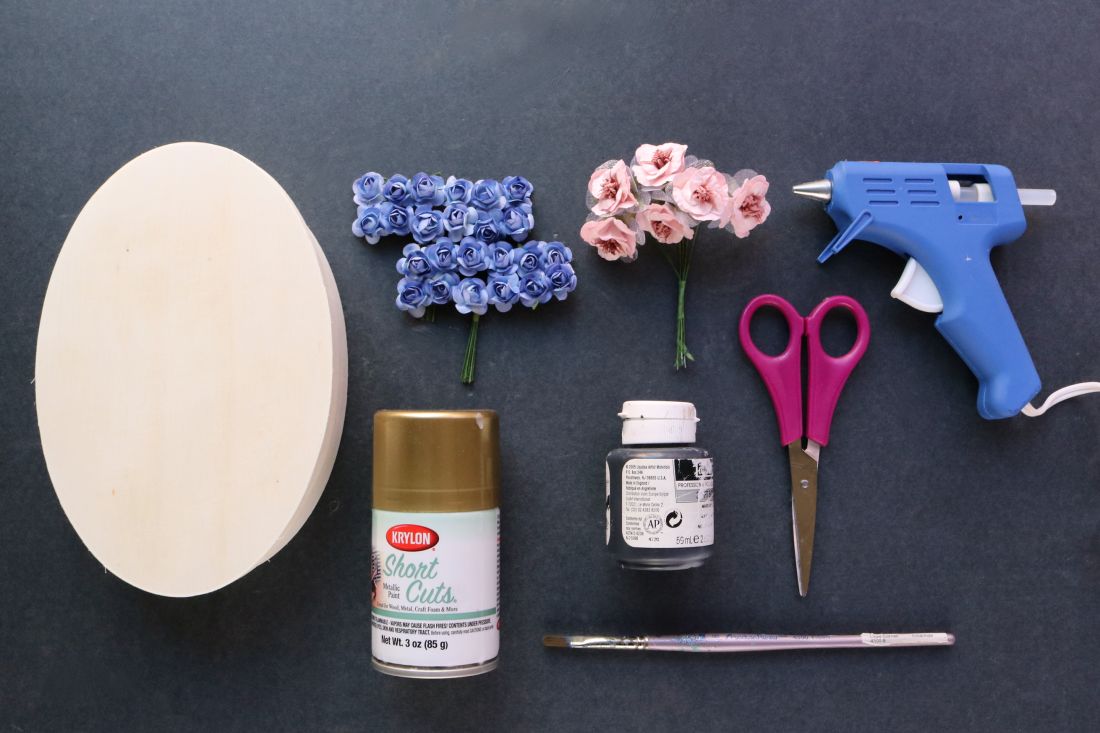
Supplies:
- Paper Mart Oval Poplar Wood Box
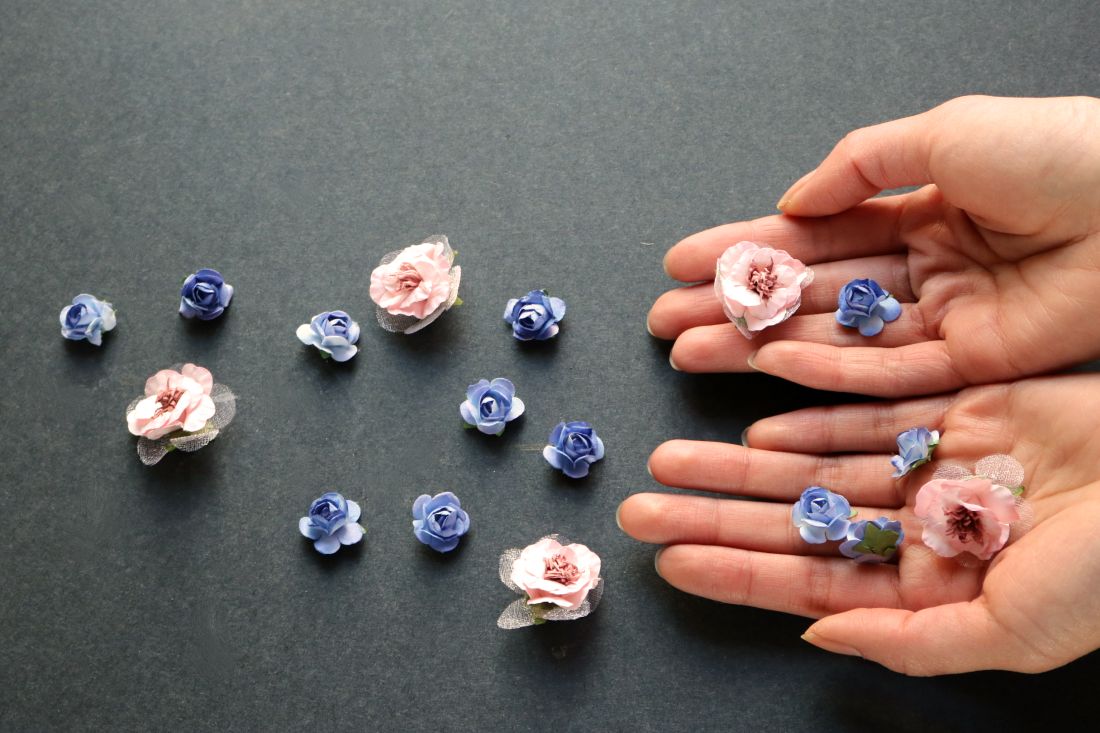
- Paper Mart Mini Paper Roses (Royal Blue)
- Paper Mart Assorted Paper Wildflowers (Stargaze)
- Metallic spray paint
- Scissors
- Black acrylic paint
- Paint brush
- Hot glue gun
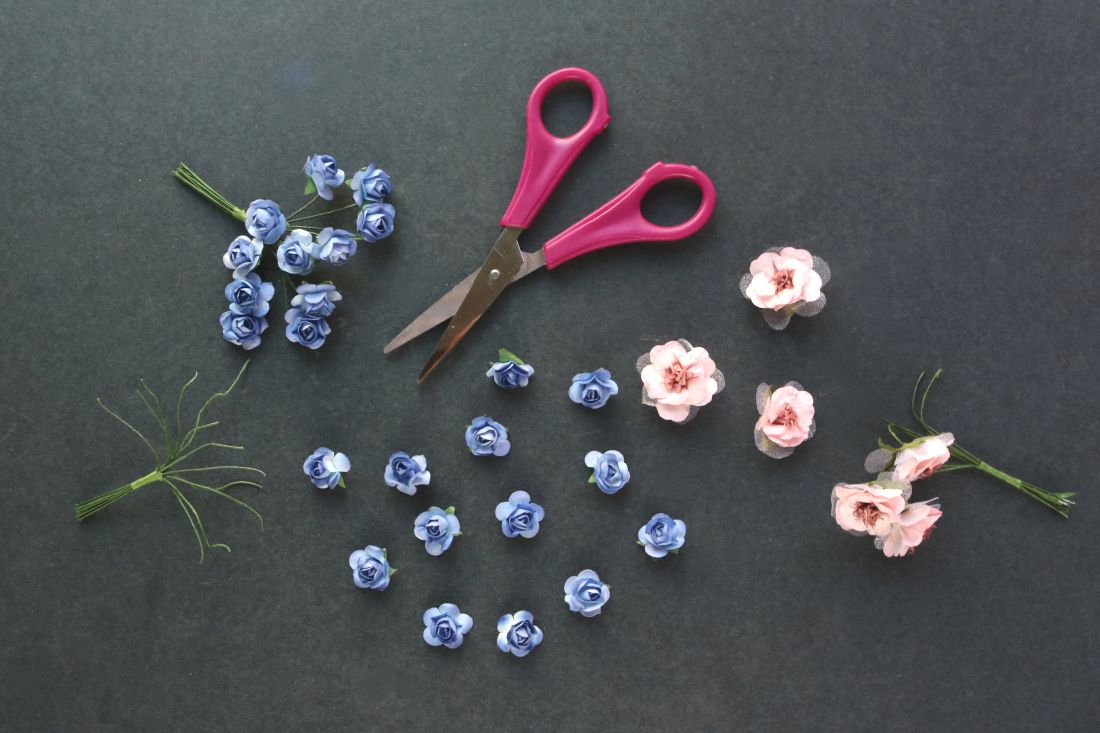
1. Using the scissors, cut a handful of roses off of the stems. I used a total of 16; you may use more or less depending on the size of your box.
Cut one paper wildflower off of the stem. This will be used for the center of the eye.
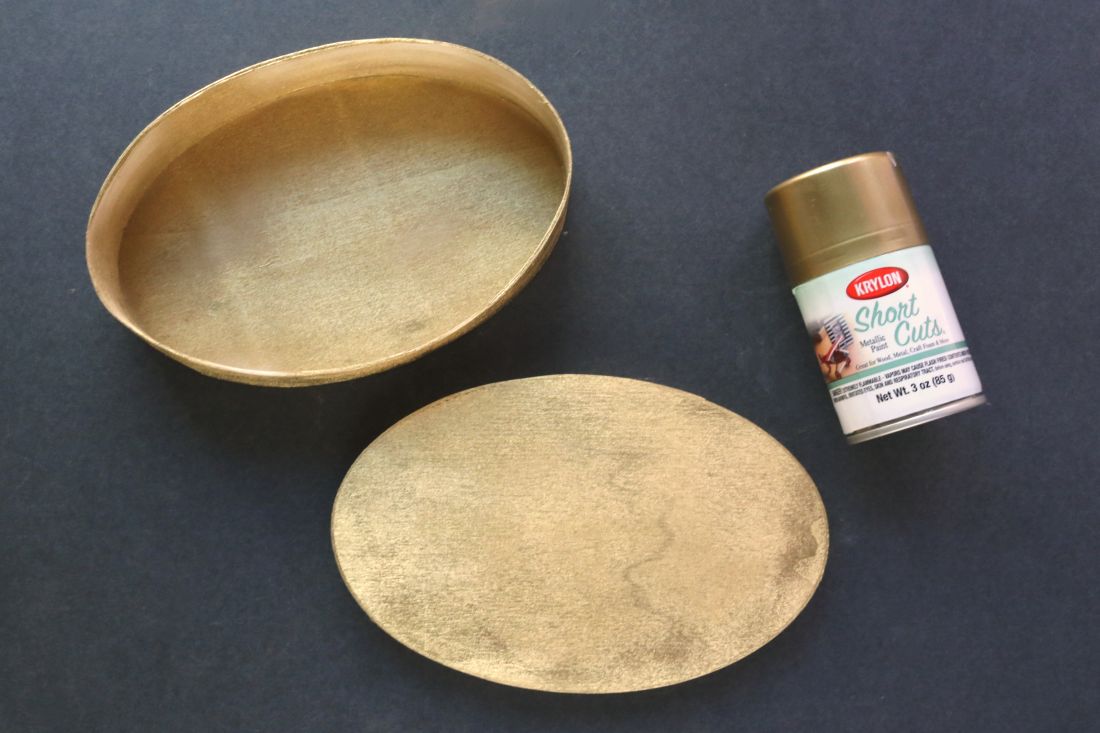
2. Head outside and spray paint the lid and body of the wood box. As always, do this in a well-ventilated space. Leave to dry completely, depending on the can’s directions.
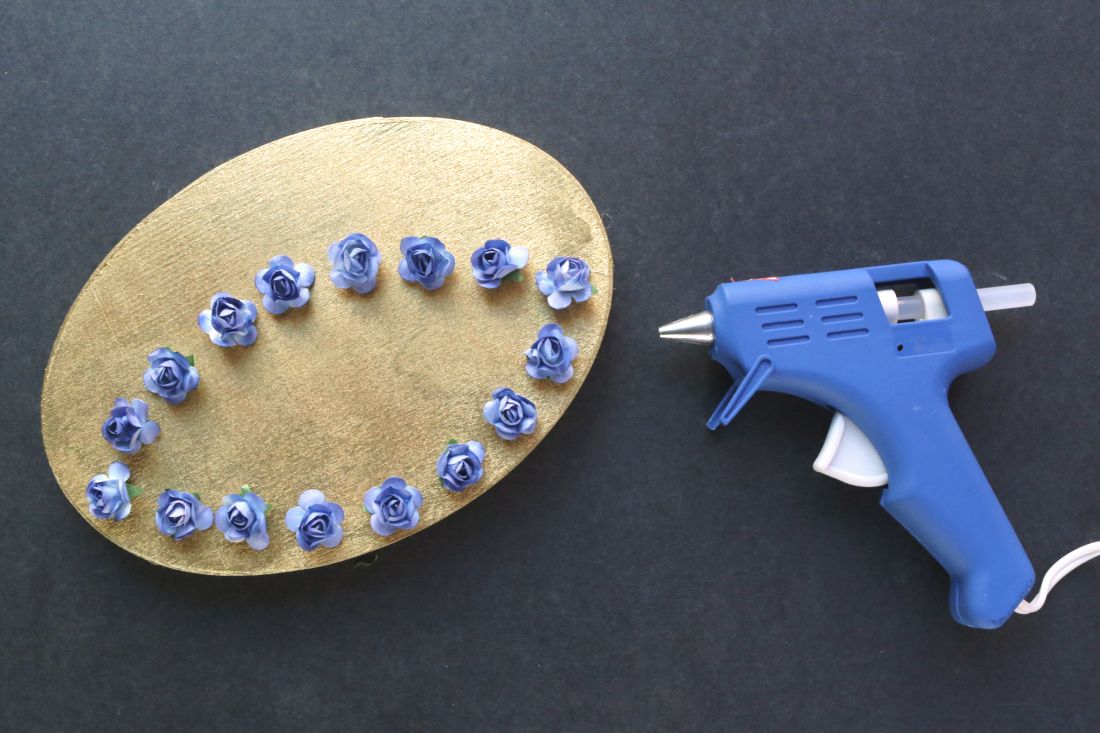
3. Position the paper roses in a pointed oval/eye shape on the wood lid. Once you have finalized the placement of each rose, hot glue in place.
Tip: To make a symmetrical oval shape, start with a rose on the left and another on the right. These will be the pointed ends of the oval. They should also be parallel to each other. Next, add another for the top center (slightly above the first two roses) and bottom center (slightly below). These will represent the mid-way points.
Next, fill in the roses from there. This technique will help you create a symmetrical, even-sized oval.
Don’t forget that it’s always useful to play around with placement before bringing in the glue gun!

4. Paint two curved lines in the center of the oval. I used the center roses as a guide; I painted lines connecting the top and bottom roses to the left and right of those center points.
If you’d like, you can use a pencil to draw the curved “eyeball” lines before painting. These lines will serve as an additional guide.
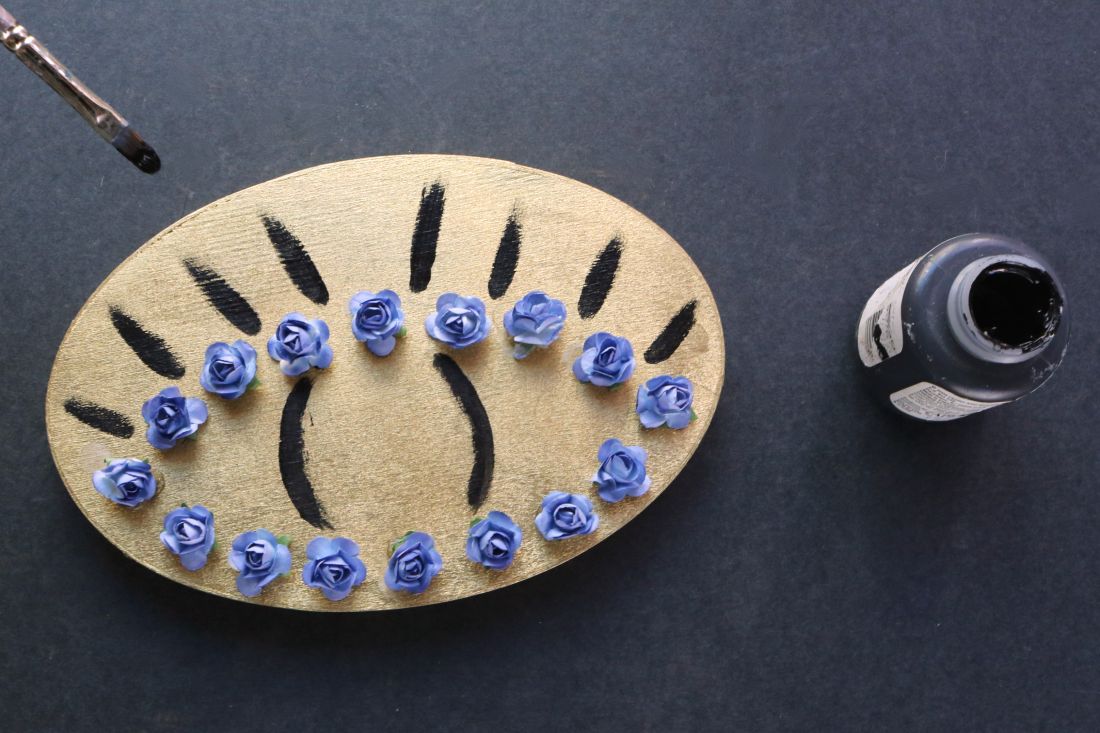
5. Paint short lines above the top of the oval for eye lashes.
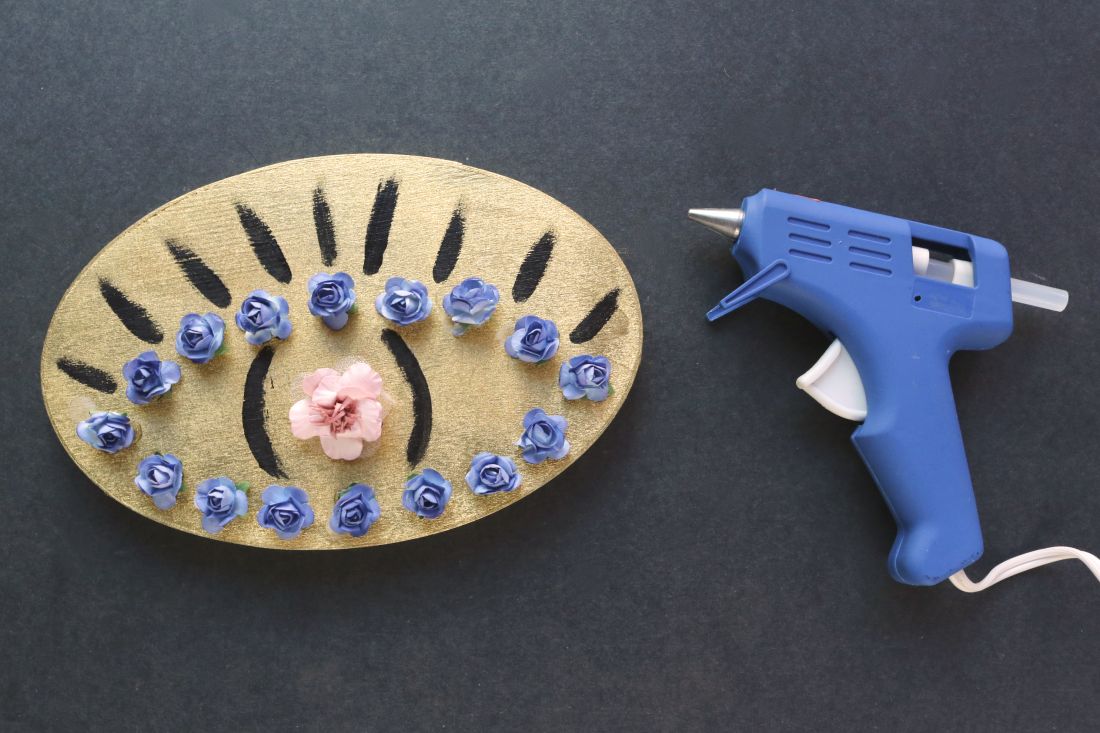
6. Hot glue a paper wildflower to the center of the eye.
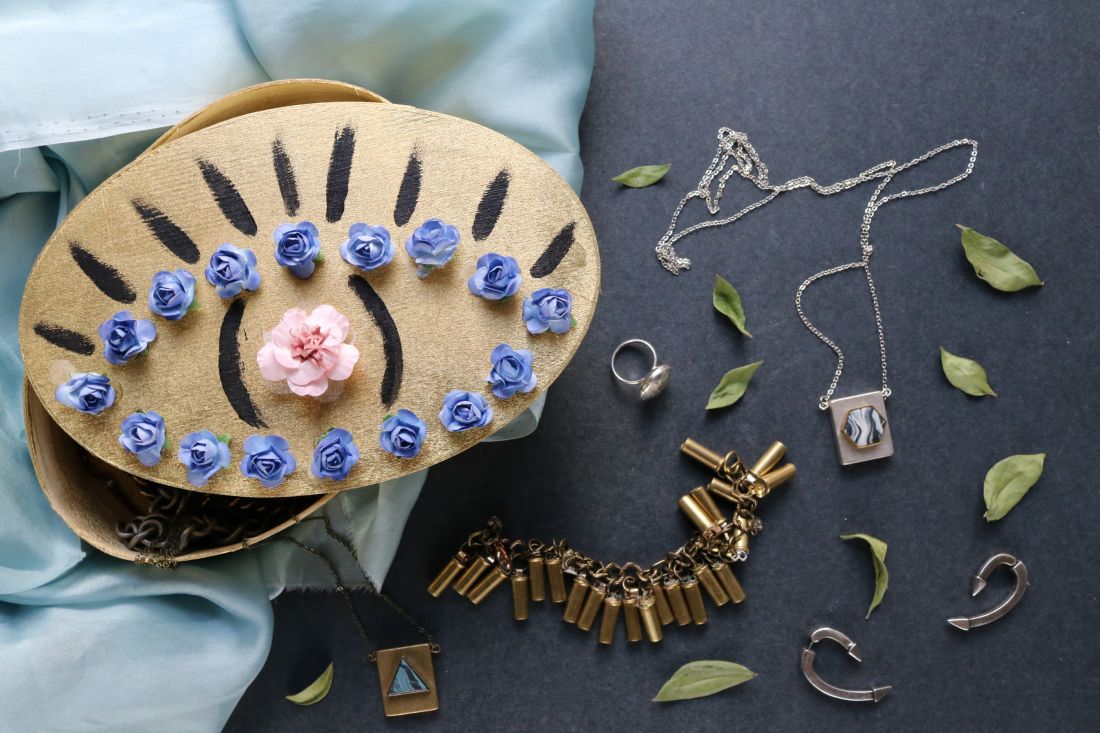
I’m loving this spring-themed take on the eye design. How beautiful are those paper wildflowers? I’m so tempted to cover everything with them. Friends and family, you have been warned.
xx K
FTC Disclaimer: Paper Mart suppliers were provided by Paper Mart and Konnect Public Relations for review and consideration. All thoughts and opinions are my own; I only collaborate with and feature companies that I truly support. Thank you, Paper Mart!