

The creative thought process never ceases to intrigue me. When it comes to creating DIY projects, it’s interesting how it can go both ways; usually, I make the project then find other components to style it with. Sometimes, it’s the other way around. I’ll have an item, and create something to specifically style with said item. This project is one of those!

The entire concept for this tutorial was inspired by Cynthia Rowley‘s venture into eyewear. The line includes both reading and sunglasses for men and women, featuring the style of the established NYFW designer that Rowley is. I’ve personally been a fan of Cynthia Rowley ever since I used to work at a Barneys NY location, so I was extremely excited to hear about her eyewear collection.

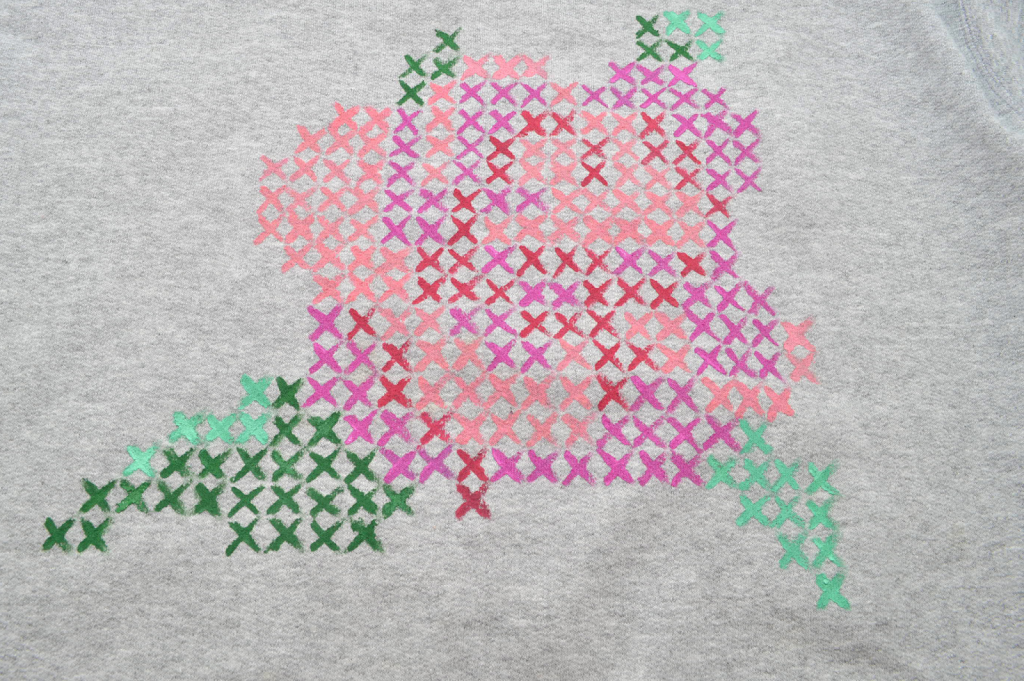
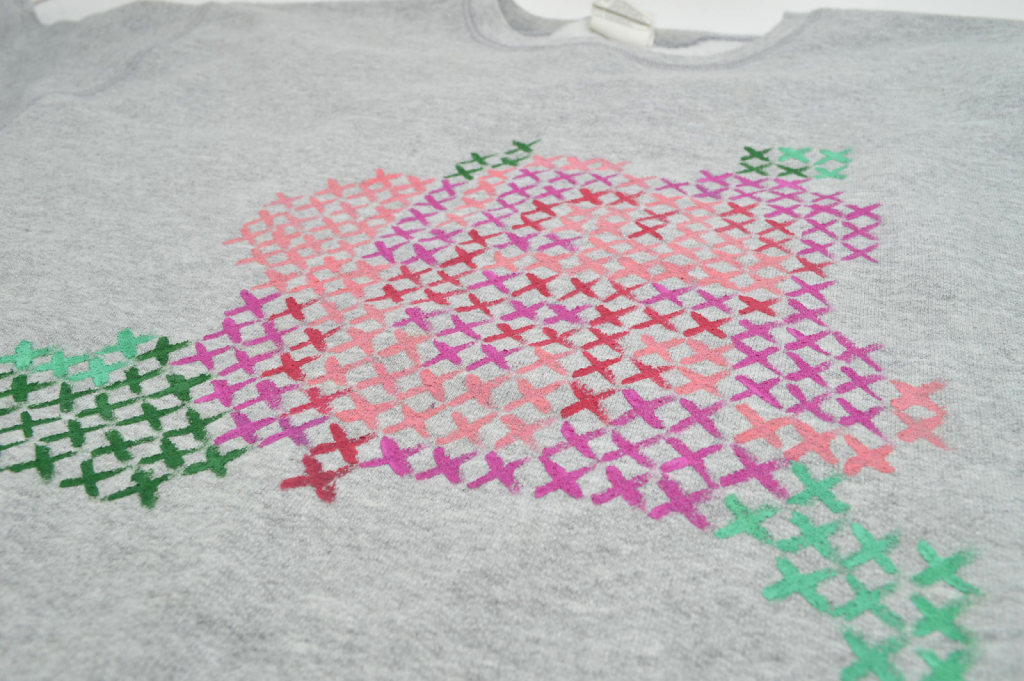
Recently, I was able to check out a few of my favorites from the Rowley Eyewear line, and created projects to go with them! This first one is No. 58, a pair of beautiful translucent mint green sunglasses. As I stated earlier, this particular tutorial was completely inspired by these mint green shades. I wanted to create something fresh, feminine and offbeat that still had that springtime touch. The end result was this painted sweatshirt, which was admittedly a challenge to create – but so worth it! I’m thinking about wearing it with leather skirts or ripped jeans and black ankle boots.
Keep on reading to see how I made it! —
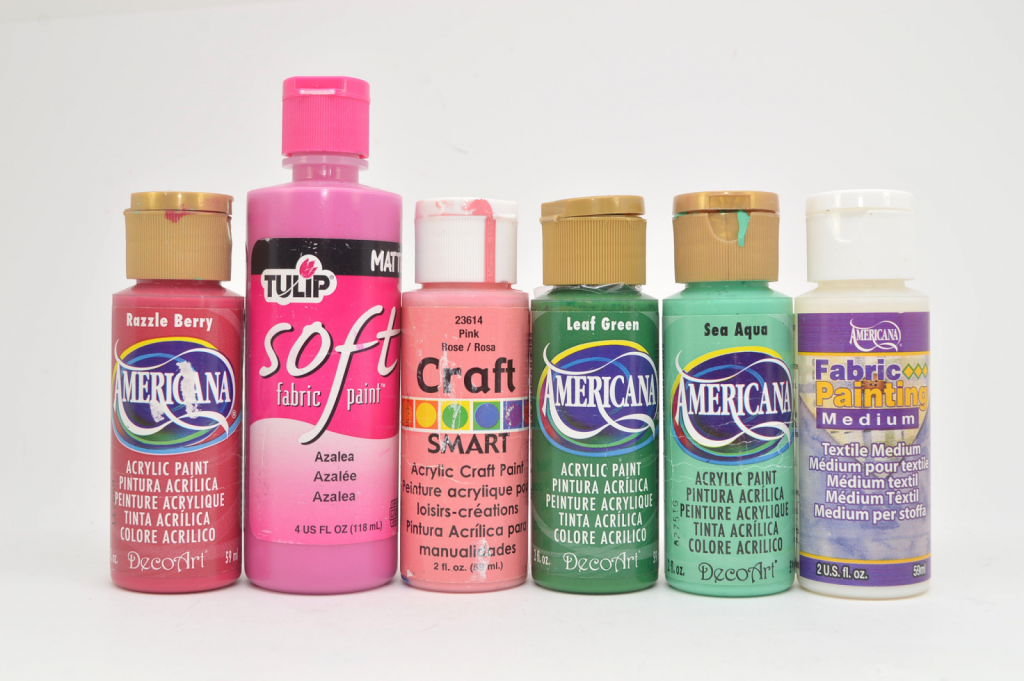
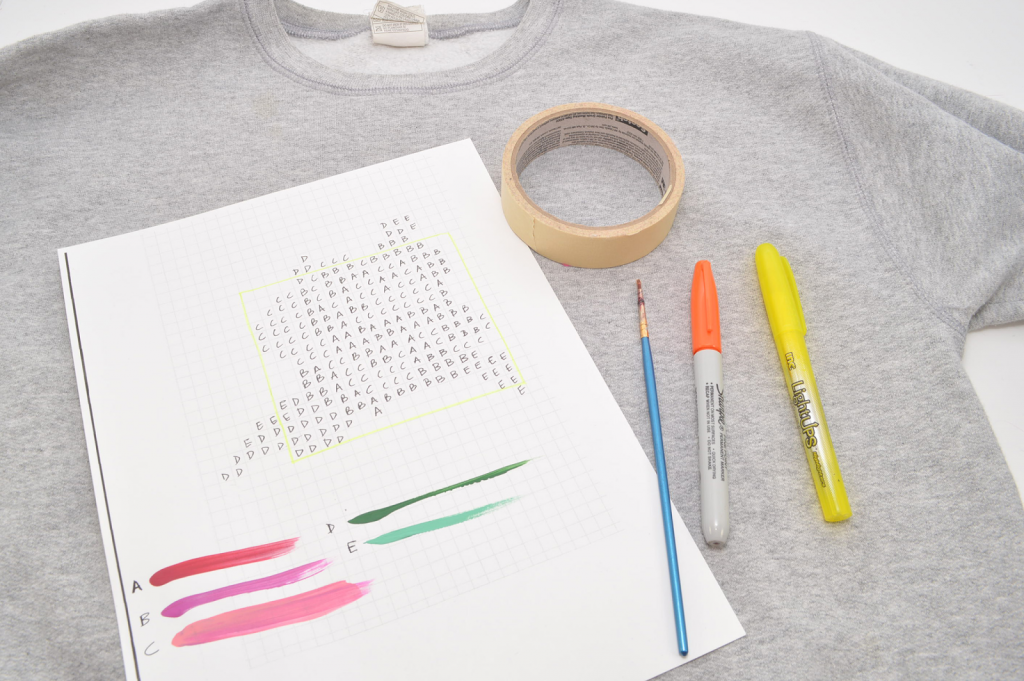
Supplies:
– Fabric Paint (or Acrylic Paint + Fabric Medium)
Dark Pink/Red, Pink, Light Pink, Green, Mint Green
– Sweatshirt
– Paintbrush (or more than one, if it’s easier!)
– Highlighter
– Sharpie/marker
– Masking Tape
– Ruler and Measuring Tape (not shown, but highly recommended)
– Printed Faux Cross Stitch Rose Template (below, or click here!)

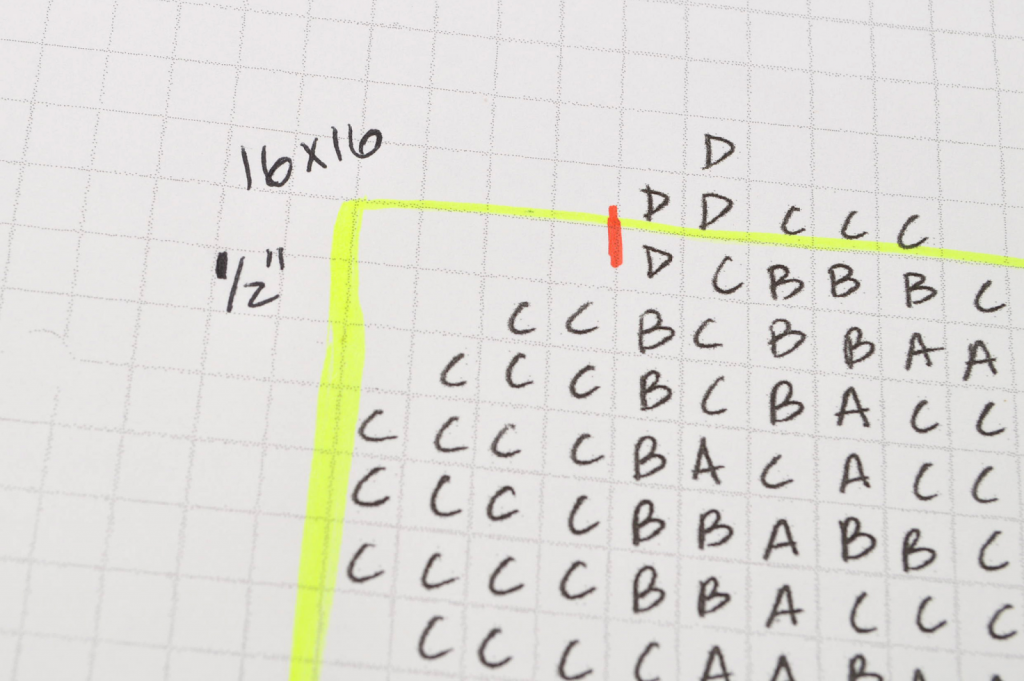
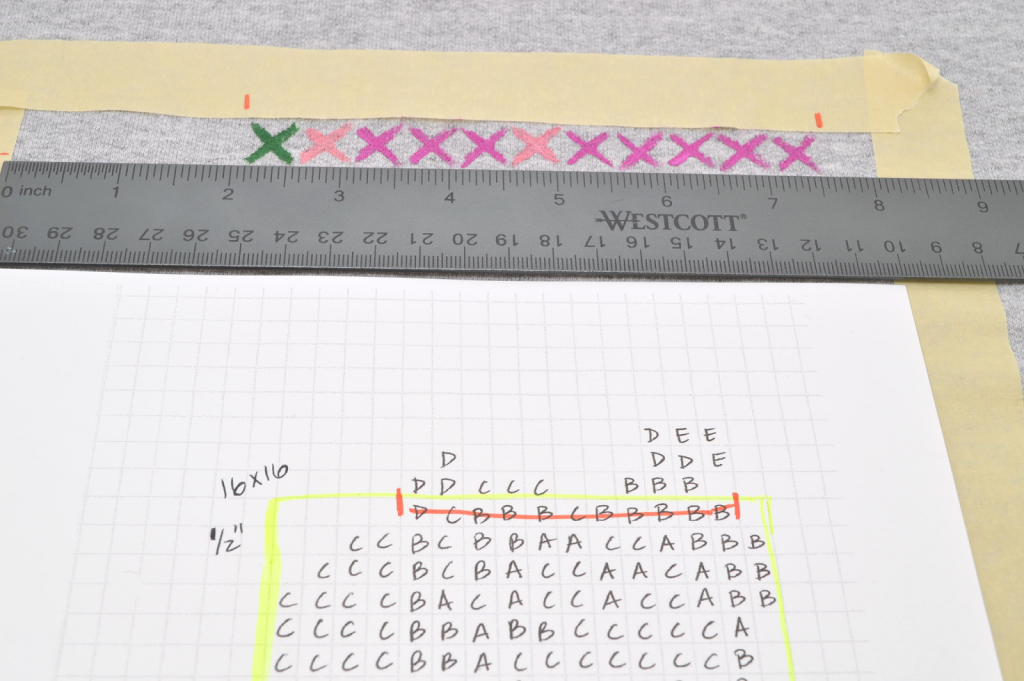
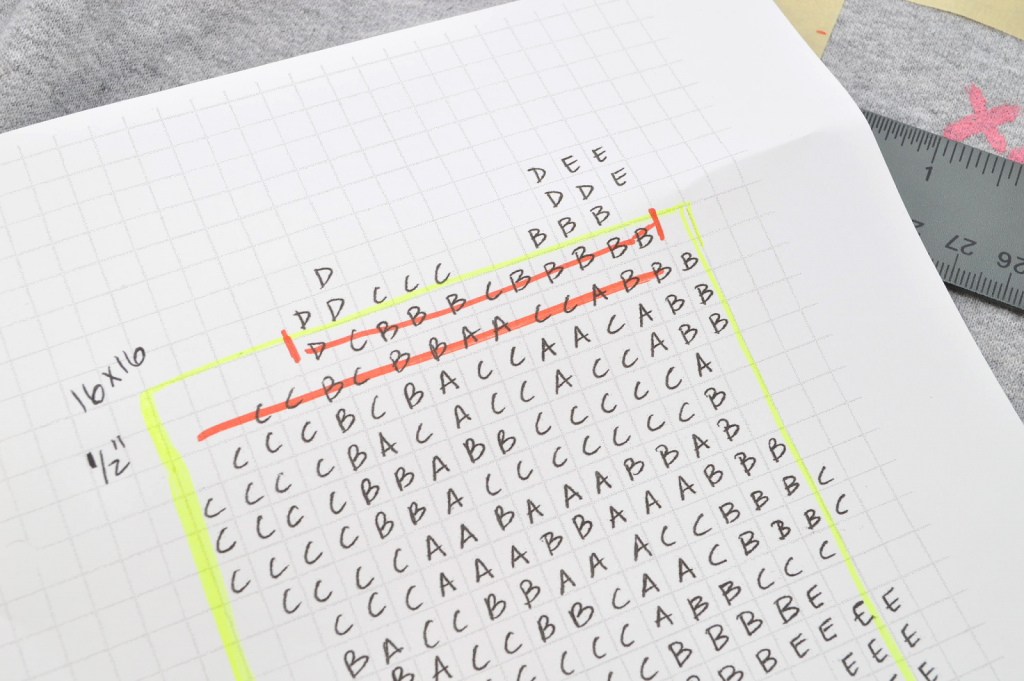
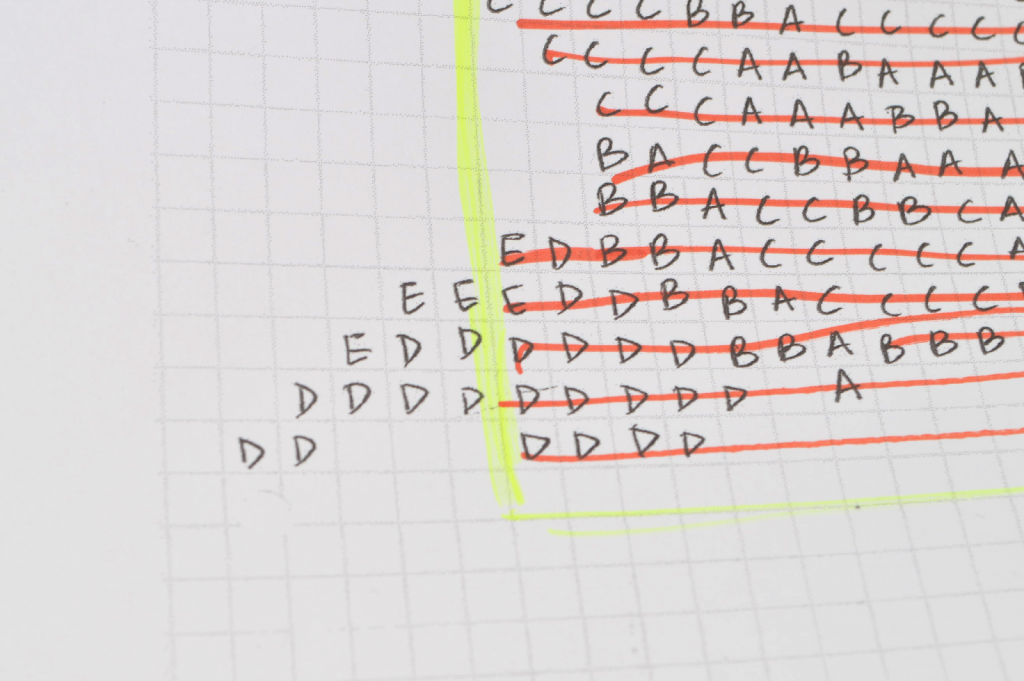
This is what the template was created from. On graph paper, I planned out the rose design using markers (left). This was the 3rd or 4th version, as it took a couple tries to get the look I was going for. No surprise there – transforming an image into a pixel-like squares is pretty tricky!
I assigned each color a letter, and “transcribed” the pattern onto another sheet of graph paper. This is the version you see on the right, and what was eventually scanned so that you can print a copy.
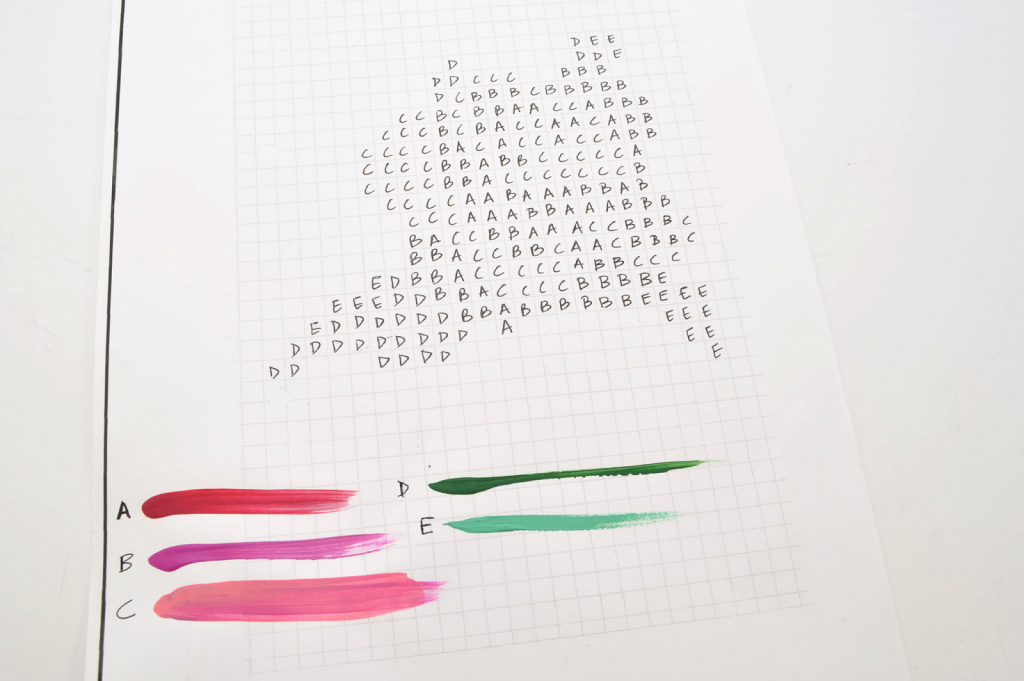
I scanned the letter pattern and then printed it out. I made a “key” on the sheet, which should be followed in order for the finished pattern to work.
A – Red/Dark Pink
B – Pink
C – Light Pink
D – Green
E – Mint Green
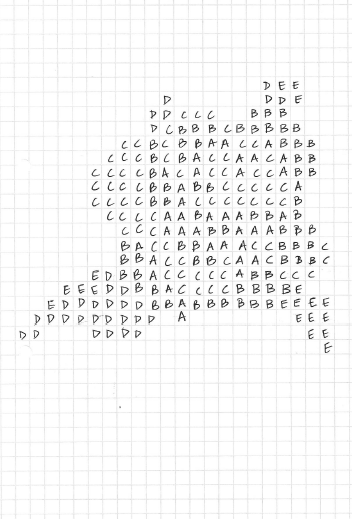

1) After printing out the template, create a 16 x 16 square using the highlighter. I completely acknowledge that the entire pattern is not included in this square, but this is just to get the bulk of the rose painted. The leftover “stitches” can be easily added once the majority of the rose is created.
Each square on the graph paper – or letter – will represent a “stitch”, or a painted X. Each square will also translate into 1/2 in (1.27 cm). So, each painted X will roughly measure 1/2 in wide on your sweatshirt.
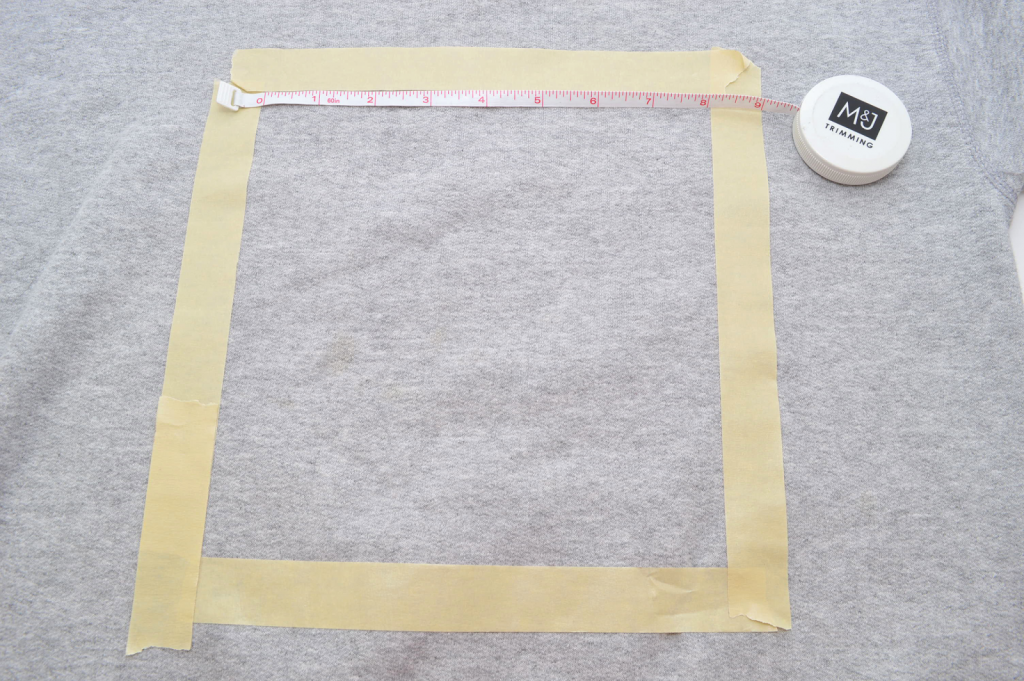
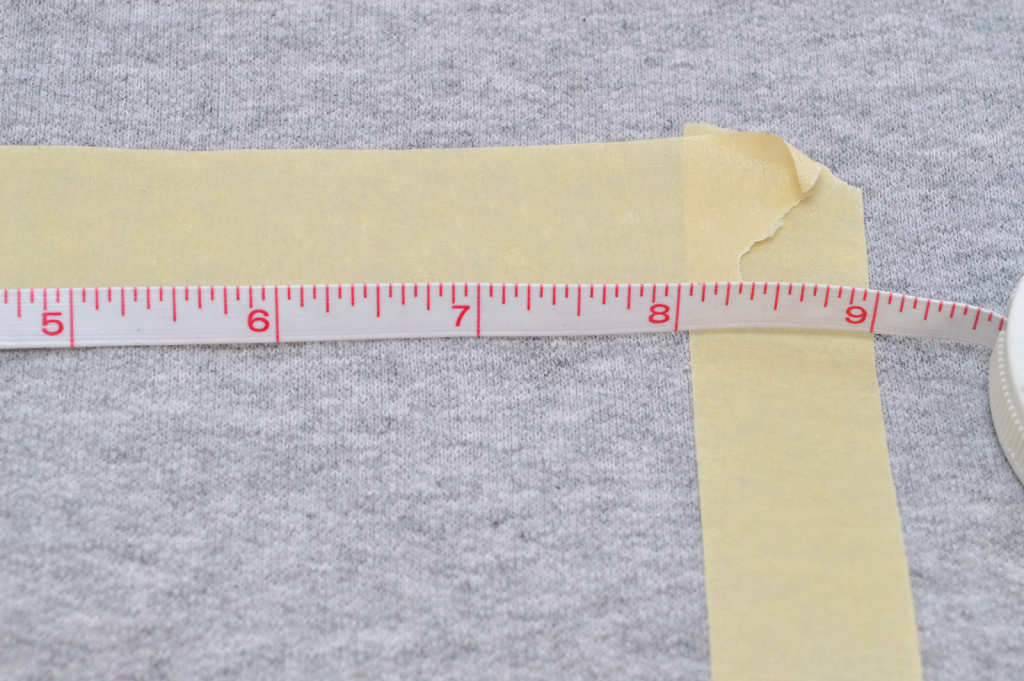
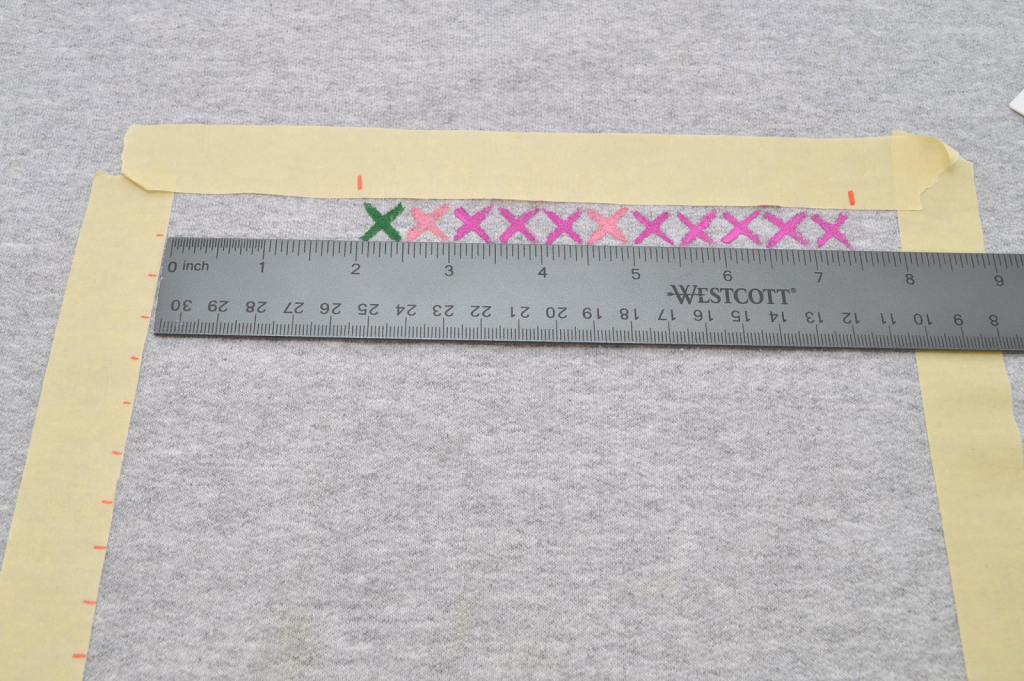
2) With masking tape, recreate that highlighted square on your sweatshirt. The actual perimeter of the inside square should be 8 in x 8 in, or 20.32 cm x 20.32 cm (the 8 in on each side was derived from the 16 1/2 in squares).
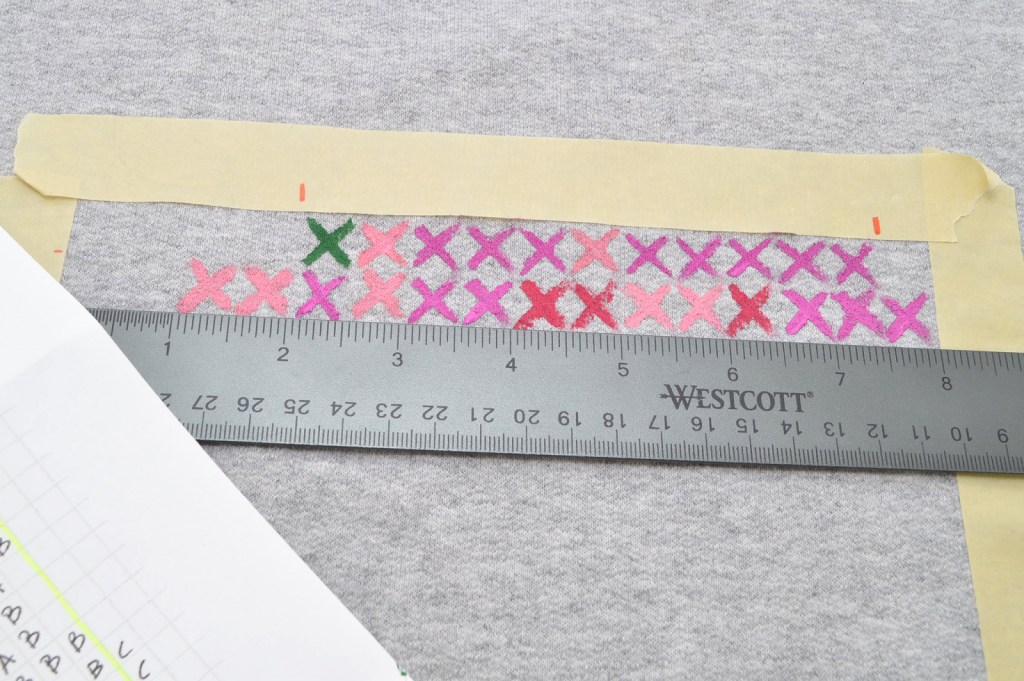
3) Here’s a little tip to help guide you and get you started. I added an orange Sharpie mark right before the first stitch in the first row.
This means you the first 2 in / 5.08 cm (4 squares) will be empty. For guidance, I marked a dash right after the first 2 in, horizontal wise (refer to picture below).
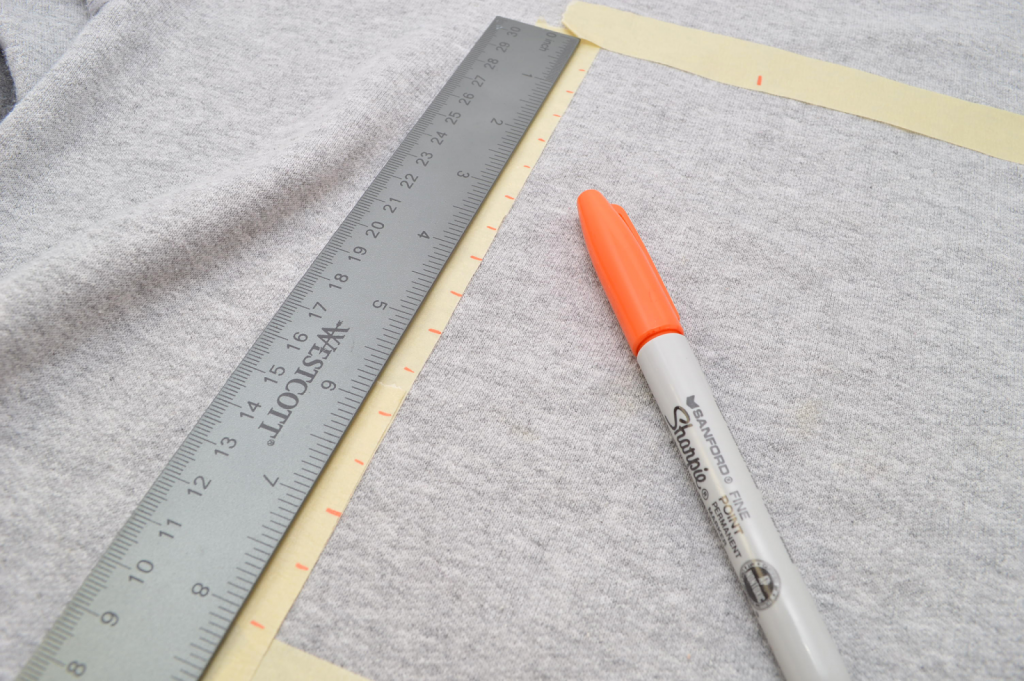
4) Along the side, add a mark every 1/2″ (each row of squares or stitches).
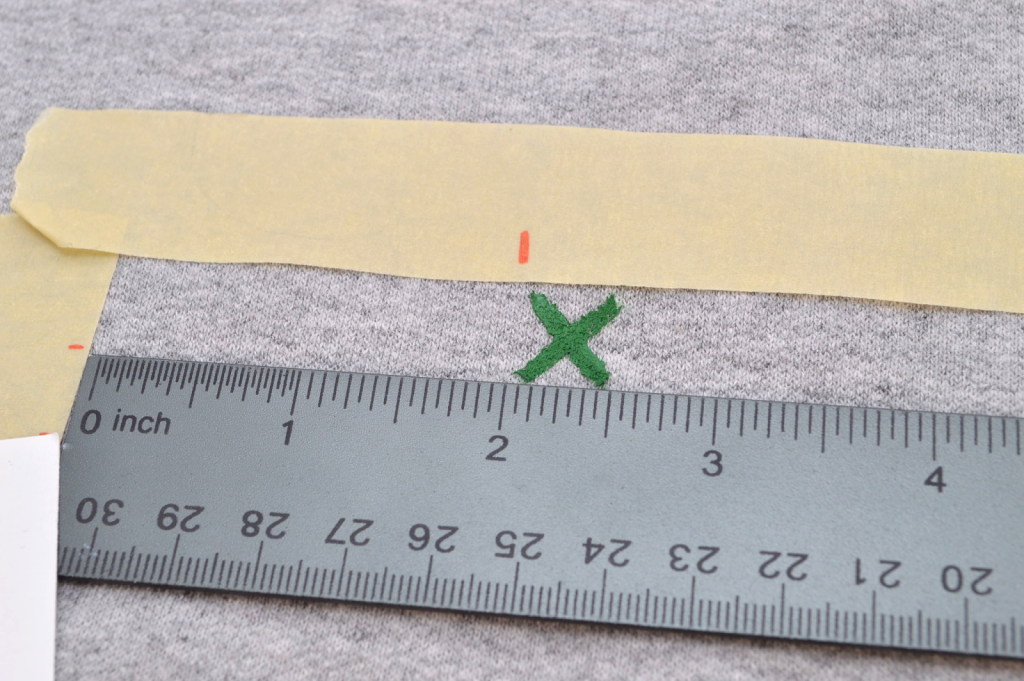
5) Line up your ruler along the first horizontal mark. Add the first stitch, using the top mark as a guidance.
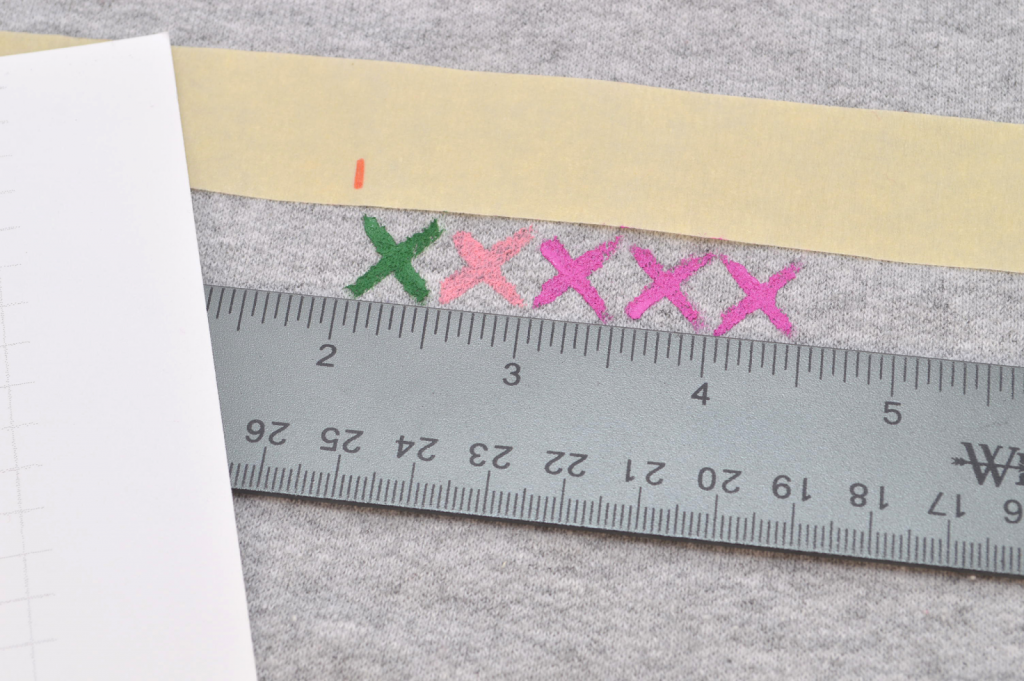
6) Continue, according to the template.
7) Cross out each row as you go along, to avoid any repetition or confusion.
8) Once the first row is done, move your ruler down 1/2 in (1.27 cm) and continue adding stitches.
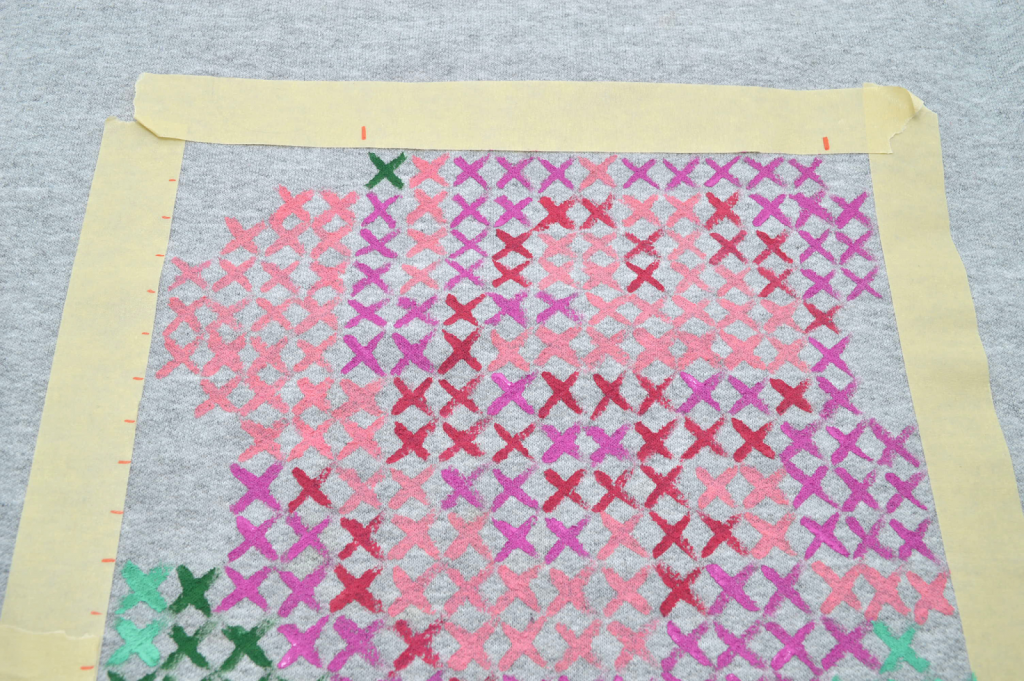
9) Repeat until the entire pattern is completed. If you mess up here and there, don’t worry! The pattern is super forgiving, and it won’t show in the whole grand scheme of things. I would highly recommend simply leaving a mistake instead of trying to fix it.
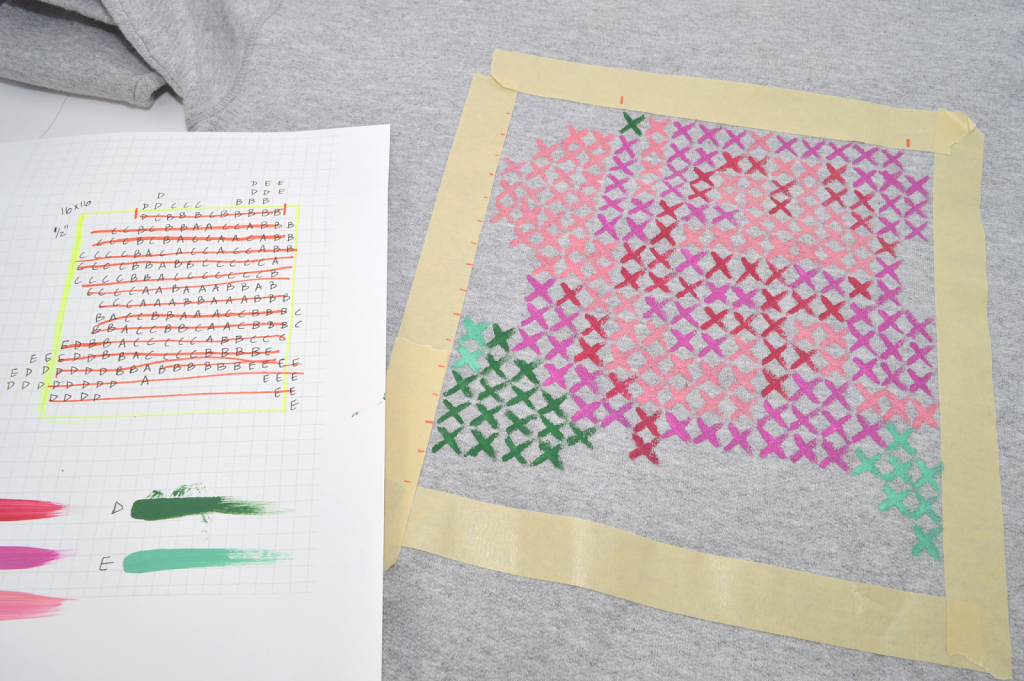

10) Section by section, remove the tape and add any of the extra stitches outside of the initial perimeter. Use the existing stitches as a guide.

I’m all sorts of in love with this project. As always, if you have any questions or need any clarification, shoot me an e-mail at kirsten [at] wildamor.com or leave a comment below. I’m contemplating attempting a couple other versions of this…possibly a skull?
Follow Cynthia Rowley on social media! Become a fan of Rowley Eyewear on Facebook, or follow Cynthia Rowley on Instagram and Twitter.
FTC Disclaimer:
Rowley Eyewear No. 58 by Cynthia Rowley was provided by Rowley Eyewear for review and consideration. All thoughts and comments are my own.