
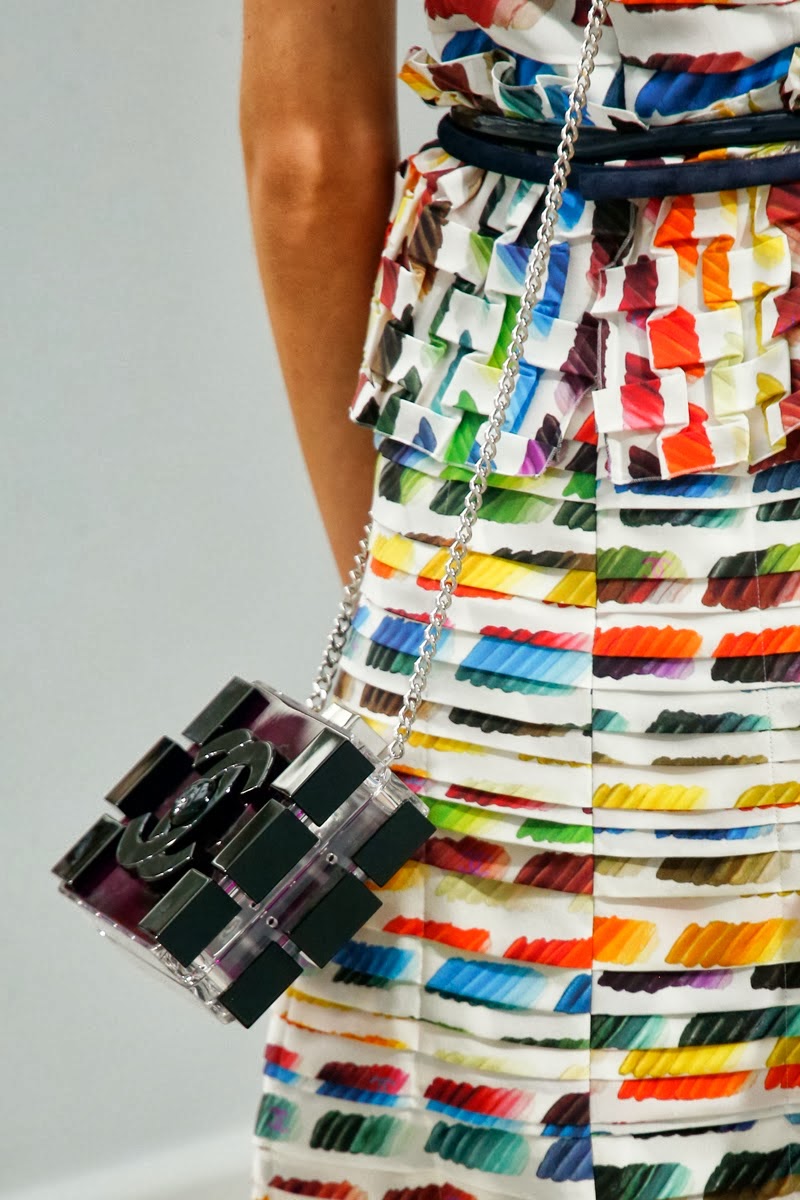
Last week, I shared some runway inspiration from Chanel. The most recent SS 2014 show showcased art inspired, paint palette prints with some major statement pieces.
Here’s a peek at the inspiration!


Supplies:
– Flat panel purse
– Acrylic paint…lots of it!!
(I opted for a general rainbow theme, but that’s up to you. Whatever theme you choose, black & white will be 2 necessities)
– Paint brush
(I used a 3/4 inch wide brush)
– Pencil
– Ruler
– Optional: Painter’s tape, to block off any corners, edges or hardware

Before You Start:
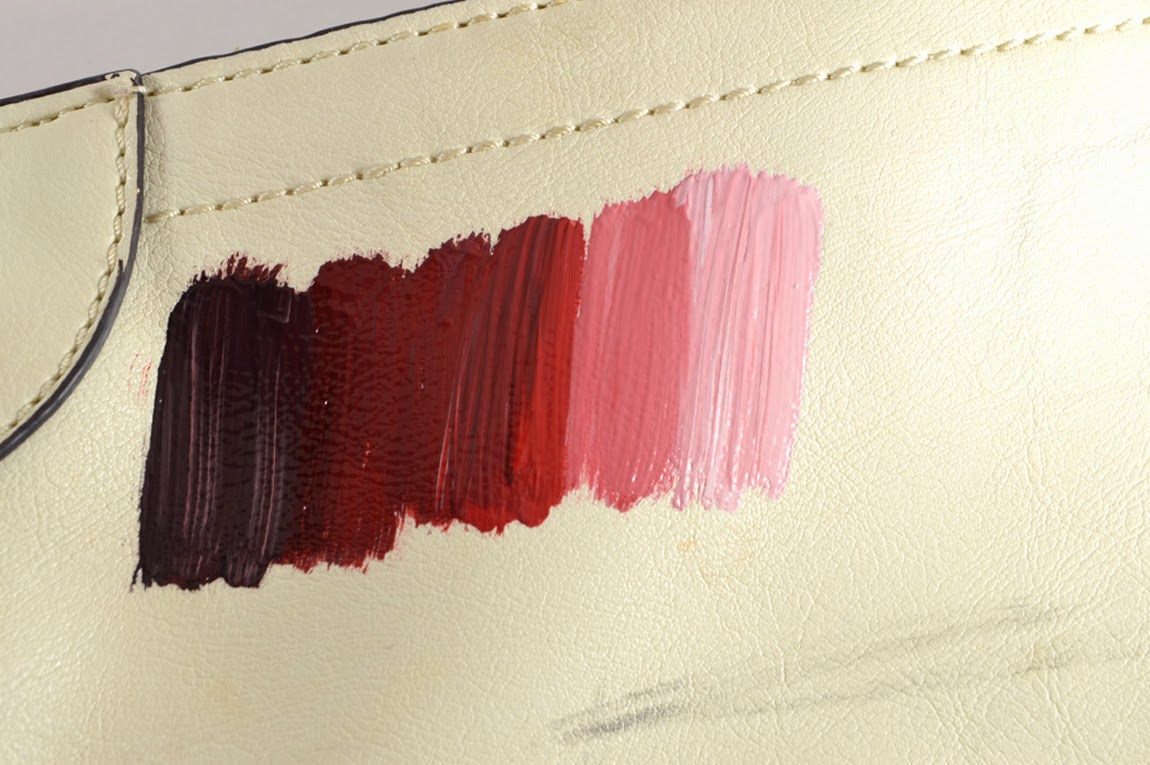
Painting a test run will give you a good idea of how to go about each gradient.

I drew a slanted rectangle, about 2.75 inches x 1.25 inches. Next, I added various shades of red.
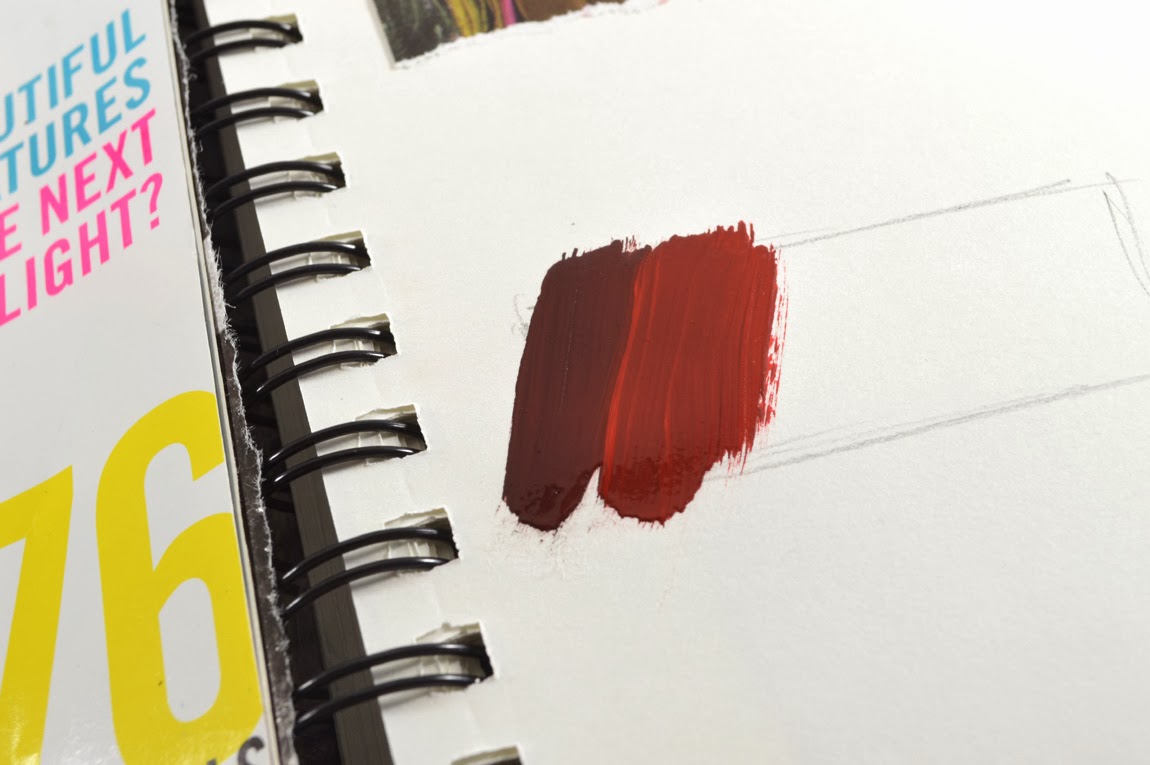

Here’s a rough breakdown of what I did, left to right:
1 – Black, some red
2 – Some black, red
3 – White added to some black/red
4 – Red, a little white
5- White, a little red
I did 5 shades in the test run, but decided to do 6 in the actual project. Anywhere from 4-6 should work out great!
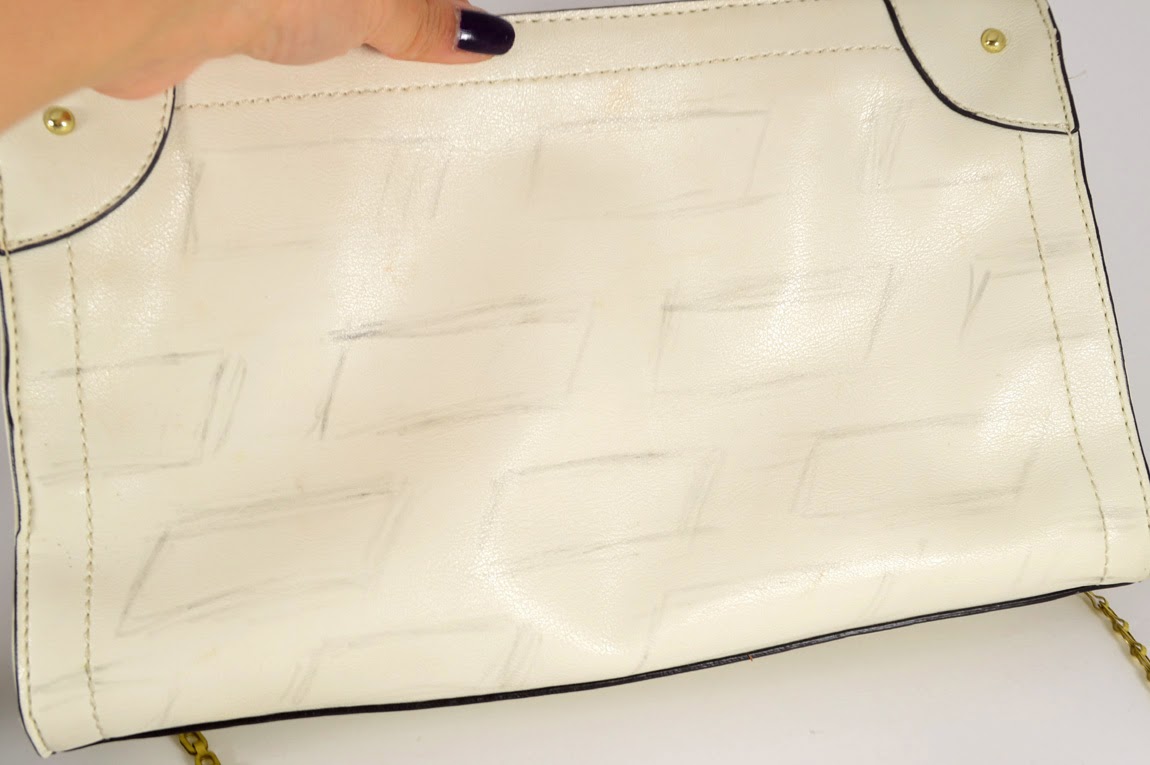
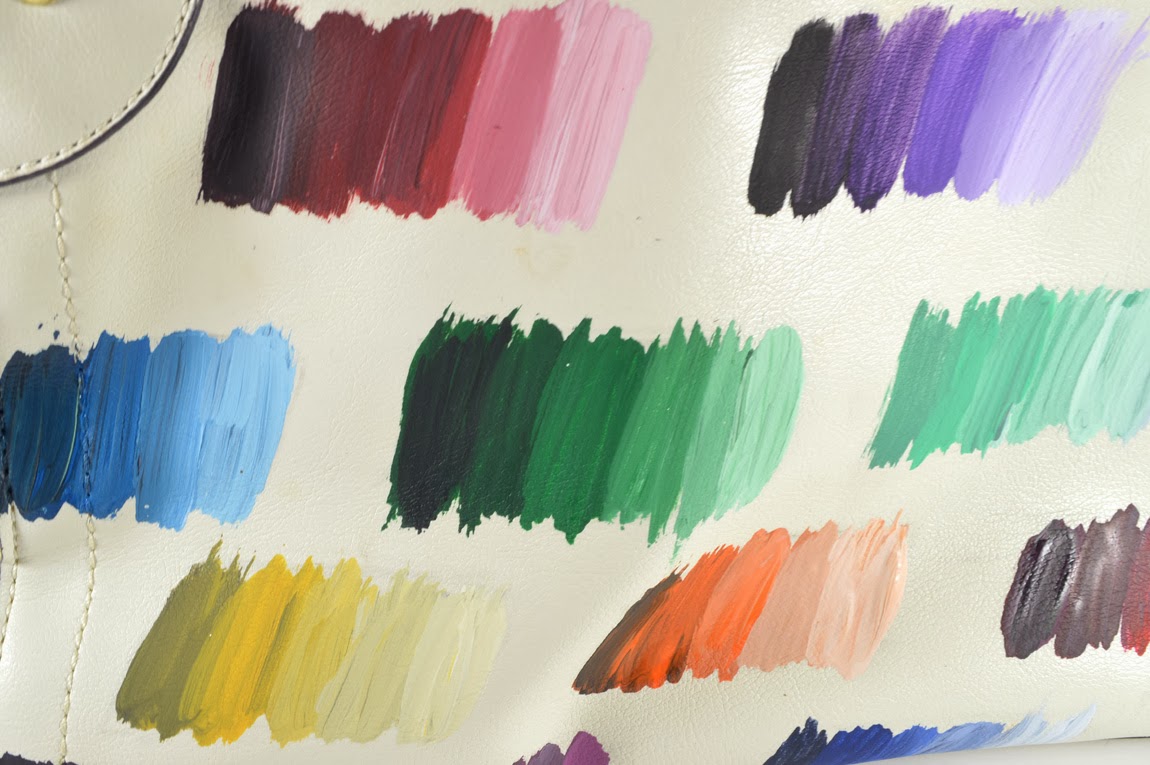
1) Map out the placement of your gradient rectangles. This will depend on the size of your purse, but the ruler will come in handy. I made each rectangle about 1 inch away from each other horizontally, then .75 inches away from each other, vertically.


2) Paint away! I started with red.

3) Next up was purple, then blue, continuing a “reverse rainbow”. Tape off where needed, if at all.

4) Continue until you have painted the entire purse. Let dry. Repeat on the other side, if you’d like.

.JPG)
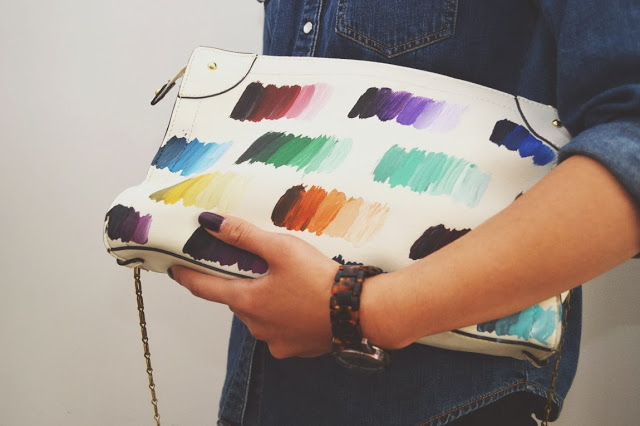
Loving the finished result, and the artsy vibe it gives off! Definitely a great way to add a pop of color to an all black (or white) outfit.
xo, Kirsten