
I love spur of the moment ideas. I thought of this while simply wandering through the hardware store (in this case, Home Depot). Who knew that Home Depot had free samples of hardwood flooring? I know this isn’t the most surprising thing ever…but they’re *the* perfect size for coasters!

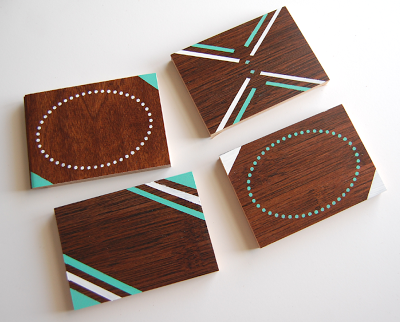
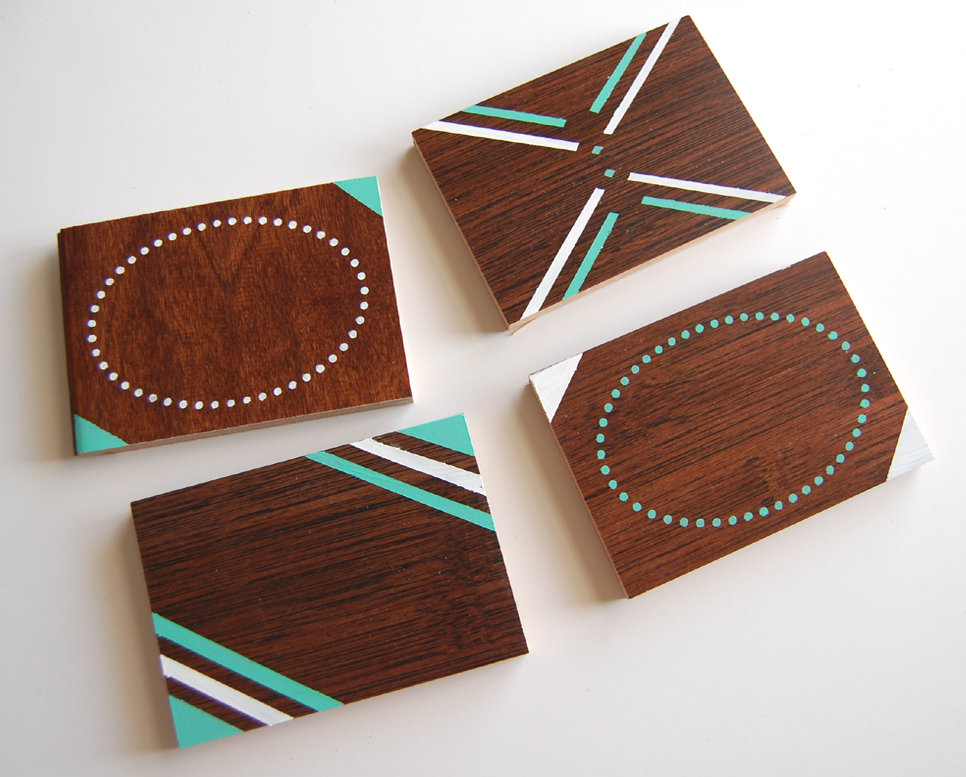
When I spotted these, I placed a few in my cart, just in case I ever came up with an idea for them. About two seconds later, that idea came: a set of coasters, painted with acrylics, which would even be great as a gift. I decided on 4 pieces of varying woods/finishes.

The only other supplies I used were things I already had on hand – acrylic paint, stencils/tape, paintbrushes, cork board contact paper (I didn’t know this even existed) and clear acrylic sealer (which is optional). So this project cost me exactly zero dollars! Even if you don’t already have these supplies, it’s still a very budget friendly DIY. Keep reading to see how I made it:


Supplies:
- 4 hardwood floor samples (There are also laminate flooring samples out there, which is another option, but keep in mind that the finishes will be different than wood)
- Stencils and/or tape, optional
- Acrylic paints
- Clear acrylic sealer, optional!
- Cork board Contact Paper
- Paintbrushes and the outdoors, along with newspapers/fabric to place the coasters on while you seal them.

1) Decide on your designs. I decided to make 2 with an oval frame, and 2 with random stripes.

2) Paint the stencil, if you choose to use one. Carefully peel it off (if it is an adhesive stencil) and gently clean with soap and water.

3) You can also combine stencils and tape, just like I added painted corners to the coasters with oval frames. When painting along the edge, I’d recommend moving the brush towards/off the edge.


4) Painters tape will give you much crisper, cleaner lines, but craft tape is also a good size for coasters. It’s up to you which one you’d like to use.
Apply paint, taking care to not overload the brush. Quick, large strokes will work best. Also keep in mind that some wood samples will have natural grooves in them, so the paint might naturally travel under the tape a bit.

5) When the paint is dry, peel off the tape.


6) Optional: Spray the coasters with clear acrylic sealer. The paint will end up lasting longer, BUT scratches will show a little more on the layer of clear sealer. I figure this will give it a vintage-y look over time – but it’s up to you if you’d like to use it!
I’d recommend doing this outside on a covered surface. Don’t forget to shake the can well beforehand, and to spray from a decent distance from the wood. Otherwise, spraying too close will cause the sealer to pool on the surface.
Let dry in between coats, according to the can’s directions (I did a total of 3 coats). Let dry overnight.

7) Cut a piece of adhesive cork, and adhere to the back side of each coaster. Make sure you peel away JUST the printed paper backing, and not the clear sticky film in between. Otherwise, your cork will easily break! If you look close enough, you’ll be able to see the different layers.If you’re not using cork contact paper, simply glue the backing of your choice with a strong glue such as E6000.
I’m sure you could also find samples – or scraps – of wood at stores that just sell hardware flooring. Either way, it’s an inexpensive and simple project.
xx K