


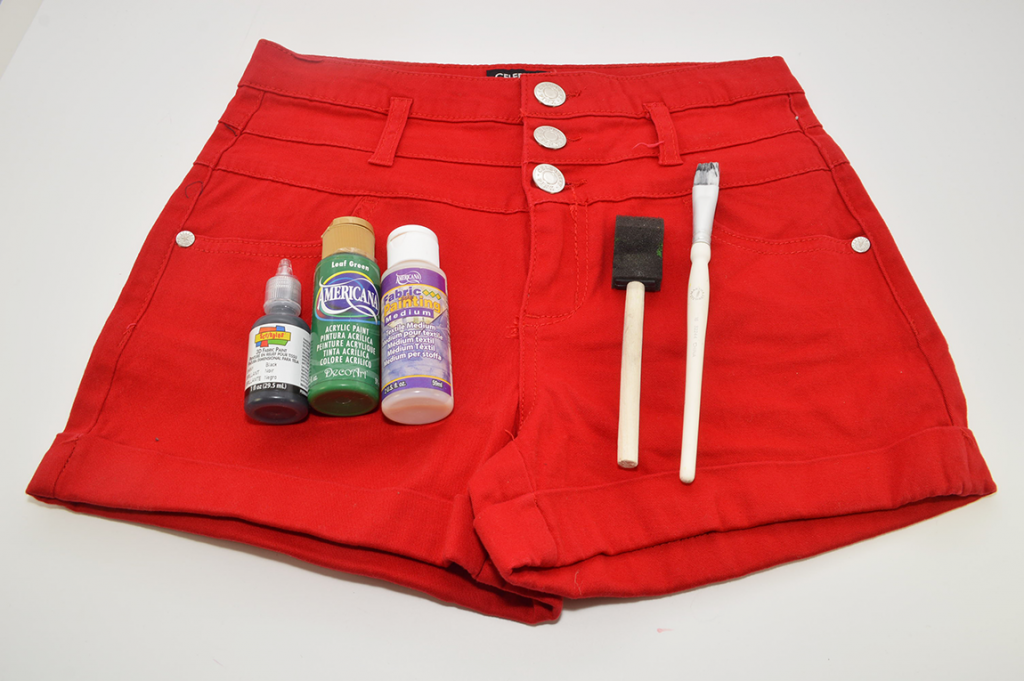
Supplies:
– Black and green fabric paint (or acrylic paint & fabric medium)
– Foam brush
– Scrap Cardboard (not shown)
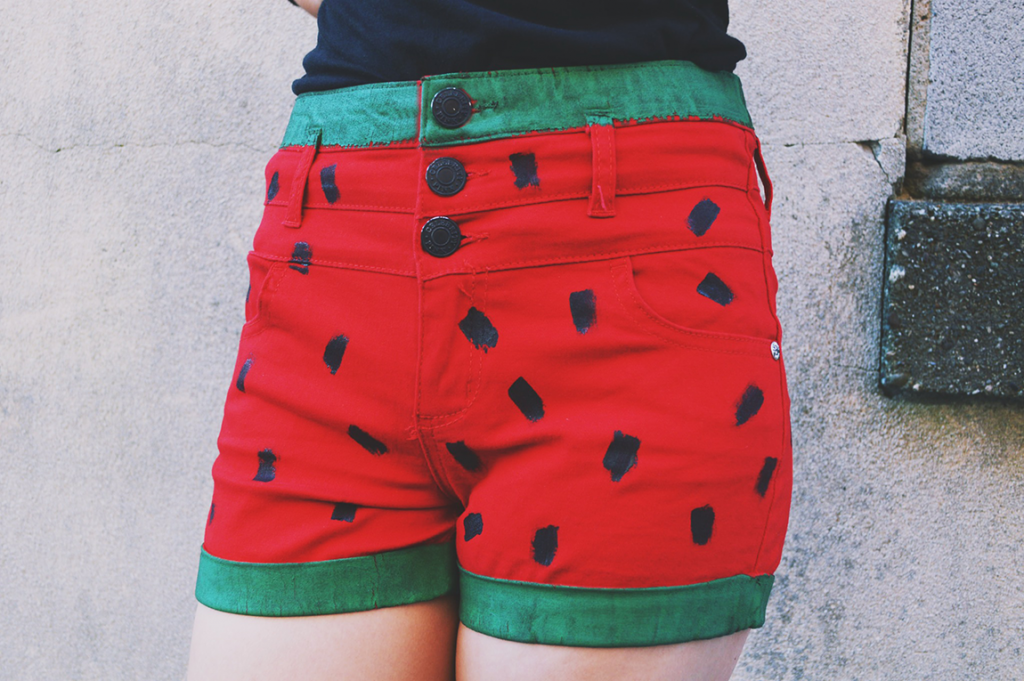
* I used these high rise shorts from Macy’s. The overall design has a fun, retro vibe to it – so I thought high rise shorts would be more than appropriate. These are on sale until the 6th, so snag them while you can! I used Tango Red. Any pair of red shorts can do, though.
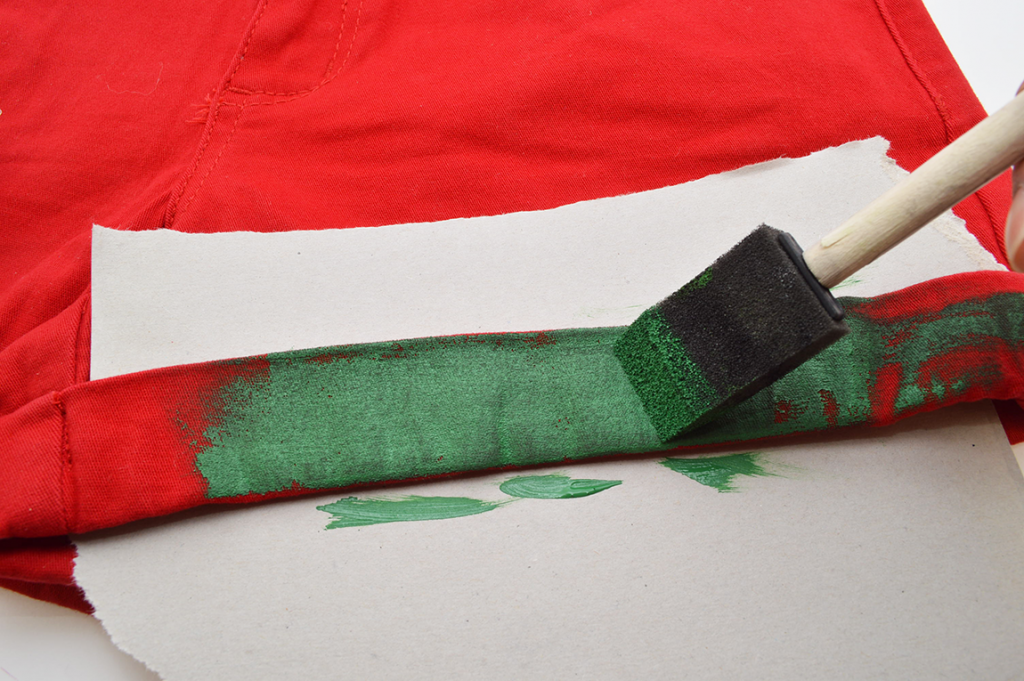
1) Place a piece of cardboard underneath the fold to protect the rest of the shorts. Place another piece of cardboard inside the leg. If your shorts have a simple hem, you can use masking tape.
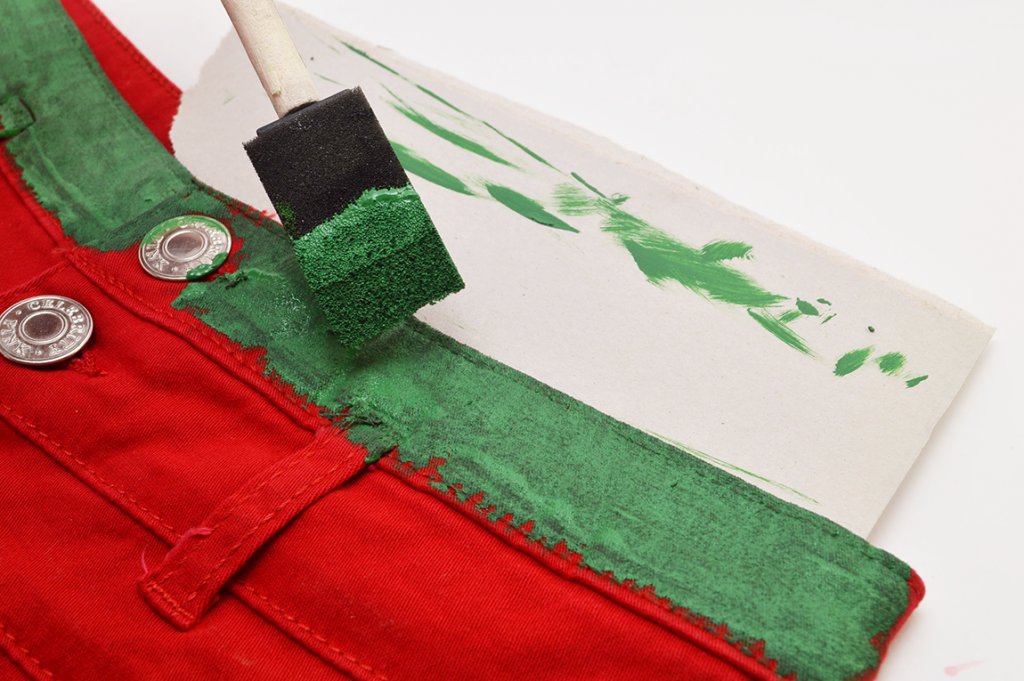
Lay the shorts flat on your work space. Add green fabric paint with the foam brush in large, even strokes. I used acrylic paint and fabric medium for the green, following the directions on the fabric medium bottle (2:1 acrylic paint:fabric medium)
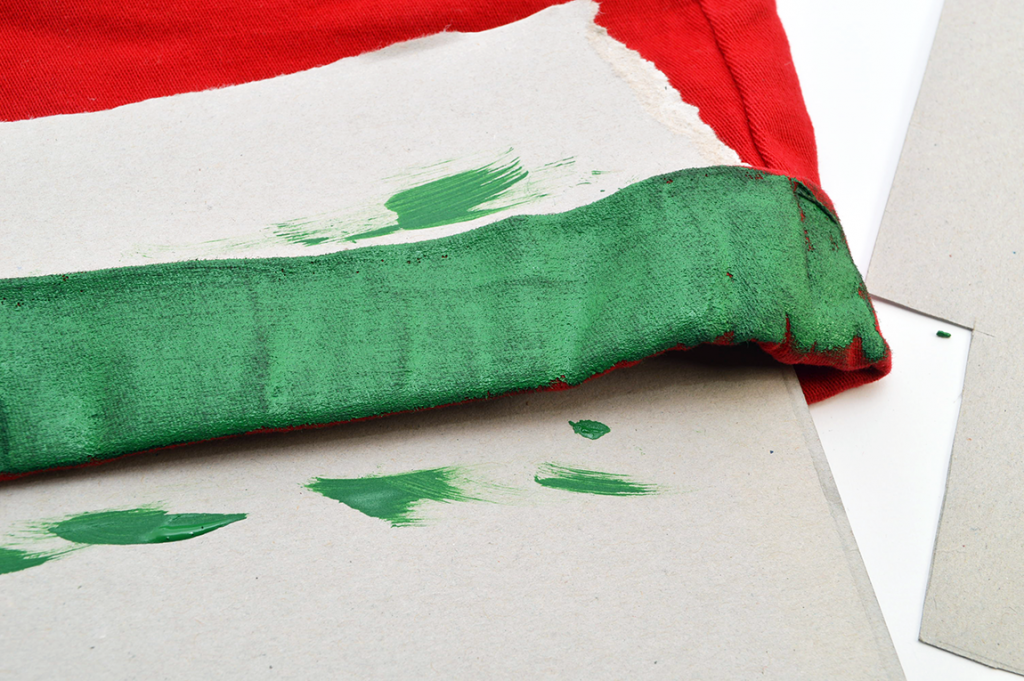
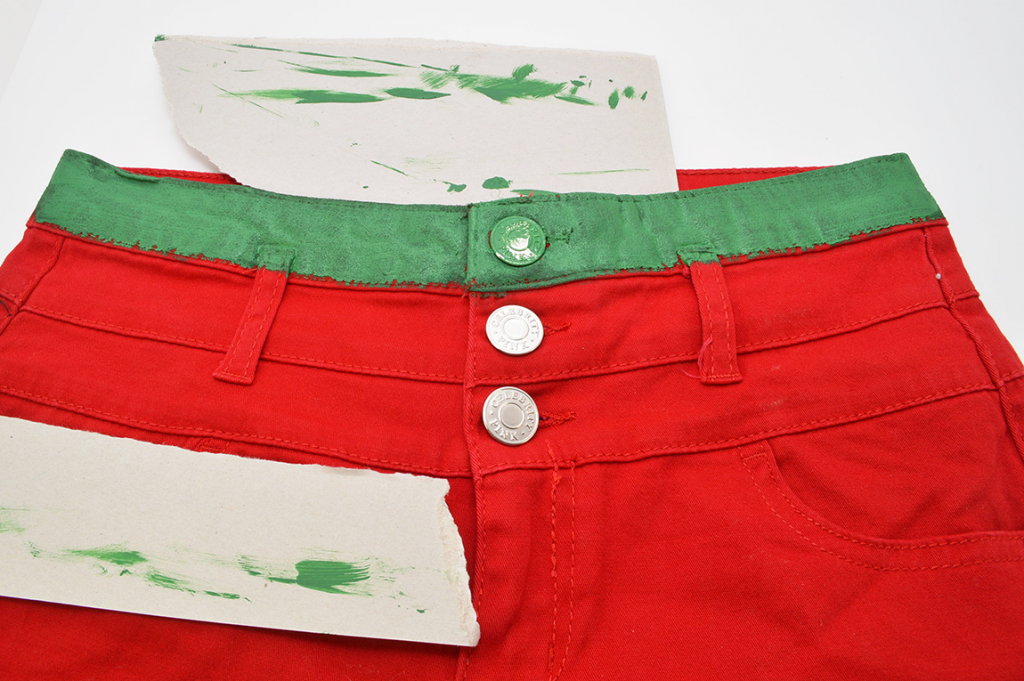
3) Repeat along the top. (I later painted the buttons)
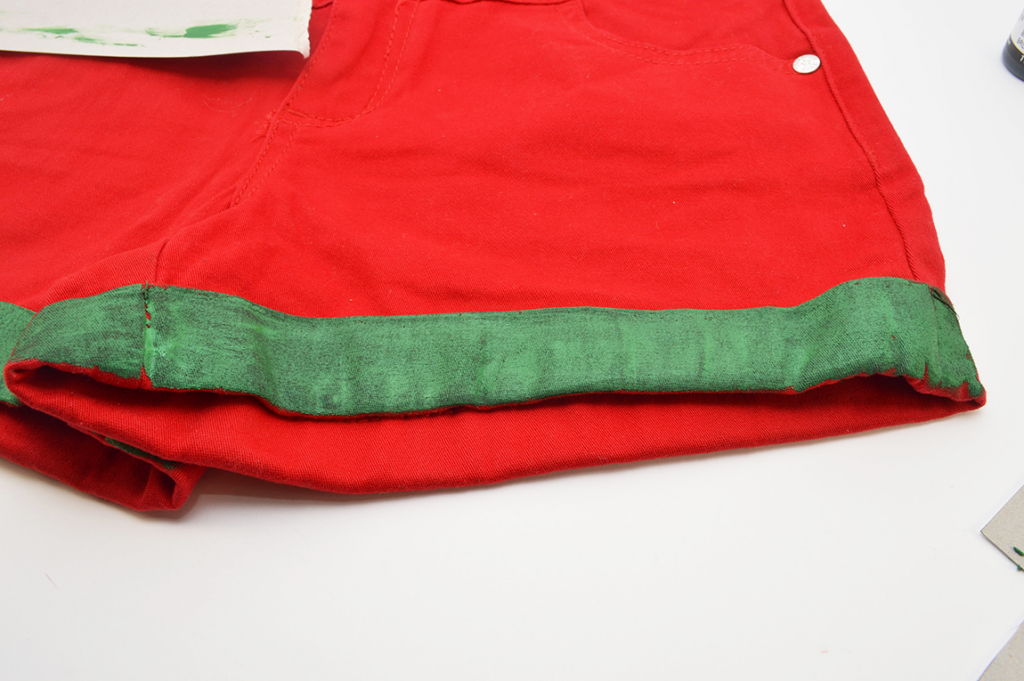
4) Let the front dry completely.
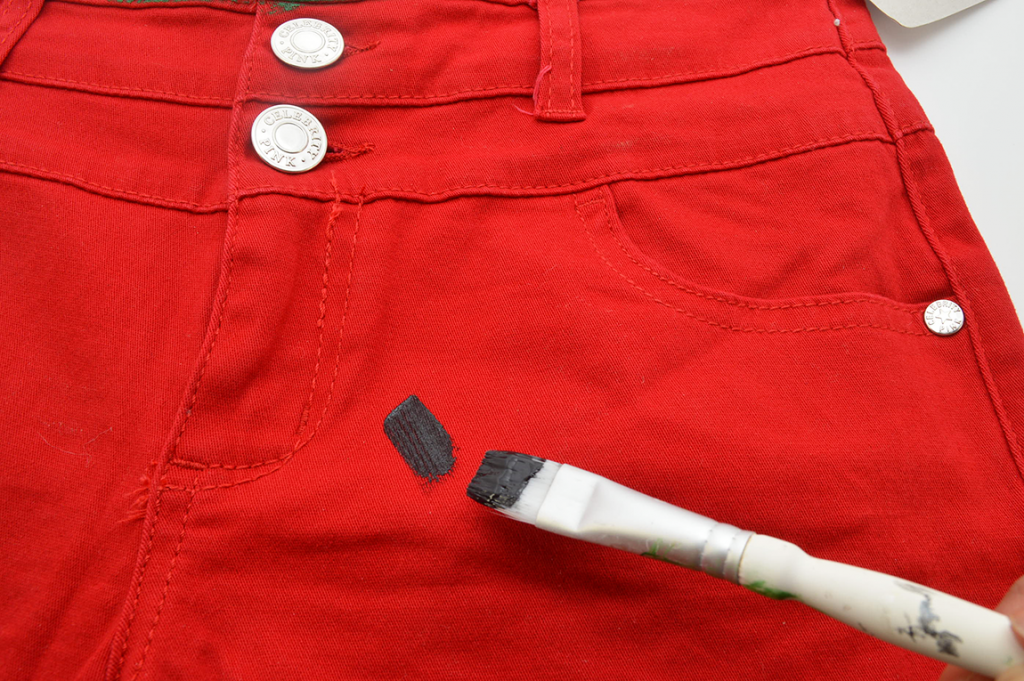
5) With the normal paint brush, add seeds! These are essentially short brush strokes measuring about 3/4 of an inch (1.905 cm). Try not to think too much about the placement. The more random, the better.
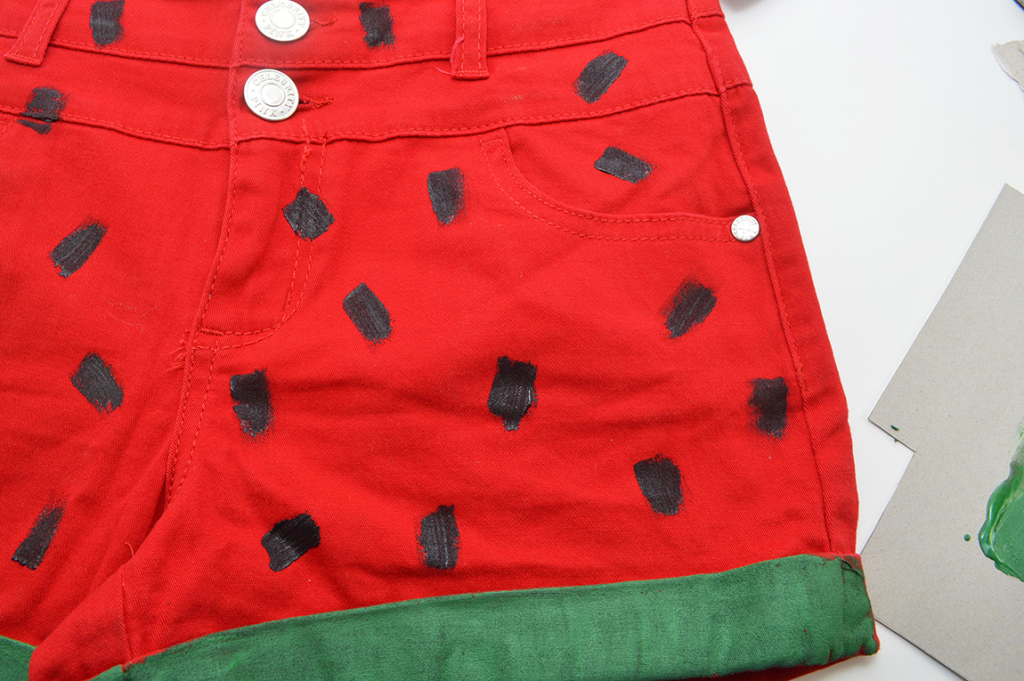
5) Repeat. Once the front is completely dry, flip the shorts over and repeat steps 1-5. Let dry.
How fun are these?!