
The holidays are a dream come true for anyone who loves crafts, recipes, or all of the above. I mean, it gives you the perfect excuse to make all the things. (Homemade gifts, anyone?) And while I’m more of a Halloween-and-autumn kind of gal, I can’t resist a fun winter holiday DIY. Extra points if it’s exceptionally clever, too.
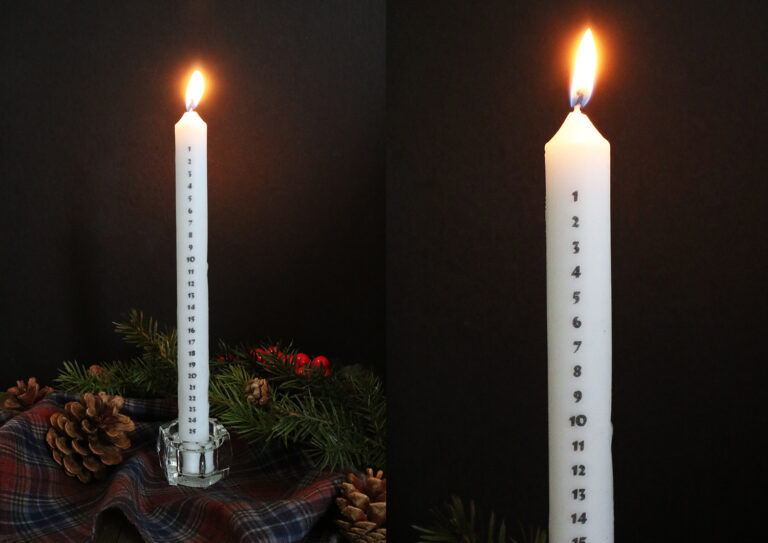
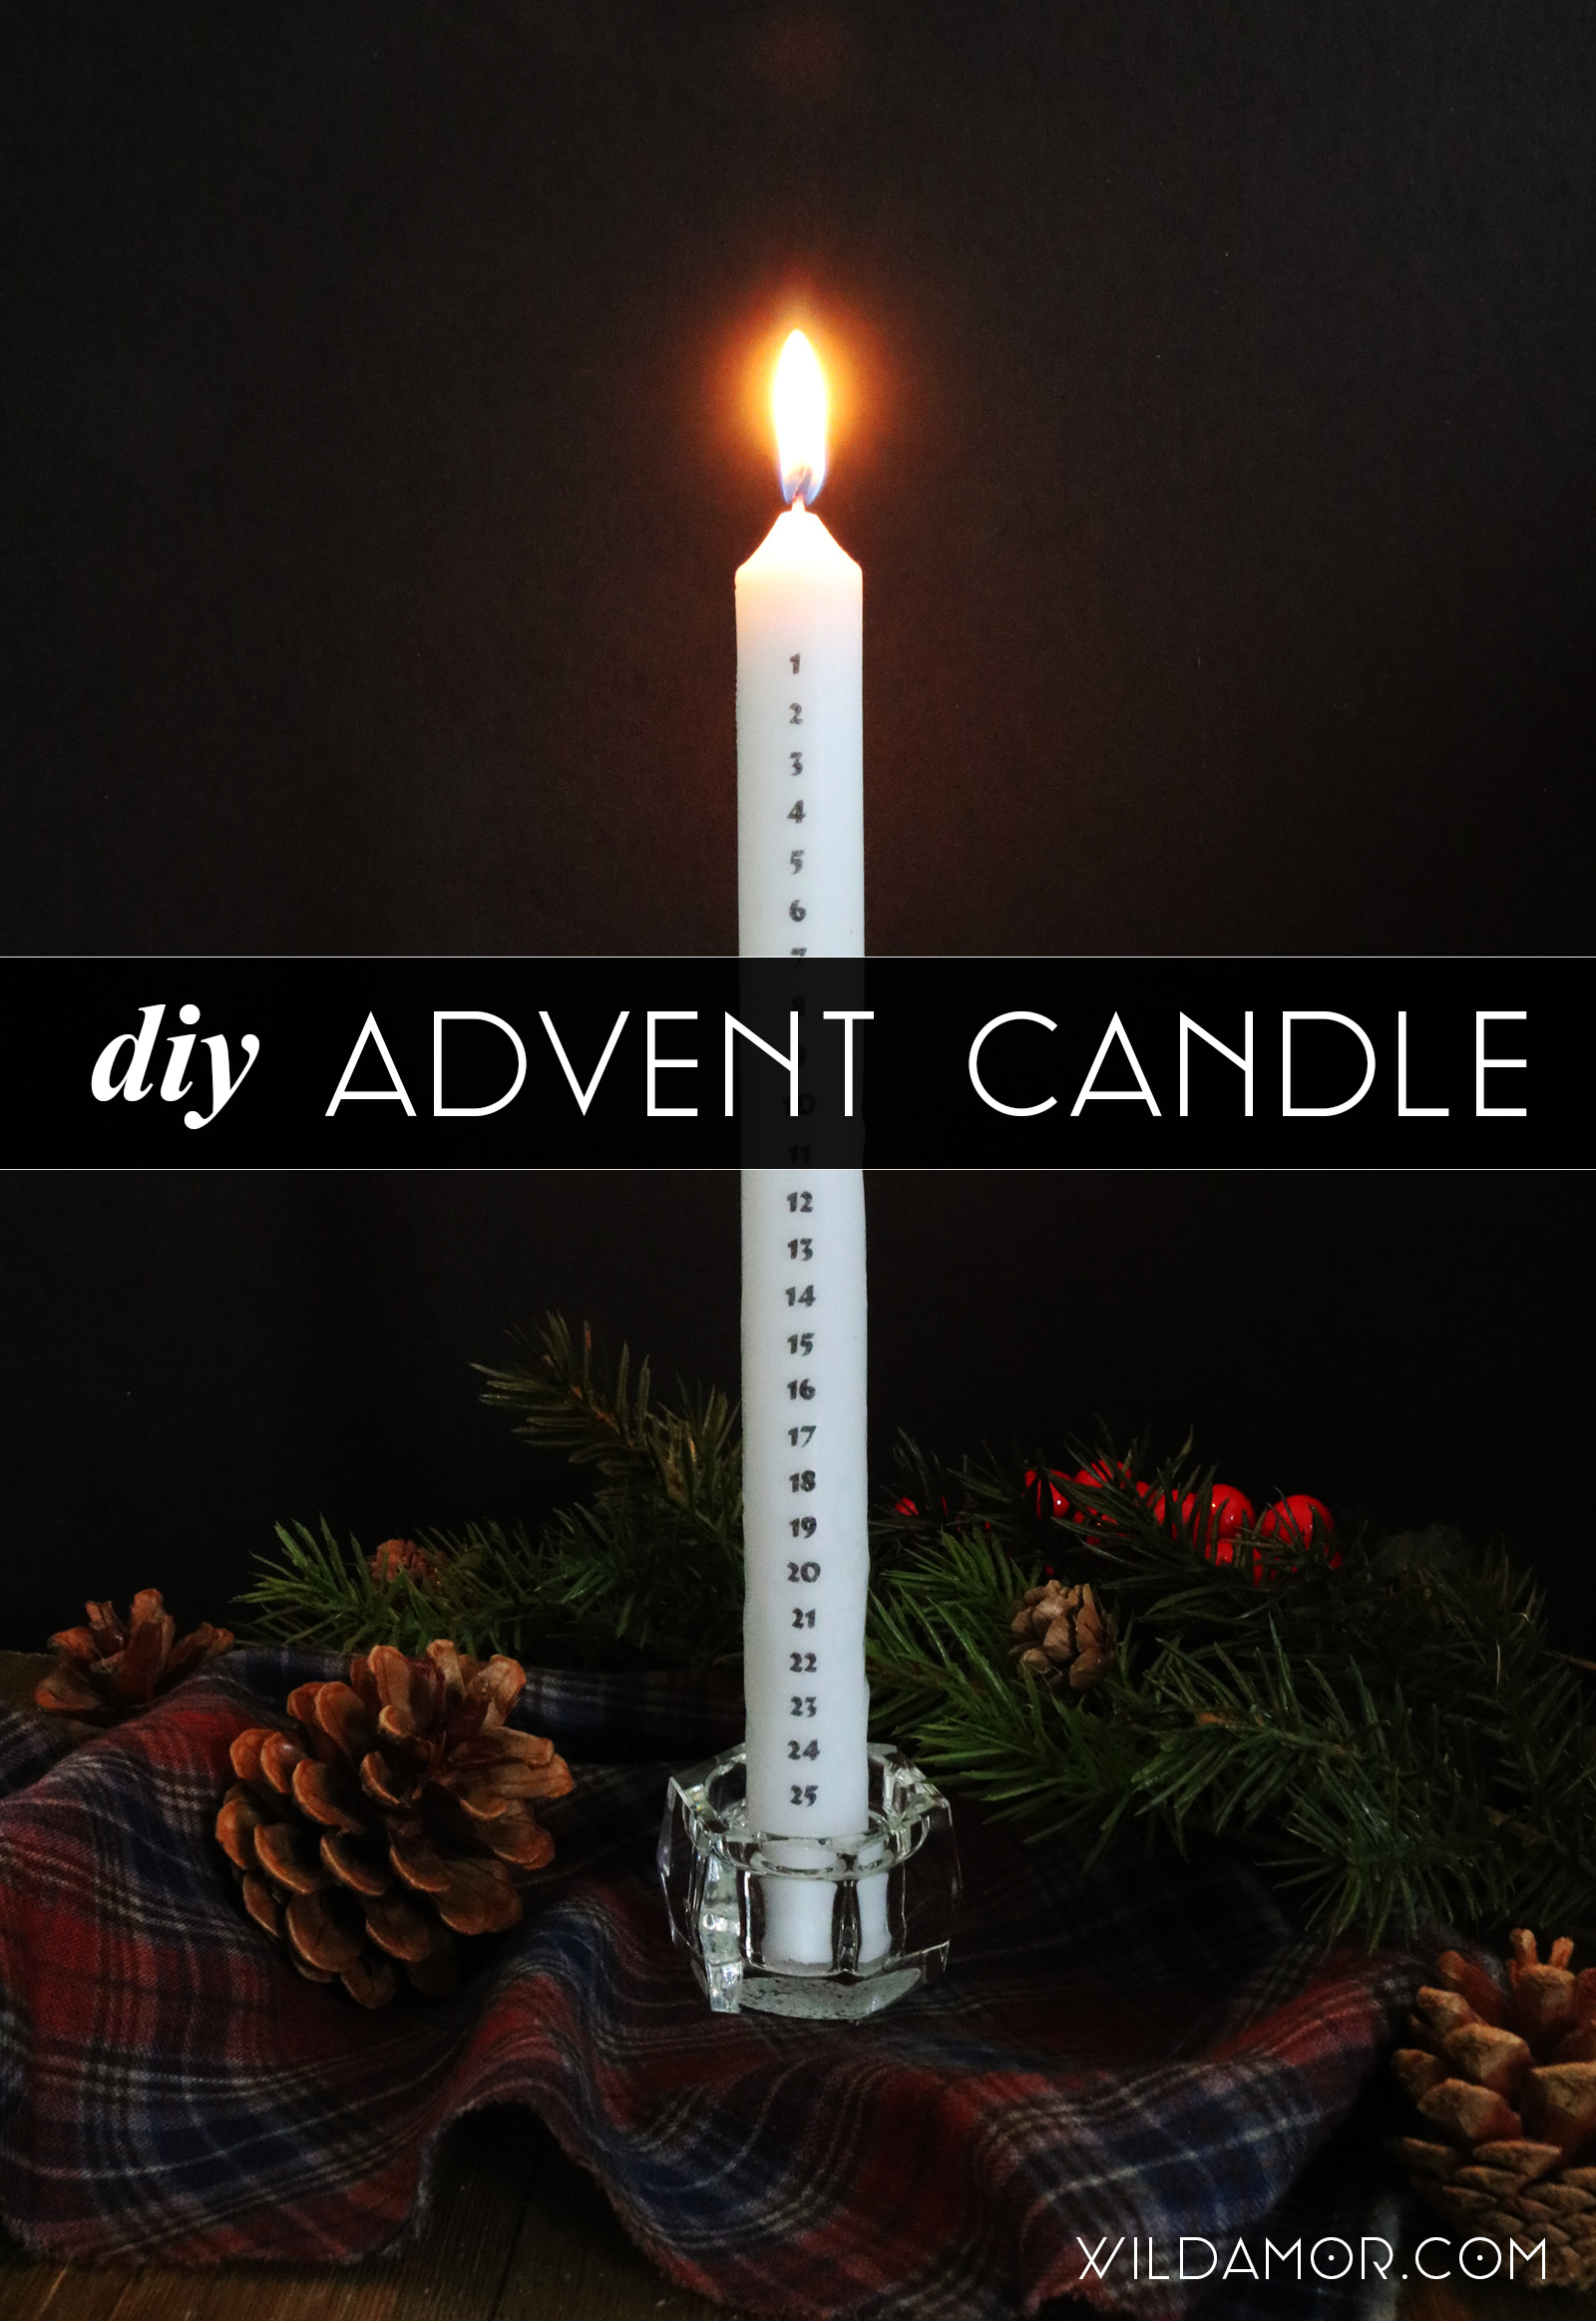
So, when I found this advent candle at Terrain, I knew I had to make a DIY version. It’s simple yet brilliant. Unfortunately, it’s also 18 bucks — pretty steep for an unscented candle that you’re planning to light up. But in true DIY hack fashion, I instantly thought about candle transfers, one of my favorite crafting techniques. And so this project was born.
To top things off, if you already own a heat gun, this DIY will cost next to nothing. The candle set me back $1.49 at Michaels.
Read on to learn how to make a super simple advent candle for Christmas:
DIY Advent Candle
Supplies:
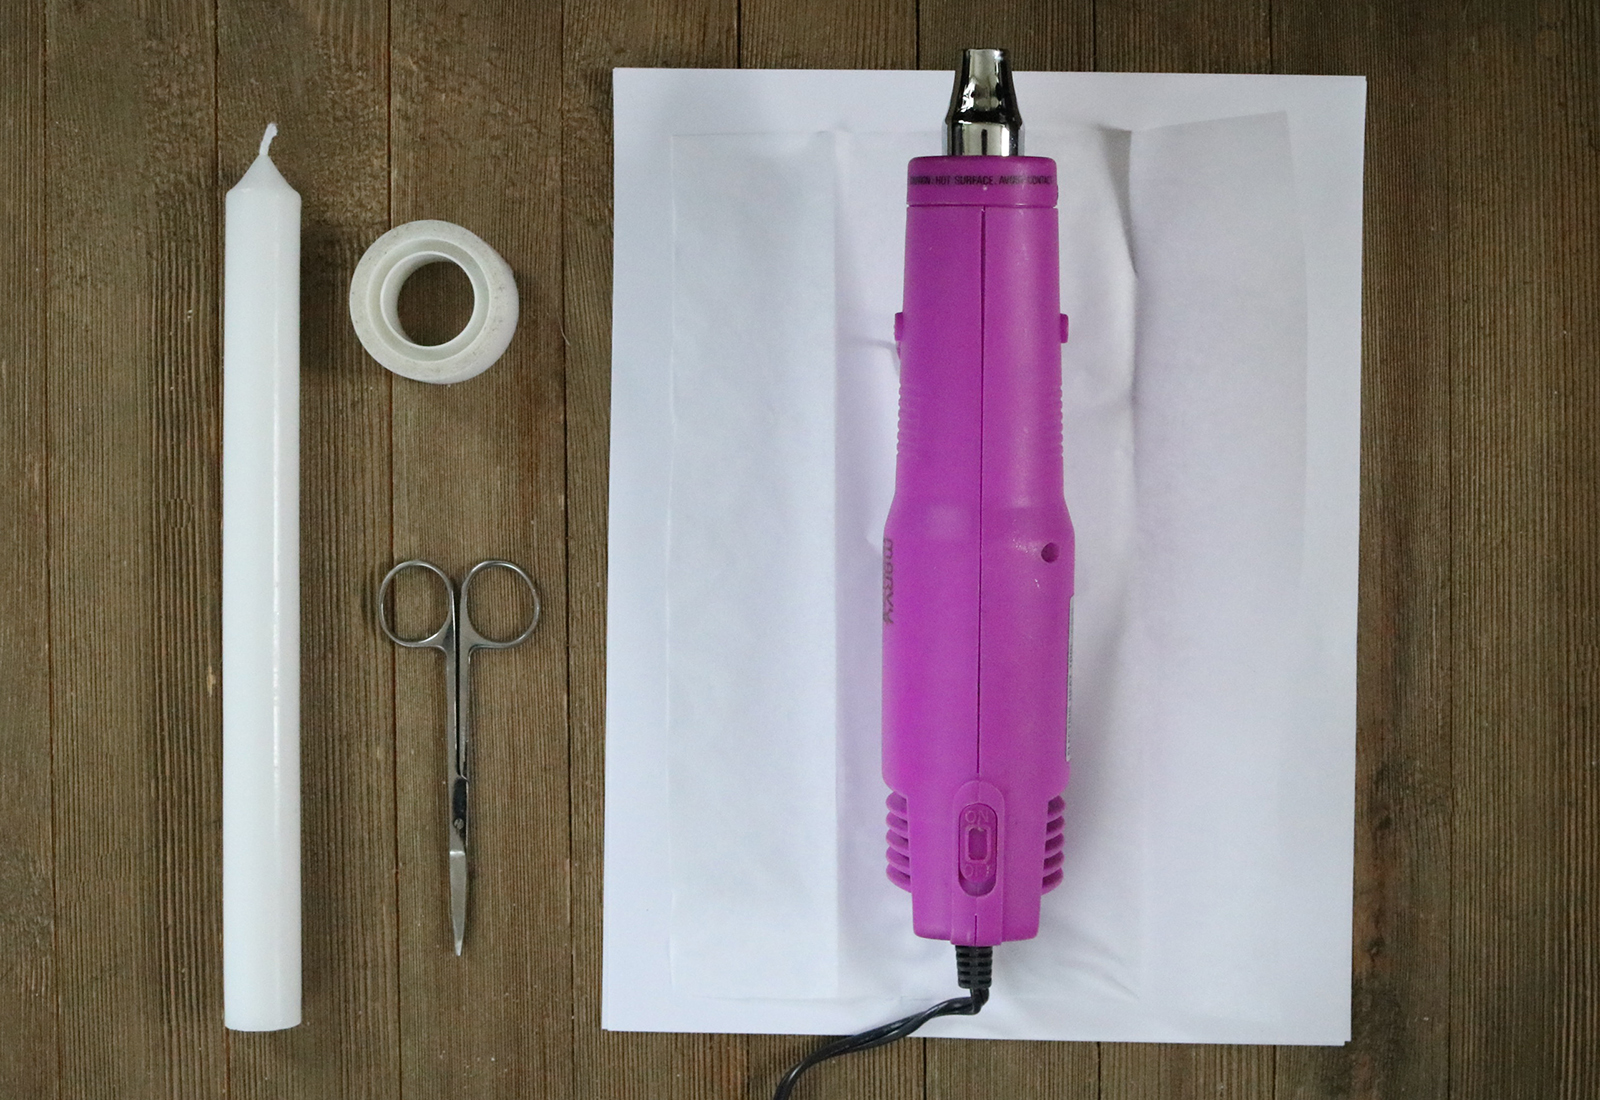
- 10″ white taper candle
- Scotch tape
- scissors
- sheet of paper
- tissue paper
- wax paper
- heat gun
Instructions:
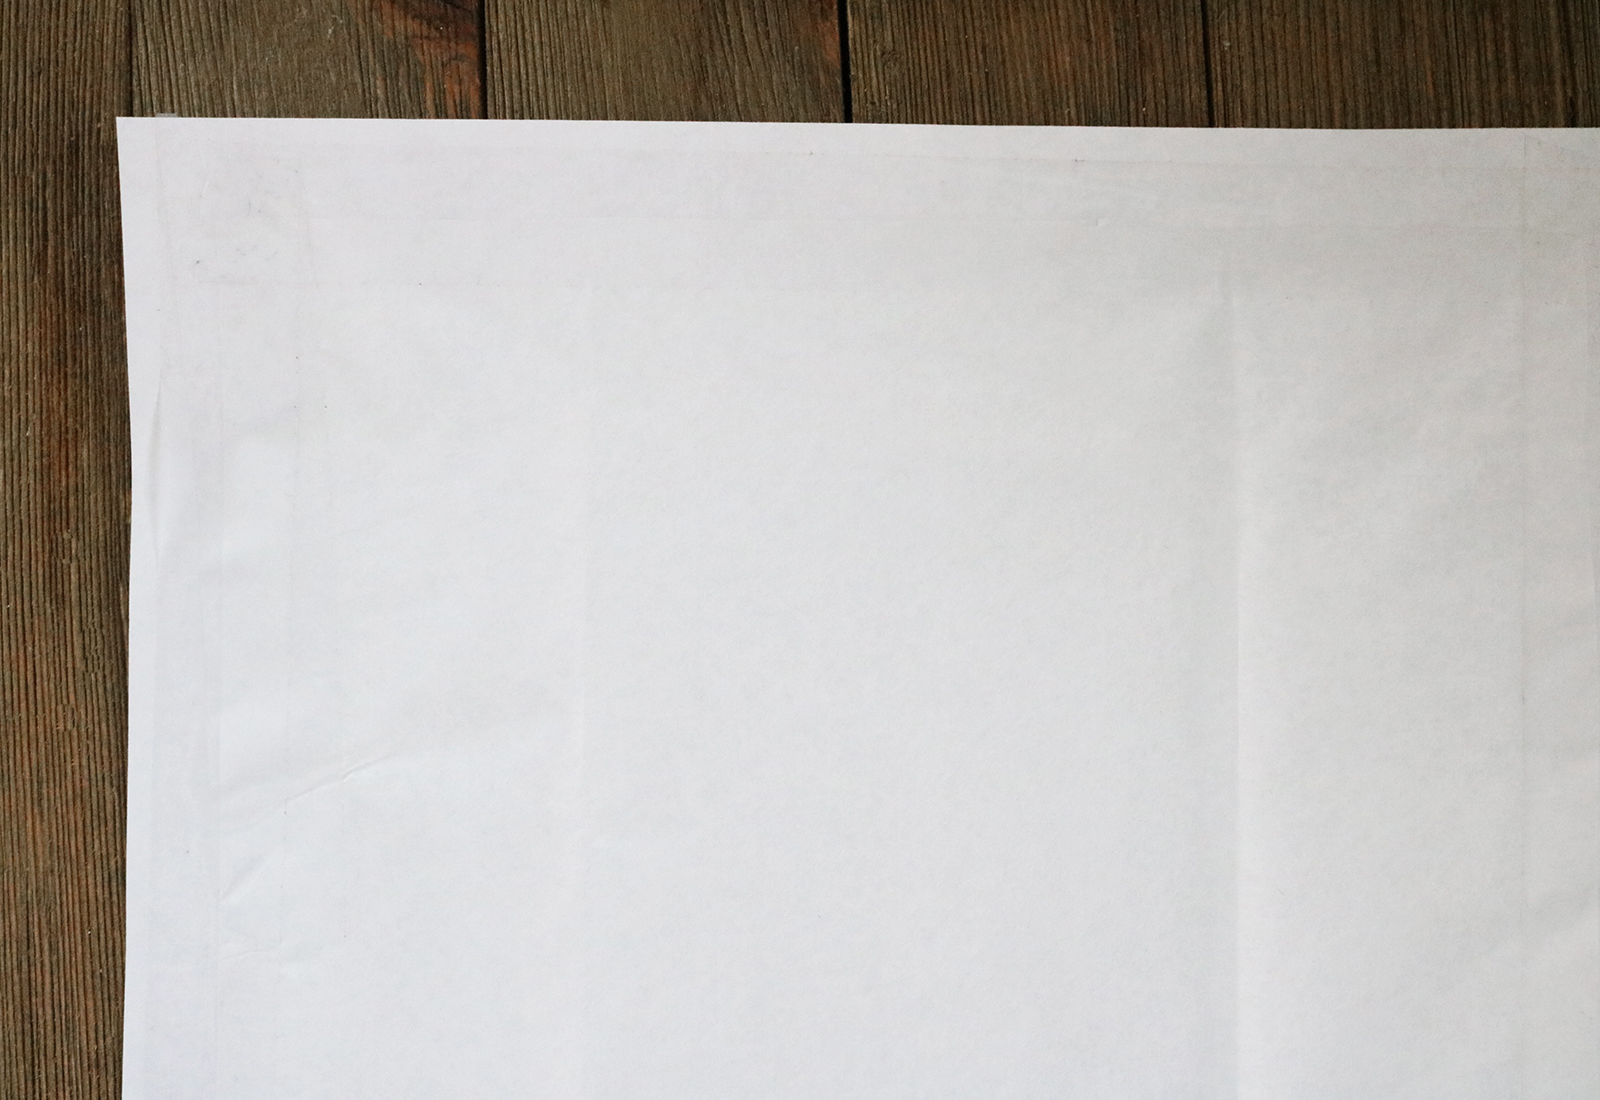
1. Cut a segment of tissue paper slightly smaller than the sheet of paper. Add a strip of tape to all four edges; this will prevent the tissue paper from jamming up the printer. Firmly press the tape down and smooth out any air bubbles.
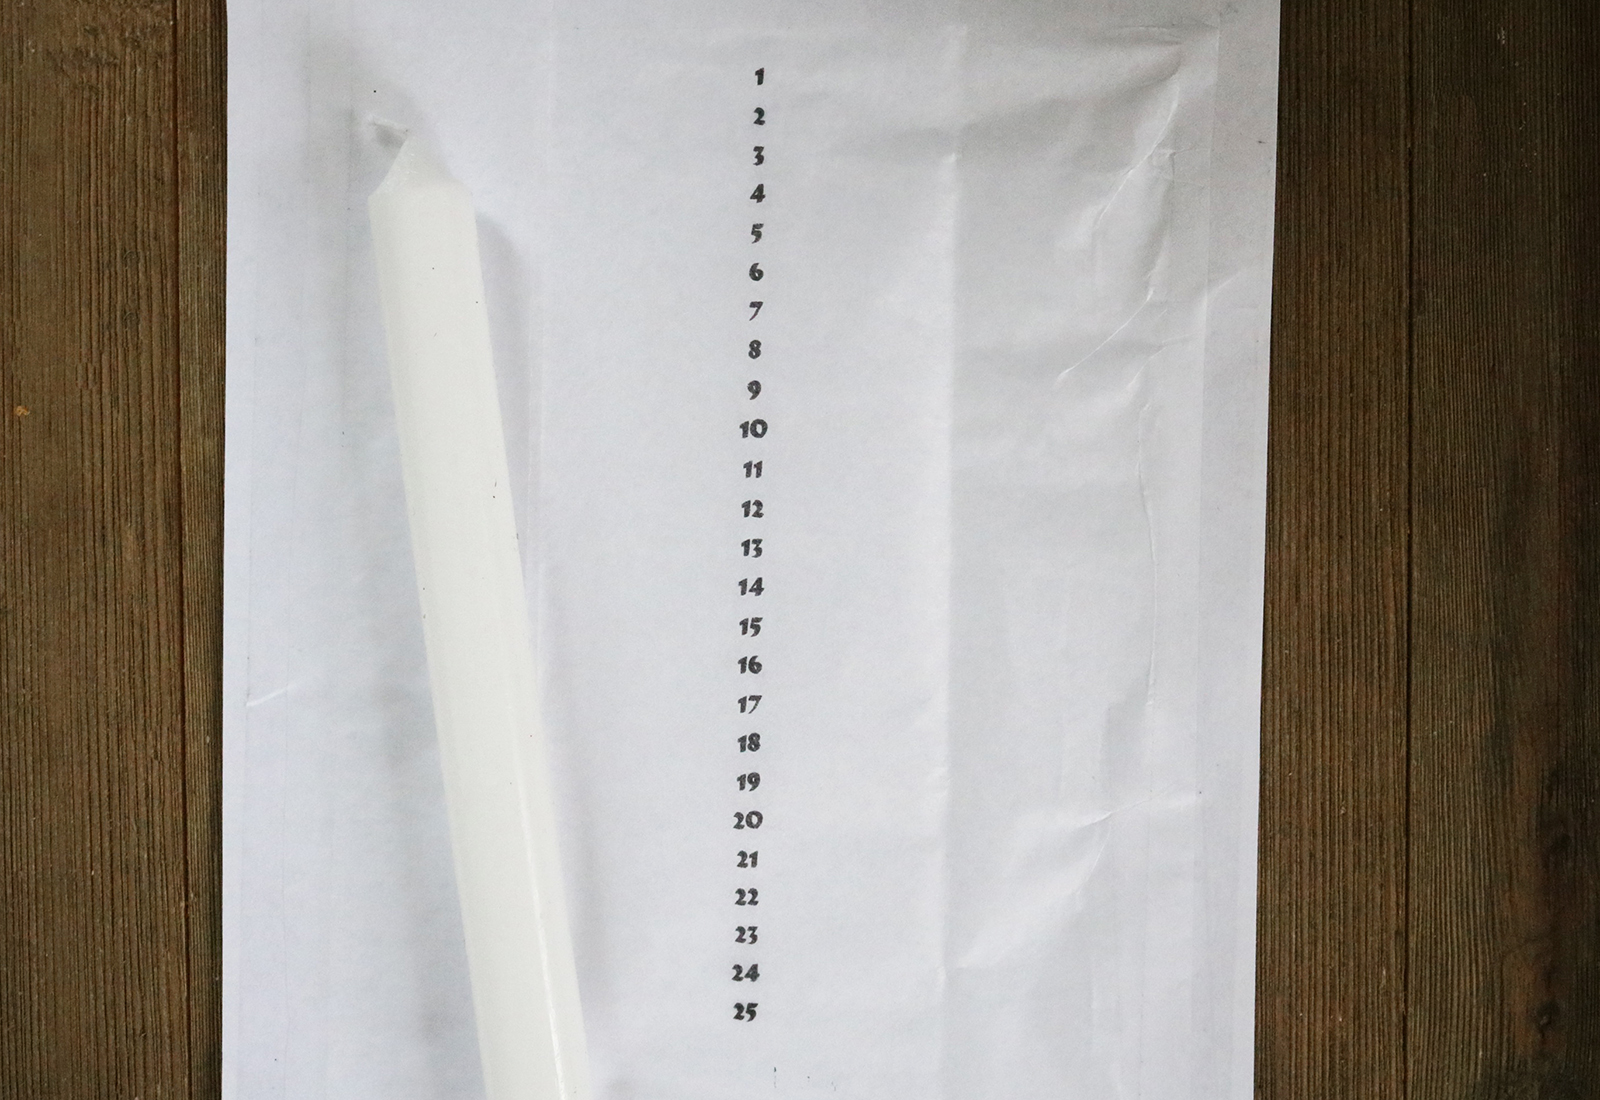
2. In a Word document, type numbers 1 to 25 in a vertical row. Print onto the tissue paper. (I’d recommend doing a test print with plain paper first. This way, you can make sure all of the numbers will fit on the candle.)
For reference, I used size 12 Matura MT Script Capitals with single spacing.

3. Cut around the numbers and through both layers of paper.
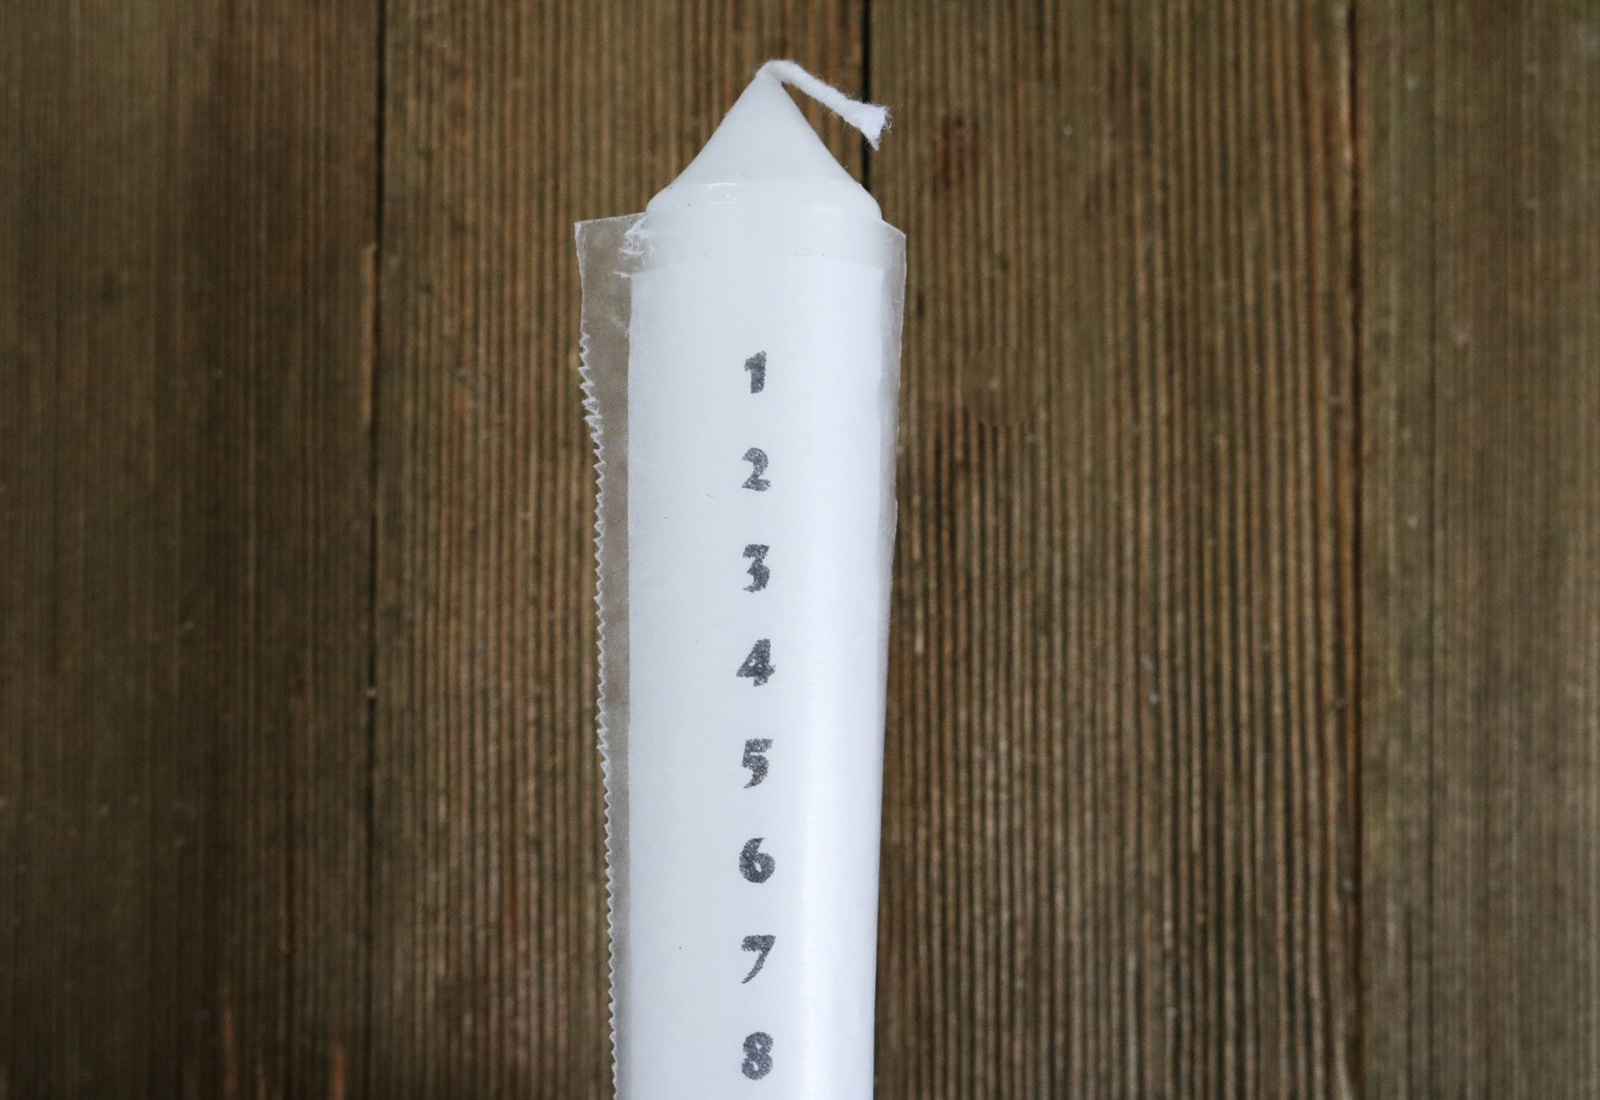
4. Place the piece of printed tissue paper on the candle. Cut a strip of wax paper that’s slightly bigger than the tissue paper; it should cover the entire piece.

5. With the heat gun, carefully apply heat to the wax paper. The wax will melt and “trap” the tissue paper, adhering it to the candle. Move quickly, though! If you hover over one area for too long, the actual candle will begin to melt and warp.
I’d recommend applying continuous moving heat. If the tissue paper isn’t fully adhered, you can always come back and melt the wax paper a bit more. It doesn’t take much for the wax paper and candle to melt.
(Watch your fingers, too!)
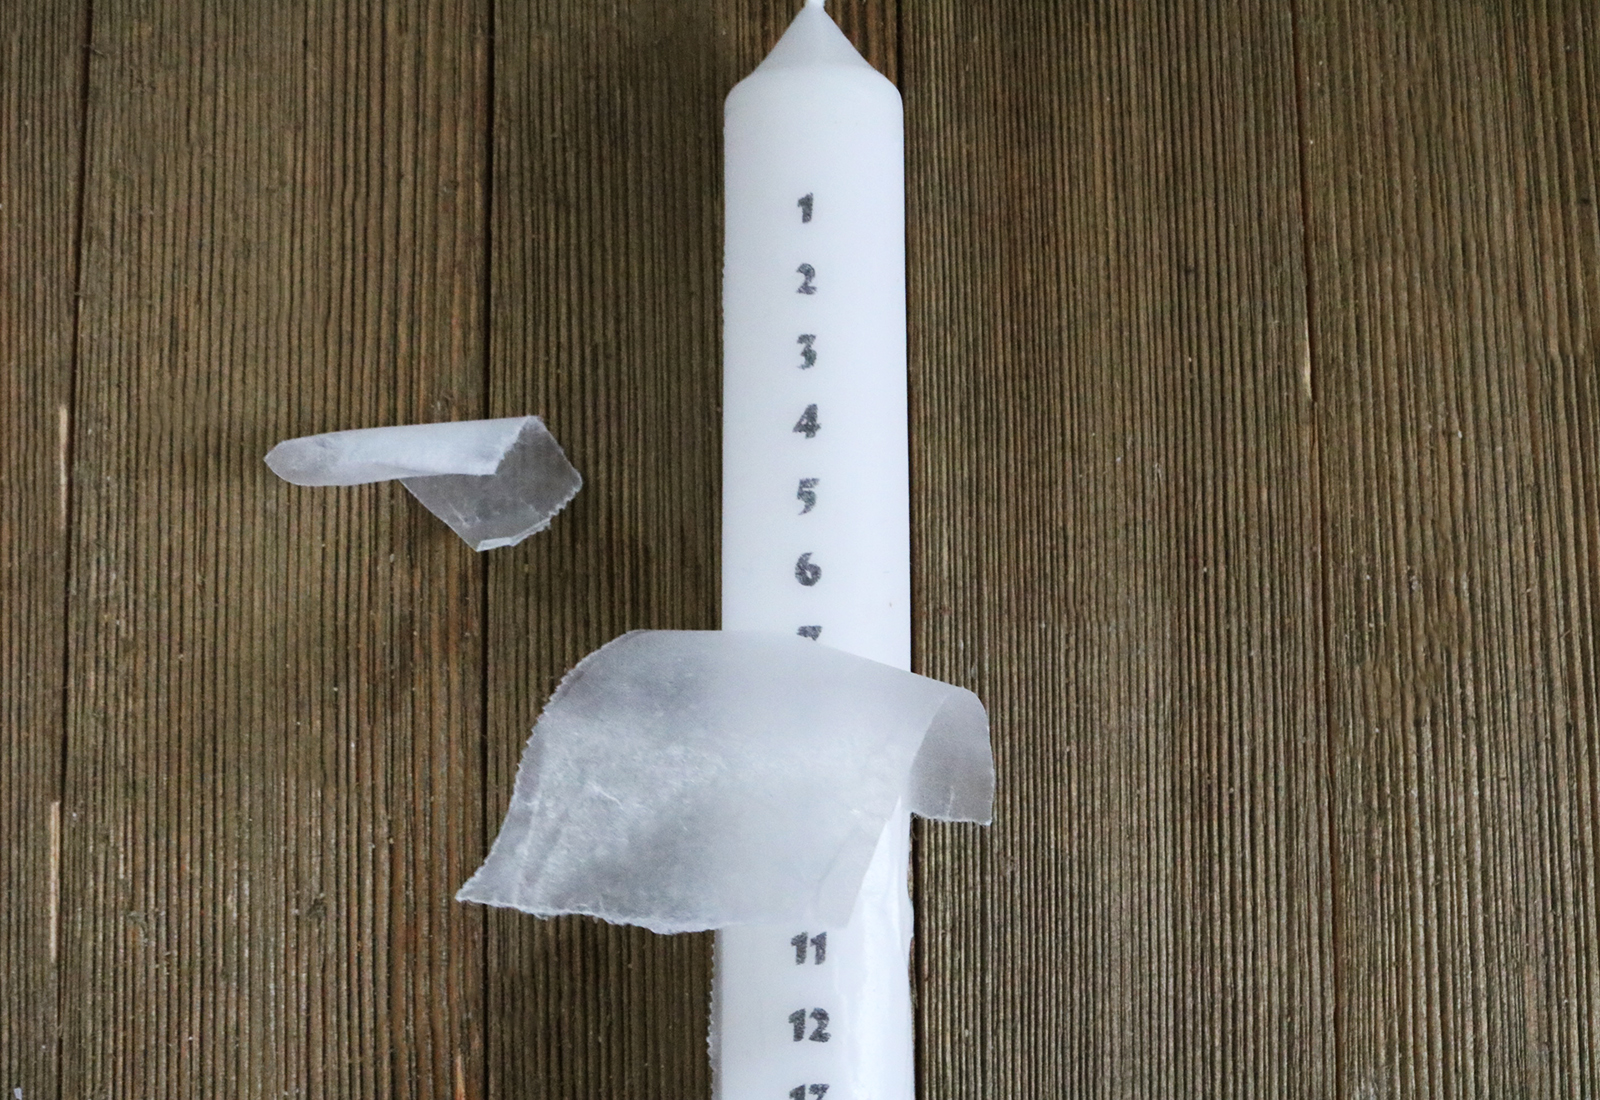
6. Once the tissue paper is fully adhered and candle is cool, peel away the wax paper.

Your advent candle is ready to use!
Remember, this is tissue paper on the candle. It might warp or wrinkle as the candle wax melts. So, as you move into each day, tear away the tissue paper so you’re left with a neat edge.
Looking for more projects to make this holiday season? Here are a few of my favorite candle-related tutorials from the past few years:
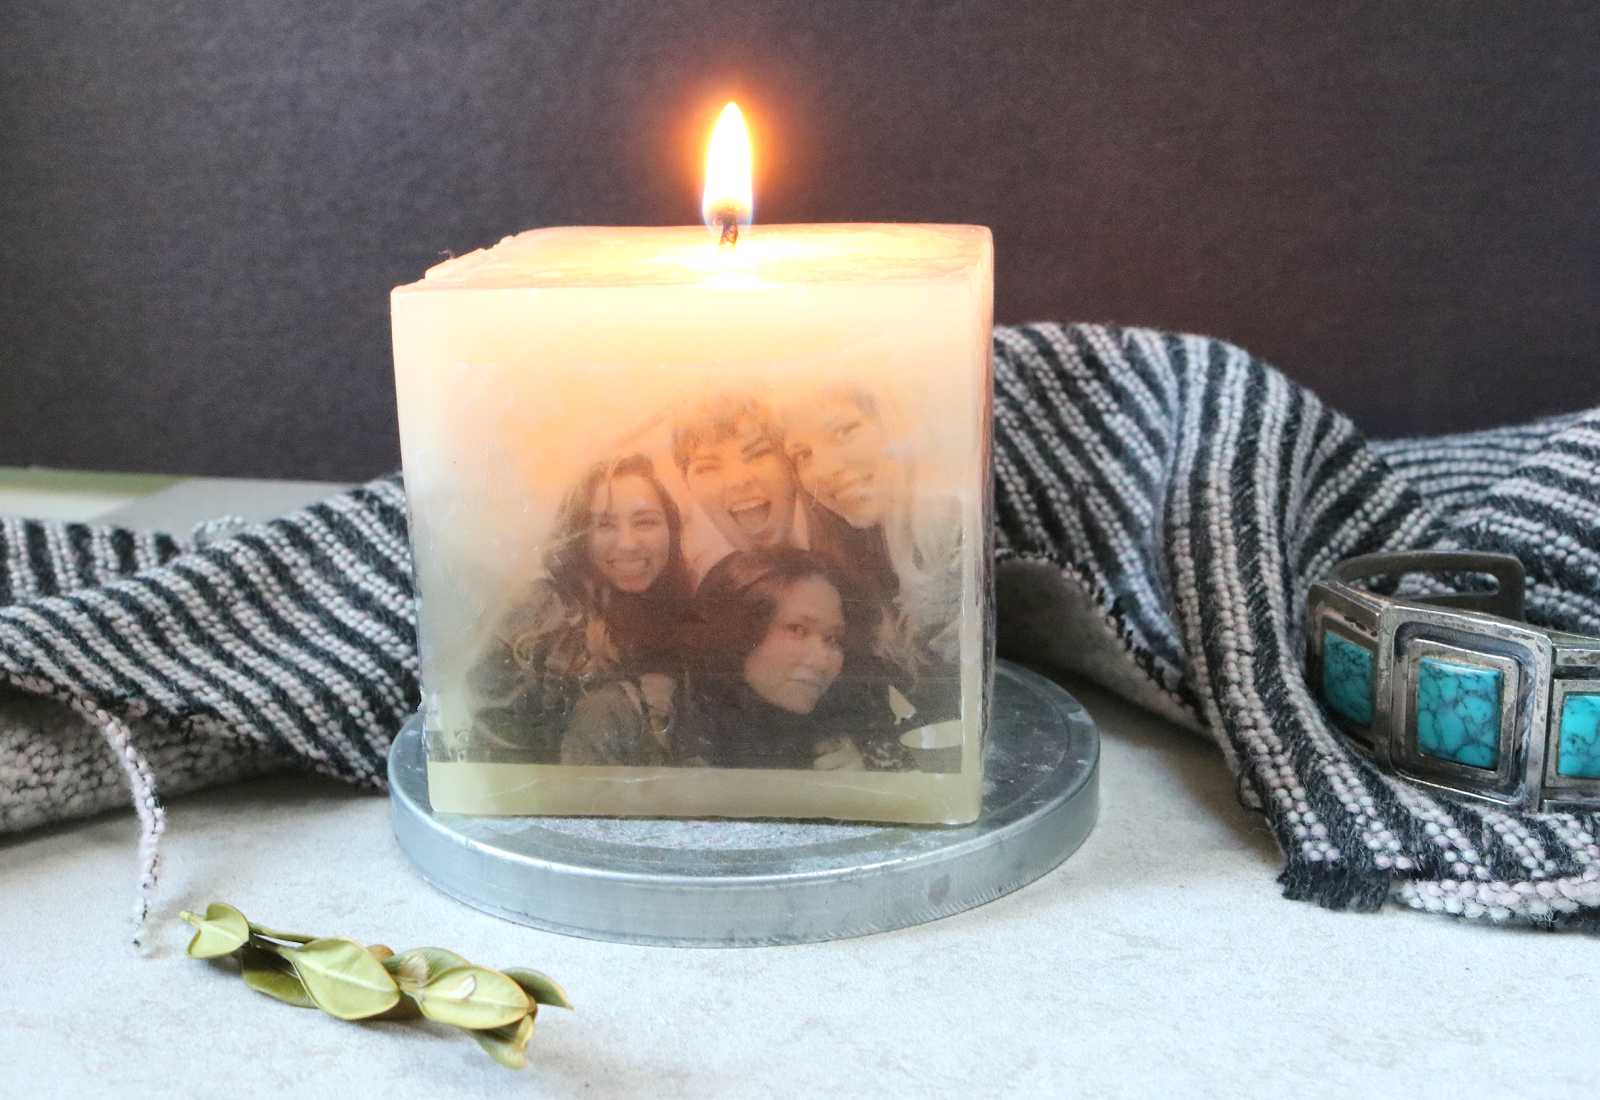
This DIY photo candle was actually the first candle transfer I have ever created, and I’ve been obsessed ever since! It makes for the perfect holiday gift. (Wild Amor)
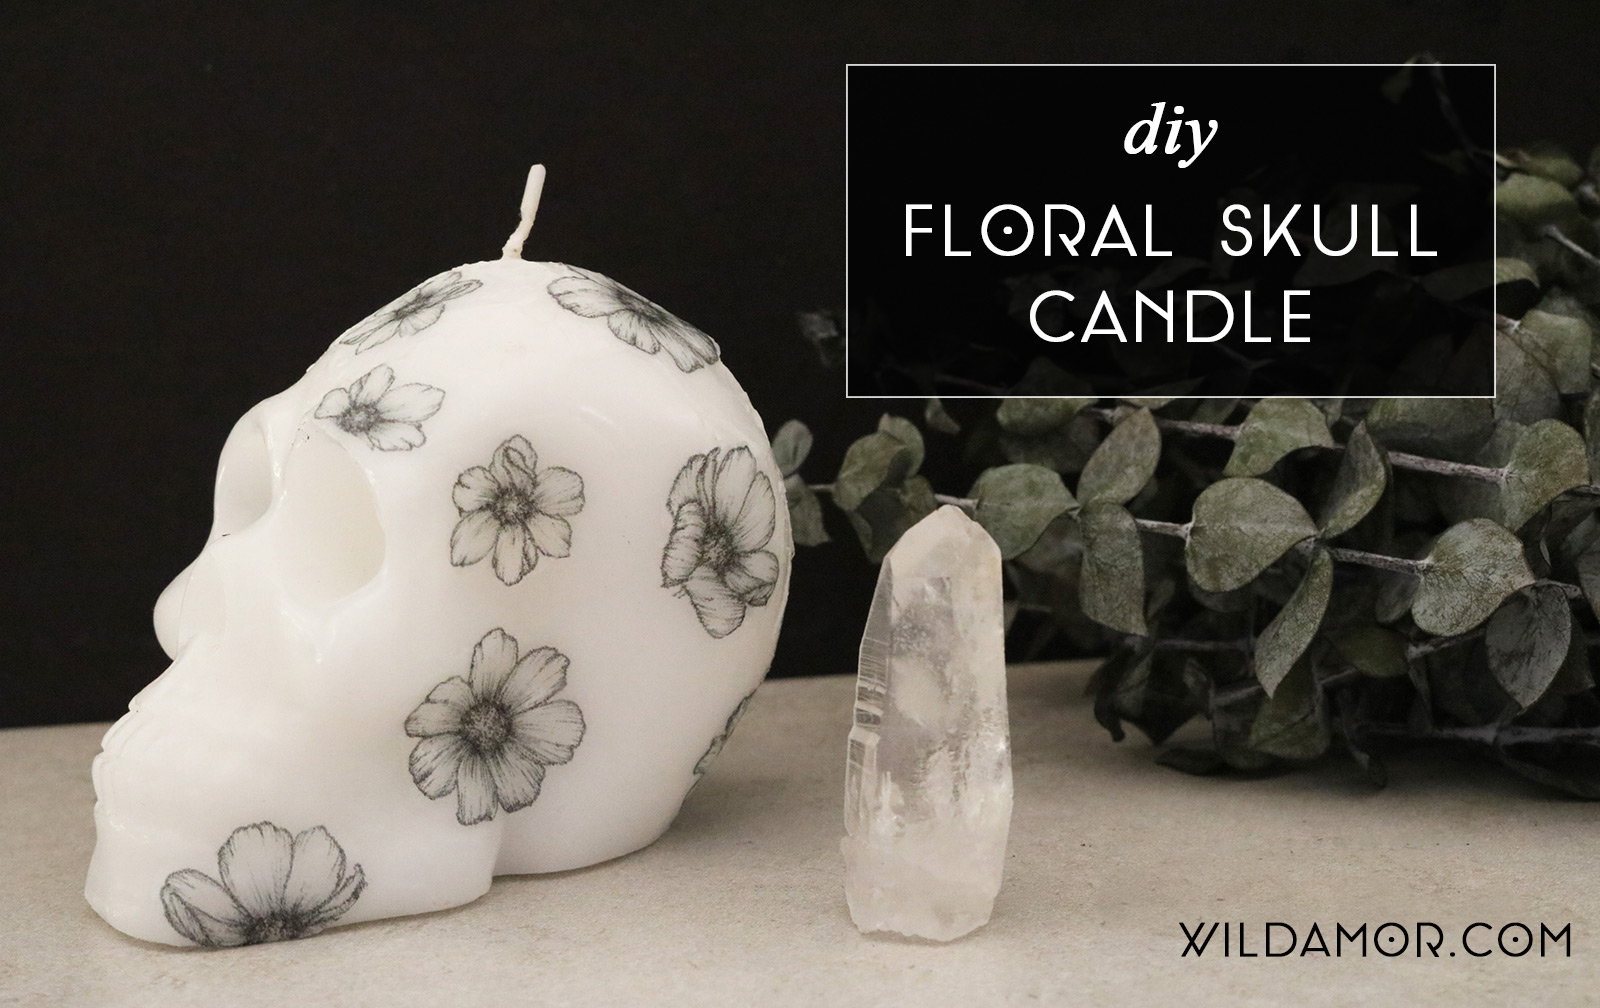
With the same technique, you can add flowers to a shaped candle (or holiday motifs to your advent candle). This DIY floral skull candle is one of my favorites. (Wild Amor)
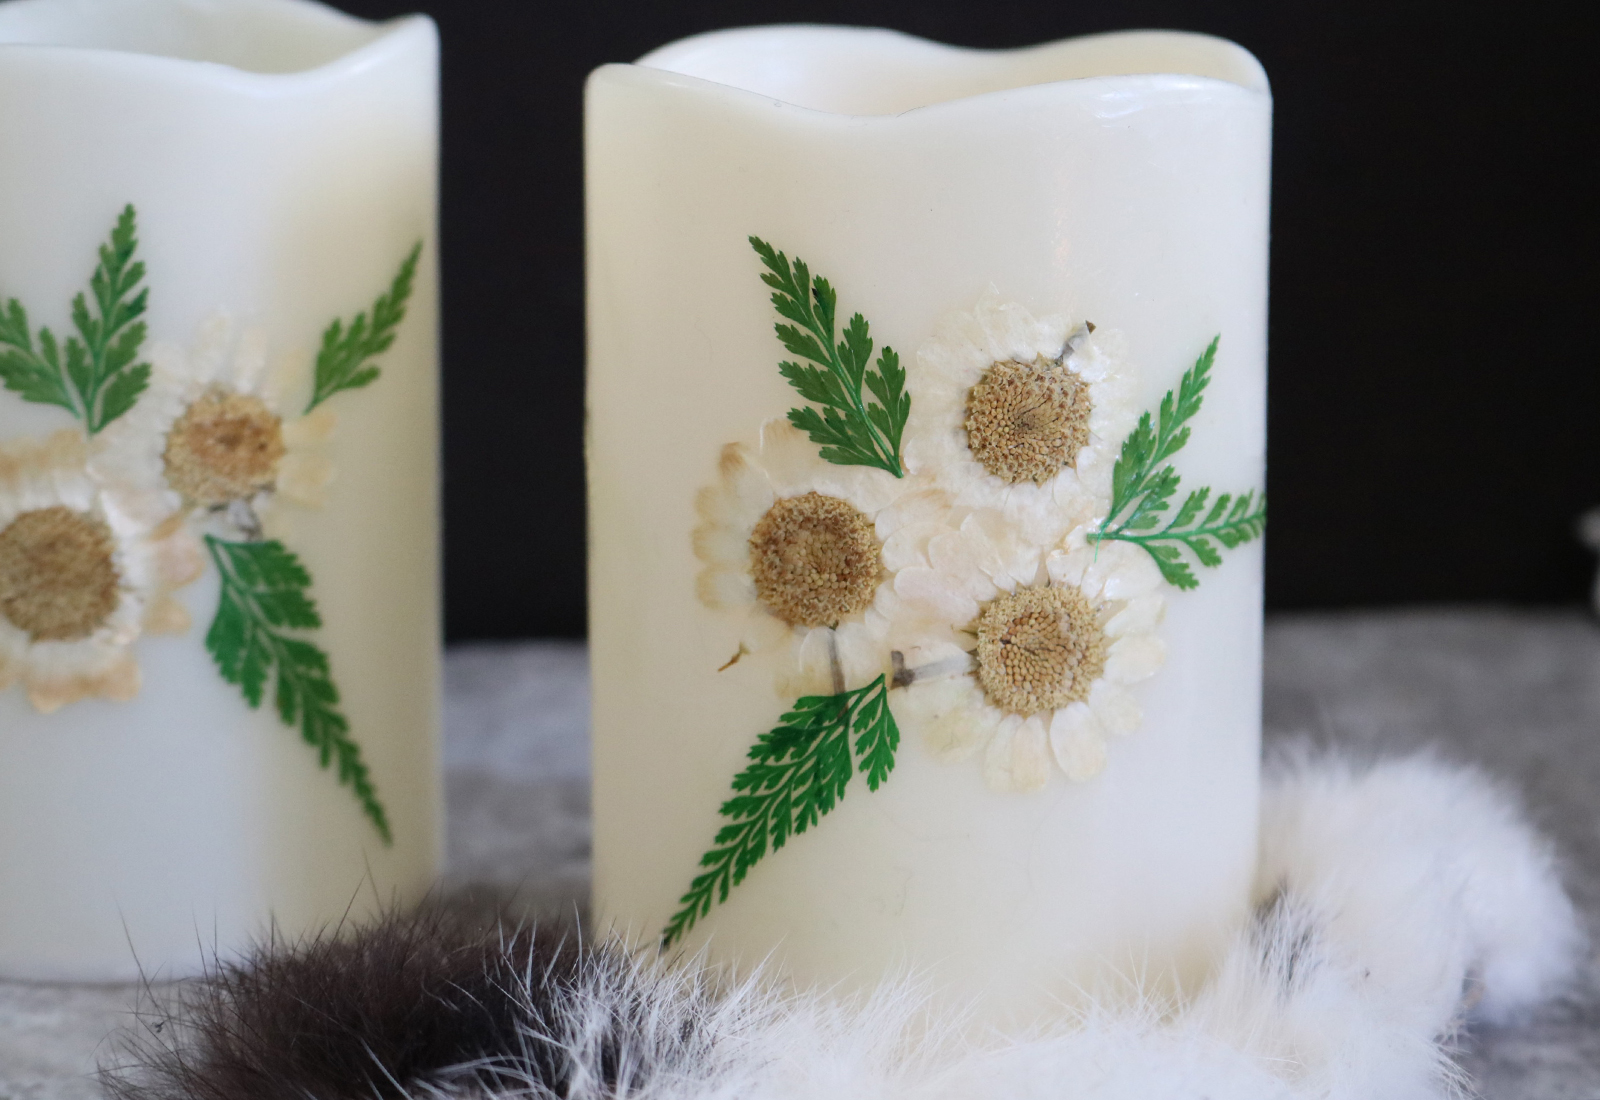
Battery-operated candles are pretty great. They last forever, they’re super useful when the power goes out, and you can decoupage dried flowers on to them. I definitely want to make another pair of flamless floral candles with colored petals. (Wild Amor)

It might be December, but I still use (and make) these cinnamon vanilla latte wax melts on the regular, skull shapes and all. (Wild Amor)
Happy holidays!
xx K