

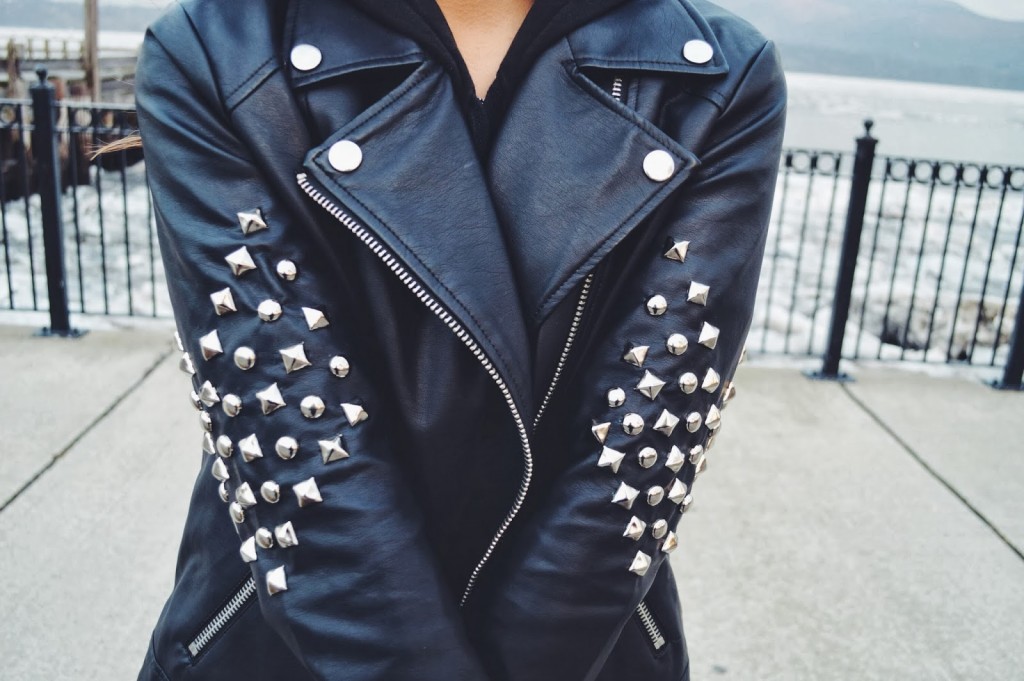
It’s kind of funny how some projects work out. The alternating dome and pyramid studs on this jacket wasn’t my original plan — but I’m so glad it became a plan. I actually didn’t have enough of either style to make 5 rows on both sleeves. But then I thought, why not combine the two? I think it creates a pretty cool visual, and it adds a nice twist to the usual studding project.

And of course, who can resist some good old chevron? This tutorial was mainly created to guide you on the placement of each stud, so that a chevron pattern develops. It’s actually quite simple with a ruler. Take a peek at the instructions, below!

Supplies:
– Leather/Faux Leather Jacket
– Ruler
– Gel Pen (in a bright color!)
– Round Nosed Jewelry Pliers
– Pronged Studs
(I used exactly 90 studs)
Crustpunks.com and StudsandSpikes.com are both great online retailers to purchase studs in bulk.
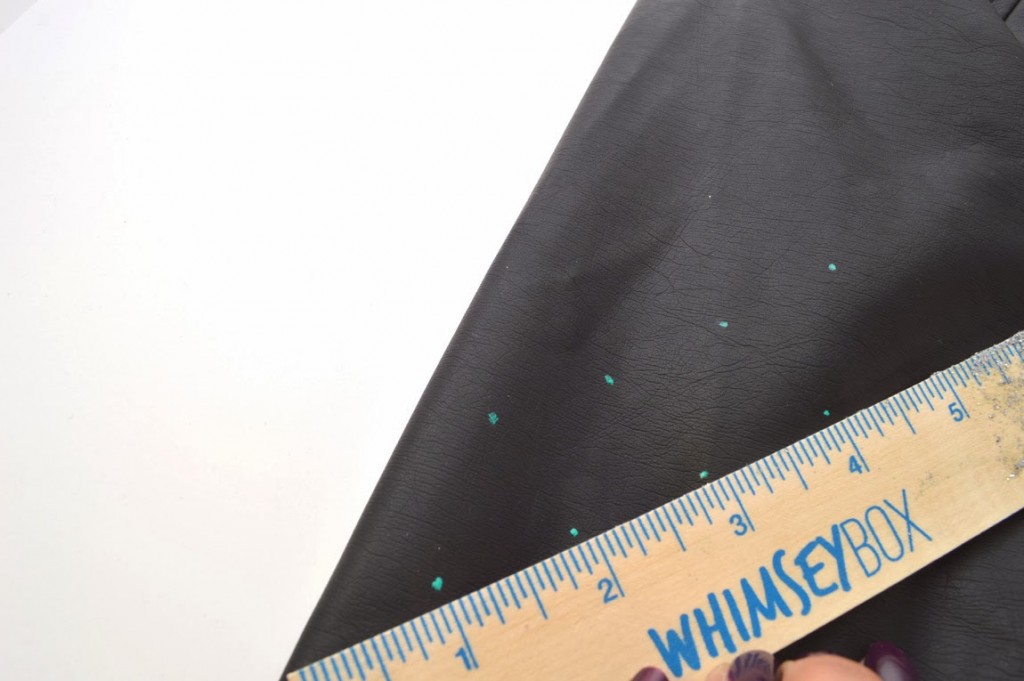
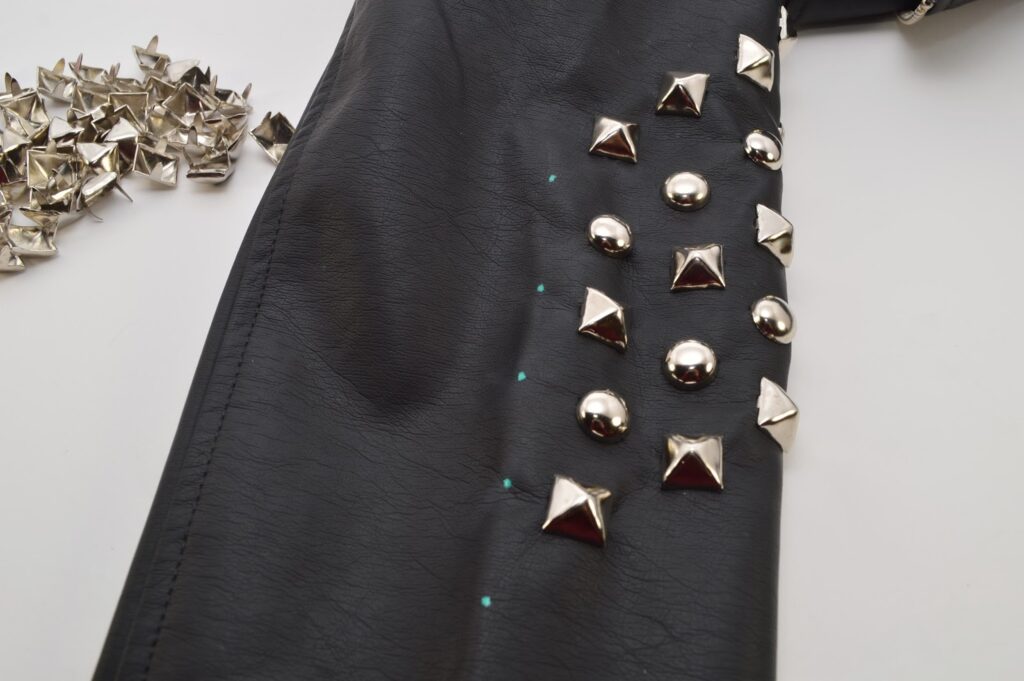
1) Lay the jacket on a flat surface. On the sleeve, measure dots 4 inches from the sleeve’s fold, at a diagonal. Each dot should be placed at 1 inch intervals.
Repeat 1 inch below your first line. Your dots should slant and (somewhat!) fall right in line with the dots above it.

2) Repeat until you have 5 slanted rows.
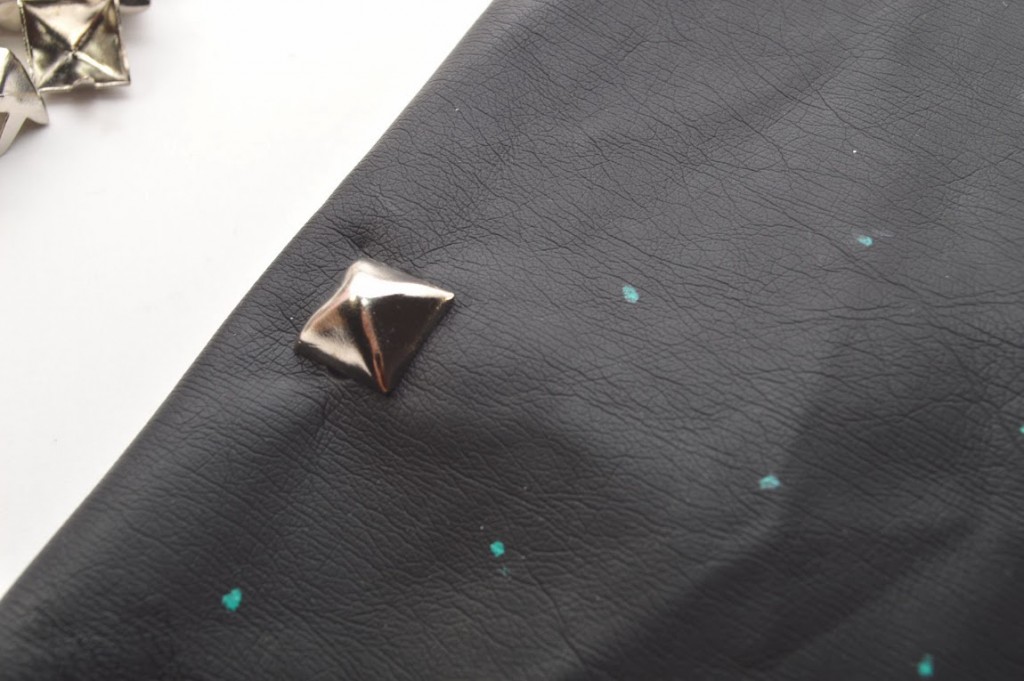
3) Carefully pierce your first stud through the sleeve. I found it easiest to slide one hand into the sleeve, then use the other hand to push the stud in. I used the hand in the sleeve to help guide the stud in, then I held onto it and simultaneously turned the sleeve inside out. This will help the stud stay in place, so that you can bend the prongs (in the next step!)
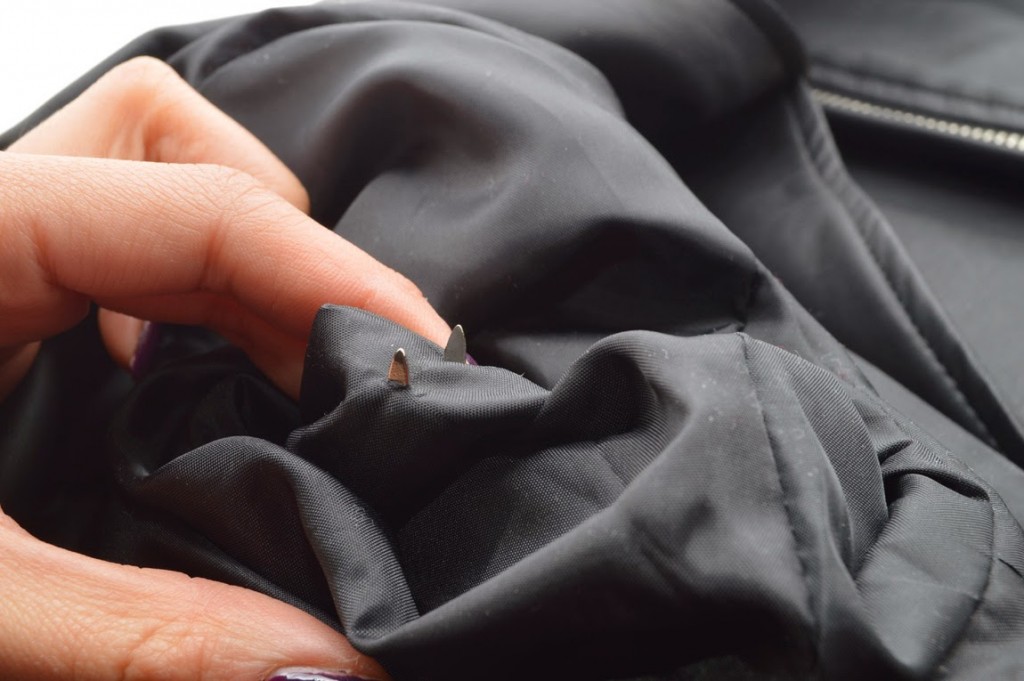
4) Make sure that both prongs are pierced through all layers of fabric.
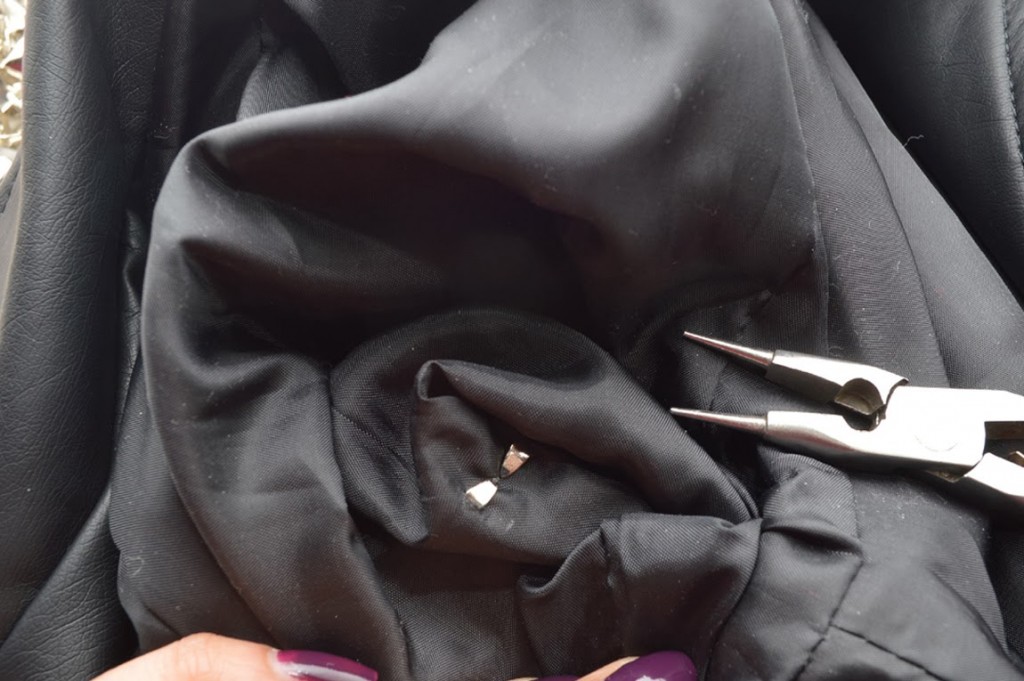
5) Using the pliers, bend both prongs inwards. Bend them in enough so that they’re snug and tight, but not too far – they’ll slide right out!

6) Continue along the row.

7) Add more studs until the entire side is completed.
8) Reposition the sleeve so that the fold is laying flat. Using the fold as a guide, add a dot continuing from each row. Again, make this 1 inch (2.54 cm) away from the last stud.

9) Add dots to create a mirror image of the studs on the other side of the fold. This may be a bit tricky, but here’s a tip to help create a mirror image. Hold the sleeve up so that both “layers” on either side of the fold are laying against each other. This will help you gauge if the one side of dots is lining up with the one side of studs.
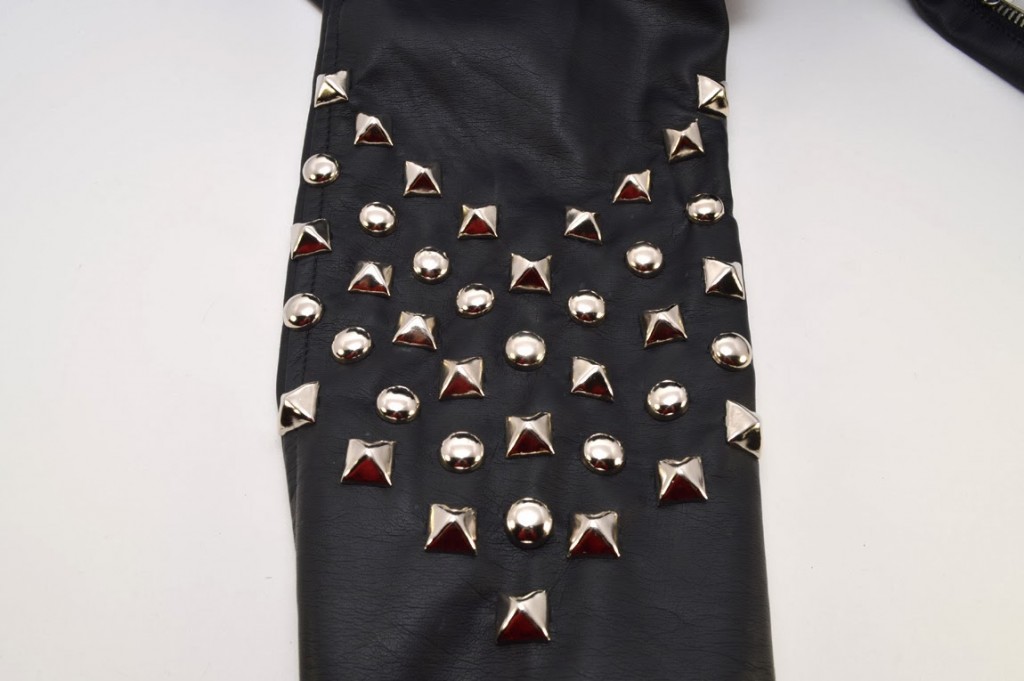
10) Continue studding away!
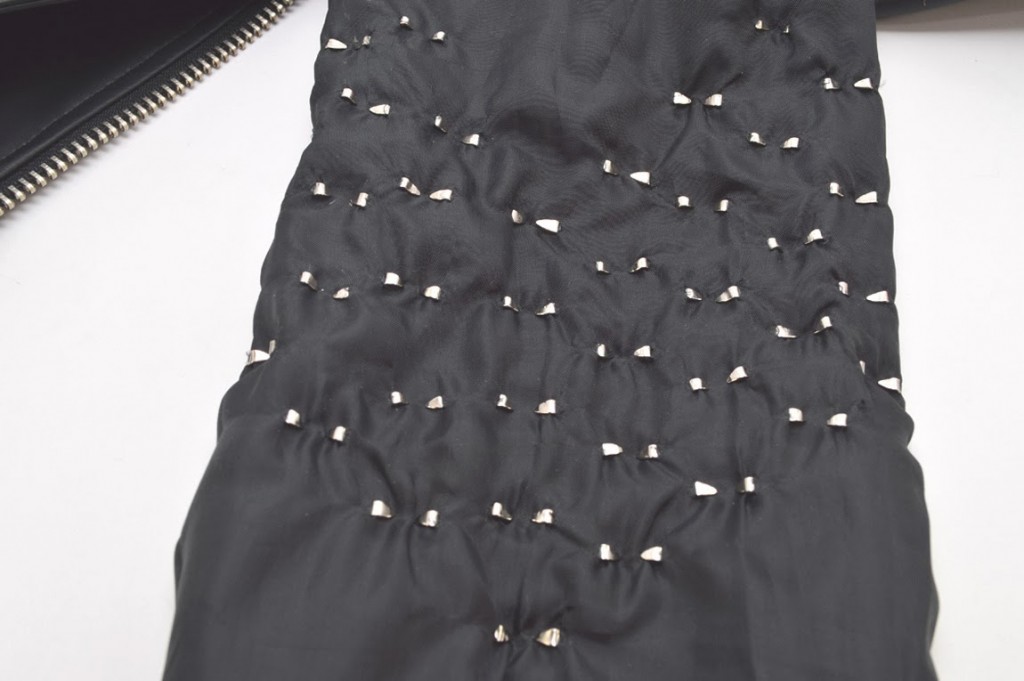
11) Turn the finished studded sleeve inside out. Lay flat.

12) Add fabric glue to each prong. This will dry clear, so don’t worry about being super neat.

13) Let the glue dry completely, and repeat on the other sleeve. The glue will give the prongs a little extra security.
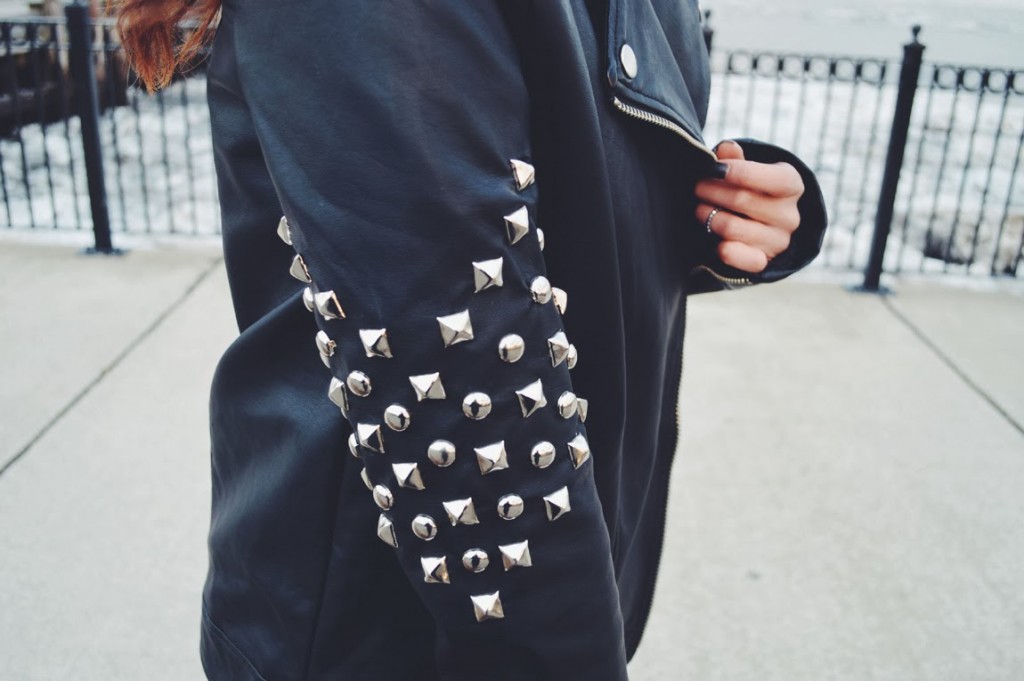


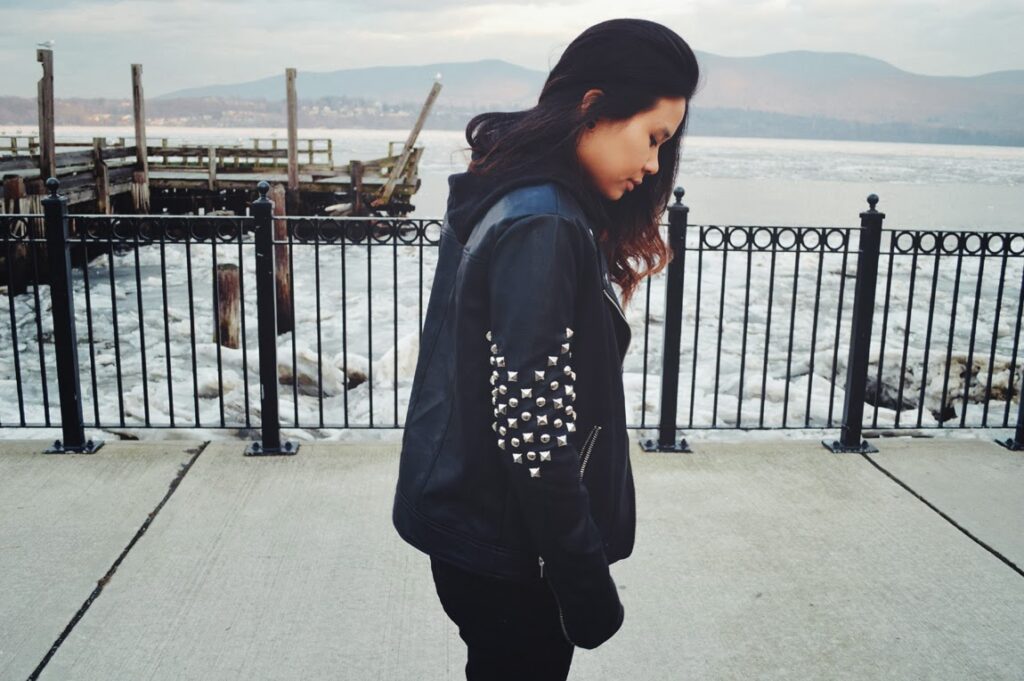
I’m in love with this jacket. I have a feeling it’s going to be in pretty heavy rotation within the next few months. Chevron and studs…honestly, how did I not think about this combination sooner?!
Xo, Kirsten