
I think you’d agree that Sharpie markers are a staple in every home (and office, and classroom, and studio)…well, I’m beginning to think their new fabric markers – Stained by Sharpie – should be a staple in every DIY’ers supply stash. I had an opportunity to try out these markers, and have created a few projects to share with you guys. Here’s one of them – two more, coming soon!
While normal Sharpie markers are permanent, they may fade over time on fabric that regularly goes through normal washing and rinsing. Stained by Sharpie markers are specially formulated for use on most fabrics, so they’ll withstand washing and rinsing.
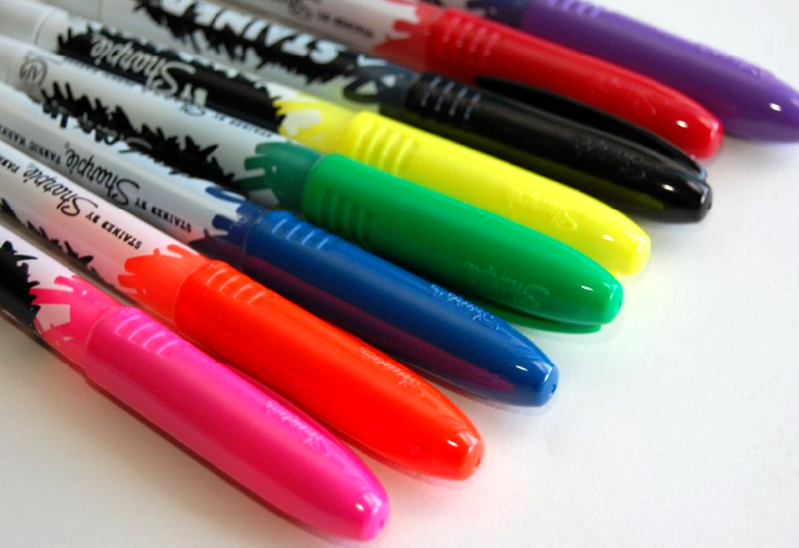
They also have these awesome brush tips. Love!
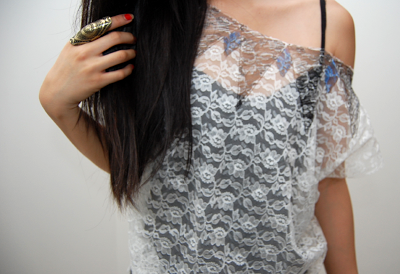
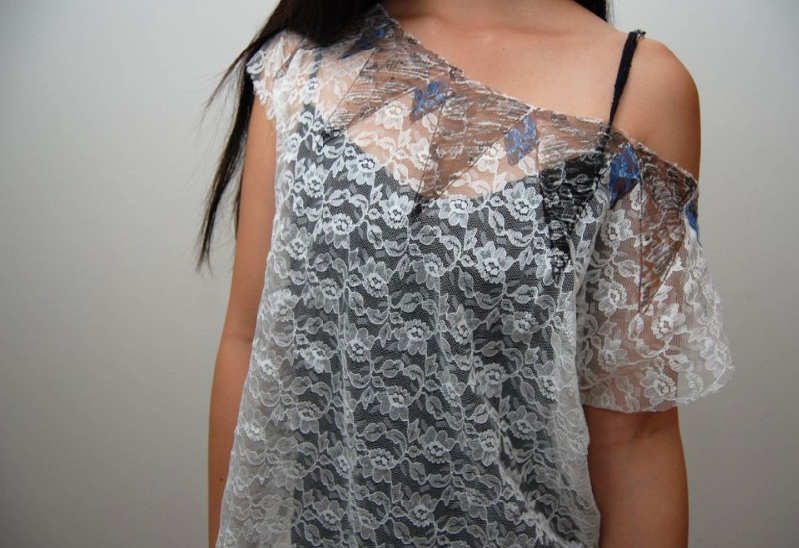
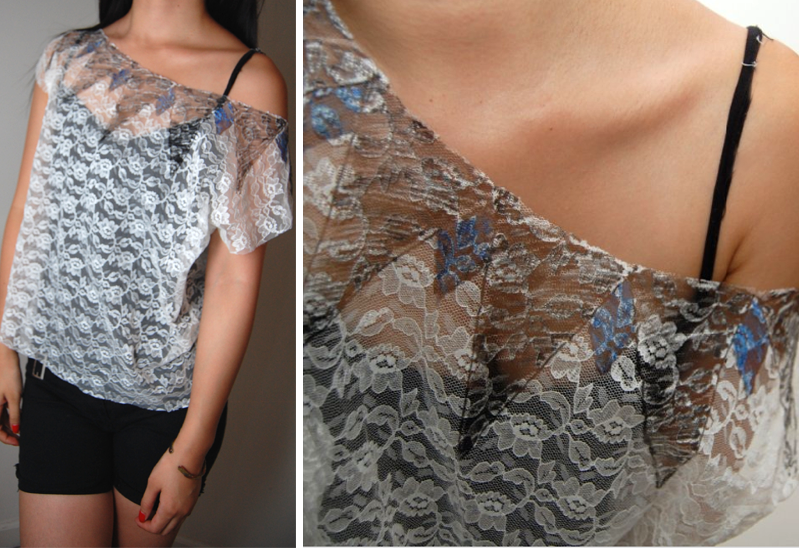
I decided to bring together two of my favorite things – lace and geometric patterns – to make this top. It’s a different take on the Ombre Lace Top (which is a dyed version of my friend Mackenzie’s Lace Top). The concept is subtle, but different.
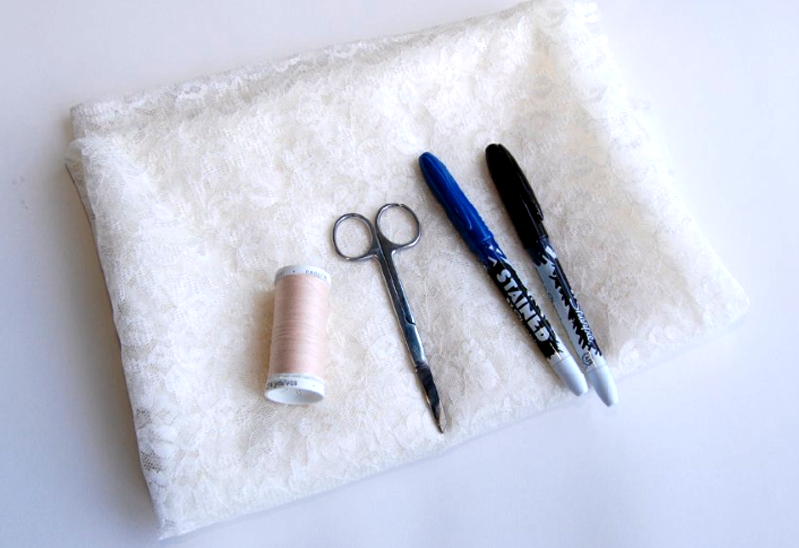
Supplies:
– Lace, about 1 yard
– Lace, about 1 yard
– Scissors
– Sewing machine or sewing needle
– Sewing machine or sewing needle
– Coordinating thread
– Large piece of cardboard
– Scrap cardboard
– Scrap cardboard
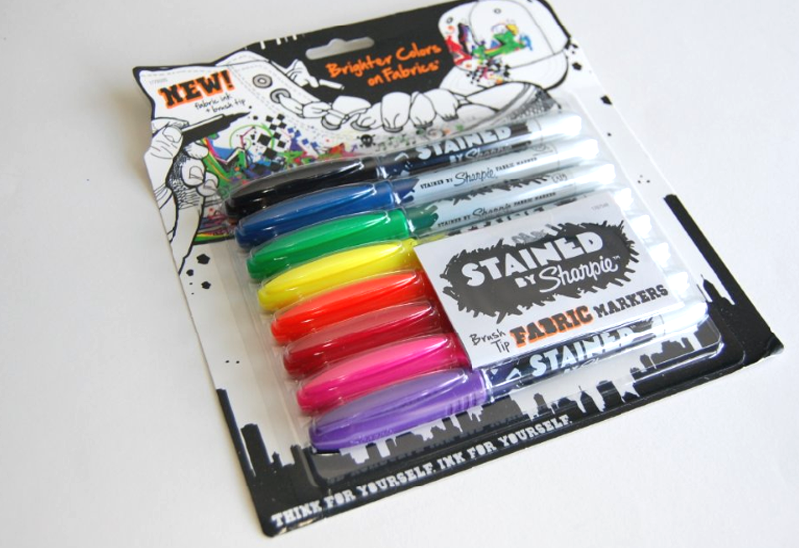
– Stained by Sharpie markers* I used black and blue.
*Available in sets of 4, 5, and 8 – on Amazon, as well as stores such as Office Depot. You can also buy the 4 or 8 pack at Blick Art Materials‘ website!
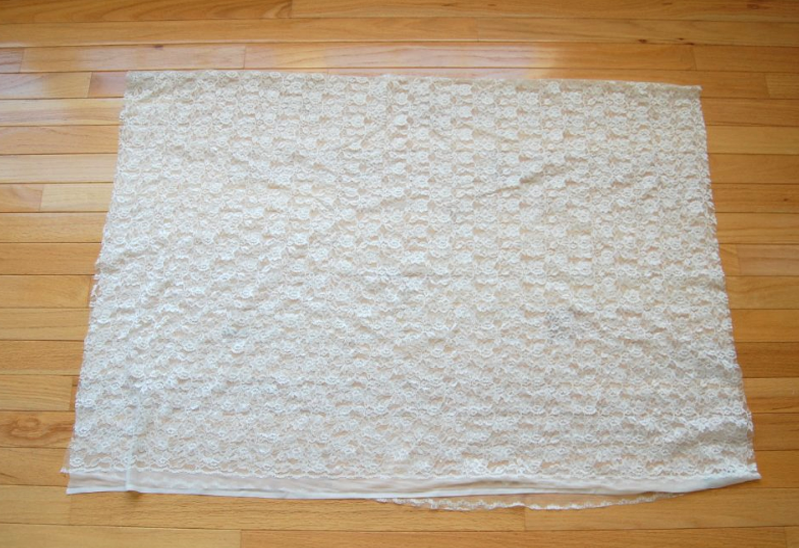
1) Fold lace in half, so that the edges meet on the bottom.
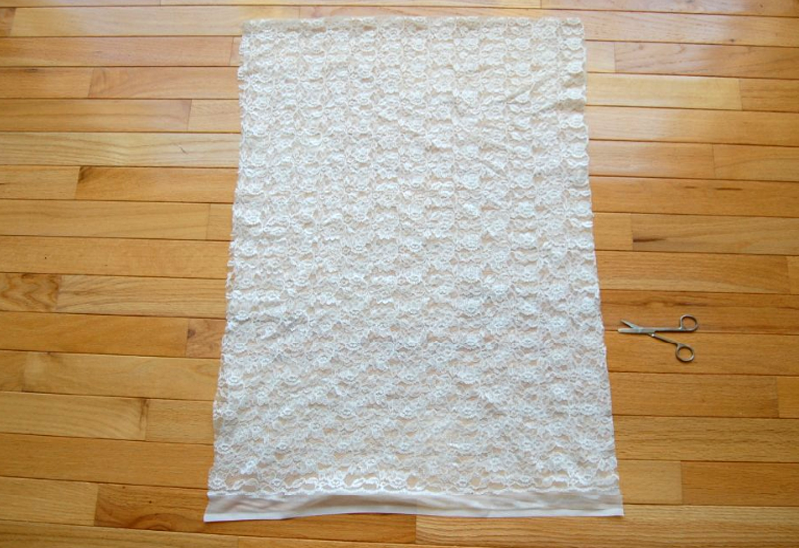
2) Trim according to your preference. I took off a decent amount, as I didn’t want to this particular shirt to be too loose and “flowy”. This is totally up to you, though.
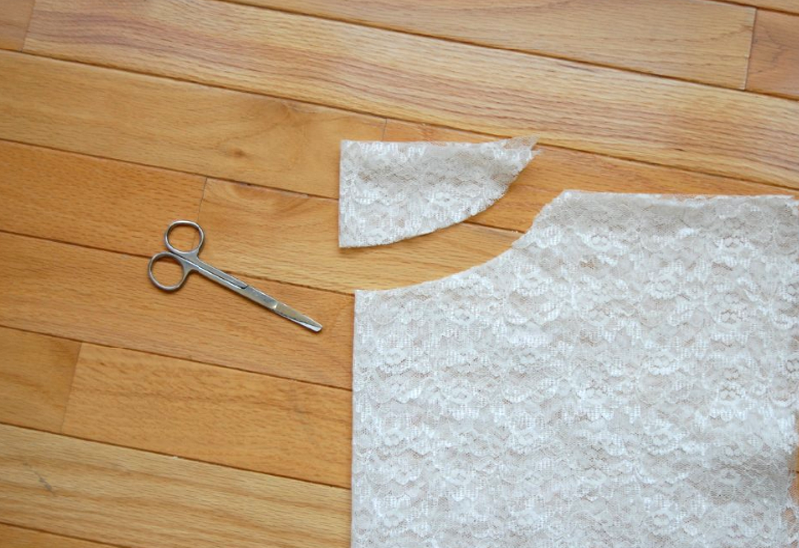
3) Fold the shirt in half again, from left to right. Cut out your neckline in the top left hand corner. As always, don’t cut out too much too soon; you can always try the fabric on and trim accordingly.
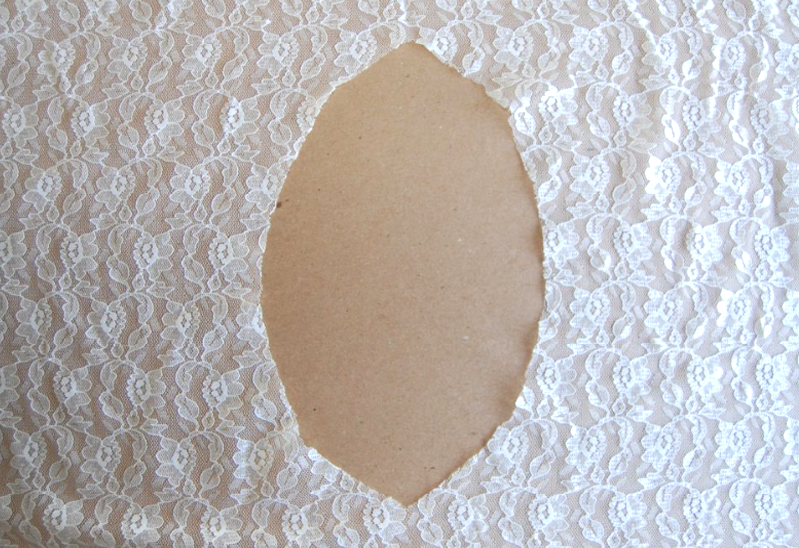
4) Unfold the fabric and lay on top of the cardboard.
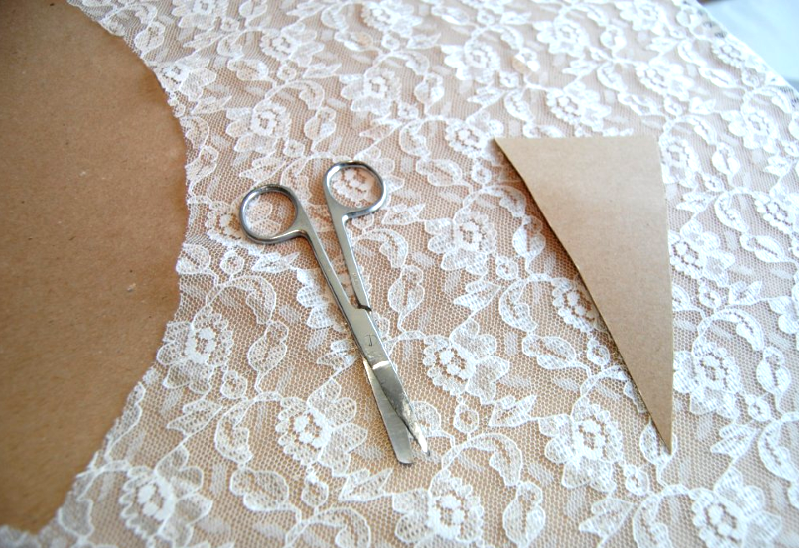
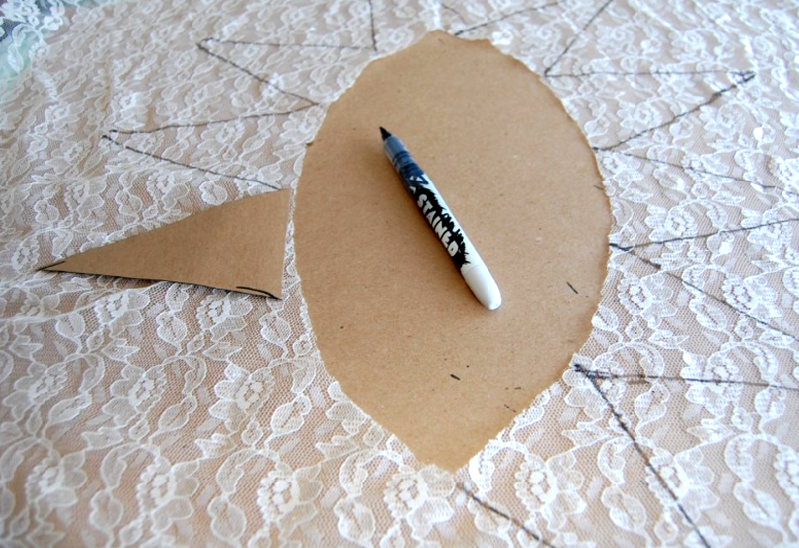
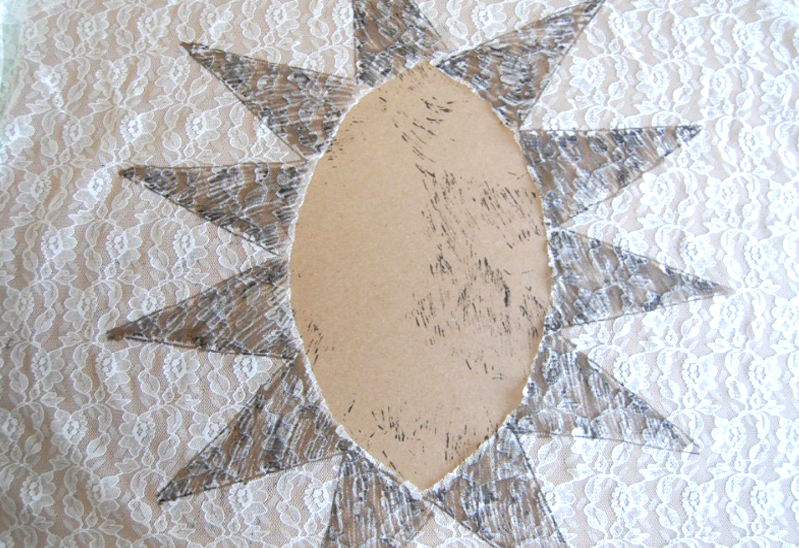
Cut out a triangle from a piece of cardboard to use as a pattern. This can be as big or small as you’d like.

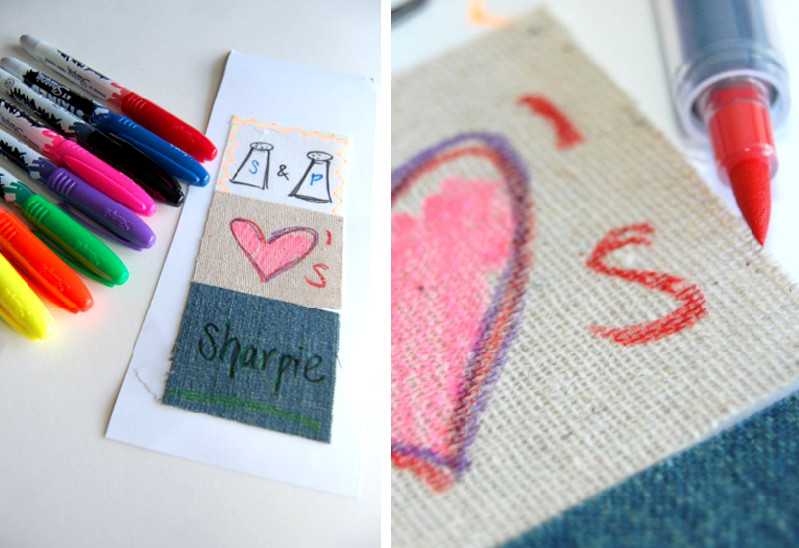
5) Use the fabric marker(s) of your choice to draw triangles along the neckline.
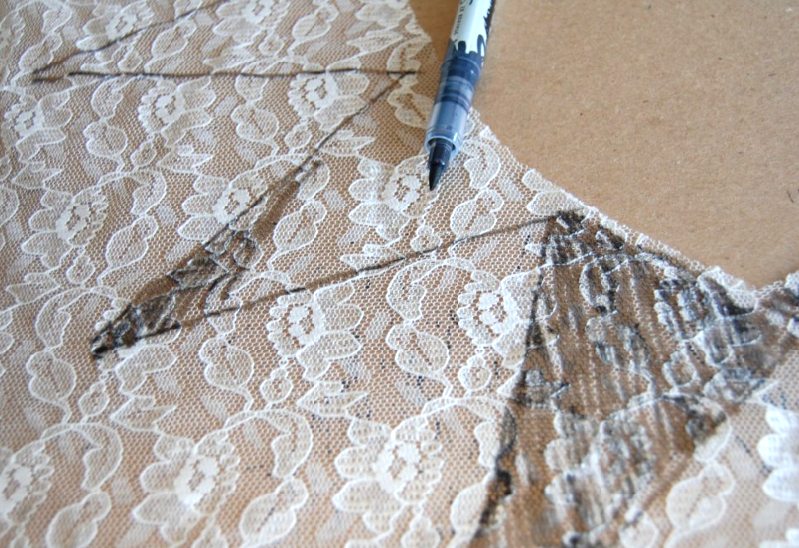
6) Fill the triangles in! Make sure your brush strokes are all in the same direction.
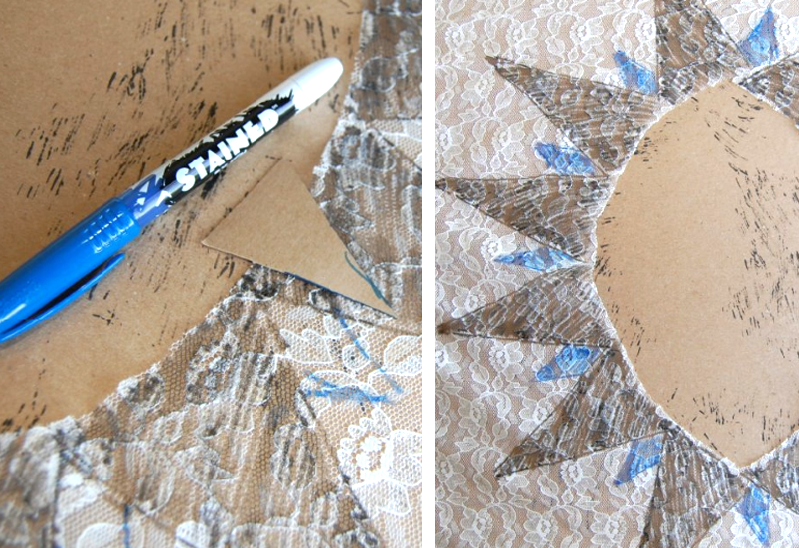
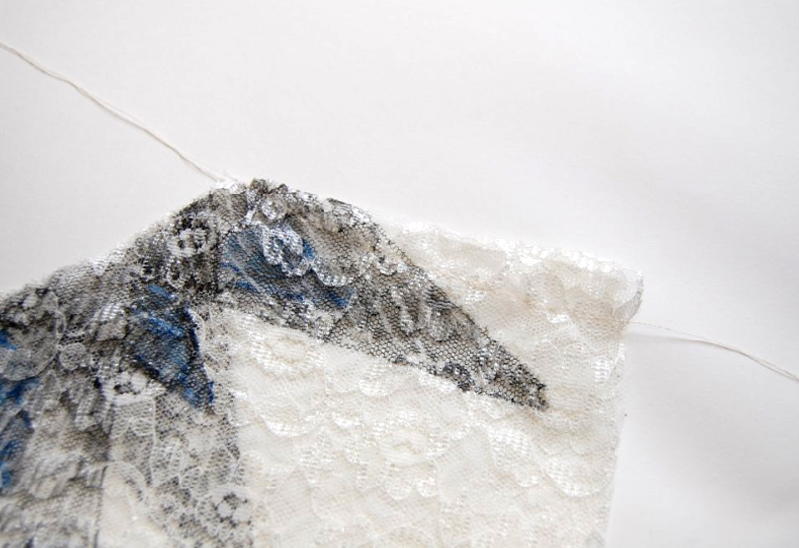
7) If you’d like, add in some more triangles/shapes. I drew smaller triangles in blue, and later went over them in black to add some dimension.

8) Trim the bottom to your liking. You can keep it long/tunic length, or make it into a crop top. (Or in between).
Sew down each of the sides; I drew arrows where I decided to sew mine.
9) The sleeves might stick out a bit, depending on how much fabric you used. If you want, you can turn the top inside out, and stitch a diagonal line as I did above. This will “soften” the arch of the sleeve.

The finished top. I love how the ink brings out the lace’s pattern.
Of course, you can go a million different routes with these fabric markers by Sharpie. You can create a pattern along the bottom edge of the shirt, or maybe along the edge of the sleeves. You can add more triangles in different colors – or just not use any triangles at all, and draw other shapes instead. You can draw stripes all along the shirt, or maybe on just the one half of it…I can go on and on with this!
Keep an eye out for more projects using the Stained by Sharpie fabric markers. xo