
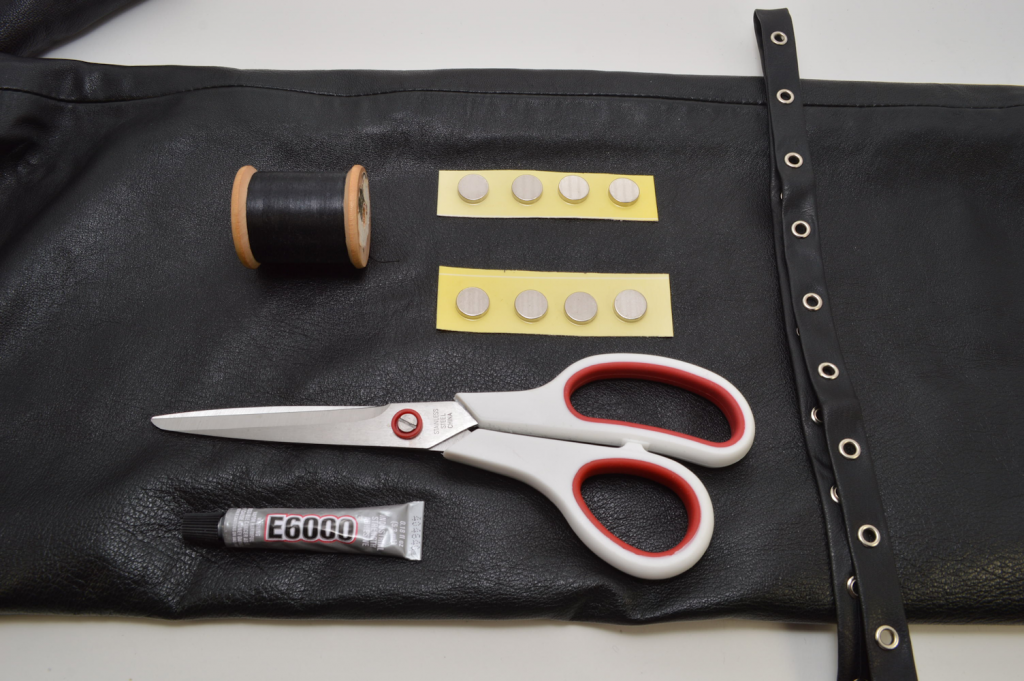
Supplies:
– Leather or Faux Leather *
– Sewing Thread + Sewing Machine
– Silver Neodymium Magnets **
– Leather Grommet/Studded Trim (anything with metal; for the magnets to latch on to!)
– Fabric Scissors
– Strong Craft Glue (such as E6000)
Optional Pattern Guide:
– Paper
– Pen
– Gel Pen (contrasting color)
* The measurements will be up to you, depending on the desired clutch size. If you end up using actual leather yardage as opposed to the bottom of leather pant leg, try cutting a long rectangle (measuring twice the desired width). This way, you can just fold the rectangle in half (again, width wise) and then just sew one side and the bottom edge.
** I ended up using 4. These are super strong magnets that have a little more hold than normal black magnets. I purchased mine at Michaels!

1) Cut your leather accordingly. I used thrifted leather pants; I cut a 9 inch (22.86 centimeters) section – measured top to bottom – through both layers. For a similar sized clutch, you can also cut out a 16 inch long x 9 inch high (40.64 x 22.86 centimeters) rectangle from a larger segment.

2) Sew right along the bottom, about .5 inch (1.27 centimeters) from the edge.
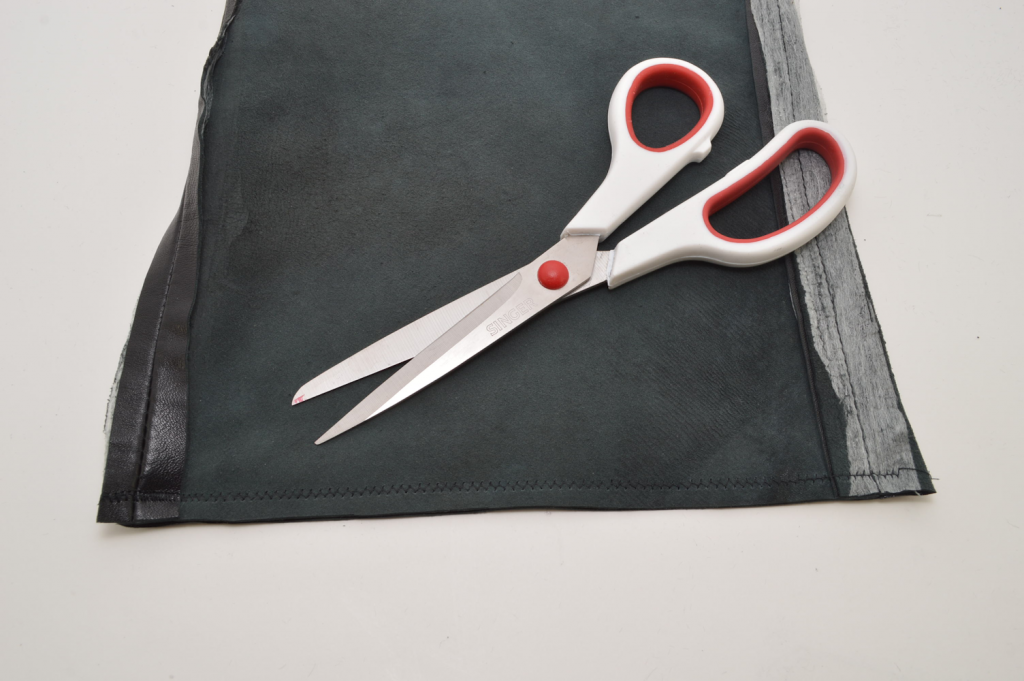
3) Tie off the threads and trim the excess.
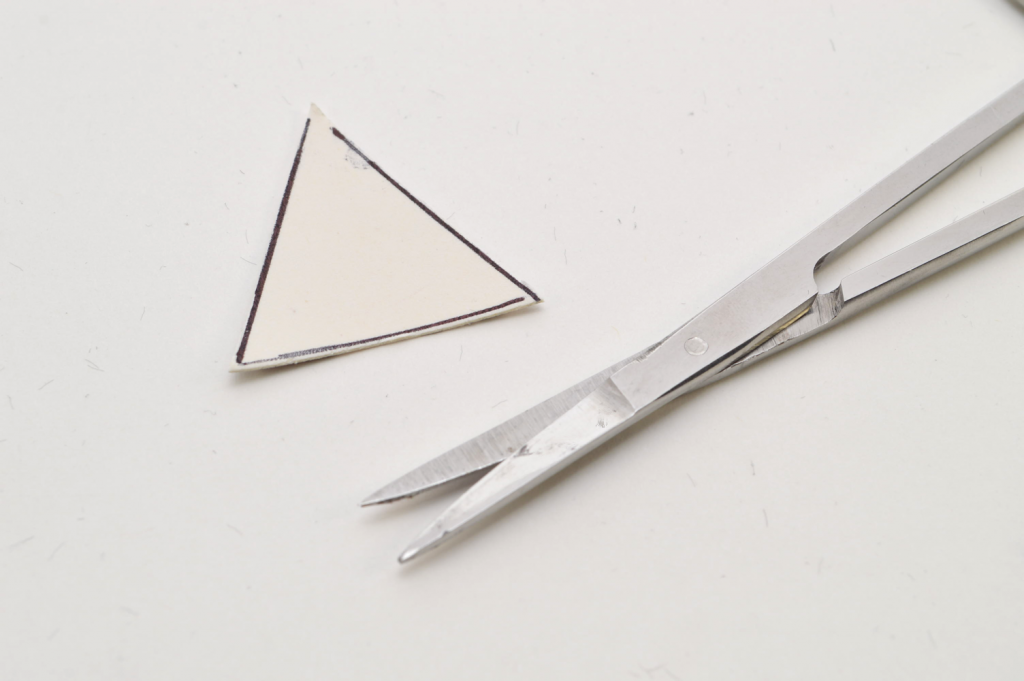
4) Optional: You can freehand the jagged edge, or you can create a paper pattern to guide you. Using a ruler and pen, draw a triangle (mine was 1 inch/2.54 centimeters on each side). Cut the triangle out.
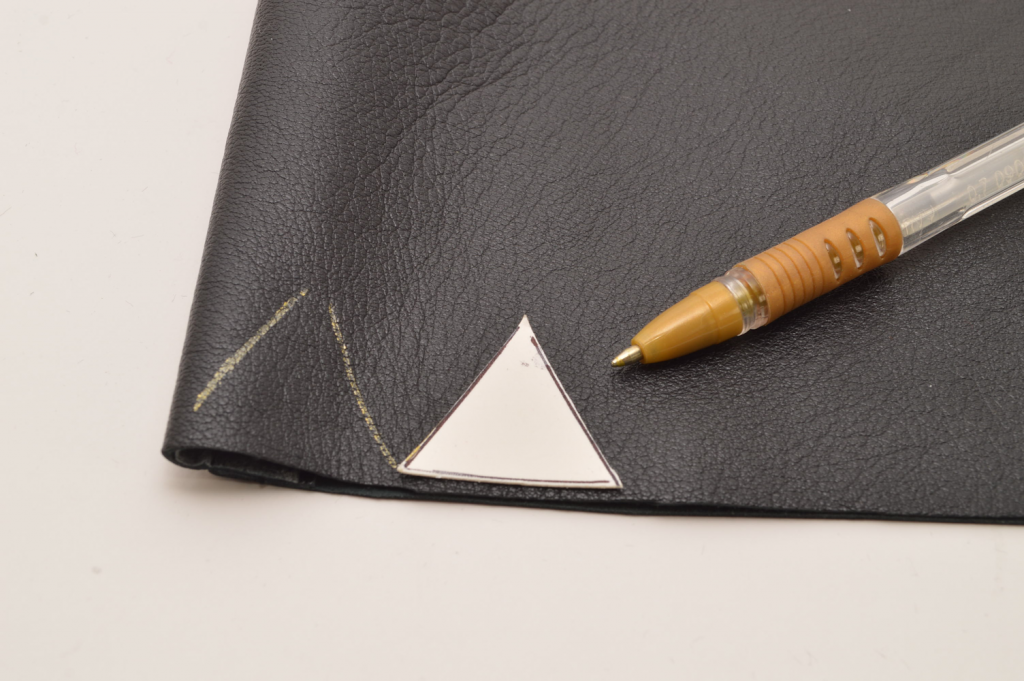
5) Along the edge, trace onto the leather using a gel pen in a contrasting color.
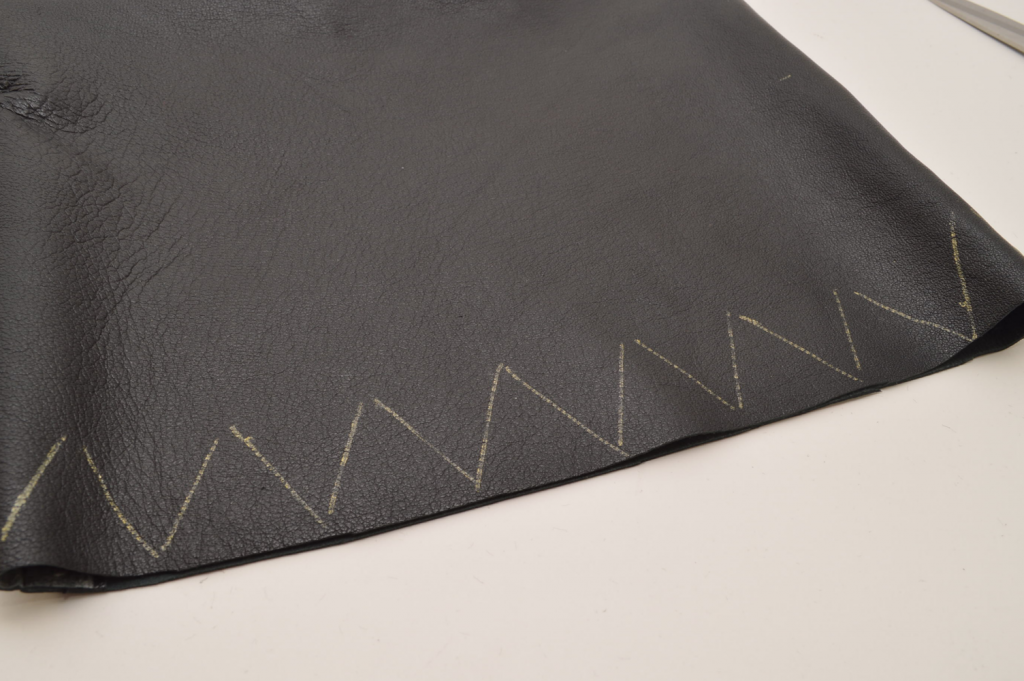
6) Continue along the edge until you have reached the opposite end.
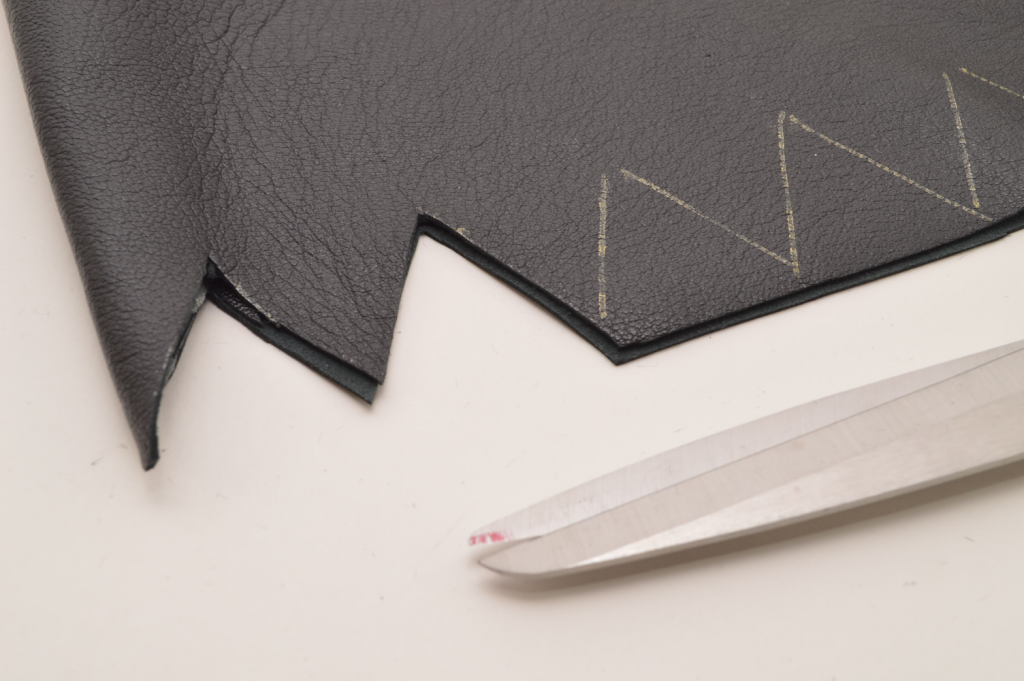
7) Following your guide, cut out each triangle with the fabric scissor.

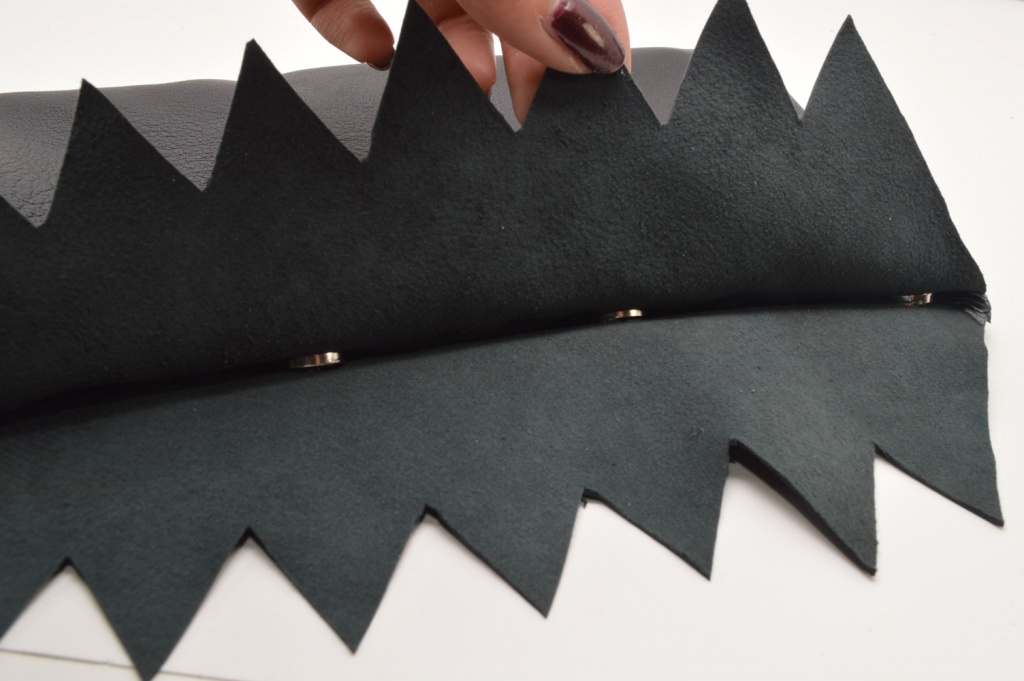
8) Continue.
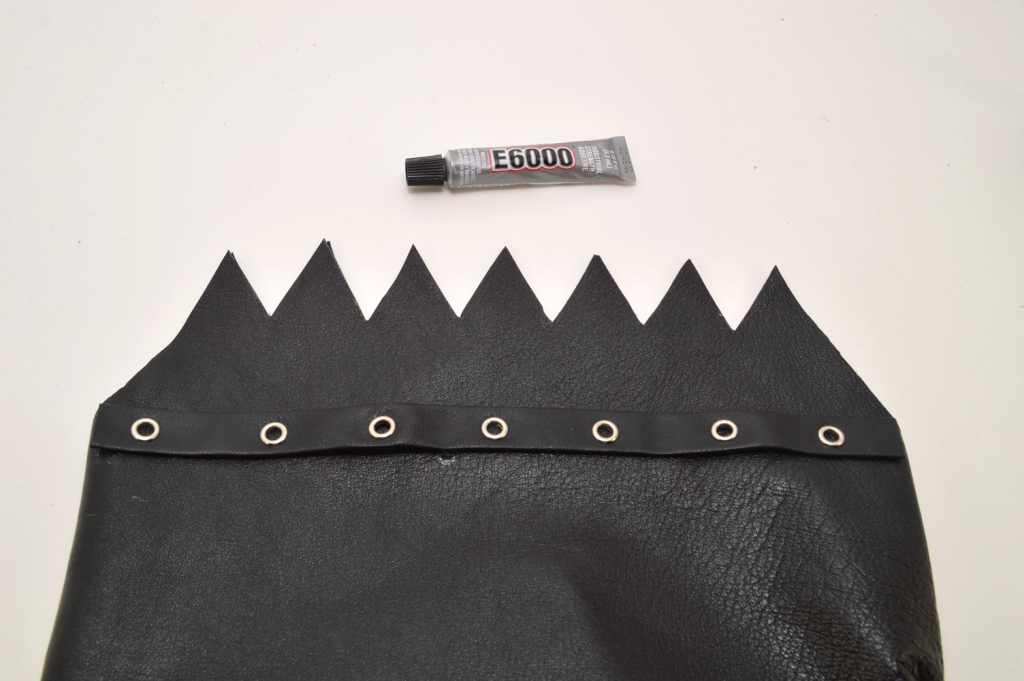
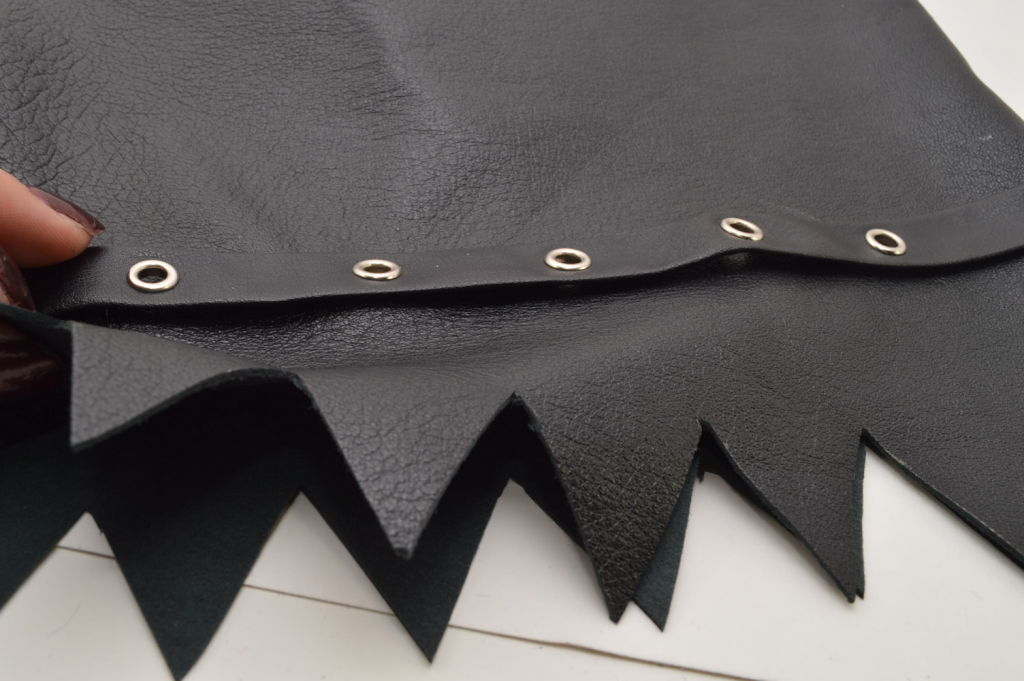
9) Right below the jagged edge border, glue the grommet trim. Let dry.
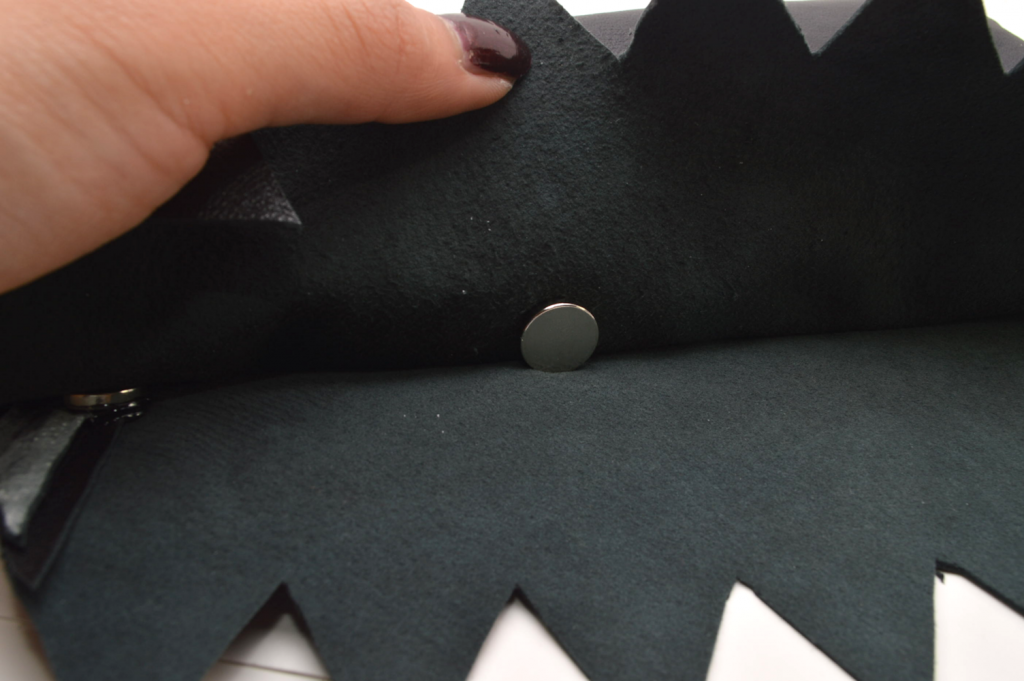
10) Determine the best spots to place the magnets so that they interact with the metal grommets in the trim. I ended up using 4 magnets in 2 inch (5.08 centimeter) intervals.

11) Glue the magnets the interior of the clutch, on the opposing layer. In this photo, the grommet trim is on the outside of the top layer, so the magnets are glued to the inside of the bottom layer.
12) Let dry completely.

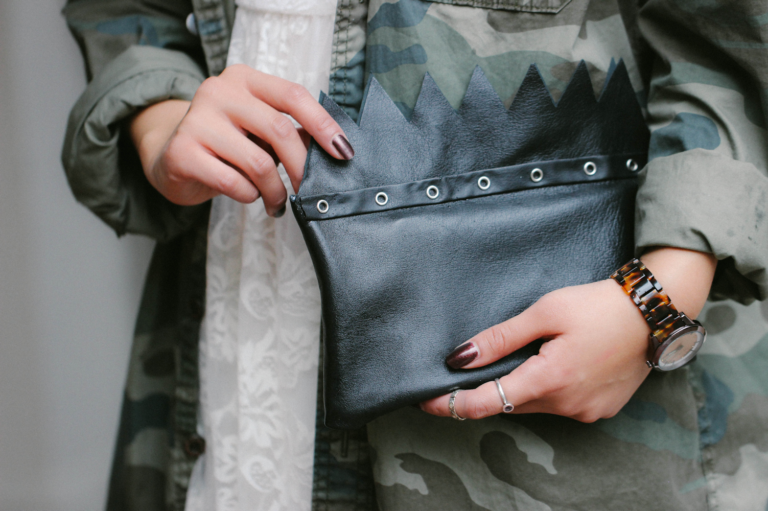
Not a bad way to re-purpose an old pair of thrifted pants, am I right?

I love the bold yet simple look this project gives off. Enjoy!
Styled Images Haruka Sakaguchi (The Denizen Co.)