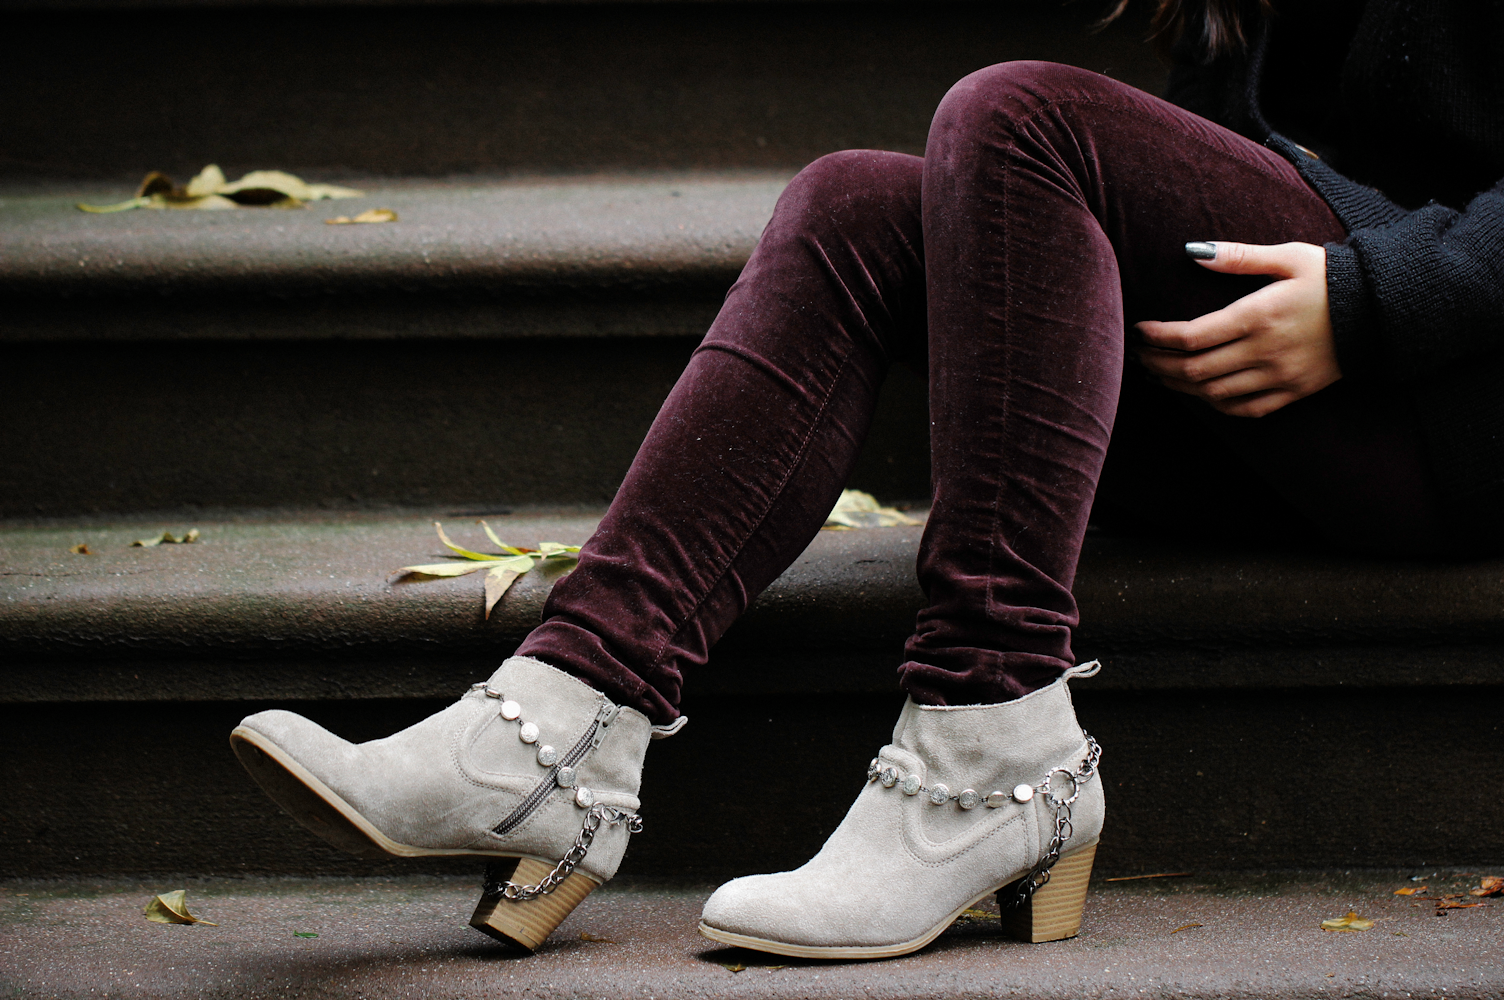
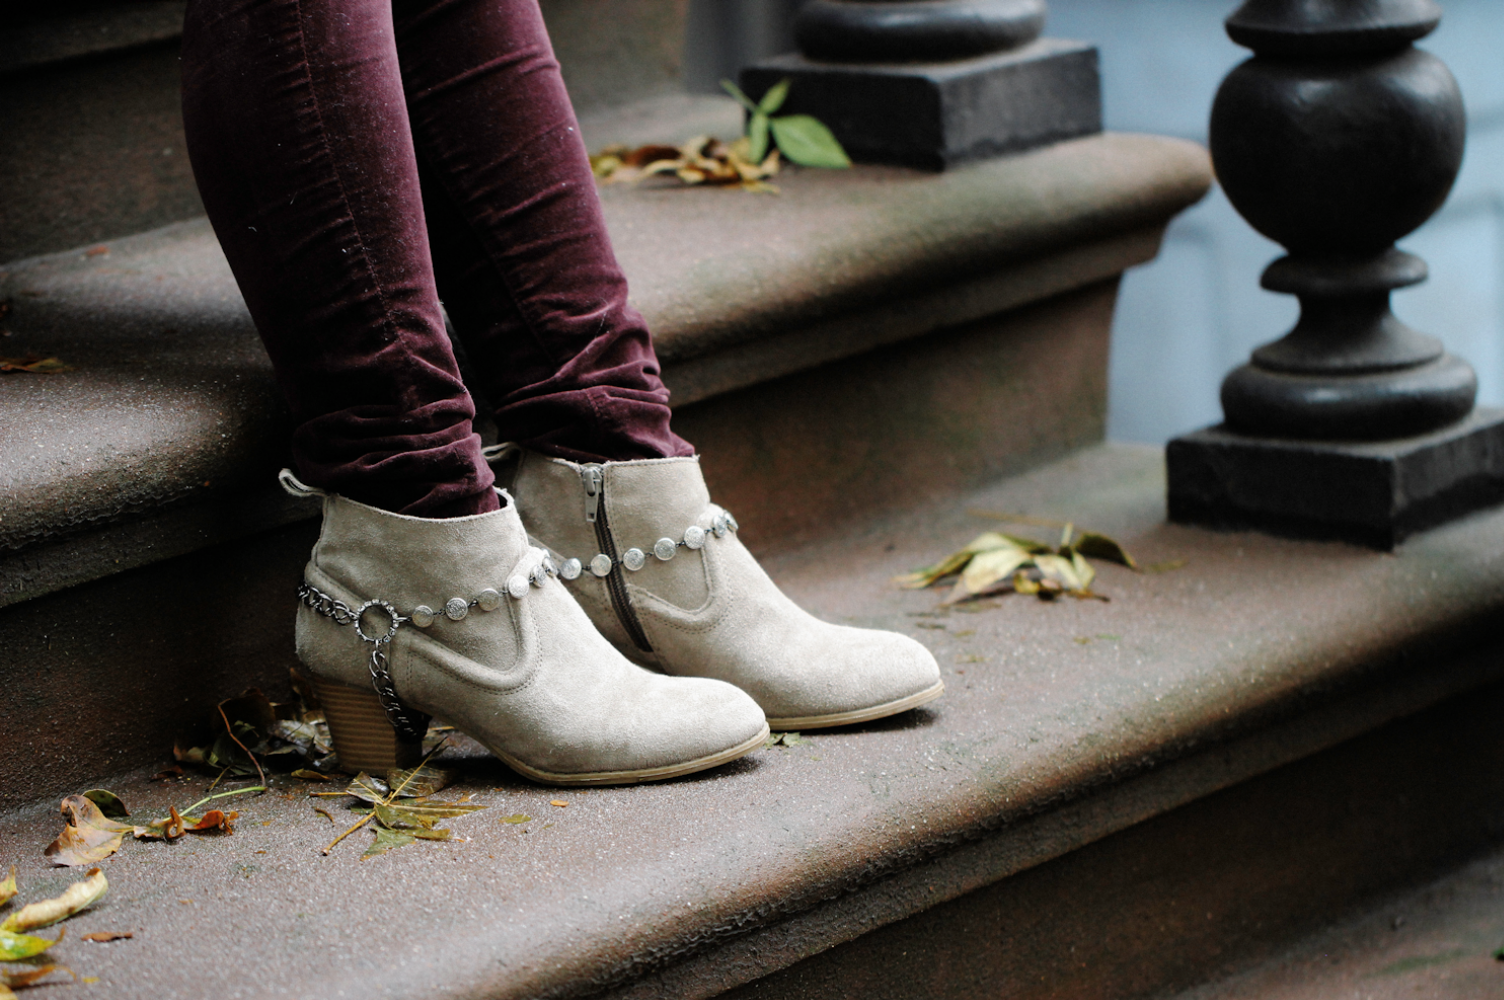
Here’s a true story: I like embellishing things that typically aren’t embellished. Notebooks, jackets, coffee mugs… you name it. Making “jewelry” for autumn boots is one of them. These chain boot harnesses require basic jewelry-making skills, and can be easily removed or replaced. See how I made them, below!
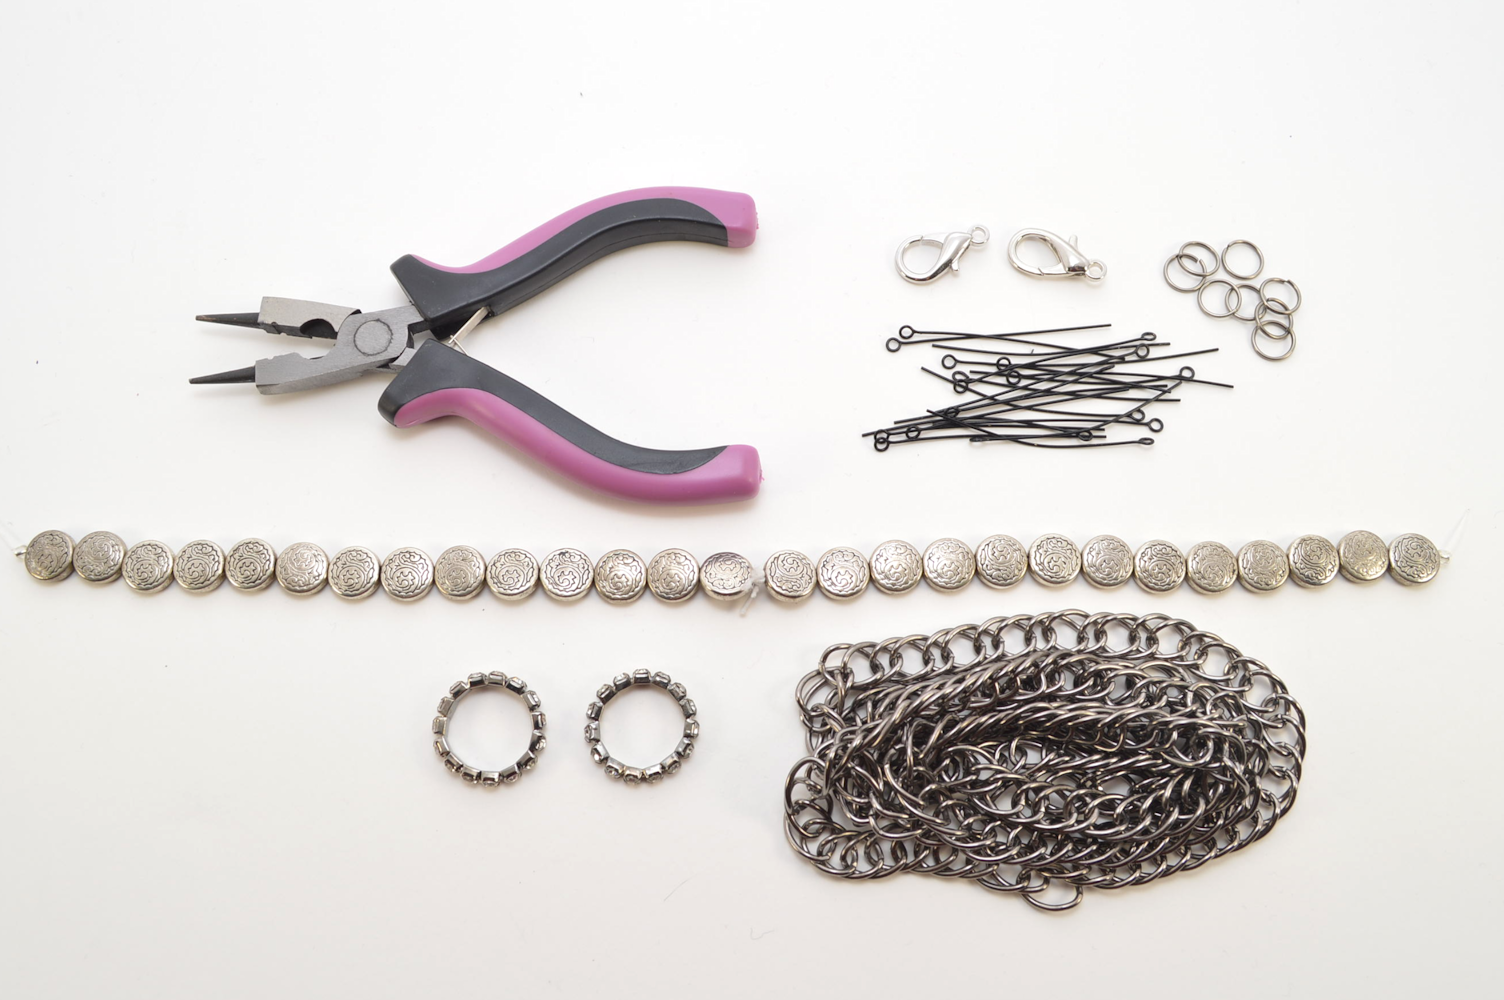
Supplies:
– 3-in-1 Jewelry Pliers
– Large Jewelry Clasps (2)
– 12mm Jump Rings (At least 10)
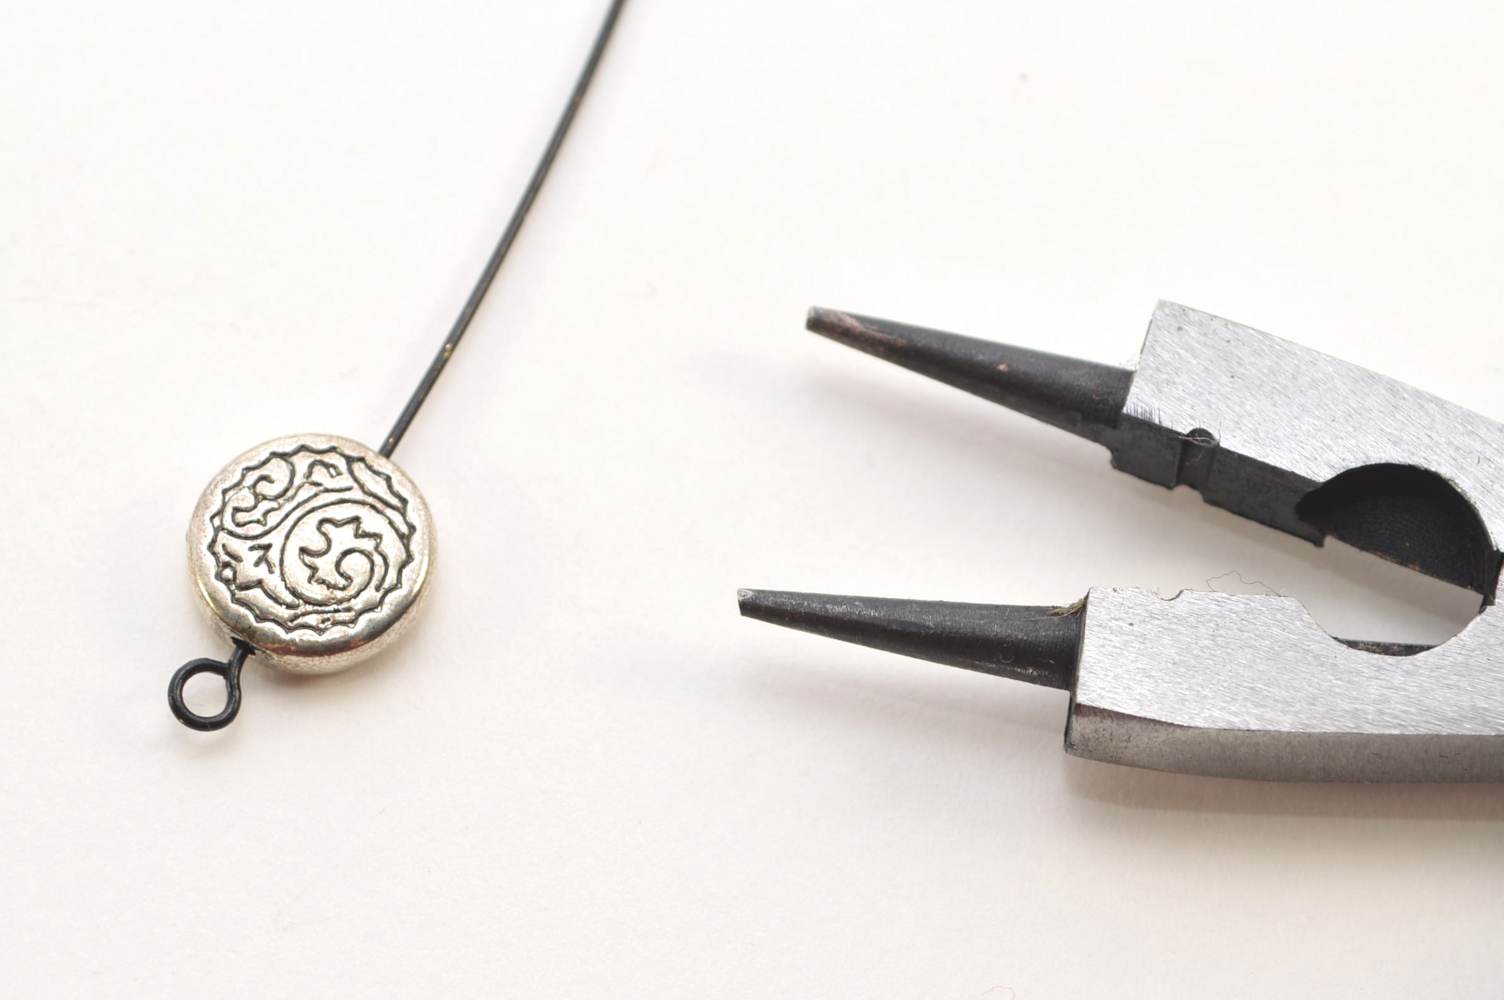
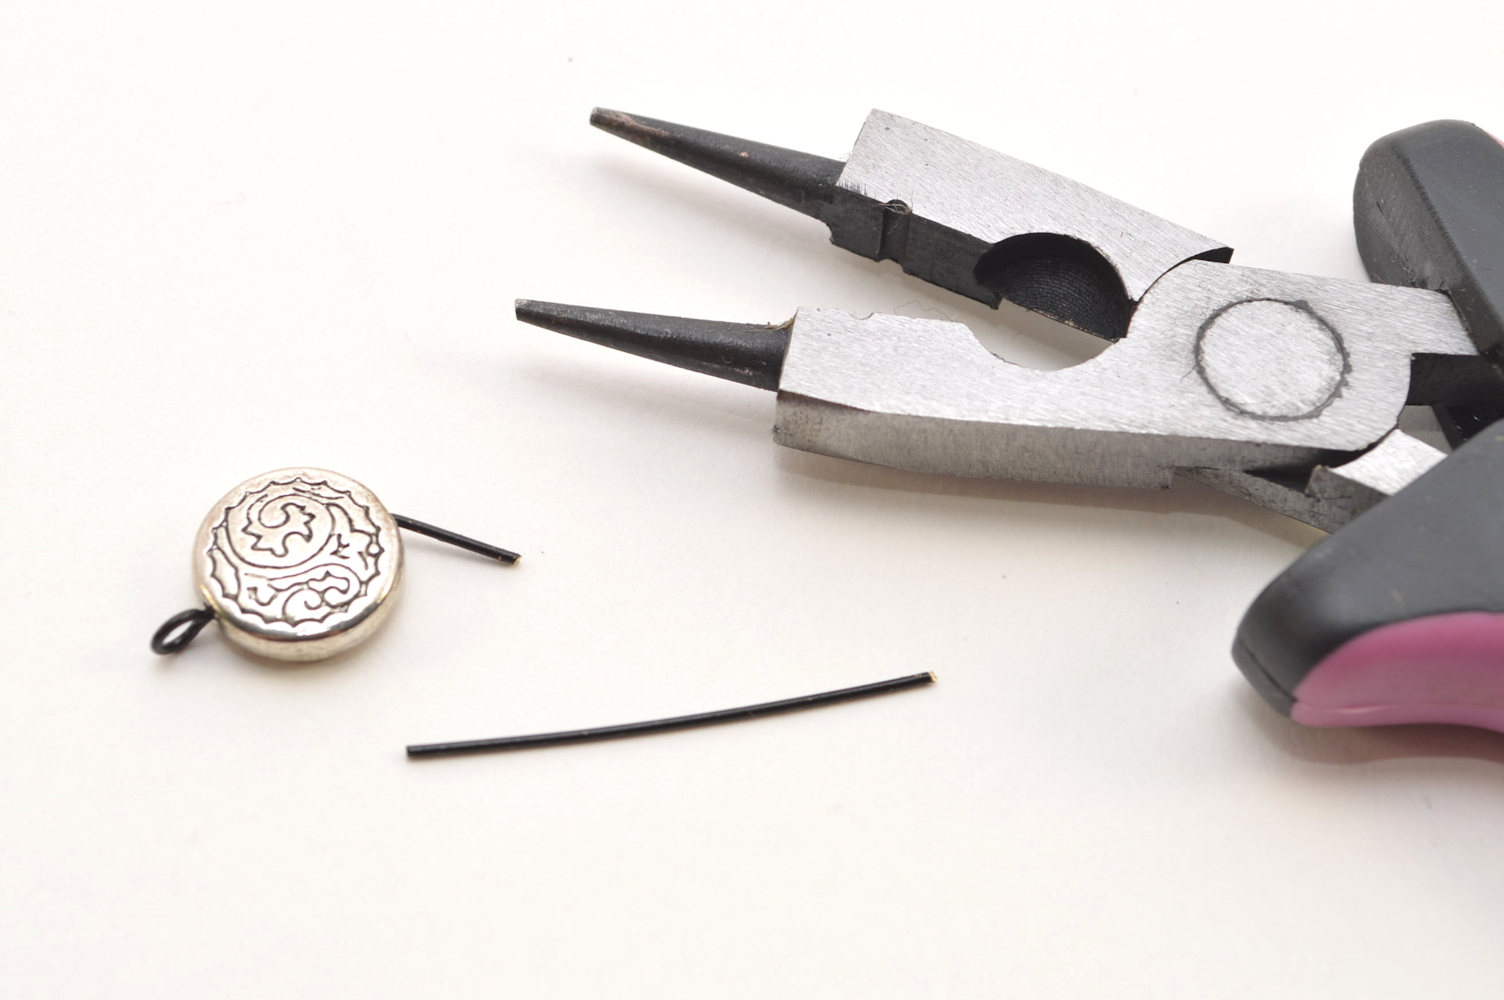
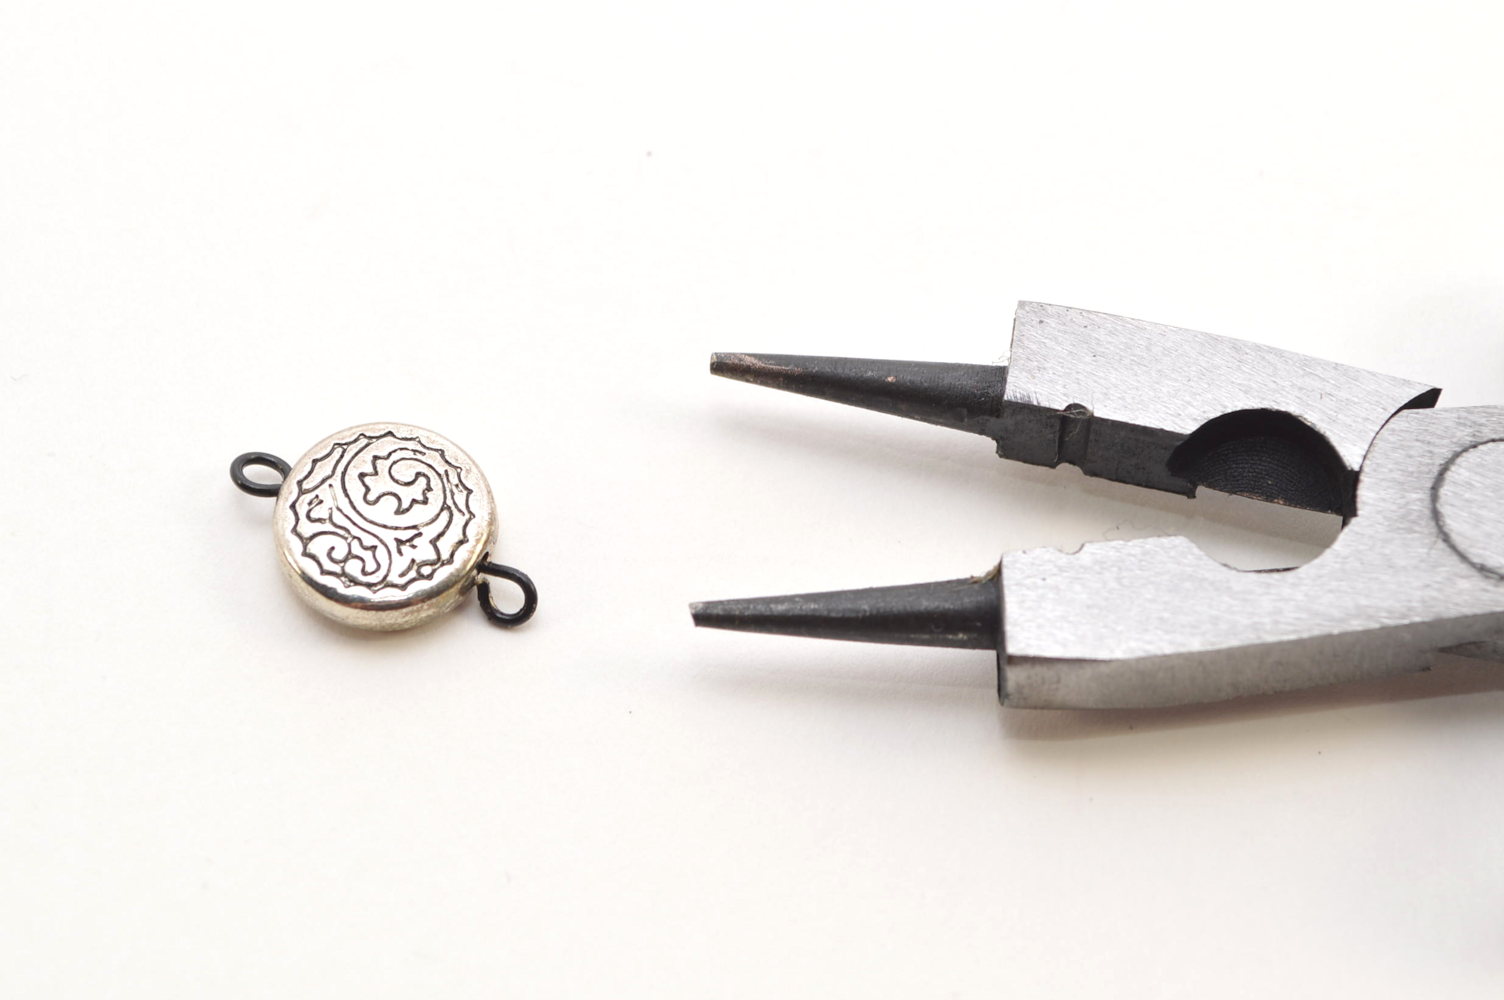
– Eye Pins (Same quantity as metal beads, long enough for your beads)
– Metal Beads*
– Metal Circle Connectors (Found in jewelry supply section. I used 2 from this pack!)
– Thick Chain (20-35 inches depending on the size and style of your boots)
* I used a total of 26 beads (each measuring .5 inch/1.27 centimeters wide). The finished strand of beads, connected with eye pins, was 8 inches/20.32 centimeters. This may be longer or shorter depending on preference, type of beads and style of boots.
 4) Repeat with more beads…
 5) … until you reach the desired length of the beaded strand. I used 13 beads for 8 inches worth, eye pins included.
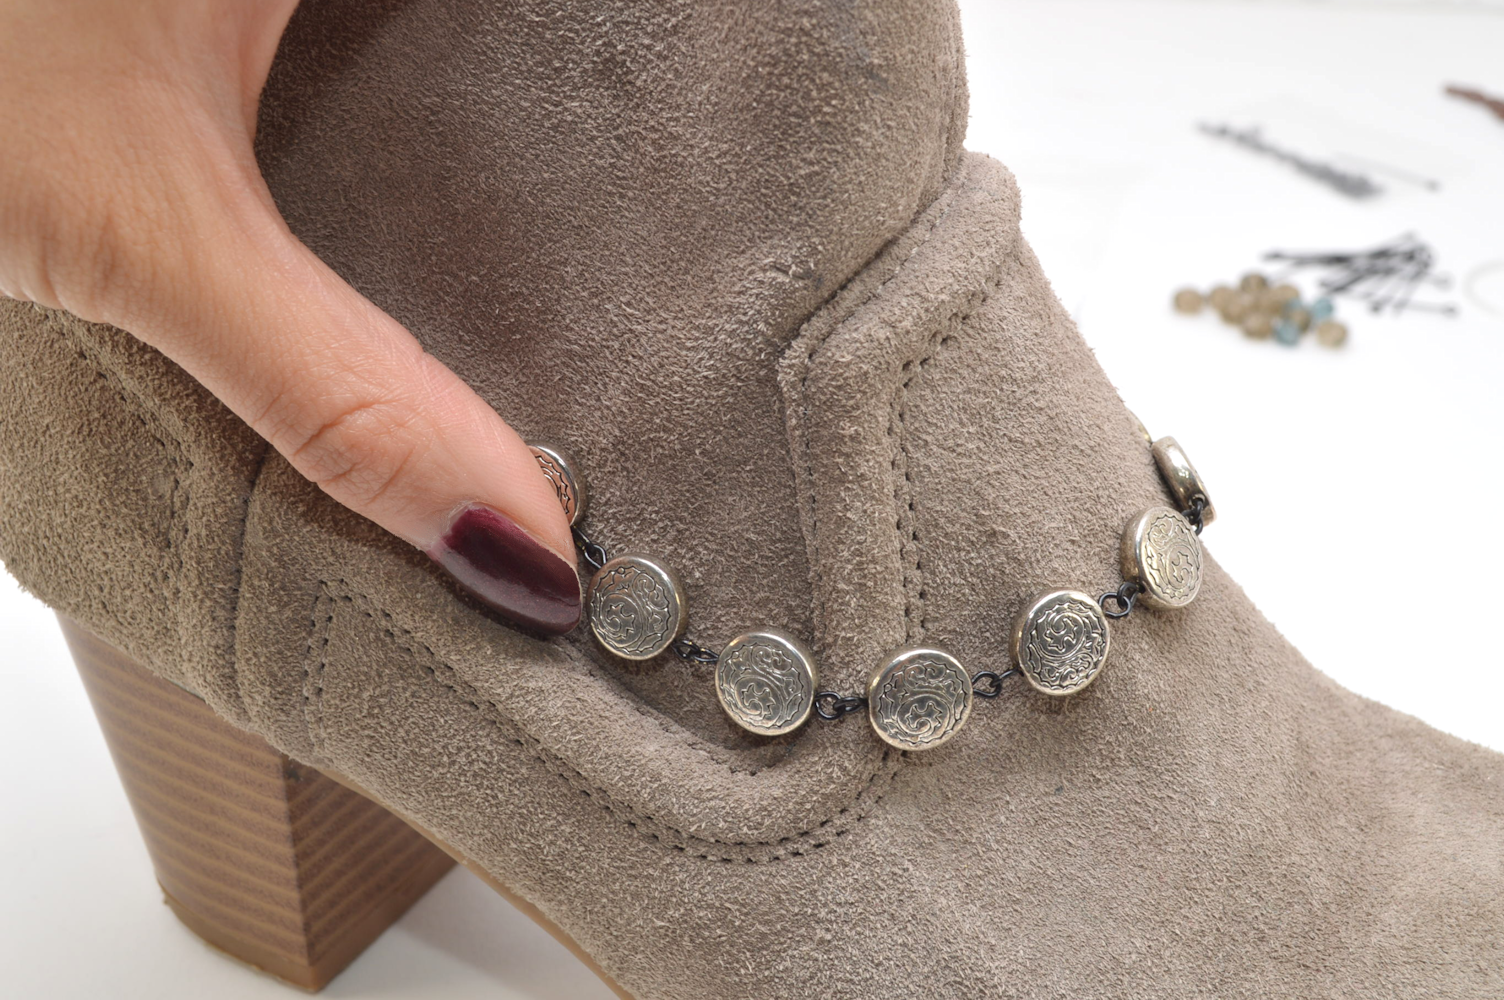
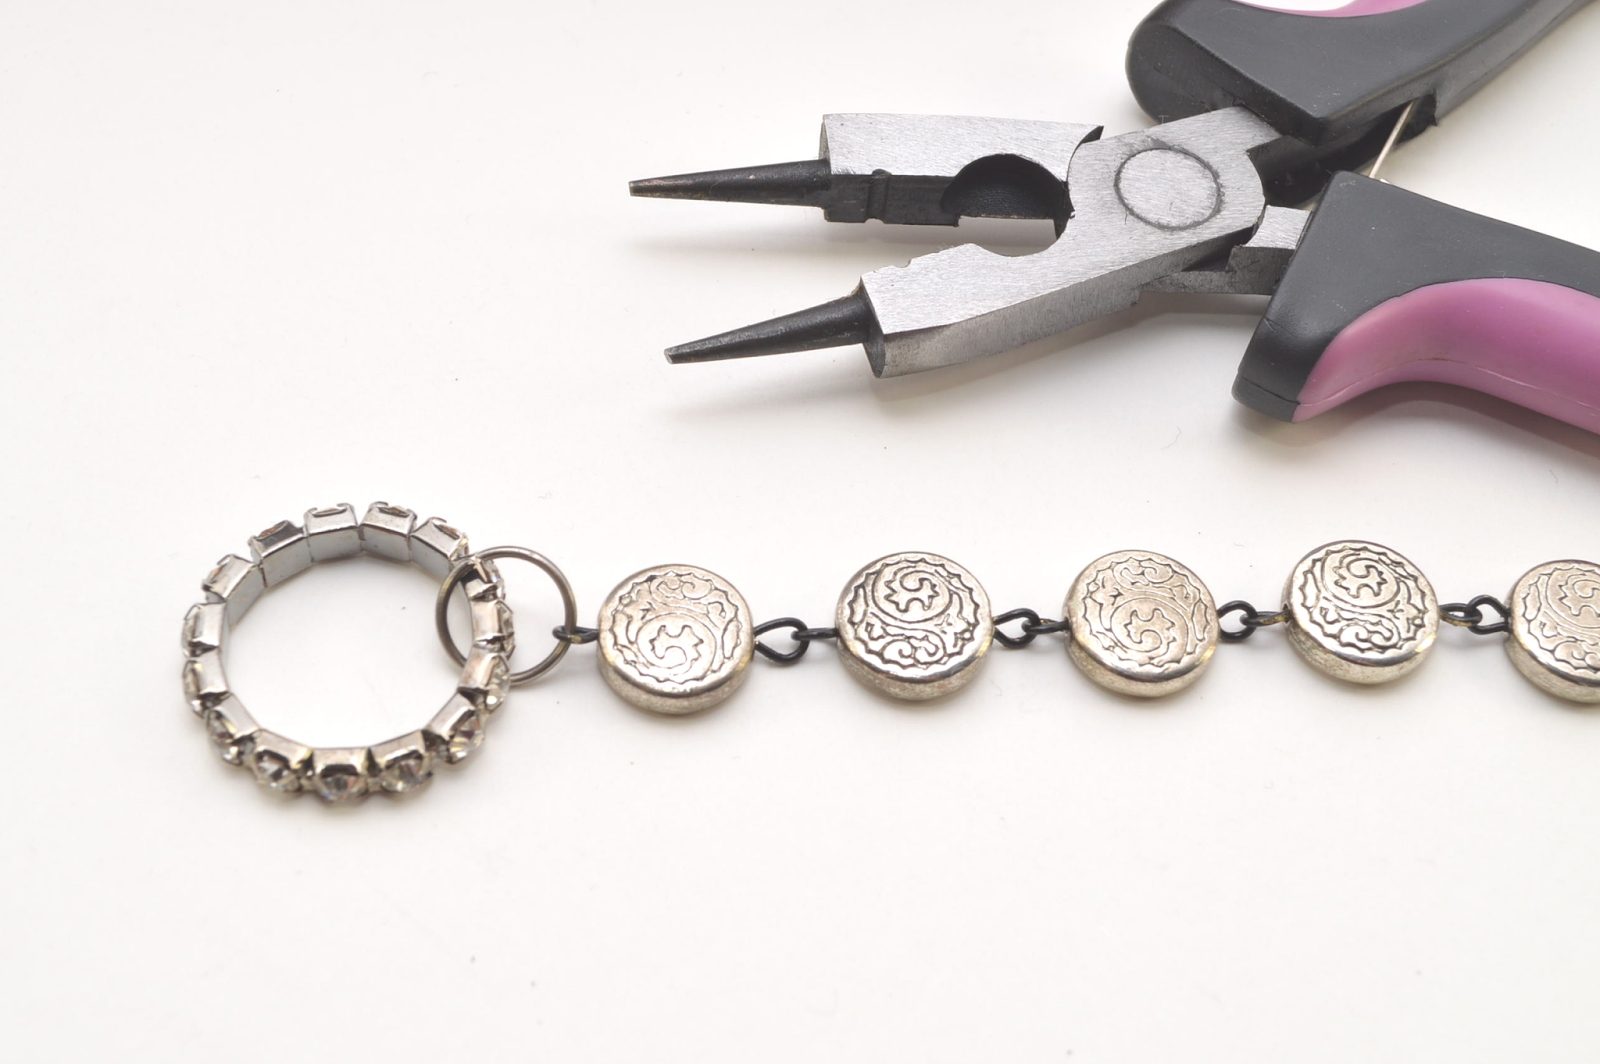
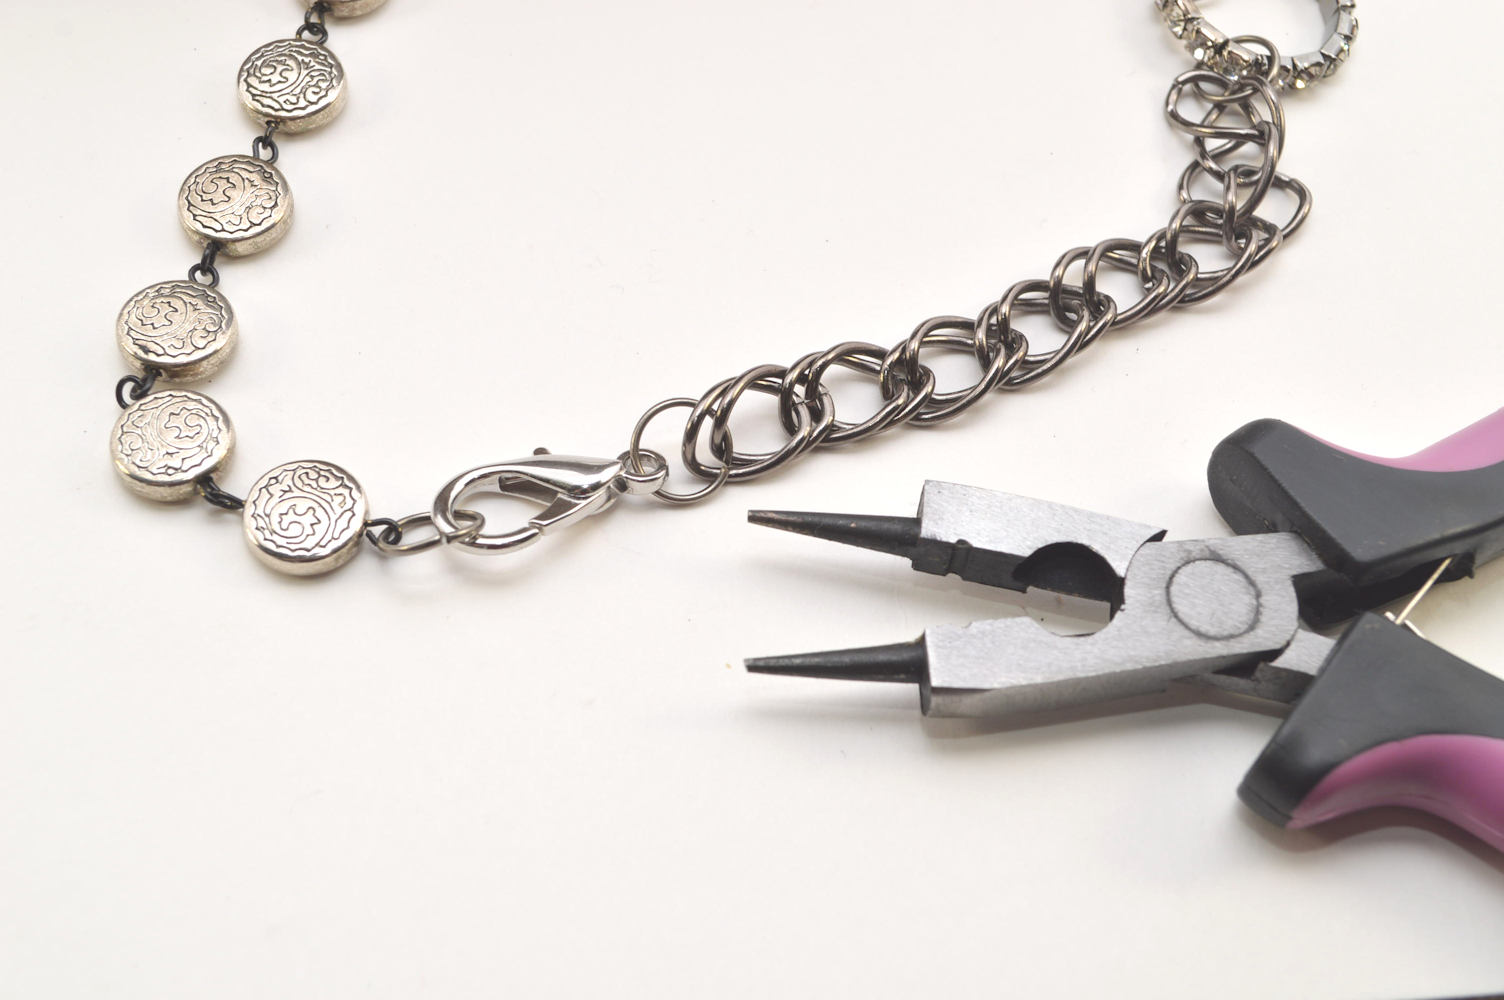
7) Using the pliers and a large jump ring, connect the beaded strand to the metal circle connector.
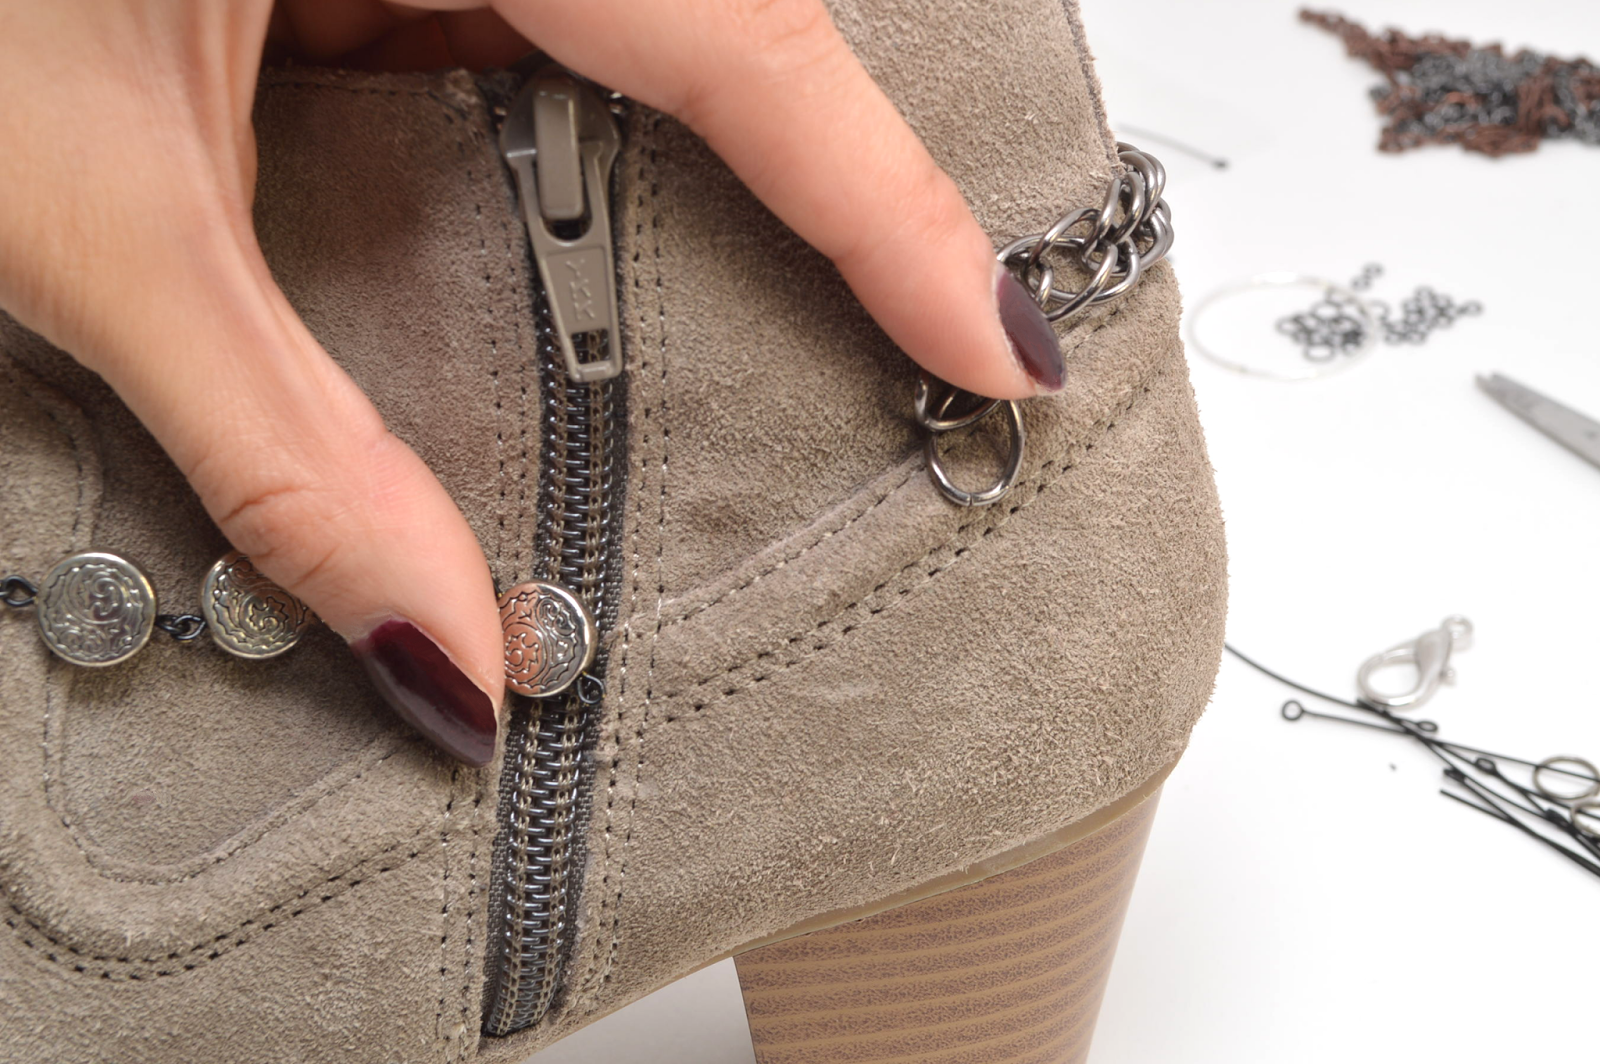
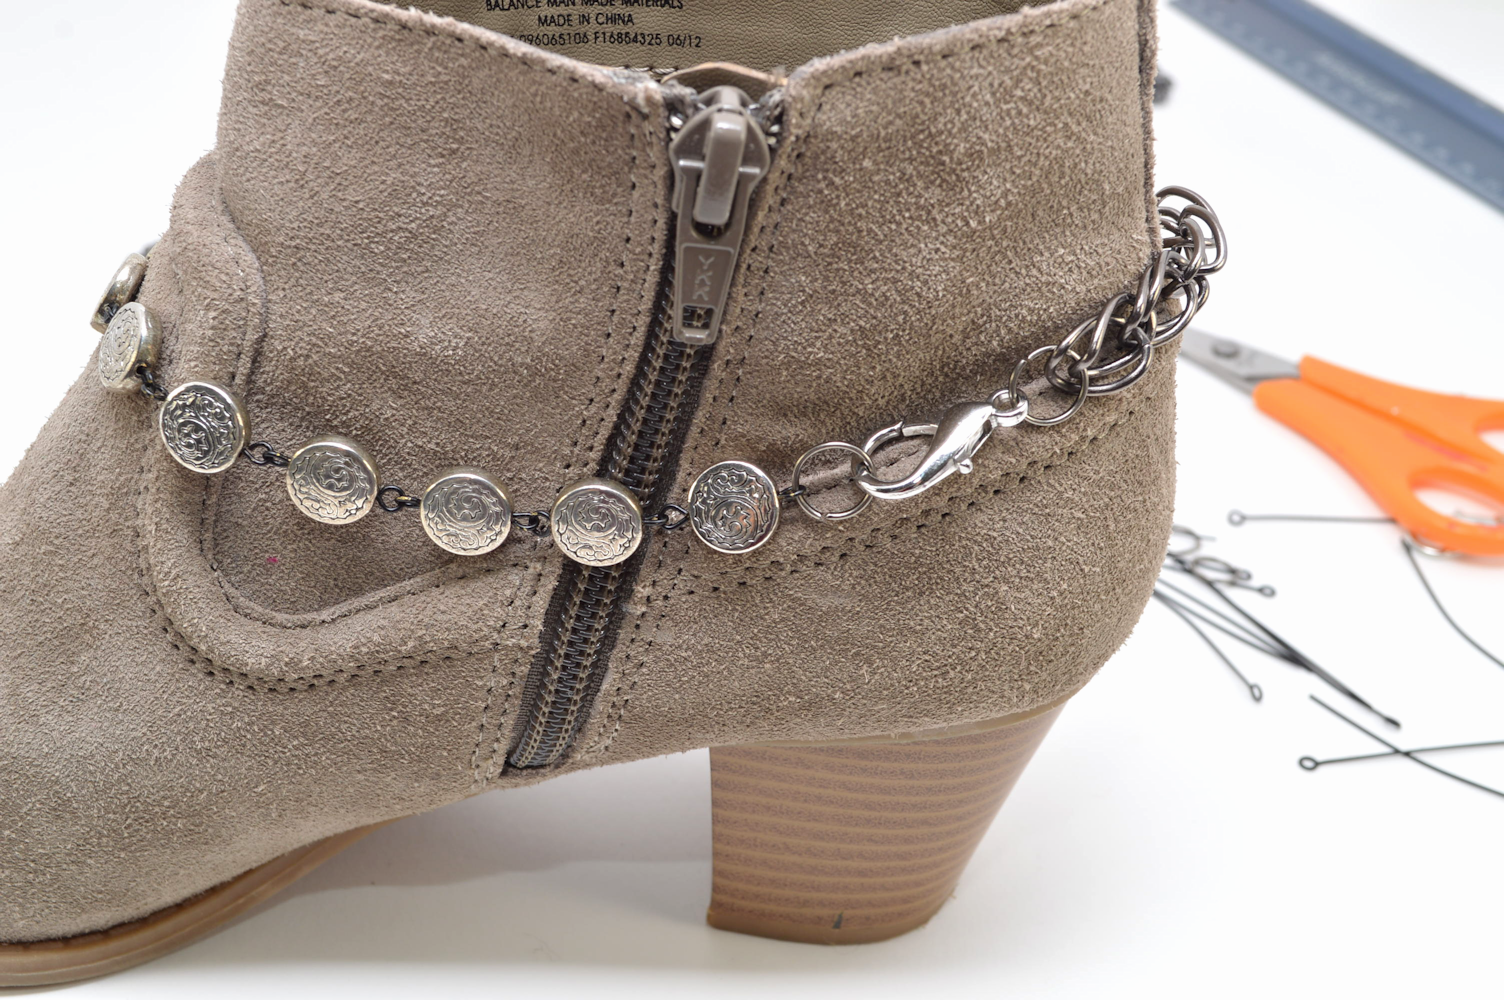
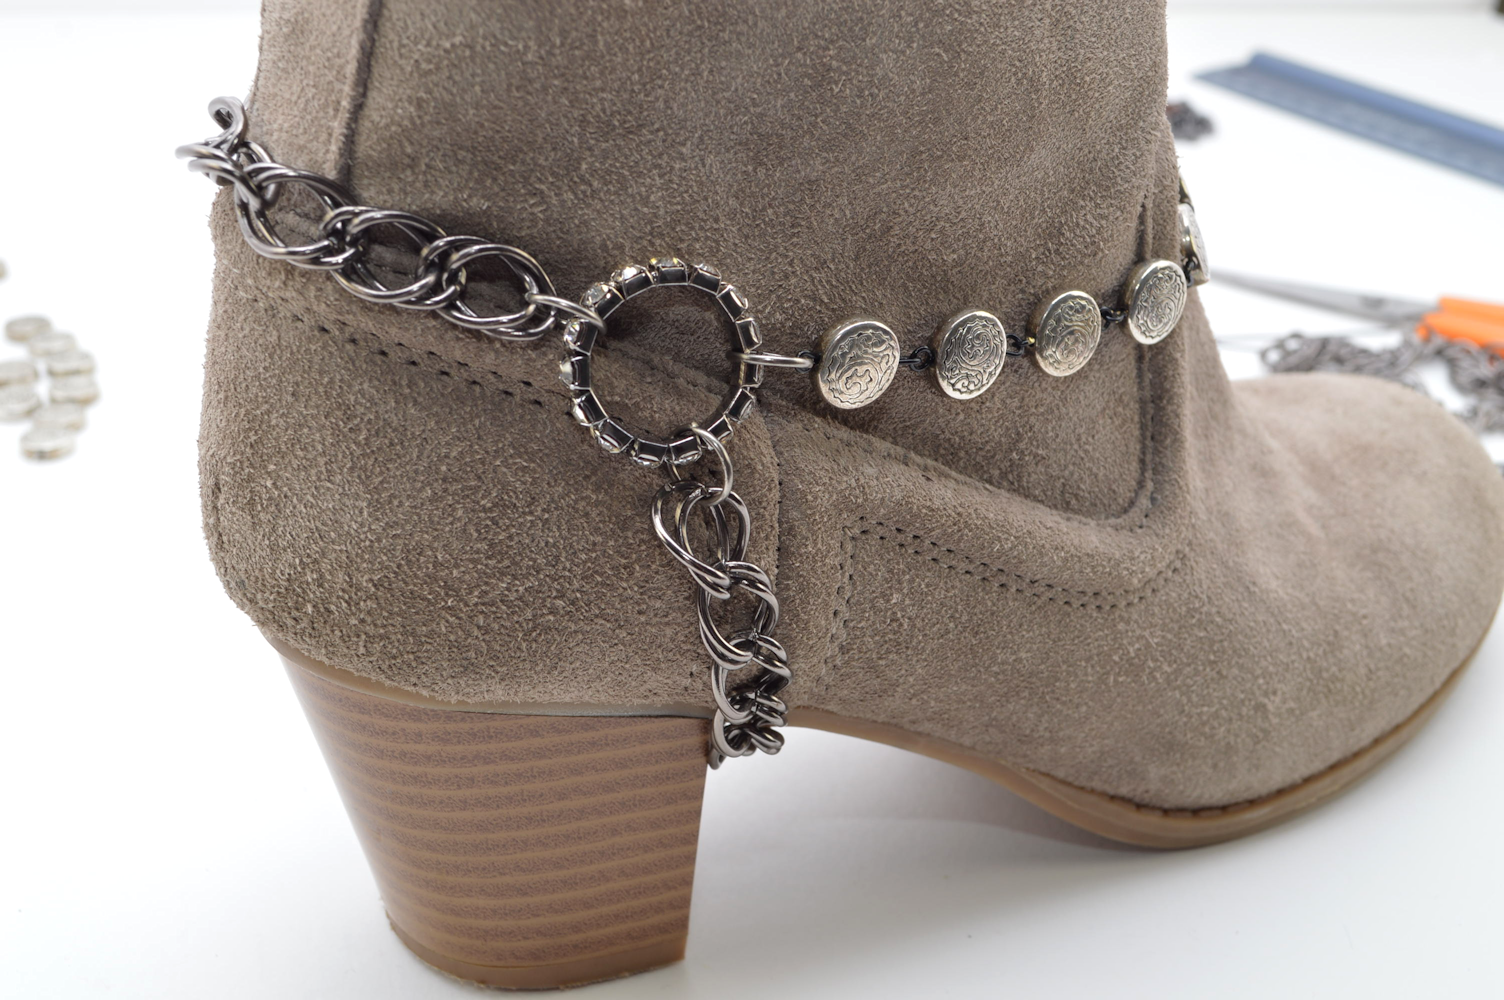
The beaded strand & chain portion: check! The clasp should be positioned along the inside of the boot.

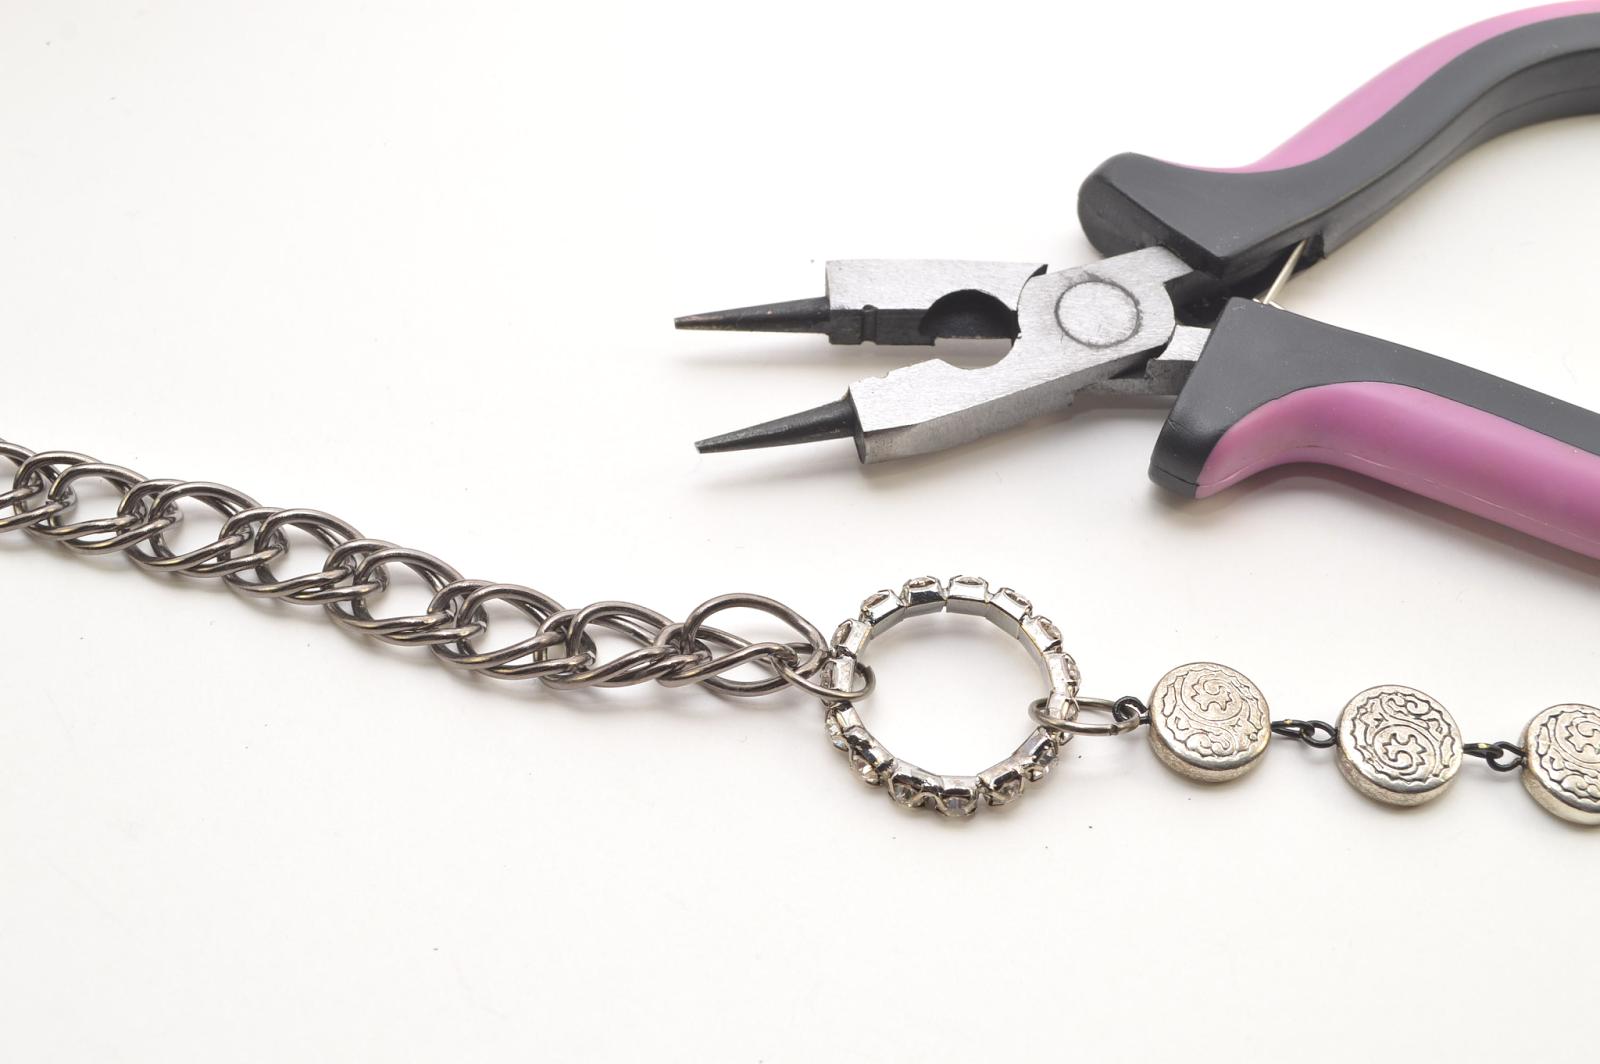
11) Attach a long strand of chain to the connector with a jump ring.
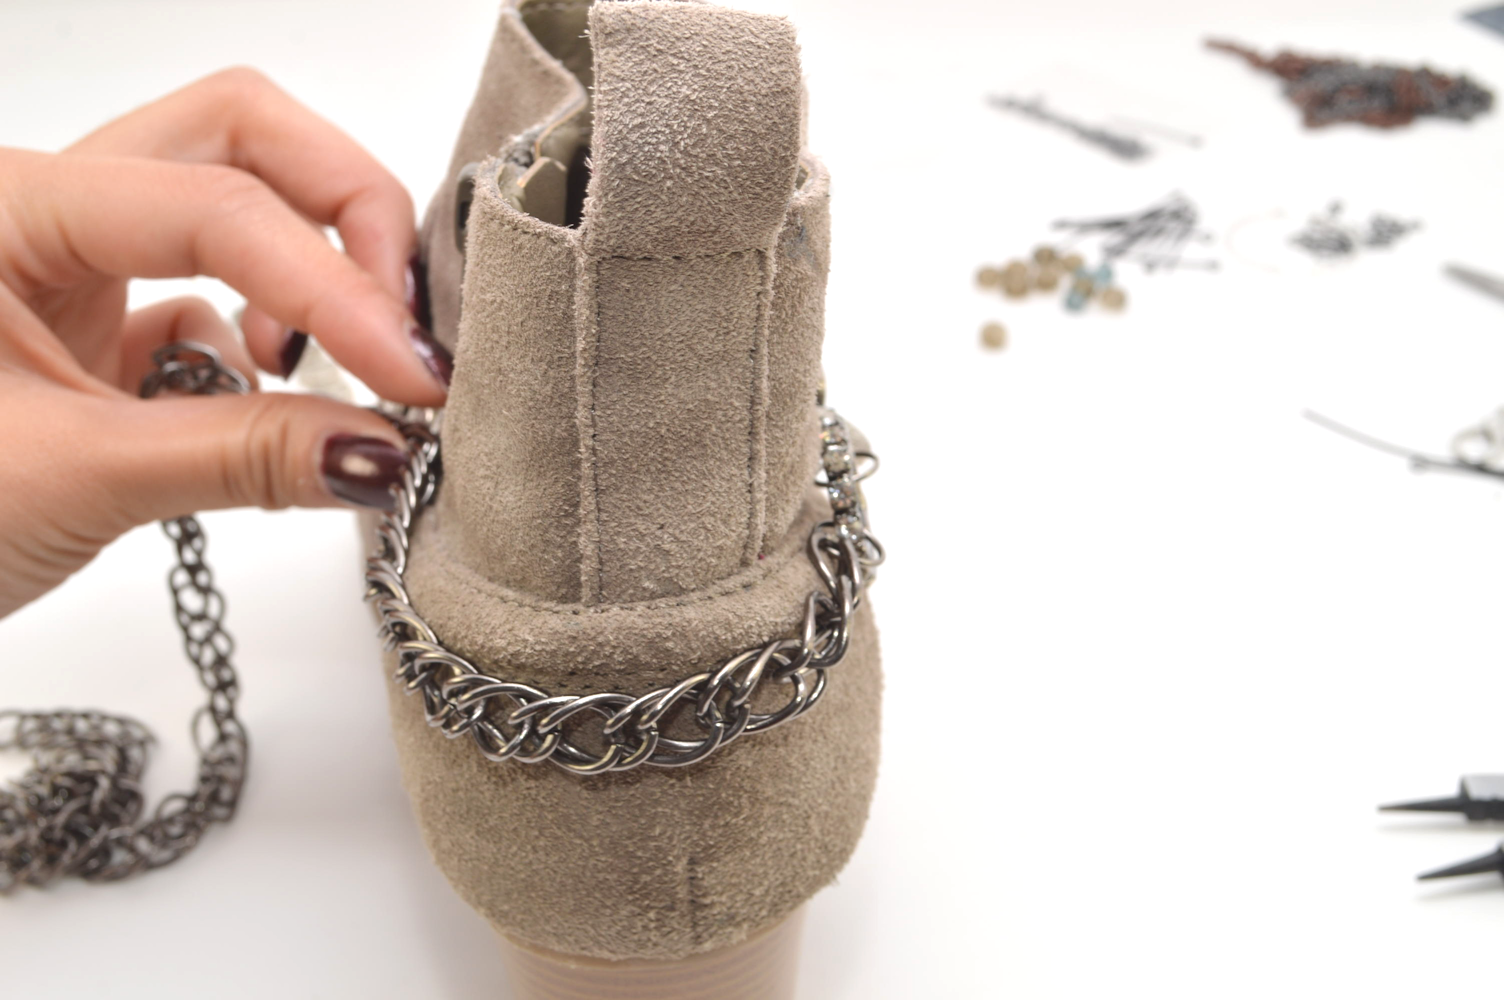
12) Bring it under the boot…
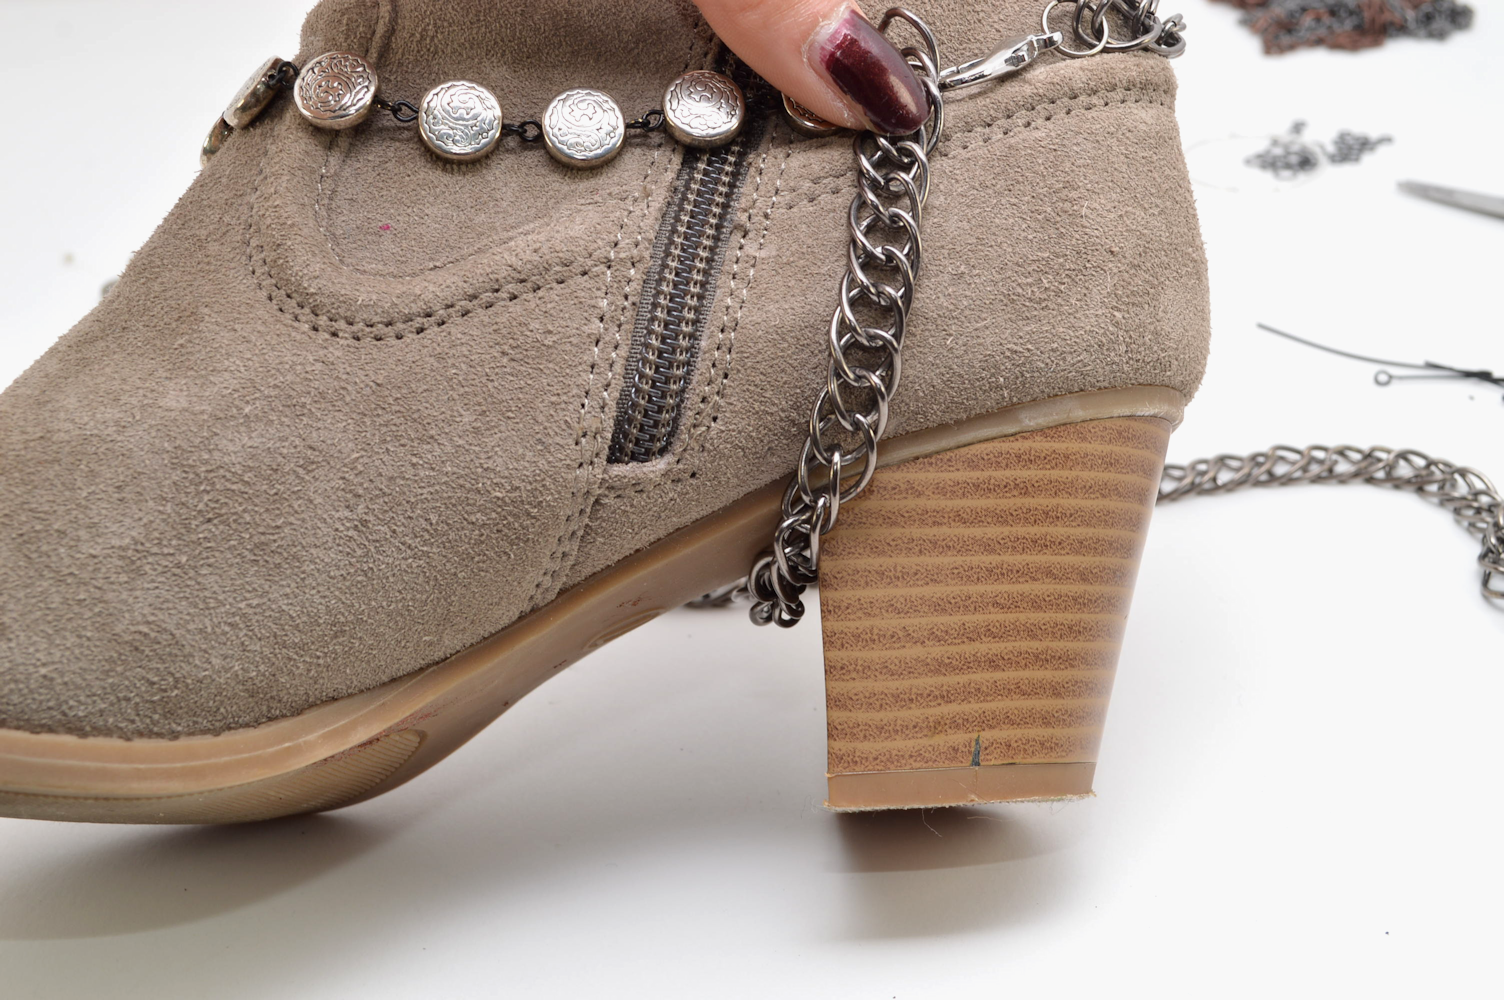
13) …and up around to the other side, where the clasp is.
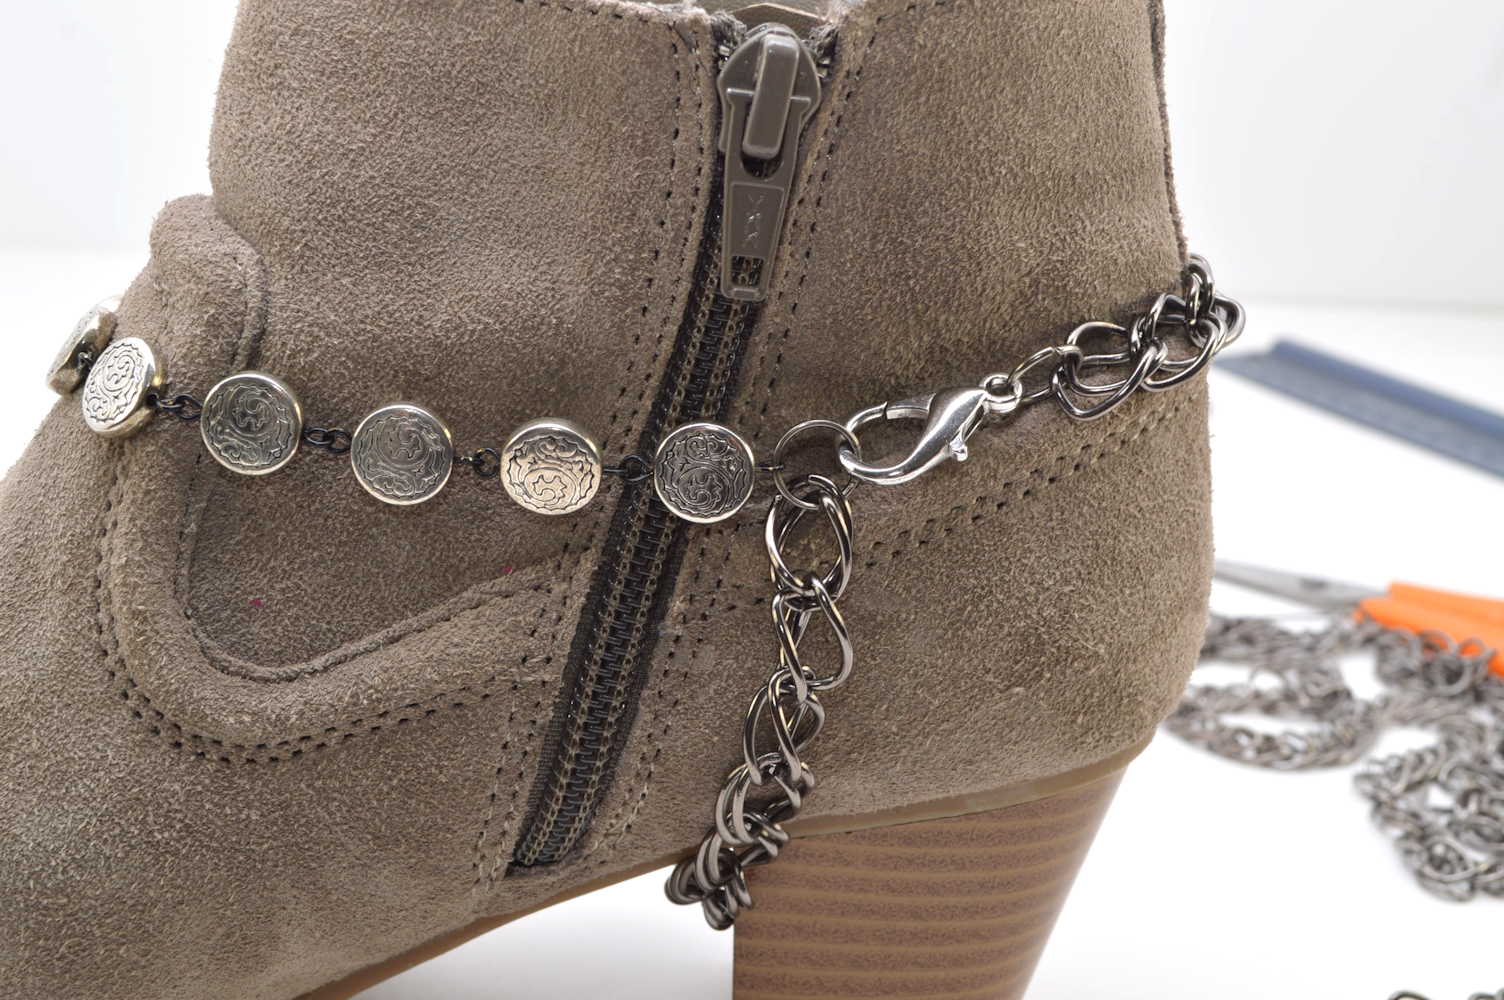
14) Trim the chain so that it can be attached the jump ring that the clasp is holding onto. Again, you’ll have to play with it a bit to ensure that everything fits snugly and not too loose. Otherwise, it will slip right off. It’s a good idea to start with too much chain and then trim slowly from there. As I always say: you can always take some away, but it’s harder to add it back!
To make another one, simply repeat the entire tutorial. If you’re feeling particularly edgy, you can always just rock one harness on one boot.
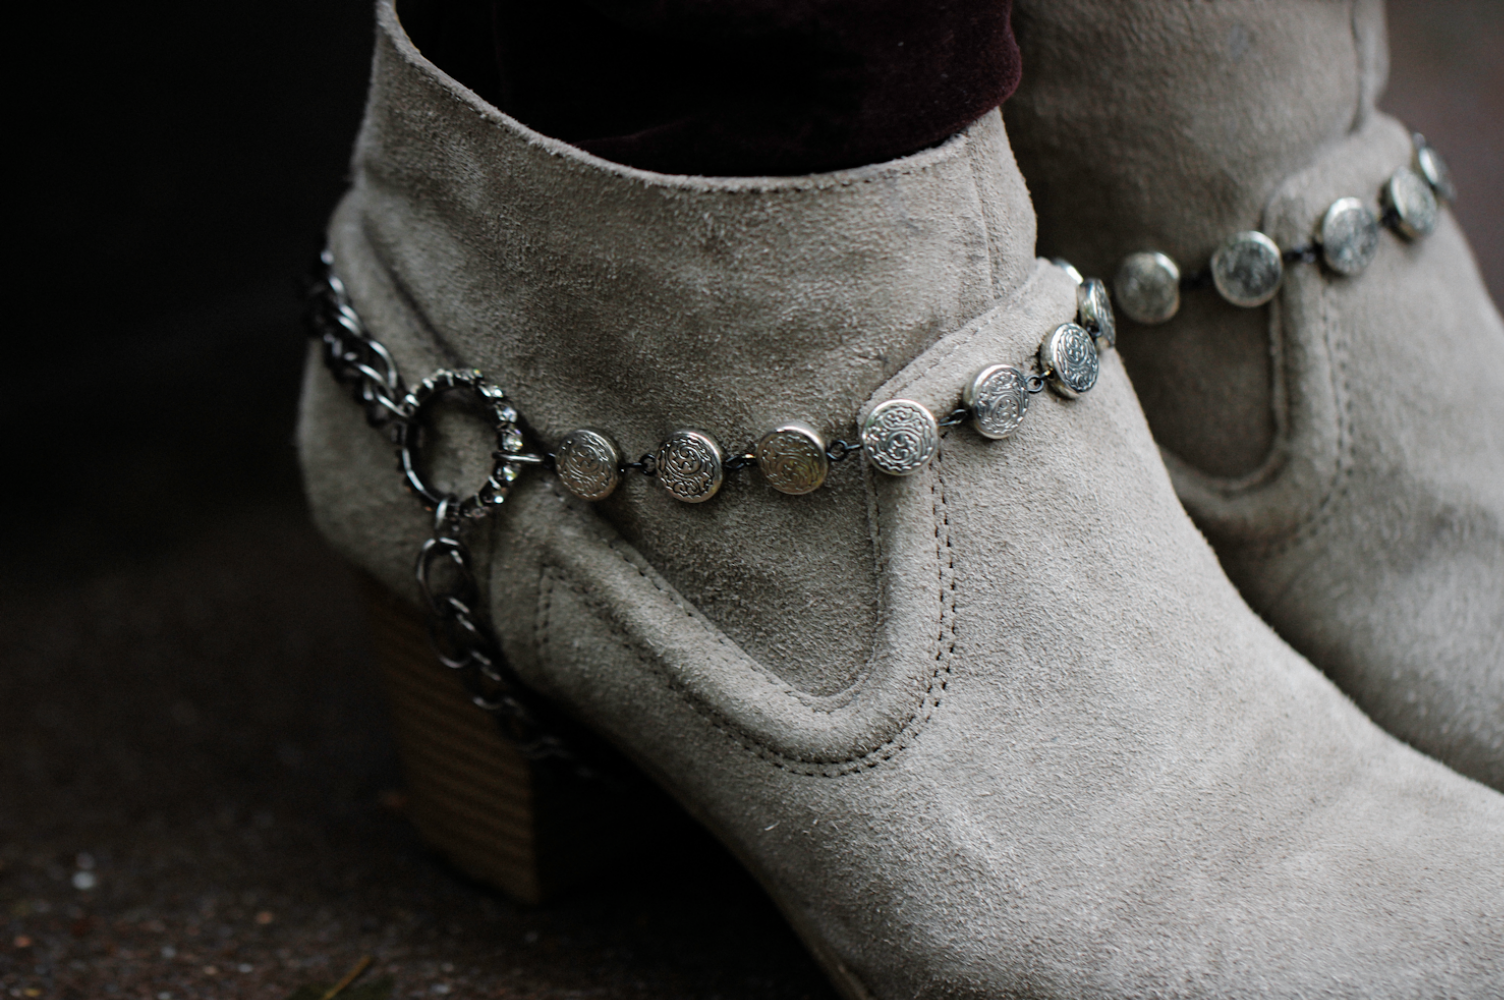
I love the way the silver and gunmetal plays off of the tan suede material of the boots. These chain harnesses can be customized to your taste and preference. They can also be easily removed whenever you say so.