This shirt is more or less what Mackenzie made — I just used a different type of lace and dyed it. I’ve made similar shirts in the “usual” shirt material, like jersey, but never thought to make one with lace. So, props to Miss Mackenzie! And thank you for letting me take a spin on your project.
Supplies:
- Sewing machine and thread (or needle & thread)
- 1 yard of stretch lace, 100% polyester
- Scissors
- 1-3 colors of RIT Dye, depending on your preference
- I used Teal, Tangerine and Wine**
- Water and a bucket
- Rubber gloves would be a good idea!
(ALL the time)
With that said, don’t expect a super vibrant shade. Because it is polyester, it not only takes a while for the lace to absorb any dye, but it won’t hold a deep, vibrant color. Everything will have a faded, light look to it. If you’re fine with that, you’ll be good to go.
1) Fold the yard of fabric so that the fold is along the top. If you’d like, trim some off at the end. Mackenzie didn’t, so her shirt had a little more “flow” to it. I did – about 6 inches – as you can see above. This is entirely up to you; both options will result in different yet equally awesome shirts. It’ll also depend on the size of your final shirt and how loose you want it to fit.
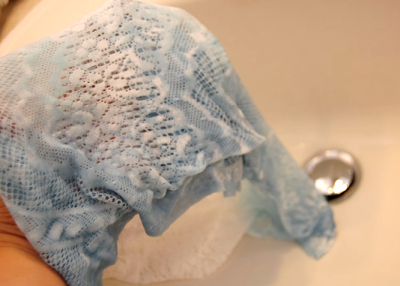
2) Dye the bottom edge of the lace. Since I was only dying a small portion, I used a small bucket to do this. (I just eyeballed the amount of dye I added to the water).
3) Rinse it off until the water runs clear.
4) Bring in the next color. Next up was the Tangerine. I used a bigger bucket and dyed pretty much the entire thing, letting the blue edges hang off the sides. I took the lace and dipped/held it into the dye, so that everything up until the blue was dyed orange.
5) Rinse it out until the water runs clear.
6) And for the Wine…
Same process, same bucket. I just made sure that there was some orange visible, as I dipped and dyed.
7) Rinse until the water runs clear.
8) Hang to dry, at least overnight!
9) Fold in half, like you did in Step 1.
10) Fold again, horizontally.
11) Cut out your neck hole. I’d recommend not cutting out a big piece; start out small, because you can always cut more later after you try it on.
When you unfold it, it’ll look like this.
12) Sew it up! One straight line on each side. The arrows indicate the general areas where I sewed. They were about 6 inches from the side, but this may differ for you depending on the overall size of your fabric. It’ll also depend how loose or tight you’d like the shirt to be, as well as the size of your shirt, your height, etc.
I noticed that it’s practically impossible to sew a perfectly straight line on stretch lace. You can barely even see the stitches when you wear the shirt, though.
Finished product.
This can easily be done without a sewing machine. All you need are straight running stitches, so this can be done through the lace with some needle and thread, by hand.
I’m kind of in love with mine because it’s so versatile. You can throw if over your bathing suit for a beach cover up. Or you can wear it with a bandeau like I did above (my bandeau is black jersey) for a lightweight, loose fitting summer shirt – also great for the beach. Or you can just wear it over a tank top and call it a day.
Thanks again to the lovely Mackenzie for letting me adopt her project!
I’d also recommend dying your lace outside, if you can. I’m not really sure why I did this in the bathroom…I had a mini heart attack when I thought I stained my bathtub Tangerine.
More summer clothing projects coming soon! I’m always on a roll with clothes projects during the summer. I’m already working on three more.


