

When you dabble in different types of projects, it’s easy to build up quite the supply stash. I know you feel me on this one. And since I’m always (literally, always) trying to think of ways of to use remnants, I decided to whip up this patchwork back patch. You know… just prepping for cool-grandma-status for when I grow up.
This one is a beginner-friendly project that is awesome for making a dent in your collection of supplies. Here’s the low down!

Supplies:
- Denim jacket (or denim vest/hoodie!)
- Fabric scissors
- Sewing machine & thread
- Straight pins
- Scrap fabric (cotton & flannel work best)
- Graphic t-shirt
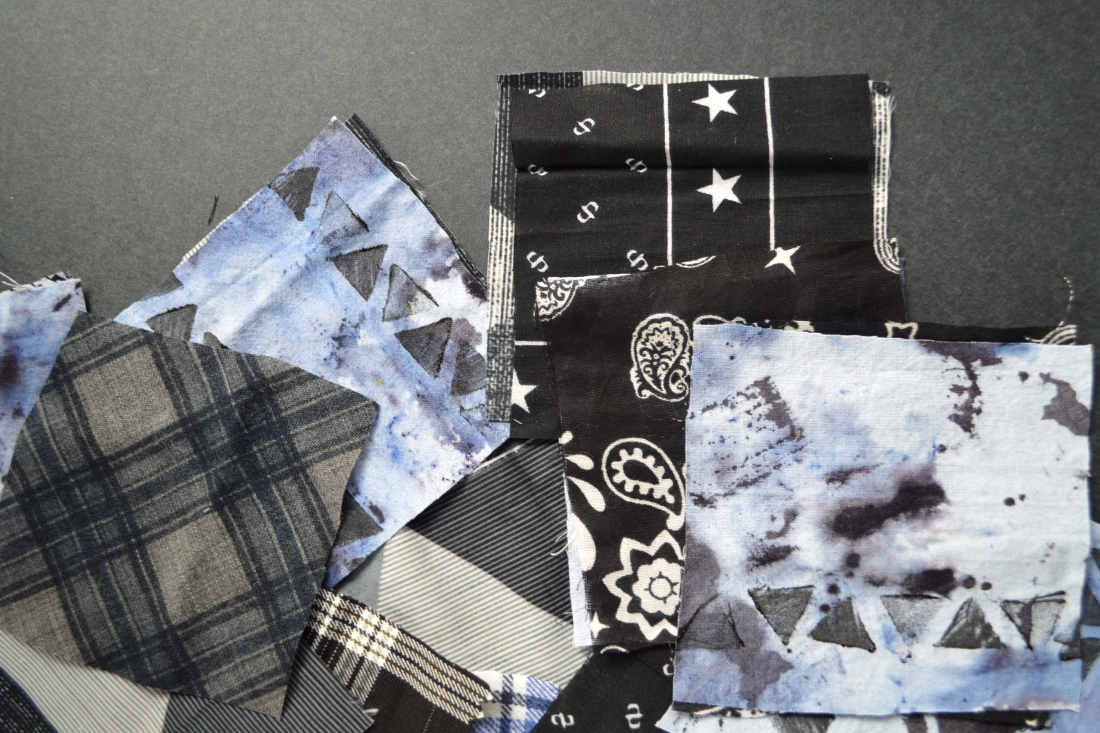
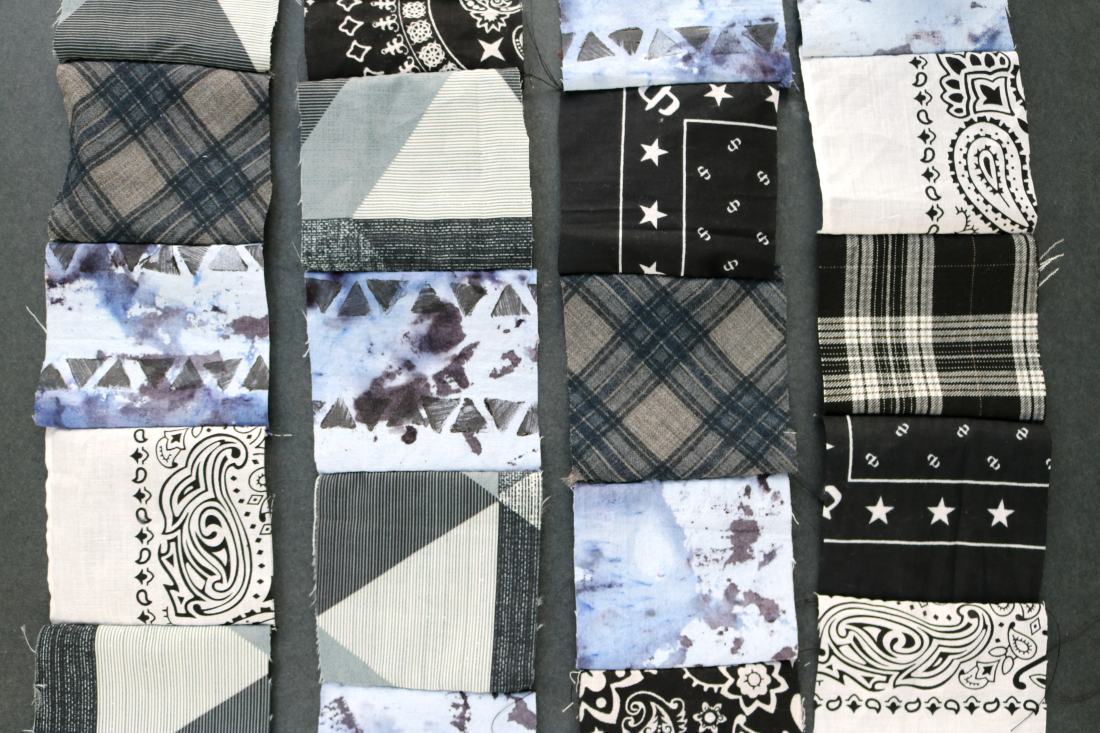
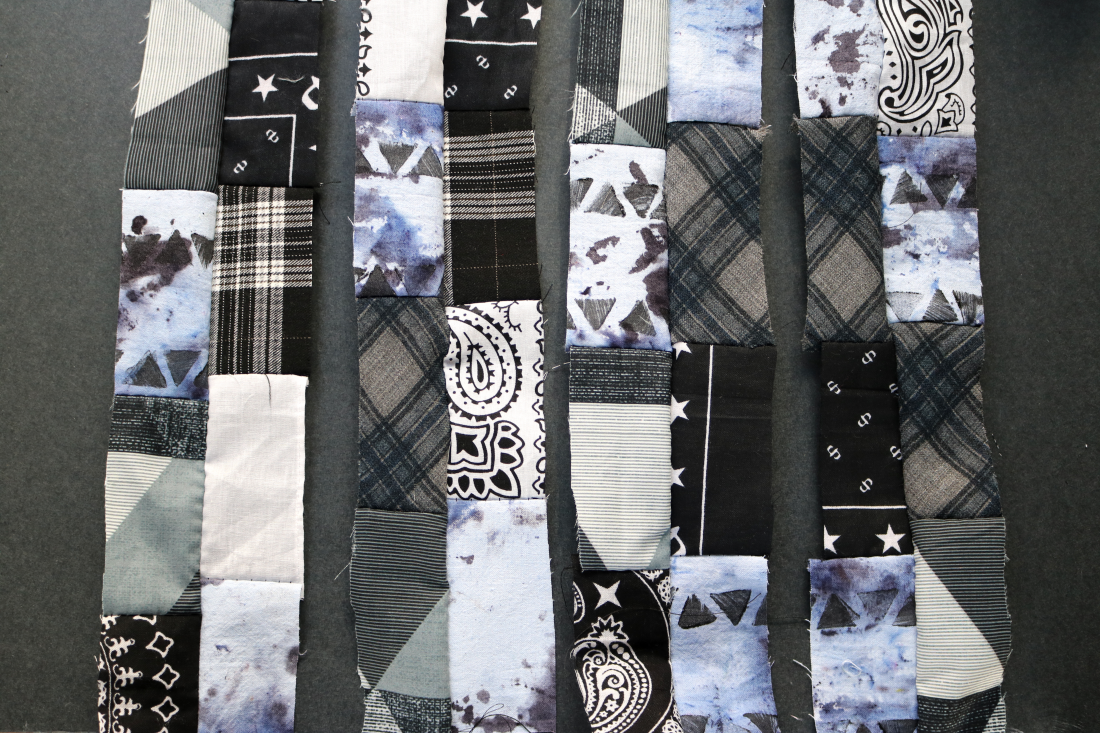
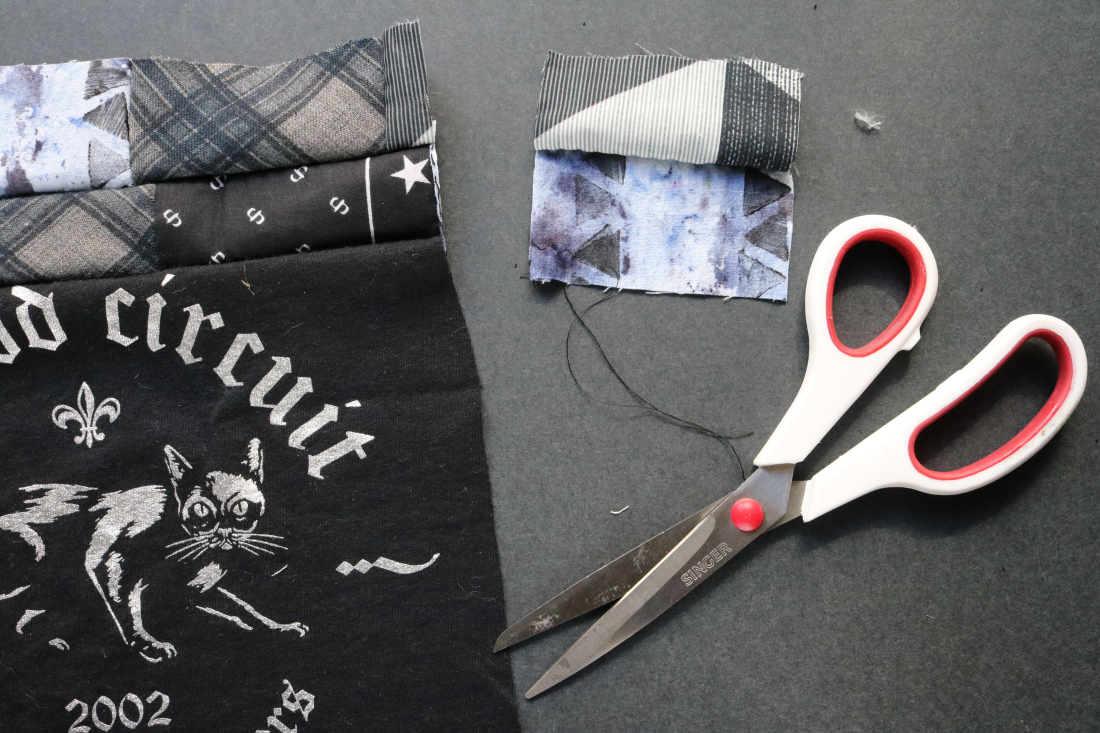
1. Cut the fabric scraps into equal-sized squares. I made each fabric square 4×4 inches.
For my patchwork back patch, I used scraps from bandannas, old pillowcases, and past projects. The blue hand-dyed and triangle-stamped fabric was from a past experiment/using leftover dye and paint from a past tutorial.
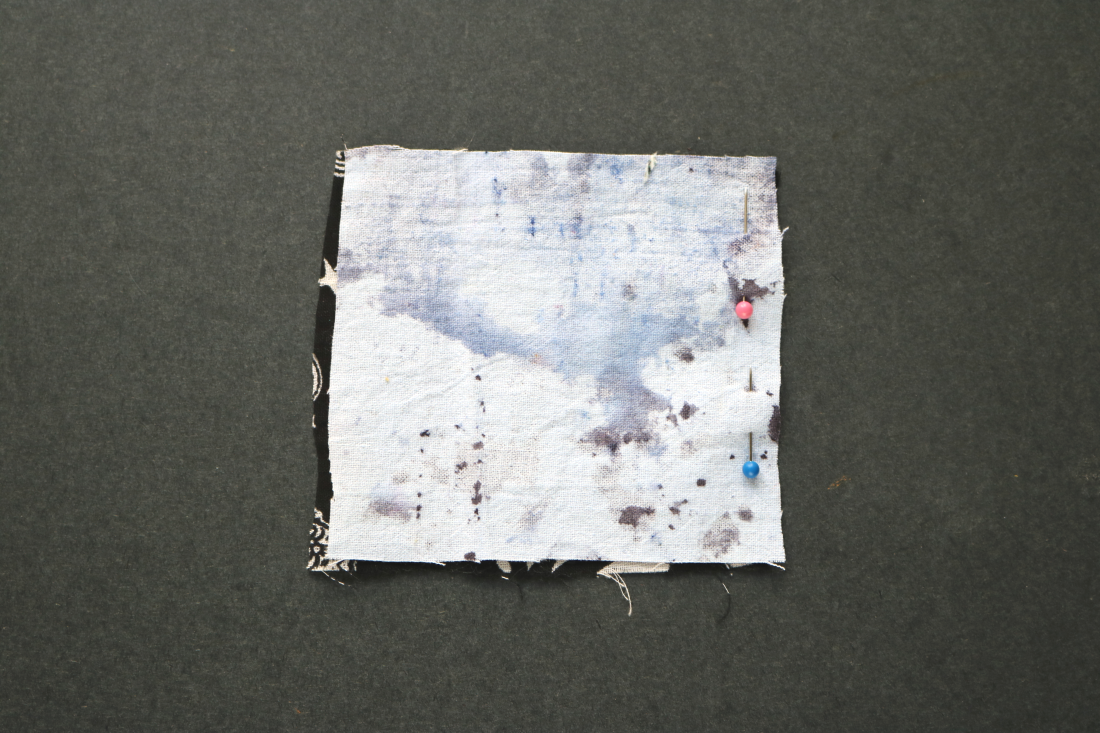
2. Pin two squares together with right sides facing each other. The pins should be about 1/2 inch from the edge.
Sew!
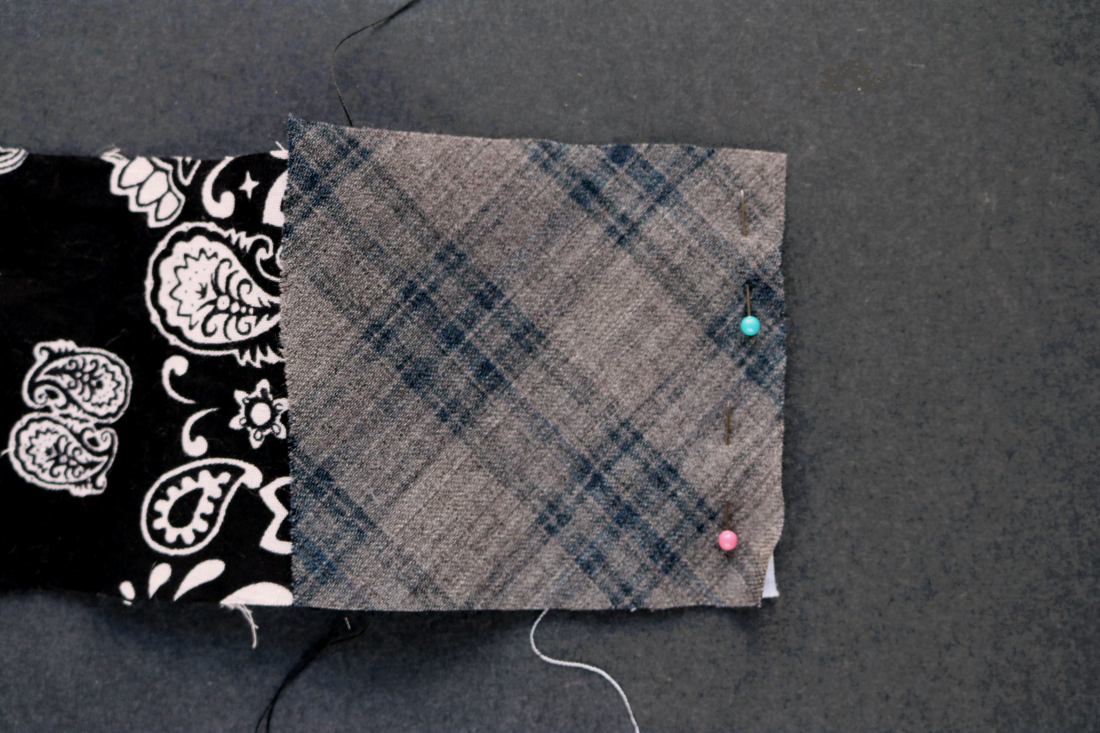
3. Continue adding squares, one by one. Don’t forget to place the right sides facing each other.
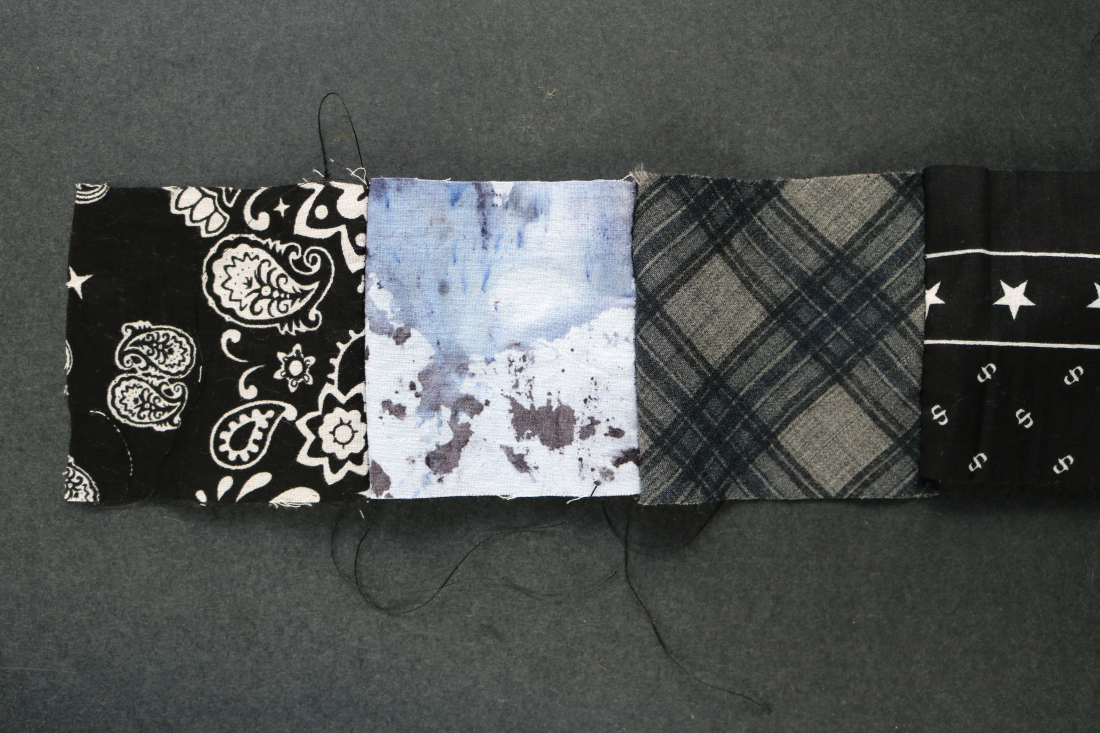
4. Continue until you have a row of about 4-6 squares. Because I always overestimate, I made a row with more squares than I thought I’d need. After all, once you get started, it’s much easier to cut away fabric instead of adding more.
5. Repeat three more times. You’ll end up with four strips of stitched squares (one for each side of a square back patch).
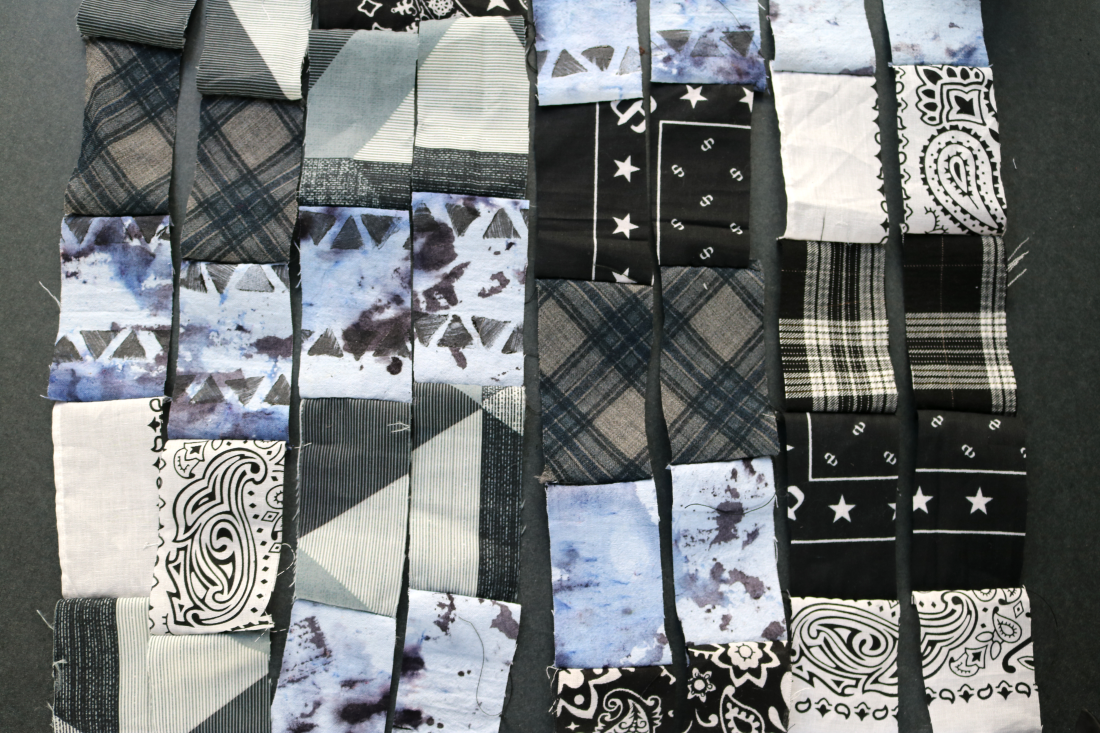
6. You can leave the rows as is or you can cut them down the middle. In order to achieve more diverse fabric on each side, I went with the latter.
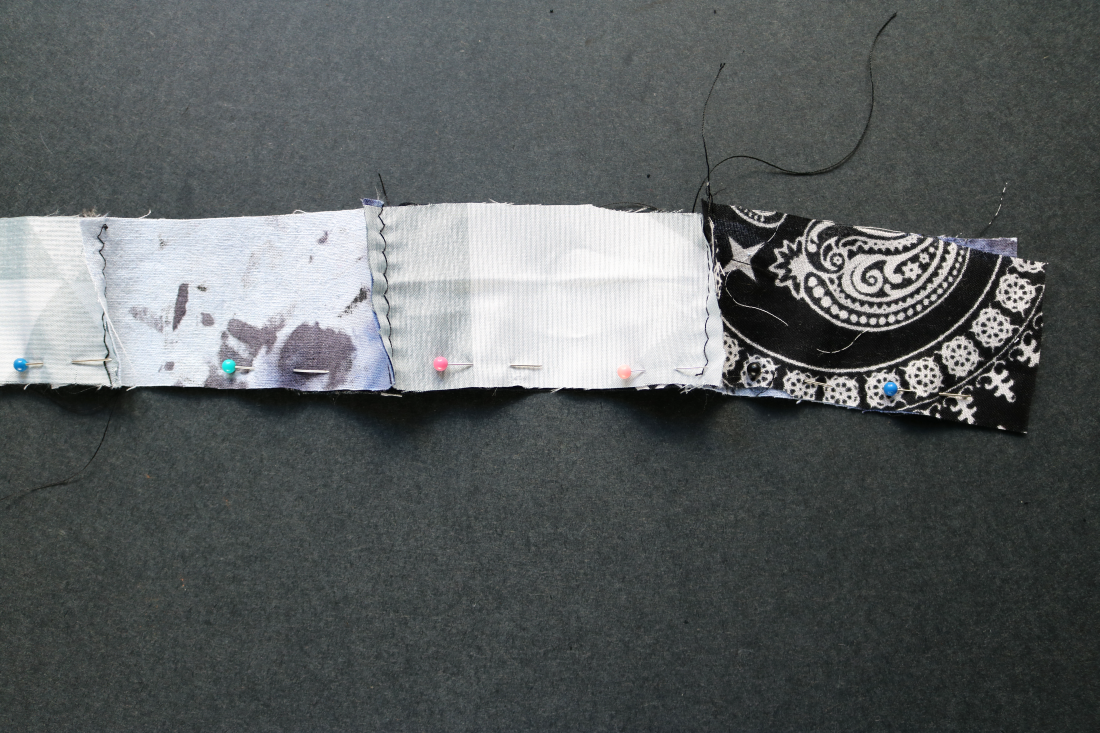
7. Take thin two strips (one from two different original strips) and pin them together, right sides facing each other.
8. Stitch them together.
My seams weren’t perfectly lined up, which was intentional. I prefer the rugged vibe. However, if you’re going for a meticulous traditional patchwork look, then feel free to do just that! It will simply require more precise cutting, measuring, and sewing throughout the process.
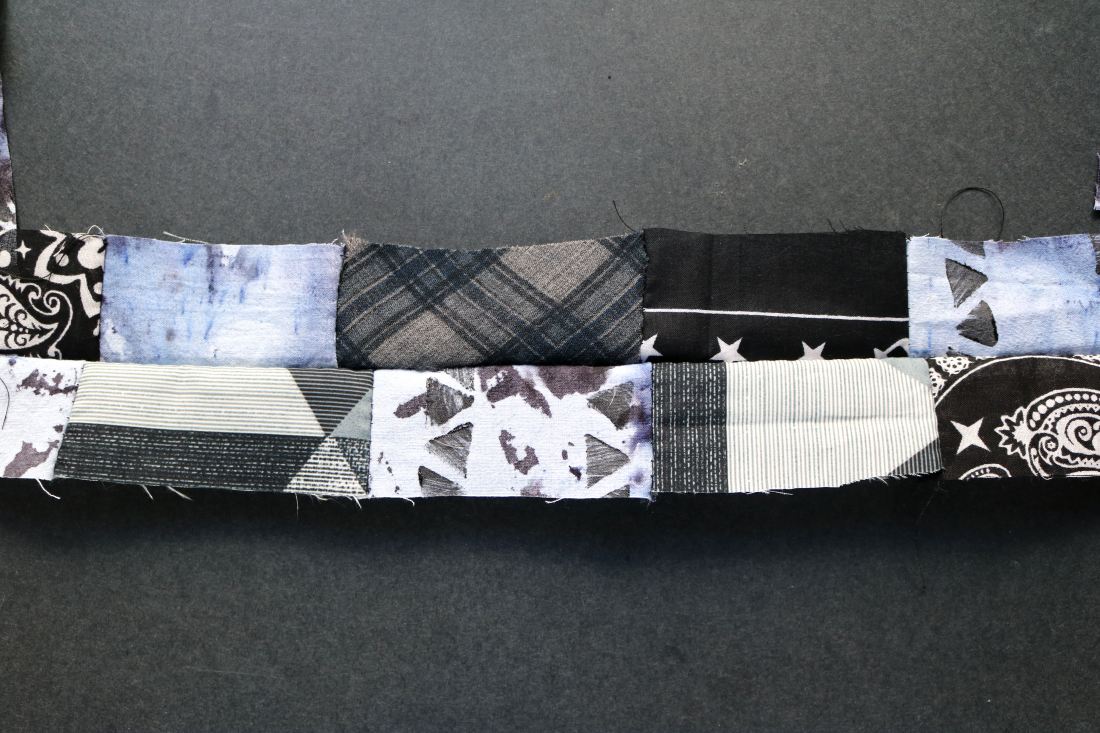
9. Pair up the remaining thin strips.
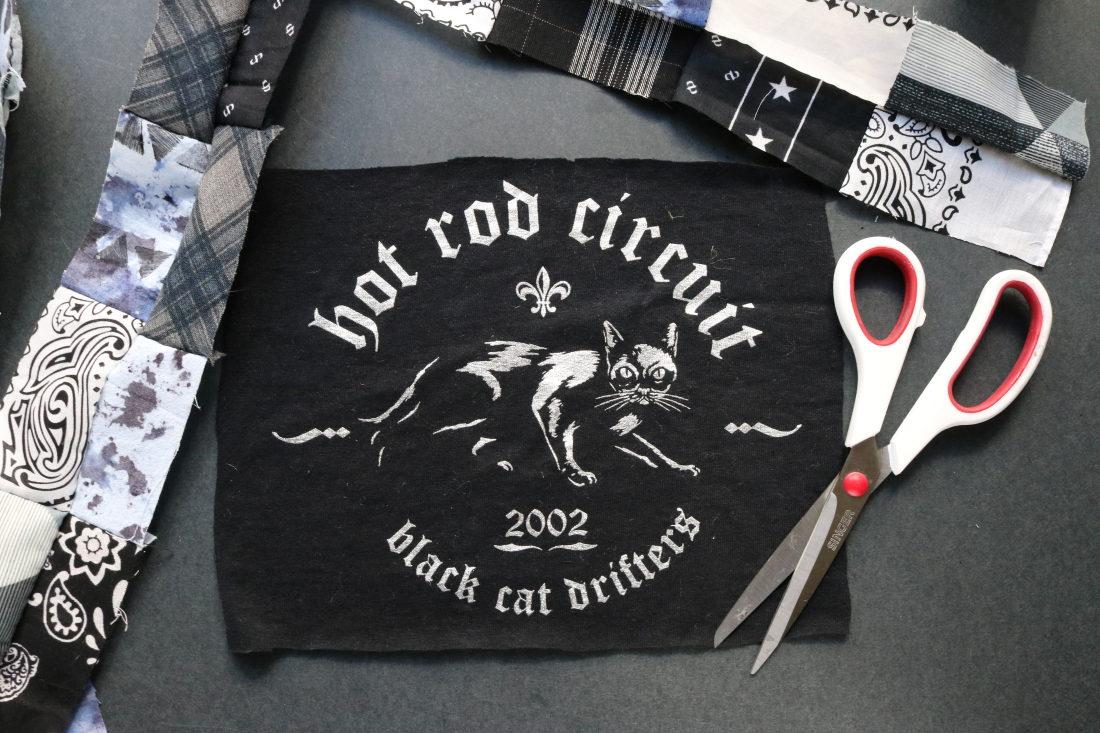
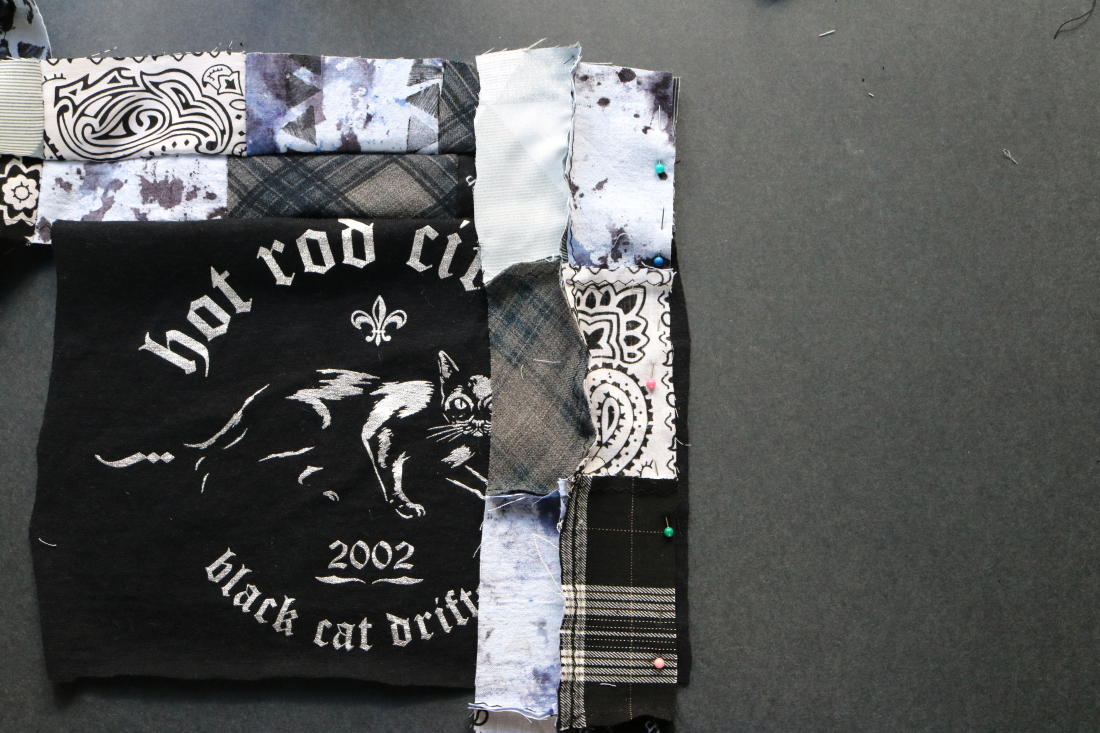
10. If you haven’t already, straighten out each side of the t-shirt graphic. Because fabric will be stitched to each side, this doesn’t have to be perfect; try your best!
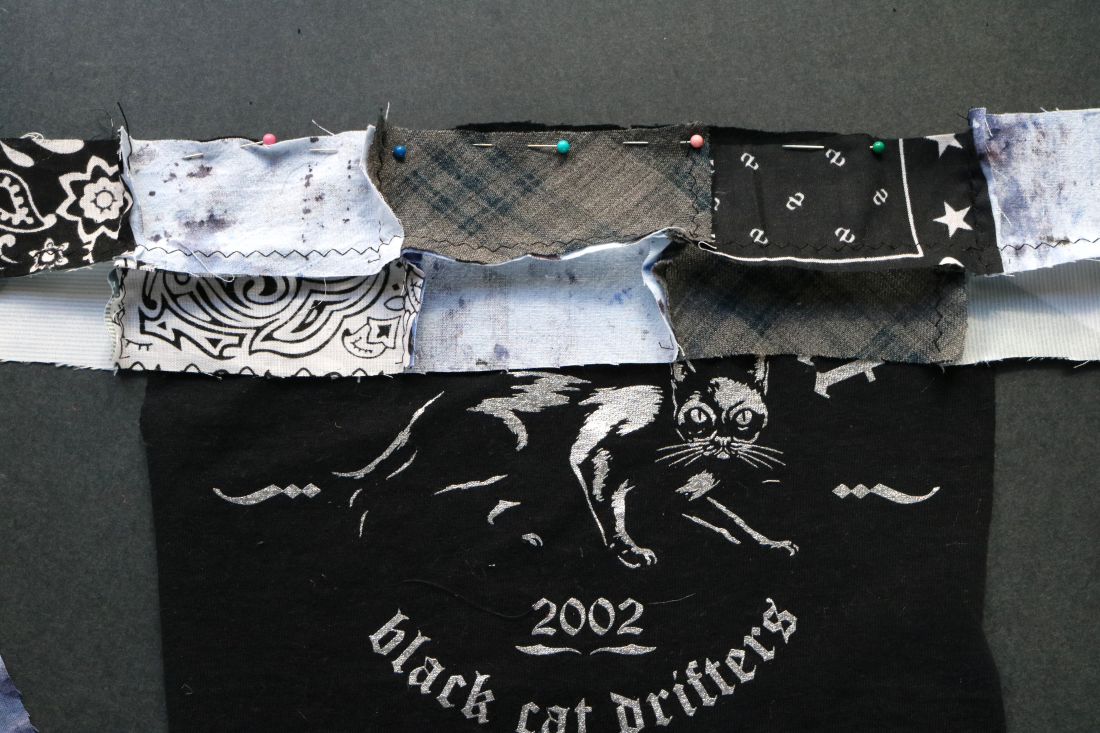
11. Now, you’re ready to stitch the patchwork fabric to the t-shirt graphic. Pin the first set of patchwork fabric to the t-shirt patch, right sides facing each other.
12. Sew.
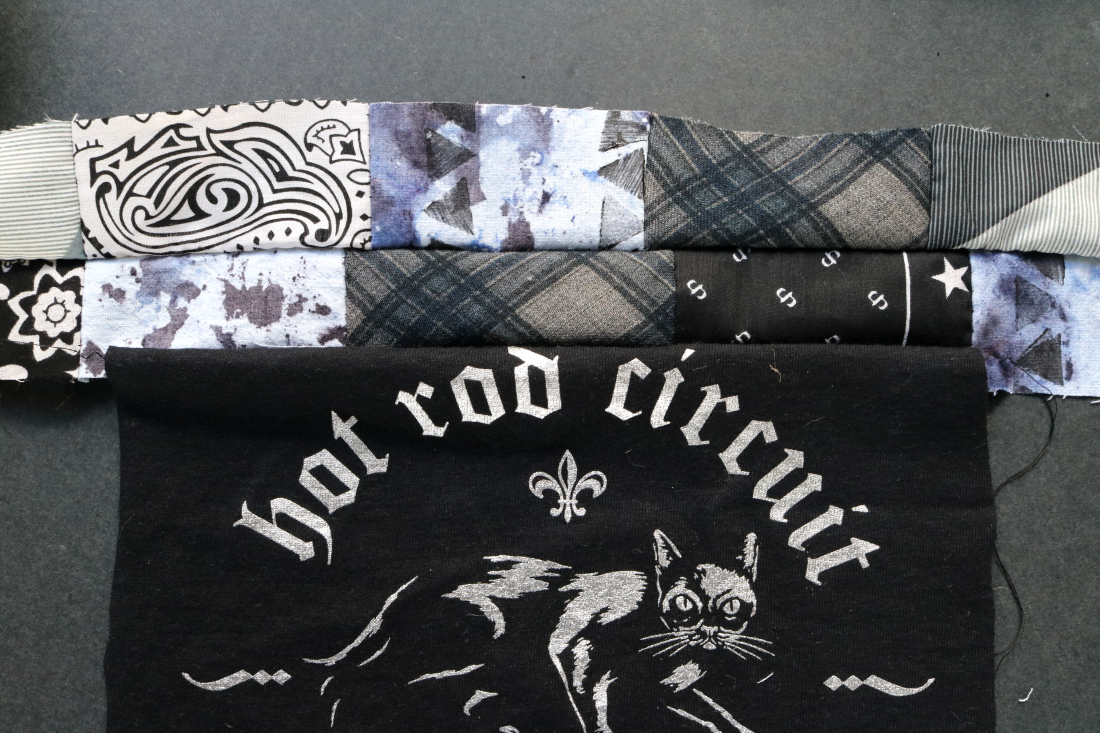
13. Trim the ends so that the patchwork fabric is line with the t-shirt fabric.
14. Bring in the next strip of patchwork fabric. Again, pin together with the right sides facing each other.
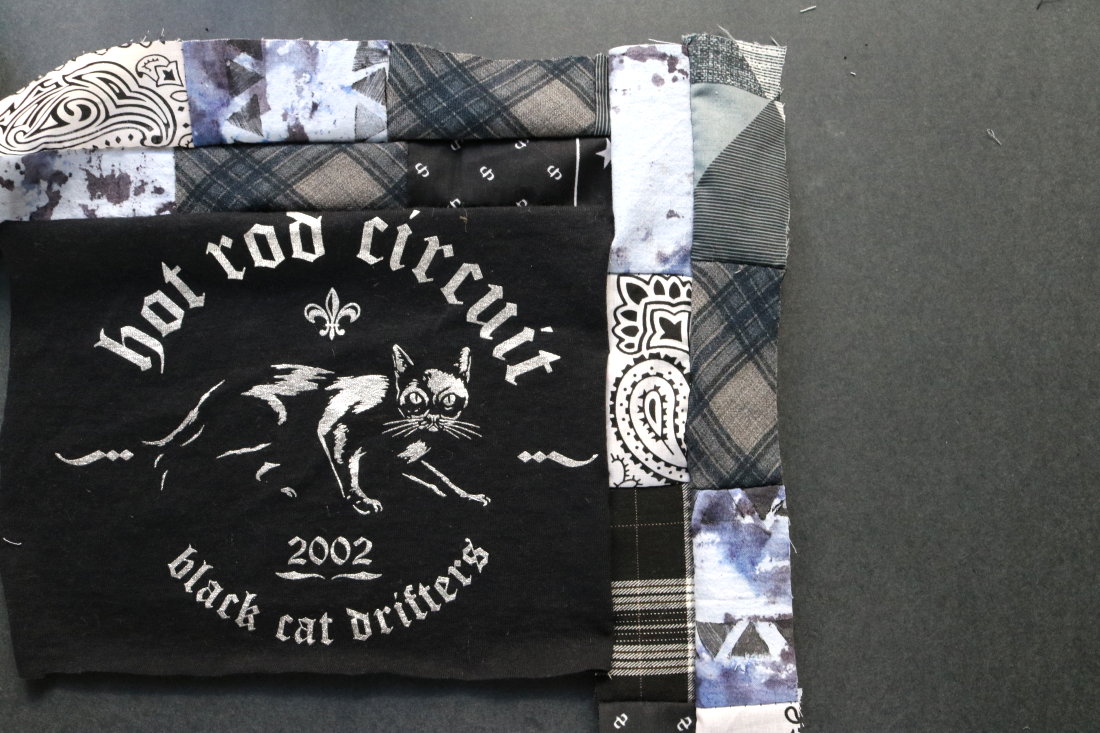
15. Sew.
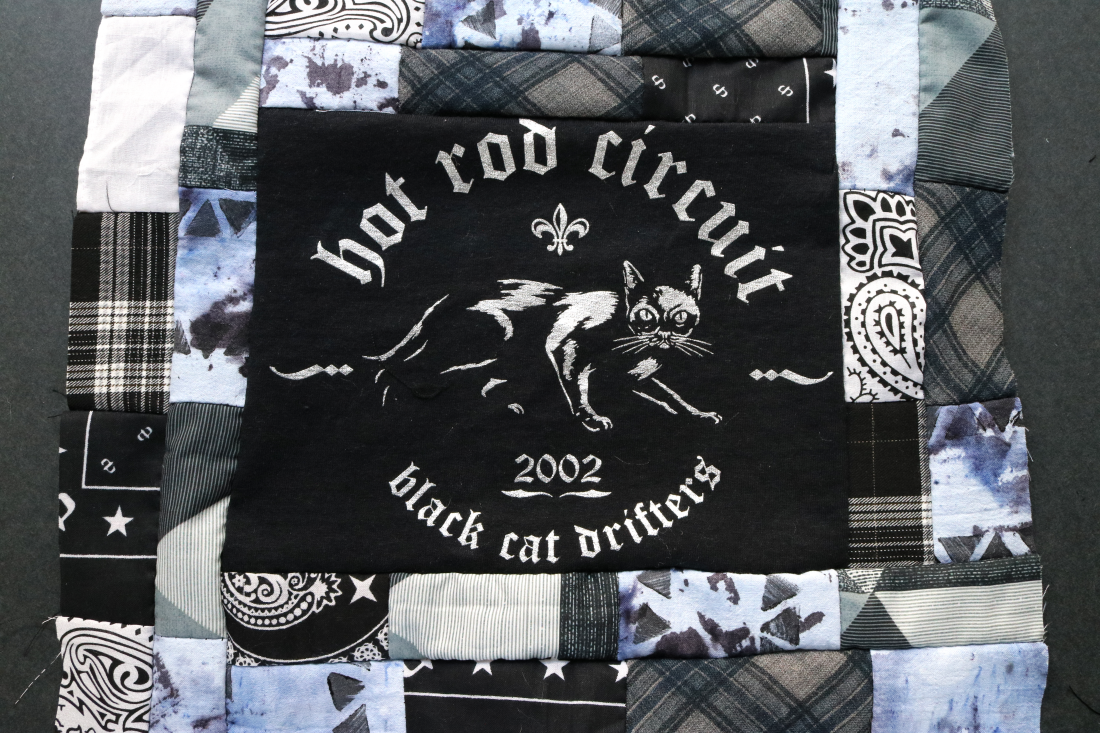
16. Repeat Steps 13-15 until all four sides are stitched to patchwork fabric.
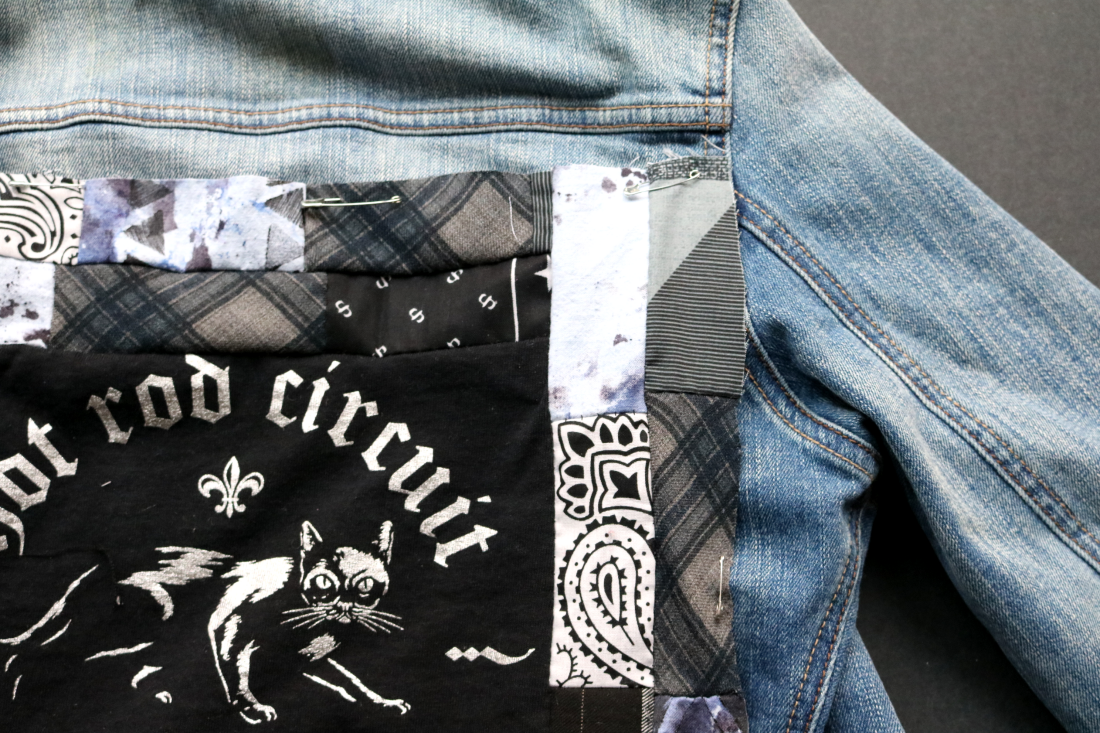
17. To attach the back patch to your jacket, stitch or use safety pins.

These shots were taken on Bernal Heights Hill against the bluest of skies. As a born and raised New Yorker, I’ve been constantly forgetting that we’re actually in the month of February. I swear, sometimes it feels like California isn’t real life.


Looking for more denim jacket projects? I got your back (GET IT?) with some projects over the years:
- Cut-Out Denim Vest
- Crossed-Out Denim Jacket
- Shoulder Panel Denim Vest
- Blanket Denim Jacket
- Floral Patchwork Denim Vest
- Embellished Shoulder Denim Vest
- Mixed Fabric Denim Vest
xx K