
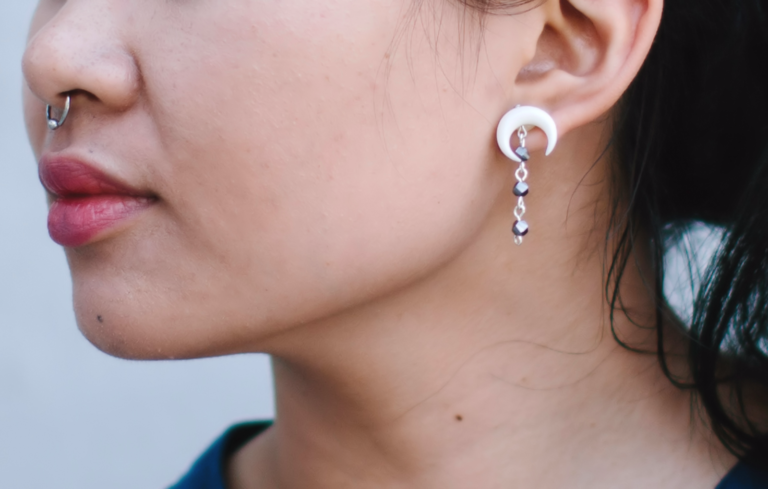
It’s no secret that I’m a sucker for offbeat statement jewelry. I mean, about half of the projects I’ve shared in the past six years are jewelry tutorials. Specifically, I’m all about using leftover materials from past creations. It might take some time to think of a design, but it is an awesome way to challenge your creativity. The following tutorial is an excellent example. These DIY earrings were born after playing around with a handful of 4mm faceted beads; I’m loving the way they look with the bone crescents!
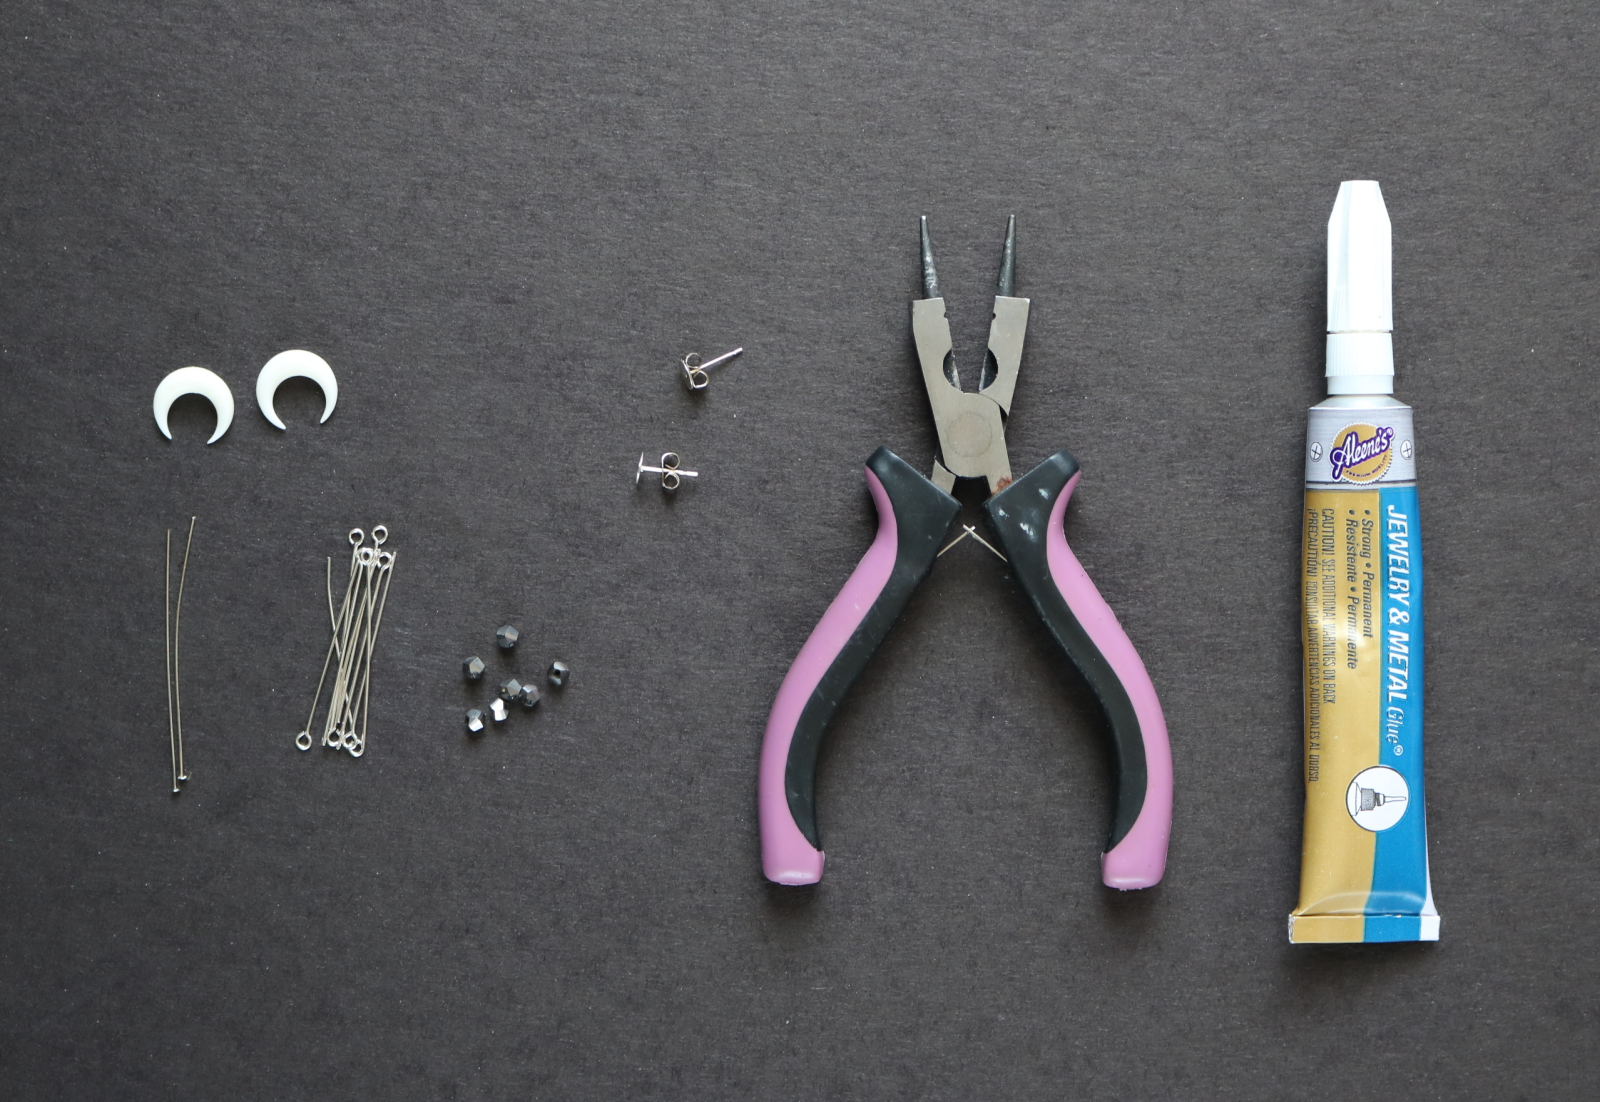
Supplies:
- Top-drilled bone crescent beads (2) *
- Head pins (2)
- Eye pins (6)
- 4mm beads (6)
- Blank earring posts (2)
- Jewelry pliers
- Jewelry glue* Size and style will depend on your preference. I used two 15mm crescent horn beads from this Etsy store, right here.
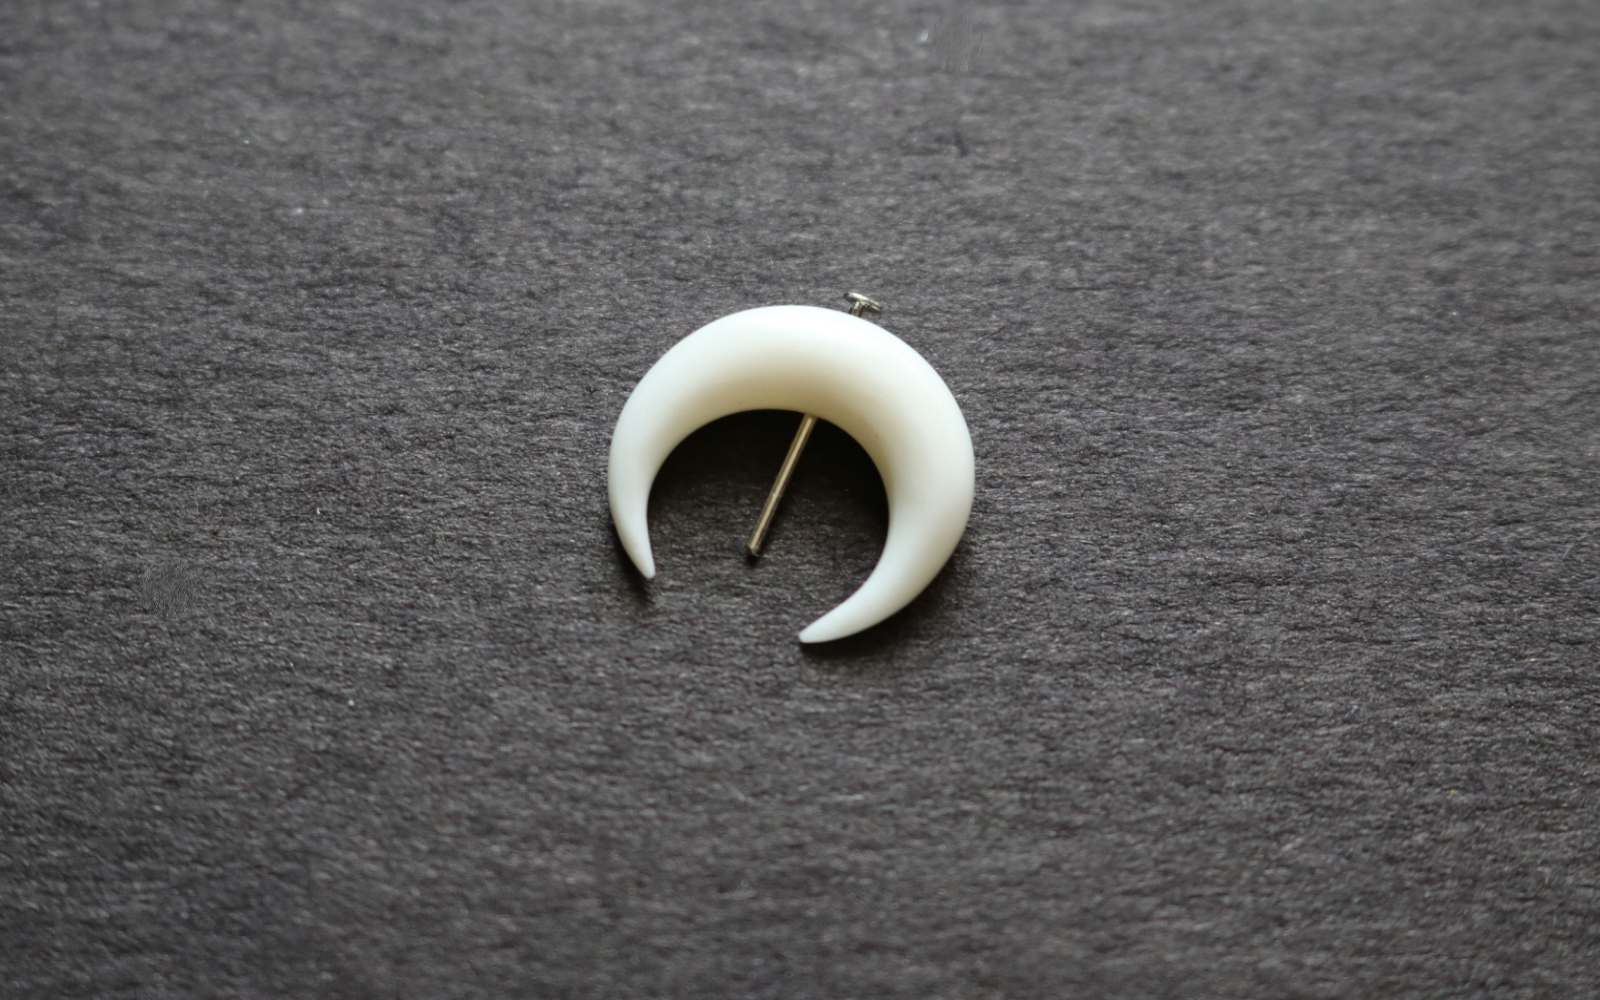
1. Using the cutter portion of the pliers, trim a head pin so that there is about 1/2 inch of extra wire when the bead is added to the pin. To do this, I inserted the pin into the bead, noted where it needed to cut, then removed the pin to properly cut.
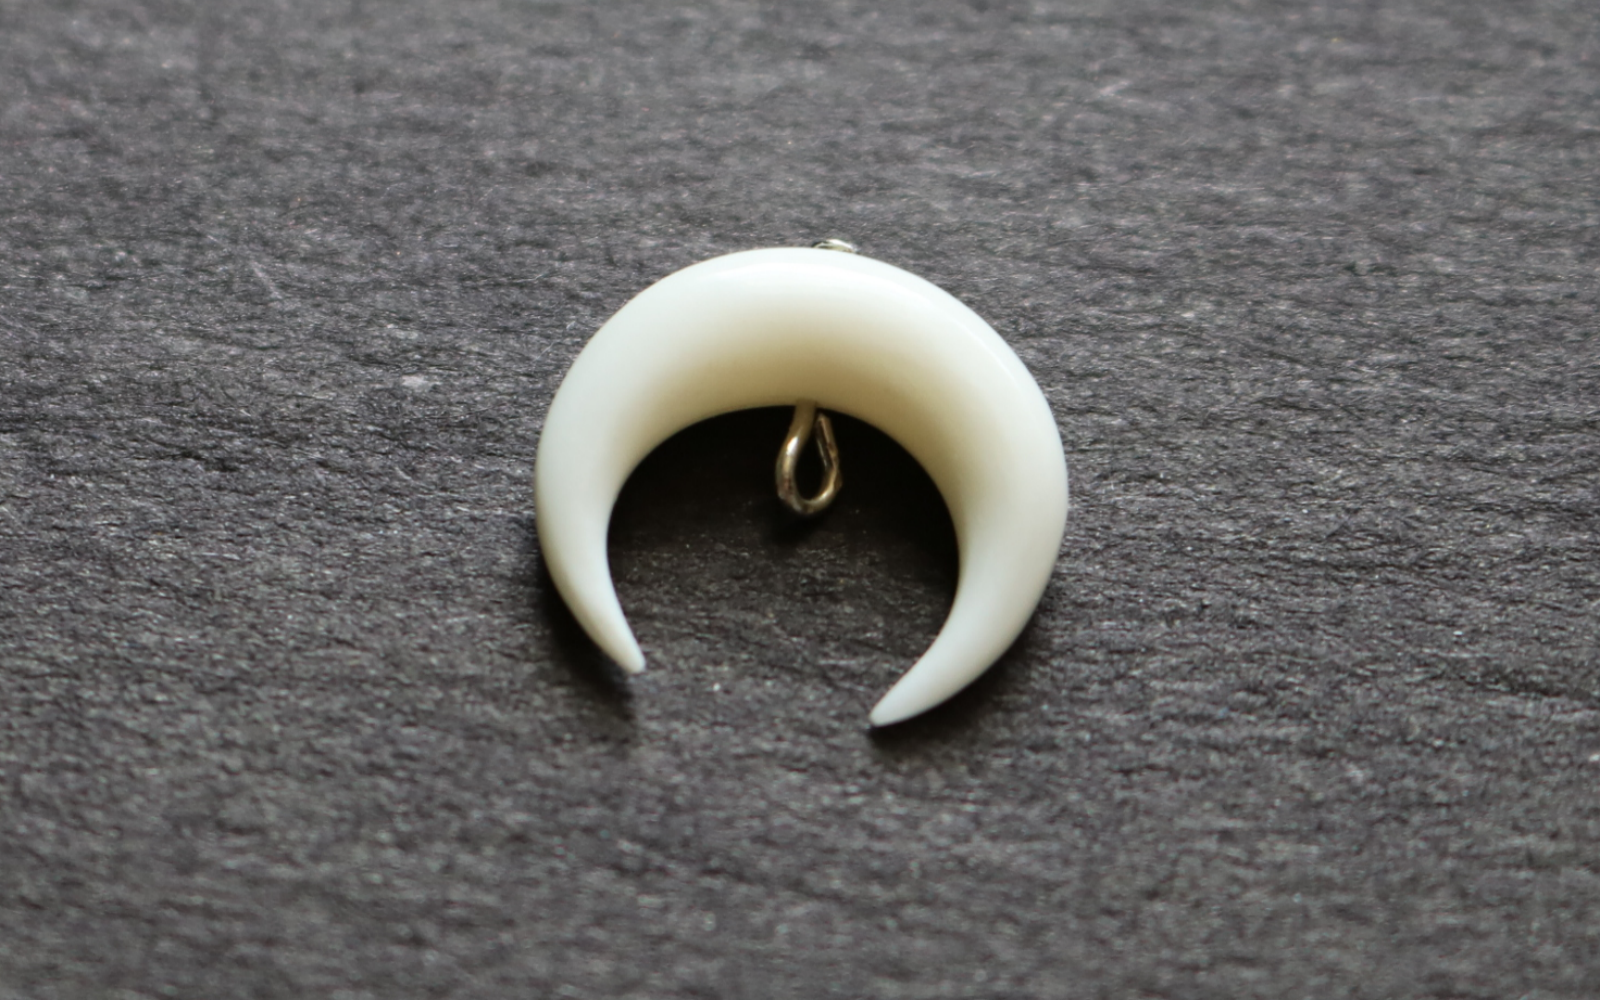
2. Using the needle-nosed ends, create a loop.
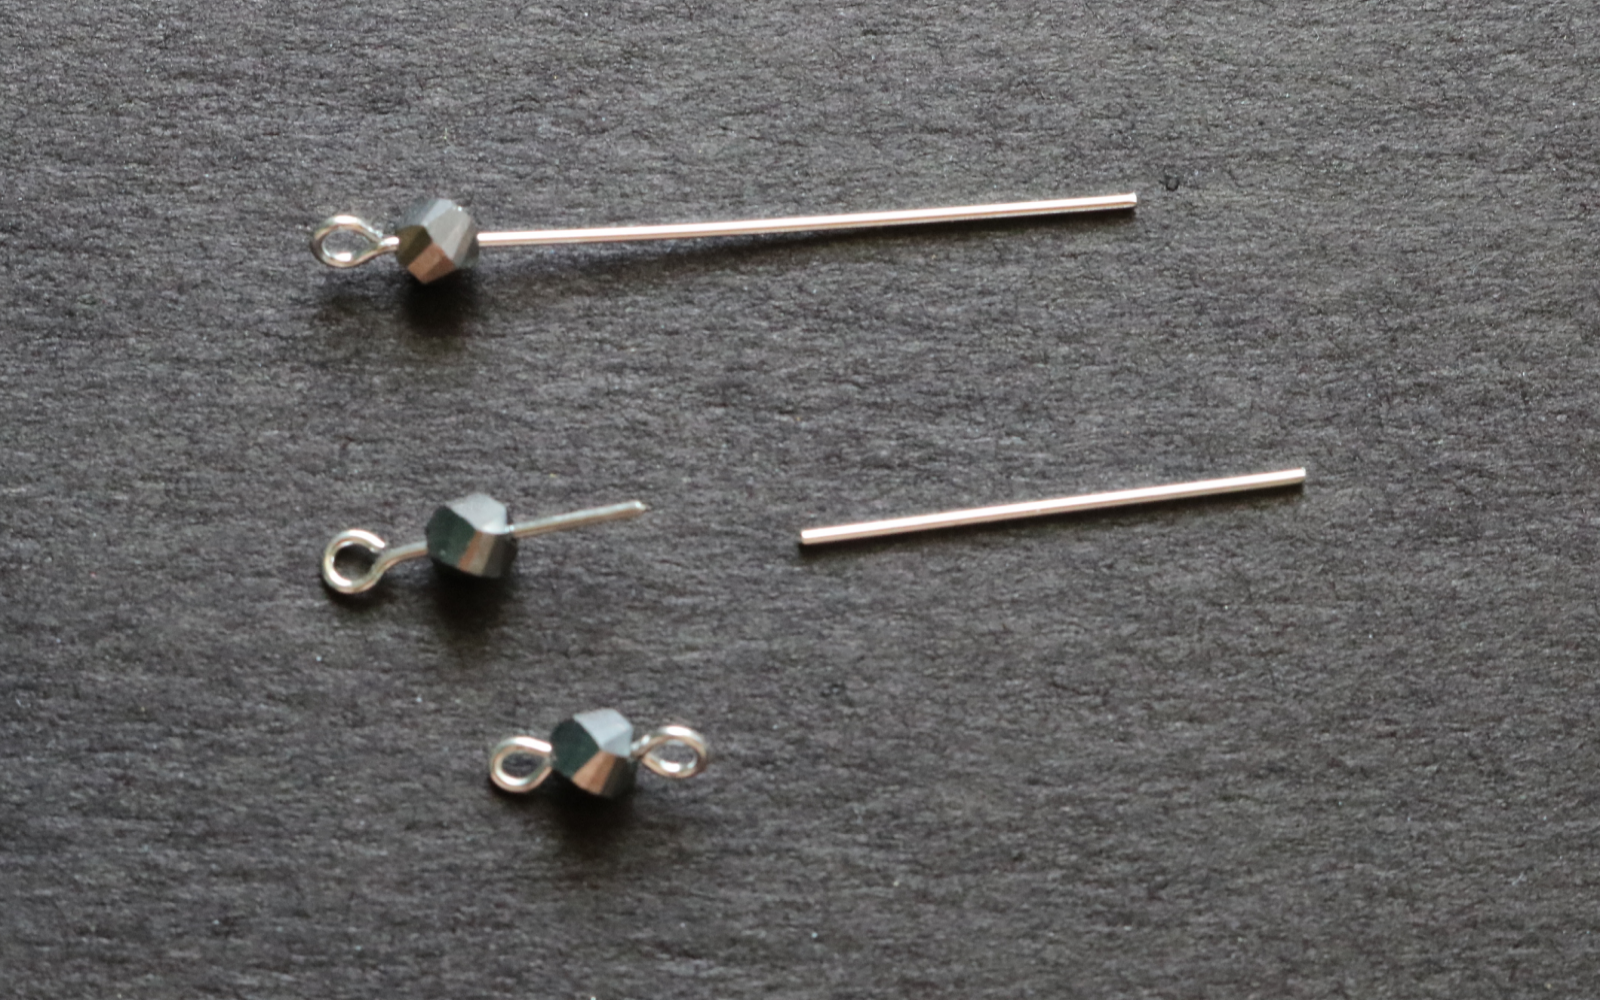
3. Add a small 4mm bead to an eye pin (top). Cut the pin so that there is about 1/2 inch extra (center). Bend into a loop (bottom).
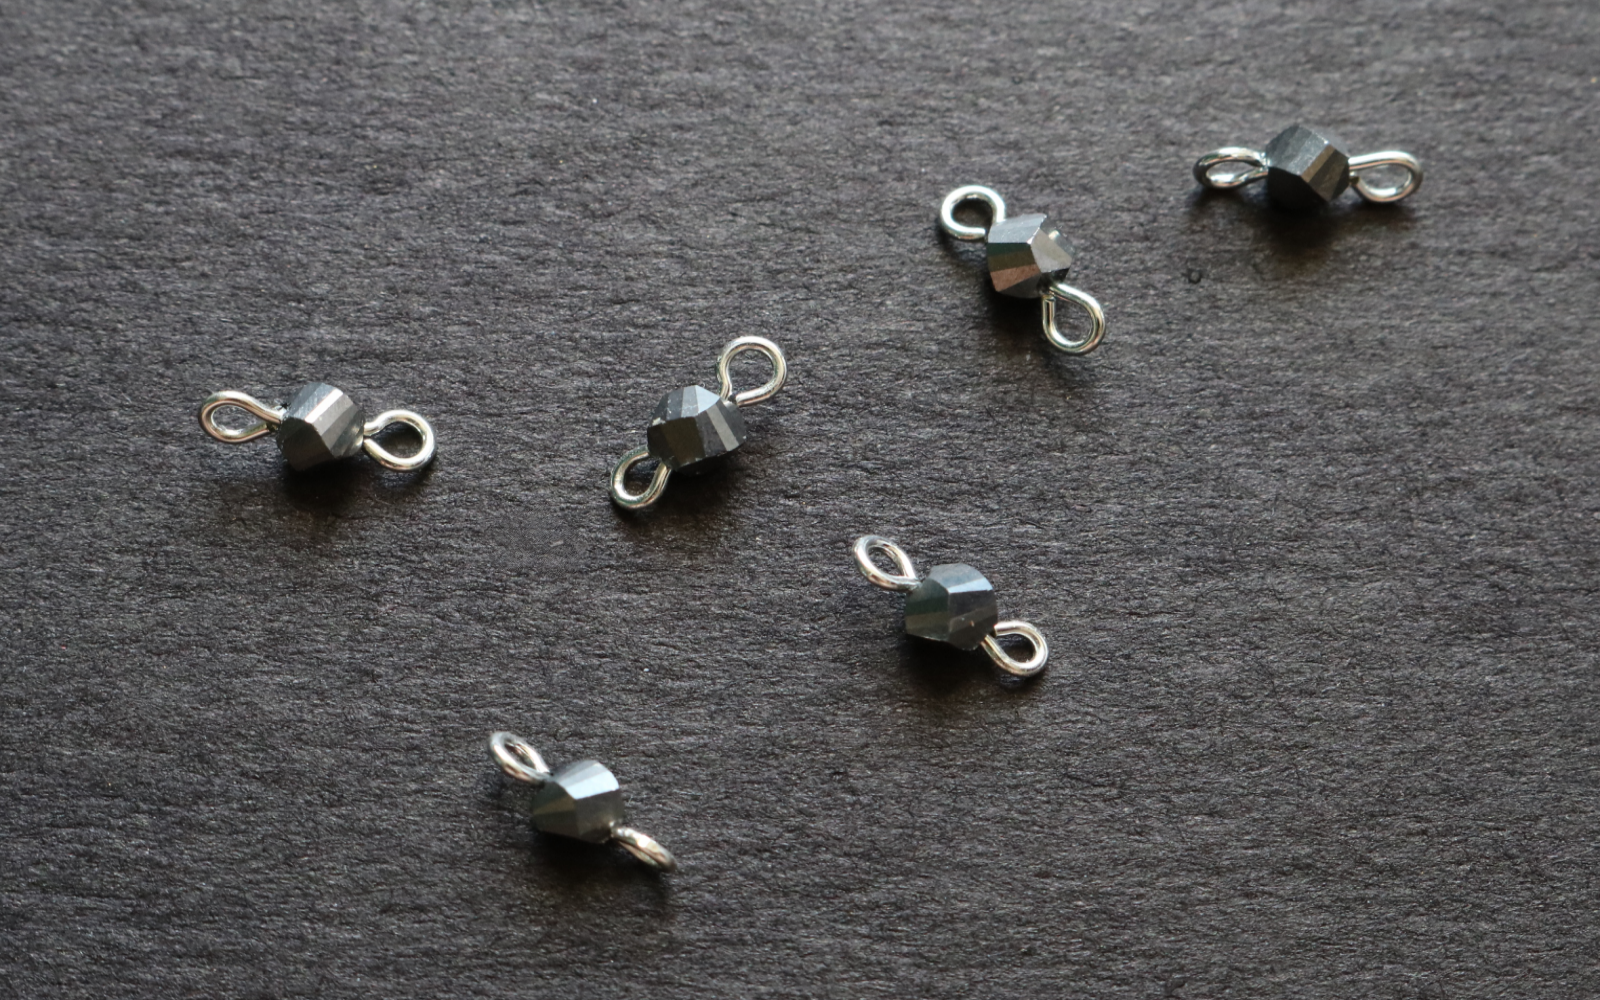
4. Repeat five more times to create a total of six beaded links.
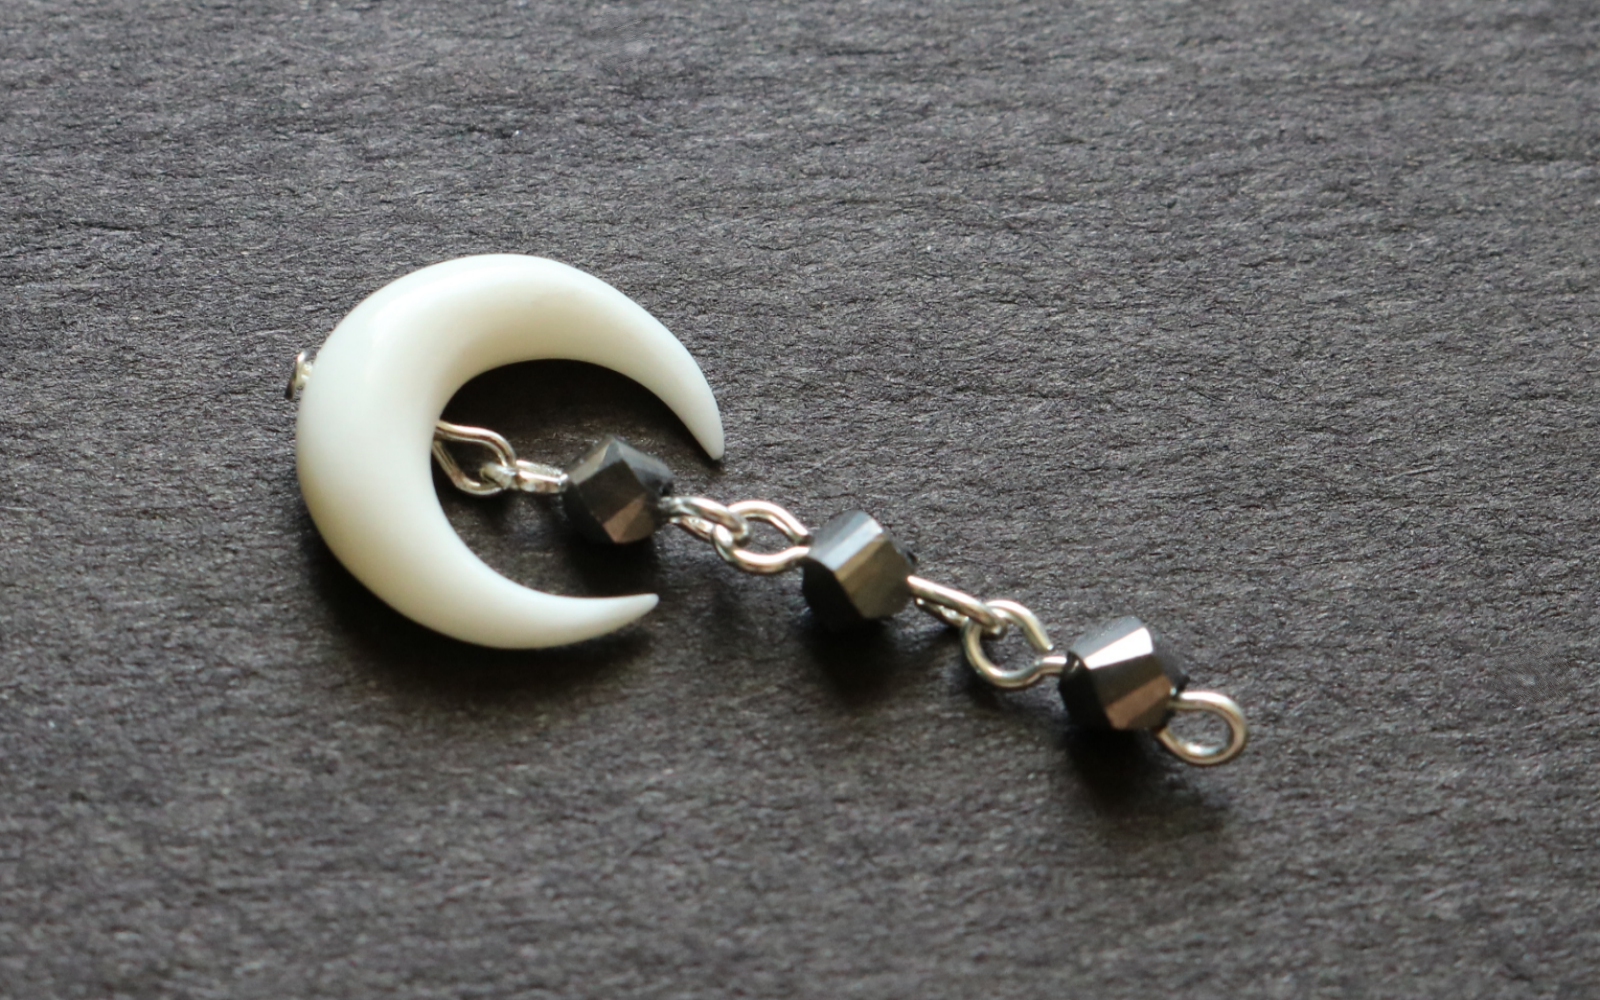
5. Attach a beaded link to the crescent. Add two more links to create a beaded chain.
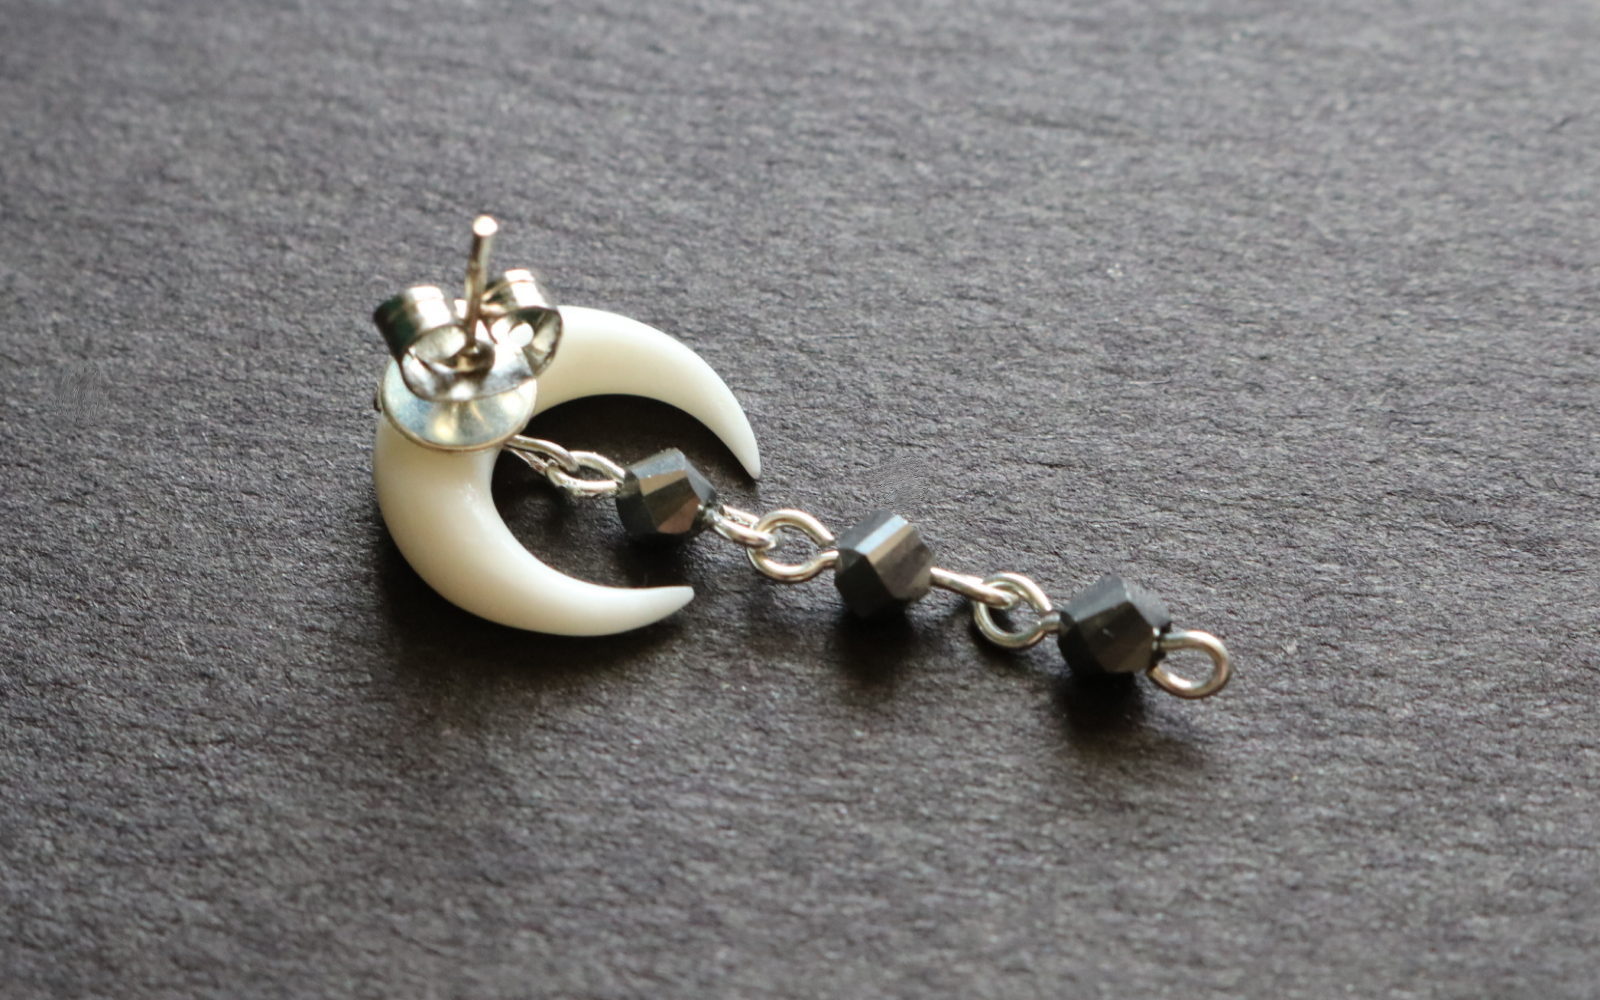
6. Glue a blank earring stud to the crescent. Repeat Steps 1-6 once more to create a second earring. Leave to dry completely.
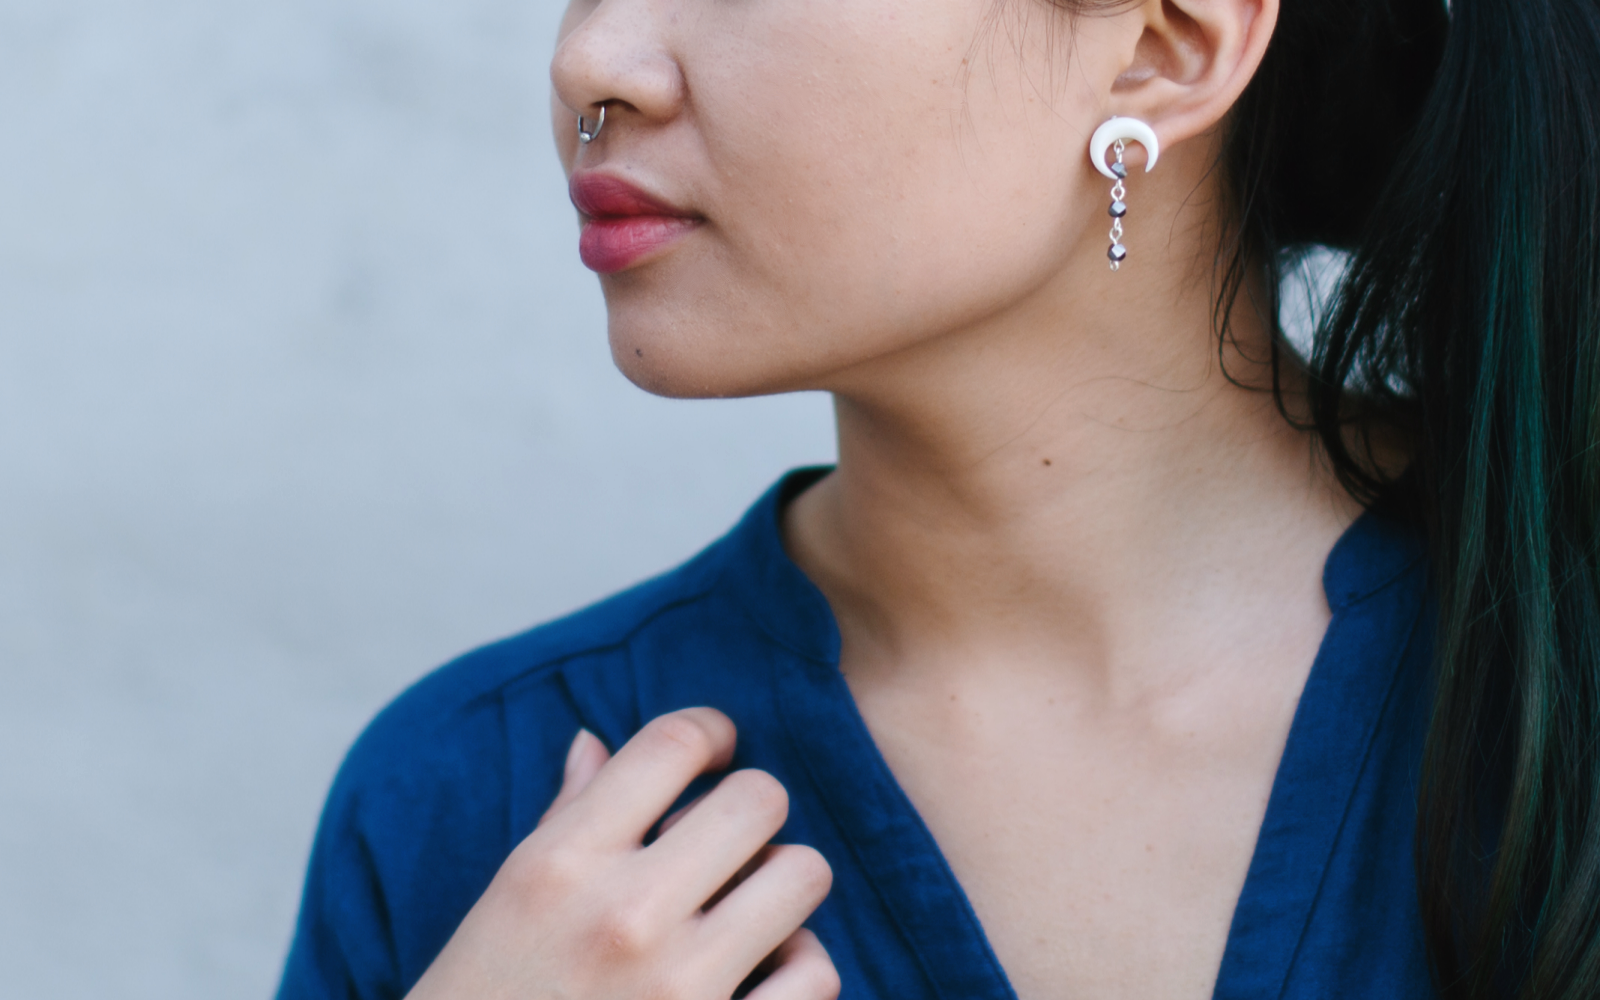
… and that’s it. Your new earrings are ready for a spin.

I’m in LOVE with these.

Again, this tutorial is ideal for using up those random leftover beads from past projects. You only need six, after all. If you have more beads, feel free to experiment and make a longer beaded chain. Alternatively, you can attach strands of chains for tassel-like embellishments.
Looking for other ways to use up leftover supplies? Check out these projects:
- Bandanna Fabric Choker (leftover fabric)
- Stone Fringe Necklace (chain remnants)
- Twisted Wire & Chain Ring (chain and wire)
- Knotted Chain Spike Necklace (chain… lots of it!)
Hope you love it!
xx K
Tutorial Photos: Kirsten Nunez
Lifestyle Images: Haruka Sakaguchi