
Because everyone needs a little bling in their life… even if you’re not the glitzy, glam type. Keep reading to check out the how-to!

Supplies:
– 6 Rhinestone Connector Beads
– 10 Small Beads (Color/style is totally up to you)
– Chain
– Key Chain Ring
– Craft Wire (Anywhere from 16-24 gauge depending on the holes of your connectors)
– Jewelry Clasp
– Jump Rings (3 x 6-8mm, 1 x 10-12mm)
– 3-in-1 Jewelry Pliers
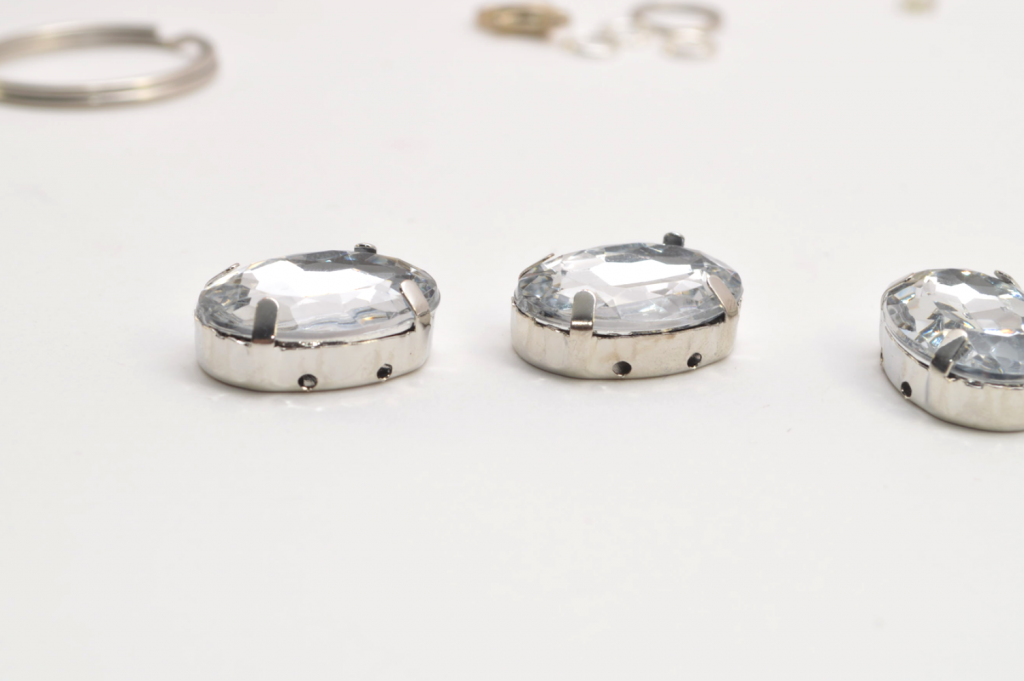
Any rhinestone connectors with two holes can work. I purchased these oval connectors at Michaels.
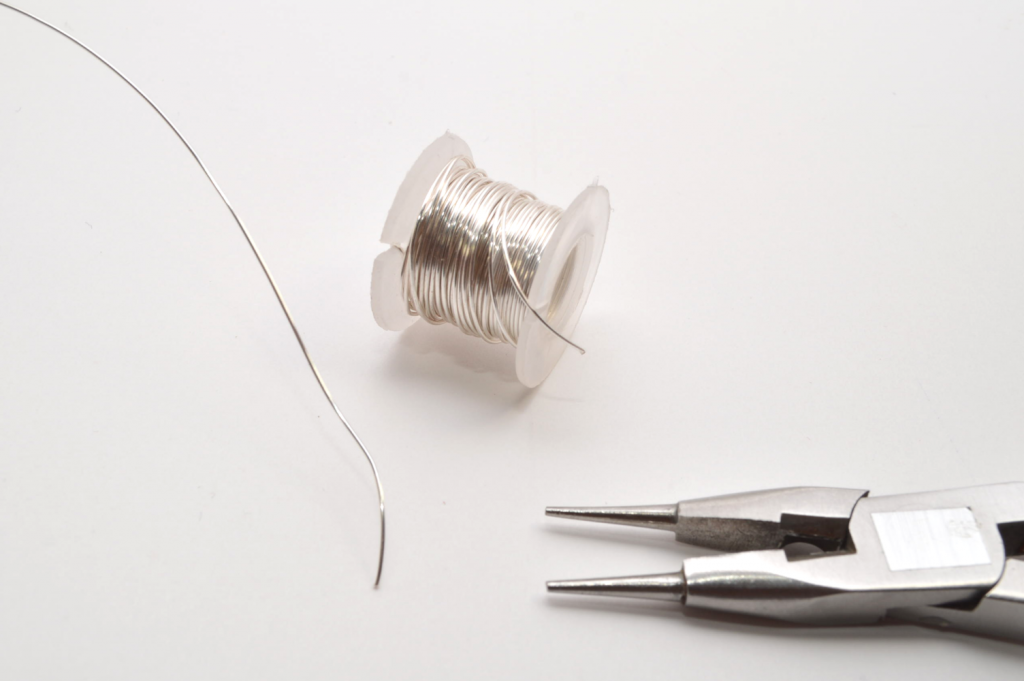
1) Using the cutting portion of the pliers, cut a strand of wire measuring at least 25 inches (63.5 centimeters).

2) Bend the wire in half and insert both ends through the connector. Add one bead onto each side.
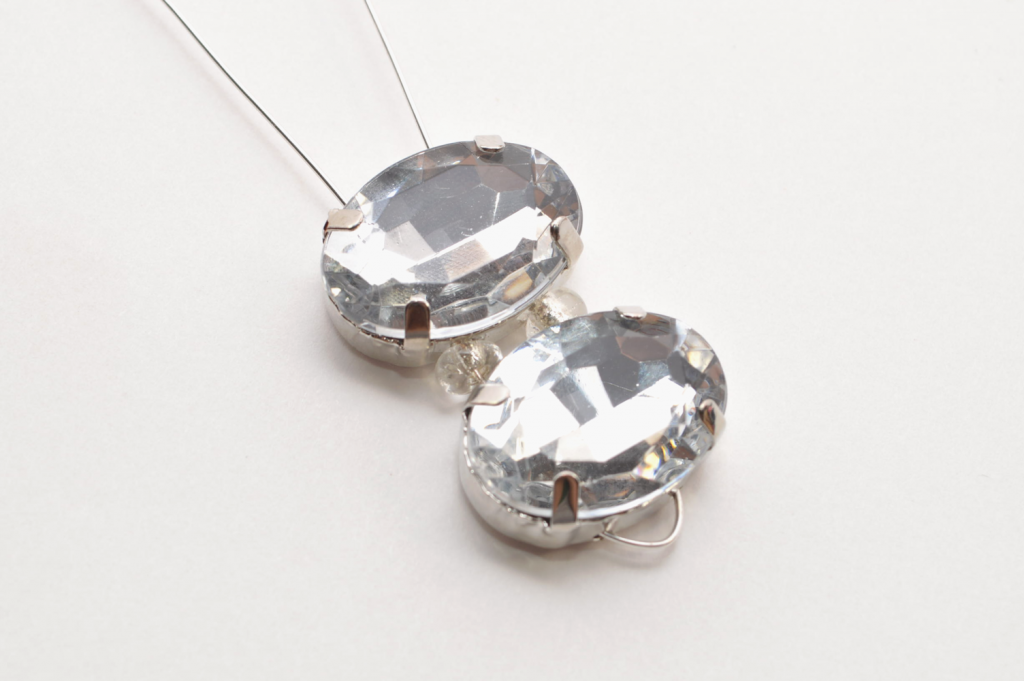
3) Add another connector.
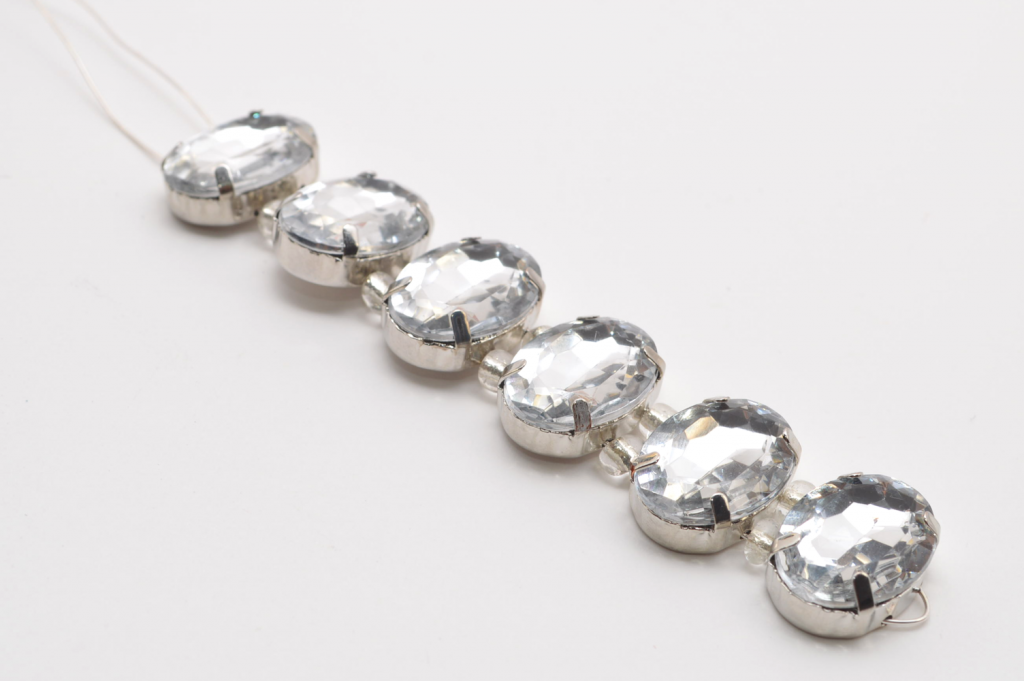
4) Continue alternating between beads and connectors.
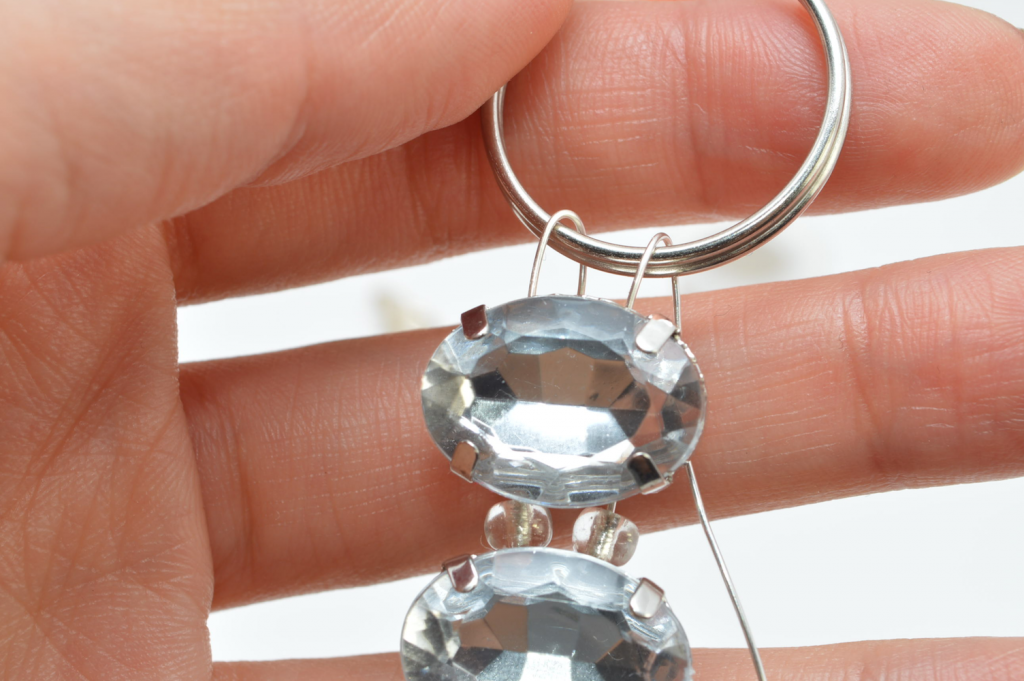
5) Insert the wire straight through the key ring and bend down.

6) Tightly wrap the wire around the ring, one side at a time. After wrapping the wire around 7-9 times, trim the wire with the cutting portion of the pliers. Use the flat portion to press down the end in place.
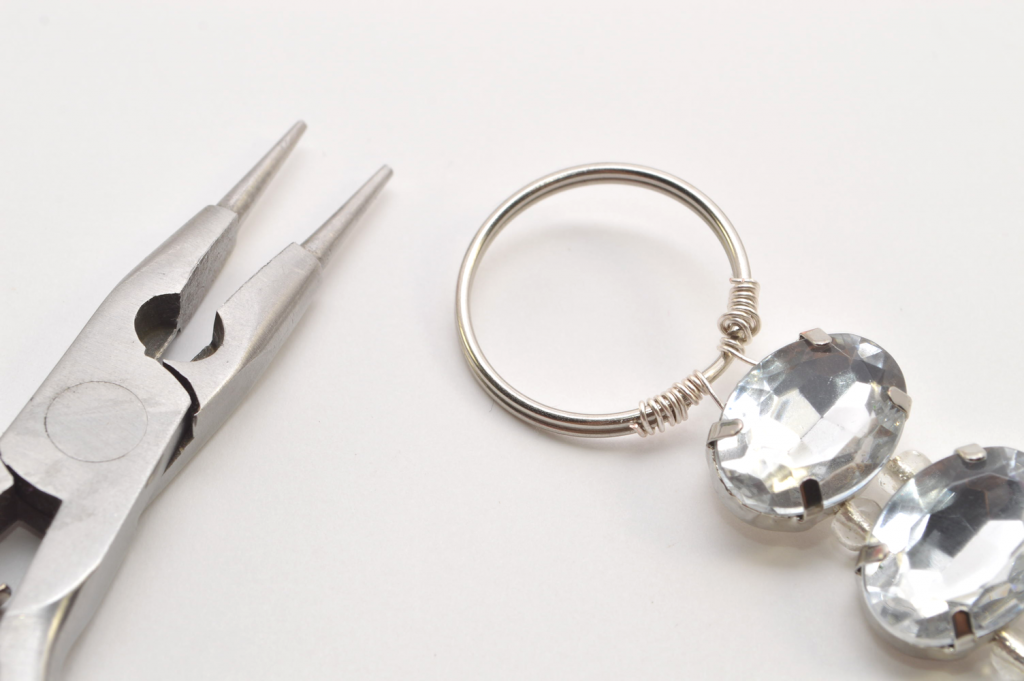
7) Repeat on the opposite side.
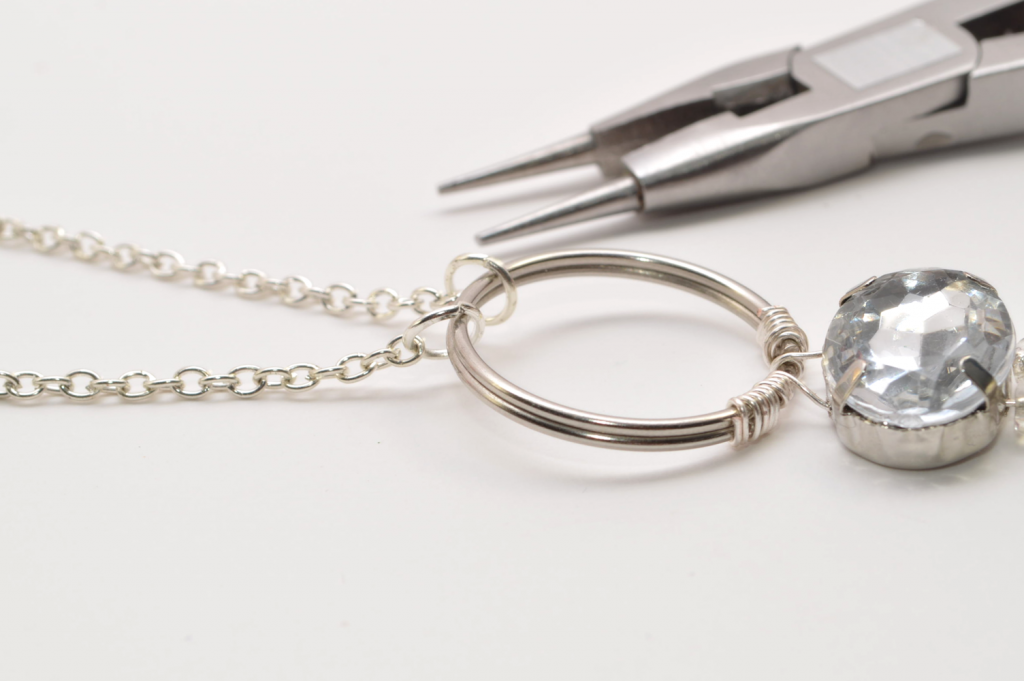
8) Using the jump rings, attach two strands of chain to the key ring. I made each strand about 12 inches (30.48 centimeters) . You can make it shorter or longer, if you’d like.
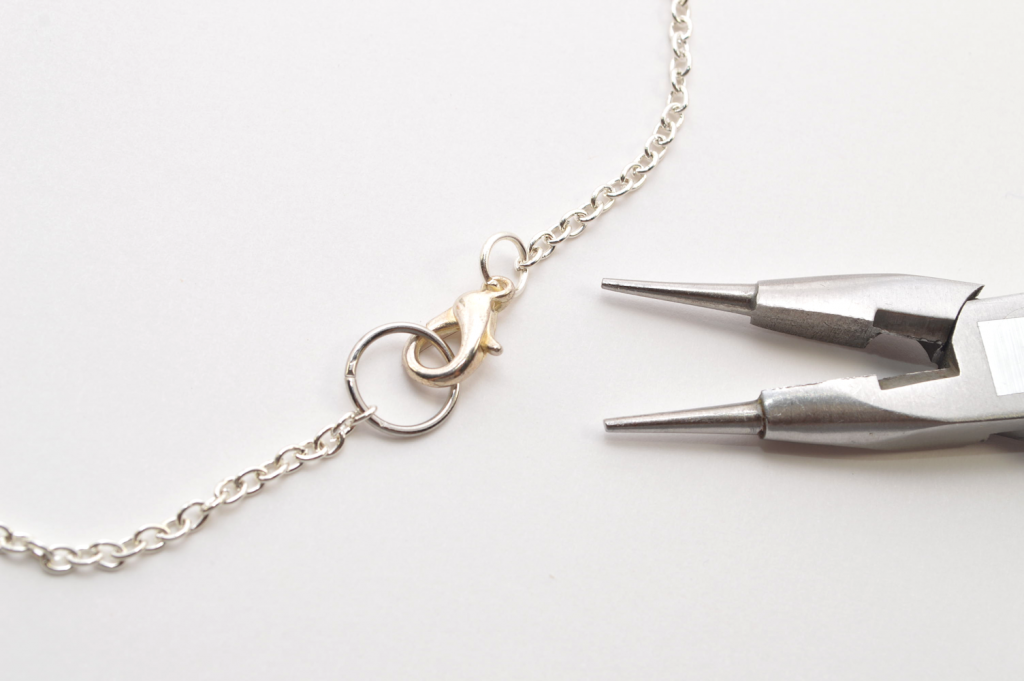
9) At the opposite ends of the chain, add a small jump ring and a jewelry clasp to one side, and a large jump ring to the other.


I love the shape of the necklace, and how it falls when worn. I’m also loving how the key chain ring is such an ordinary item, but plays such a significant part in the construction of the necklace.


Tutorial Images: Kirsten Nunez
Styled Images Haruka Sakaguchi (The Denizen Co.)