DIY: Rhinestone Ombre Rope Necklace
crafts fashion jewelry necklaces tutorials

DIY: Rhinestone & Ombre Rope Necklace

I’m beginning to think ombre has become more of a staple instead of a trend. It’s been around for years, and there’s no sign of it fading out (no pun intended, I swear!) anytime soon. I personally love ombre/dyed anything thanks to my favorite art medium, watercolor paints. This project came about while rummaging through one of my many boxes of odds n’ ends, and I’m loving the end result! See how I made it, below: 
 
 
Supplies:

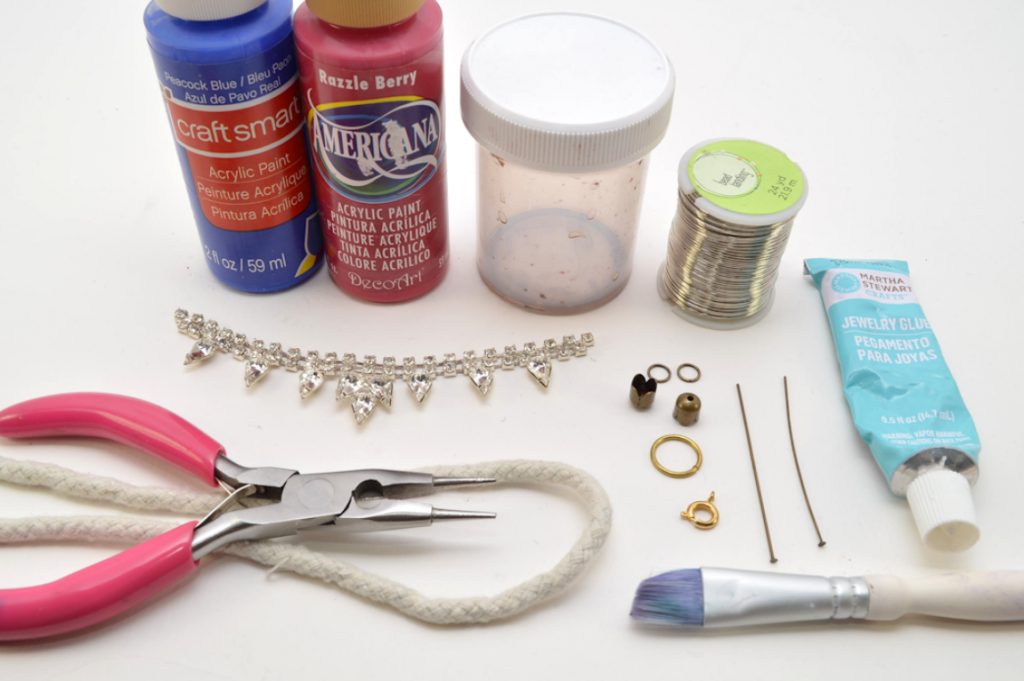
 – Acrylic Paint (1-3 Colors)
– Plastic Cup/Container(s)
– Wire (I used 22 Gauge)
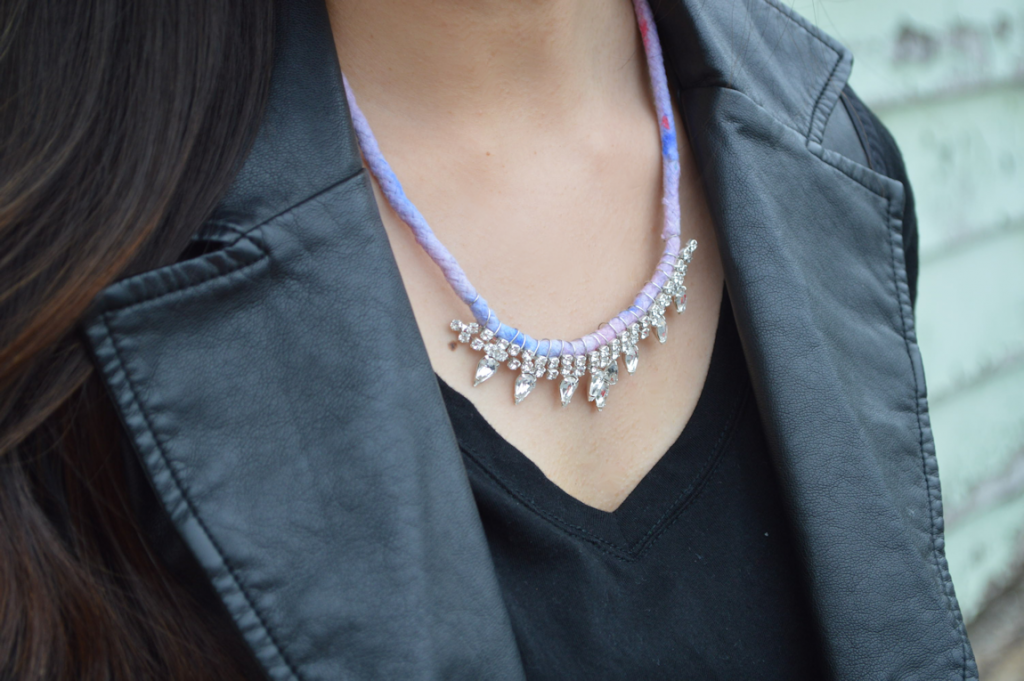
– Rhinestone Bib Necklace **
– Strong Craft/Jewelry Glue
– 3-in-1 Jewelry Pliers
– White/Cream Colored Rope
– Paintbrush
– 8mm Jump Rings (2)
– 14mm Jump Ring (1)
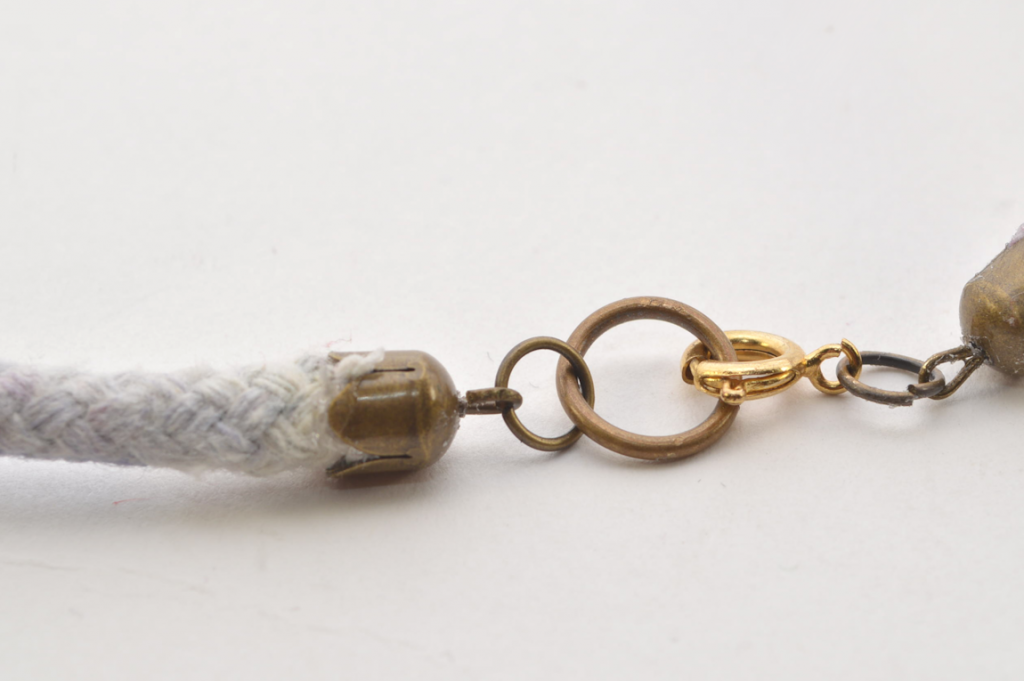
– Bead Caps (2)
– Jewelry Clasp (1)
– Head Pins (2)

** I already cut off both sides of the necklace before thinking of this project, but you’re going to want to look for a necklace kind of like this, this or this. I found mine at Claire’s in the section focused on proms/etc. If you can’t get to a Claire’s, try Forever 21/H&M/anywhere that sells costume jewelry. Etsy is a great place to look, too! Search for “rhinestone vintage necklace”, and throw in the words “prom” or “wedding” if needed.

 
For the jewelry components, feel free to use whatever type of metal you’d like. I know I used silver wire, but I had everything else available in brass. I personally don’t mind mixing and matching metals, so that aspect is up to you!
 
 
1) Add water to the container and add just a little bit of acrylic paint. Mix well to tint the water, and apply to the rope with the brush. Don’t forget to protect your surface with old magazines or newspapers.
 

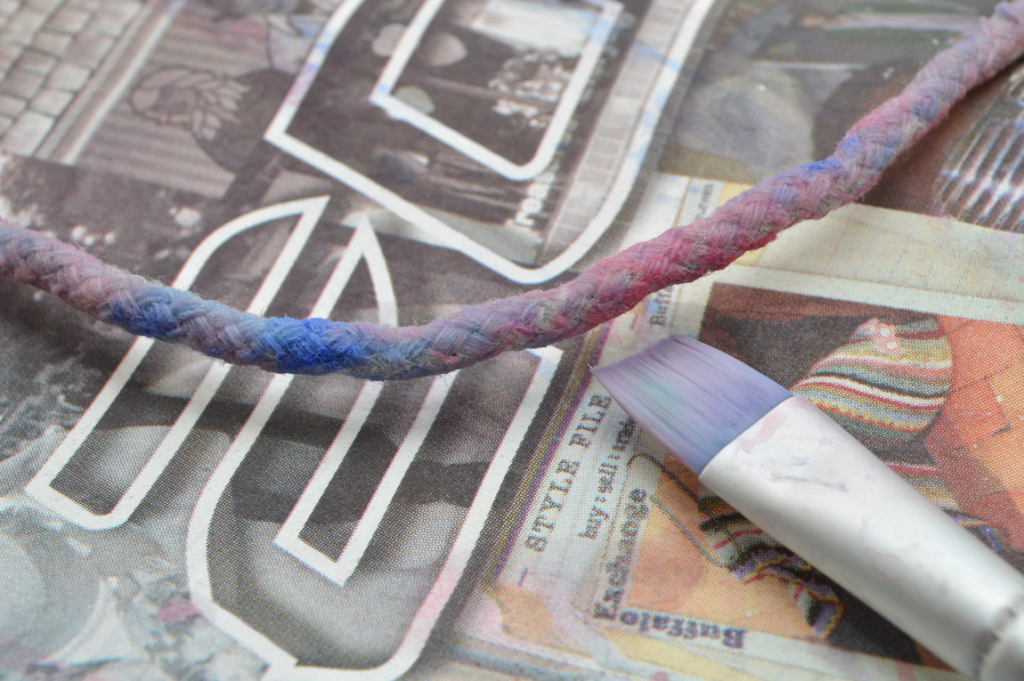
2) Repeat with the second color (and third, if you have it) and add to the rope. Blend colors together by simply applying water to the points where shades meet.

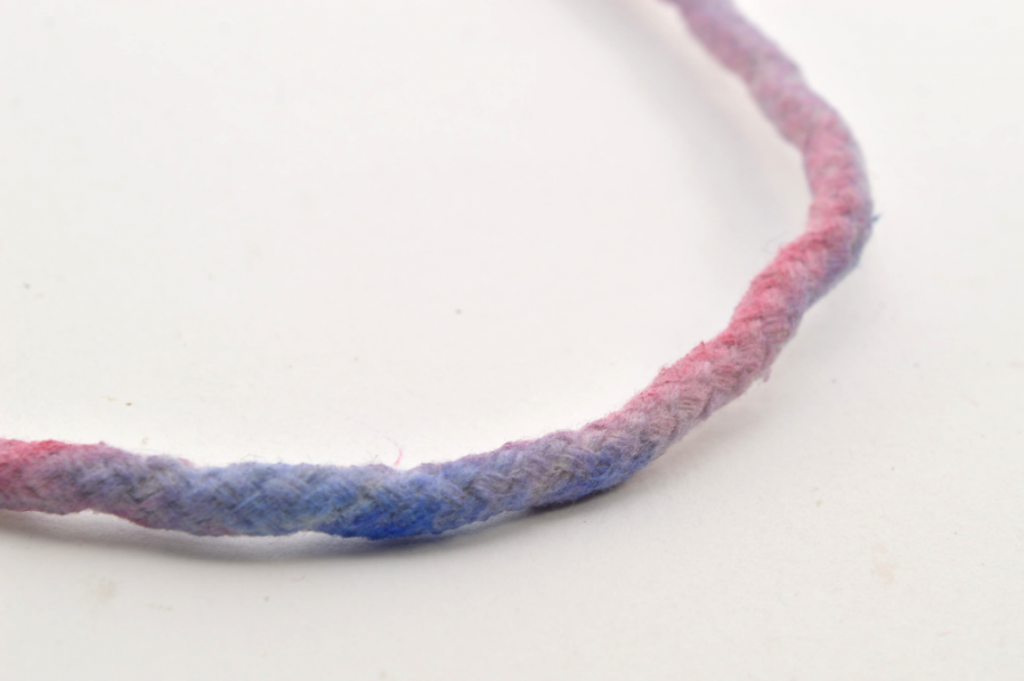
3) Let dry completely.

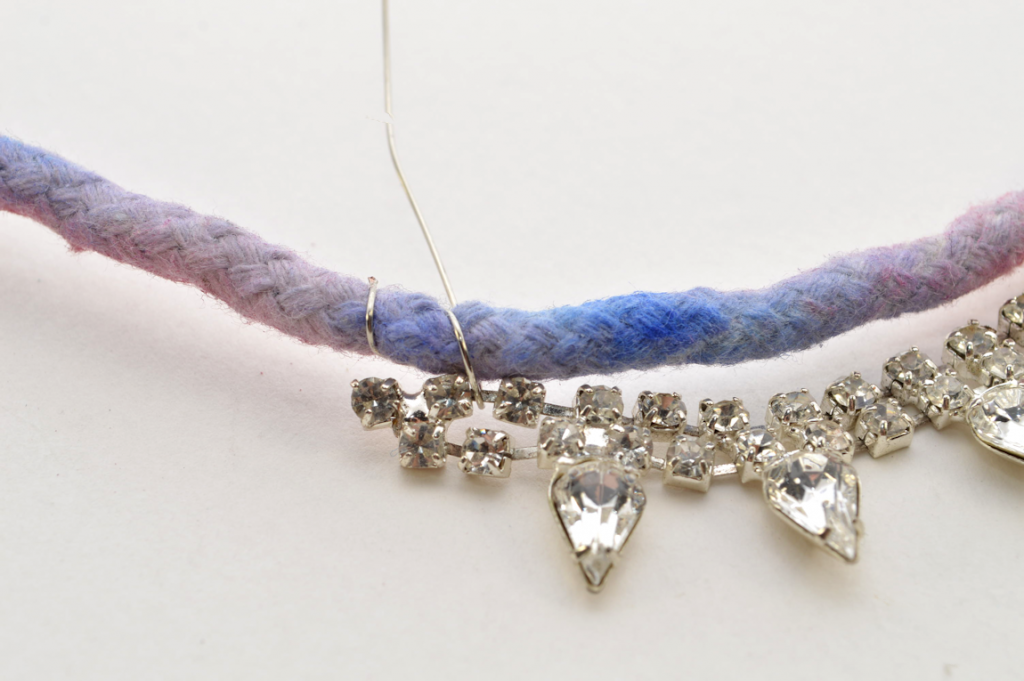
4) If you haven’t already, cut apart the necklace so that the main design/bib portion is left. Cut a long strand of wire and press the end into the rope to secure. Begin wrapping, weaving around/in & out of the rhinestone component.

 
5) Continue along the rhinestone bib.


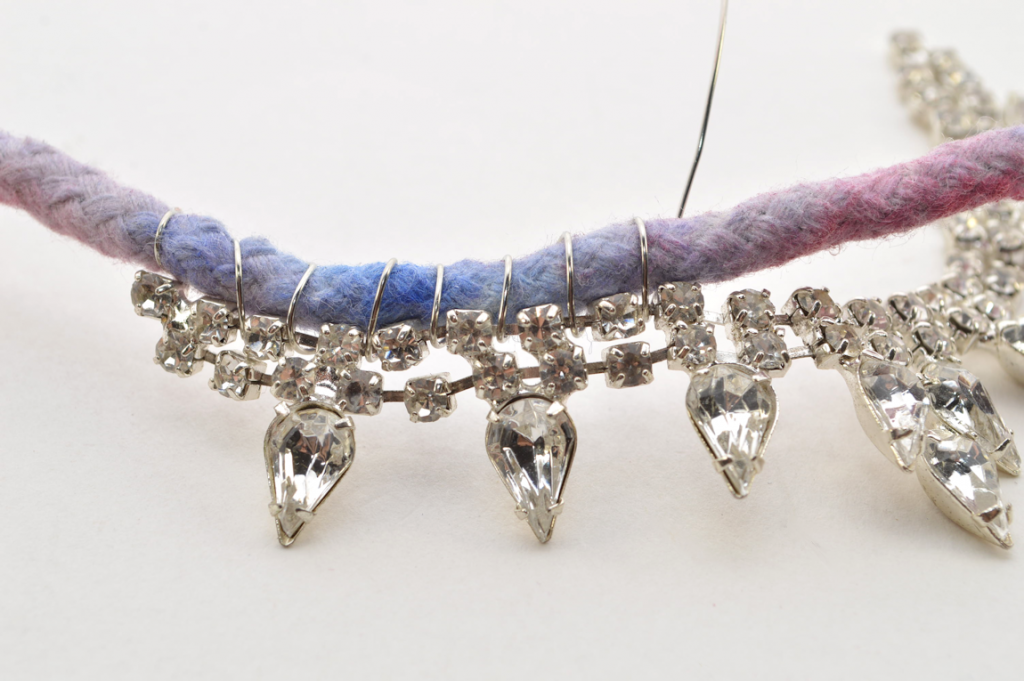
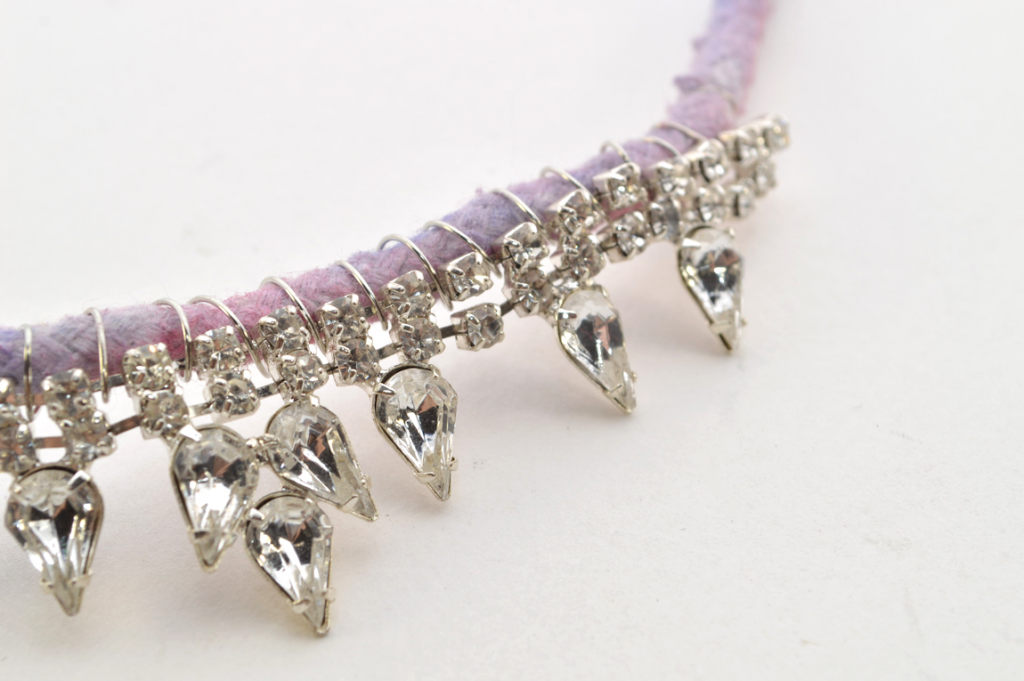
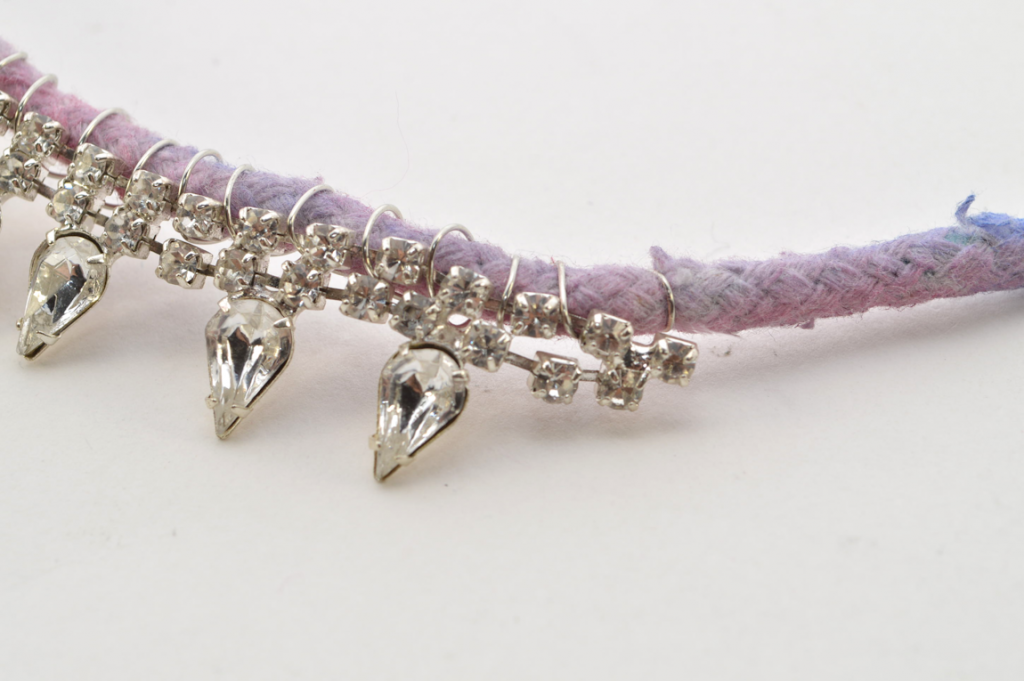
6) At the end, trim the wire and press down the end into the rope to secure.

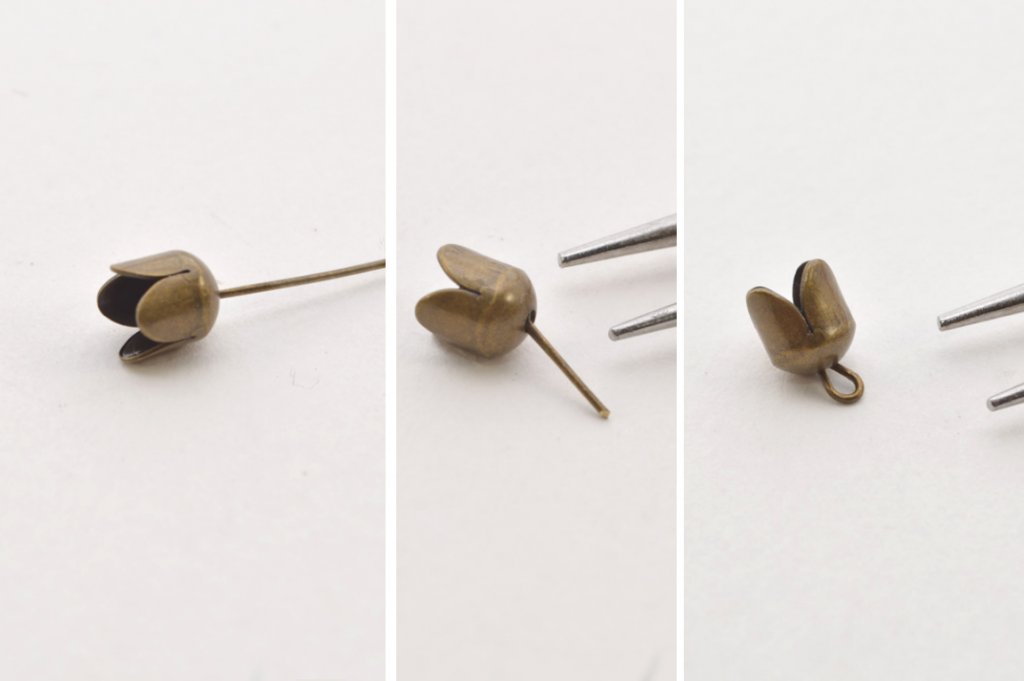
7) Add a bead cap onto a head pin. Trim the head pin, leaving about .5 inch (1.27 centimeters). Create a loop with the round nosed tips of the pliers. Repeat once more.

 
8) Trim the rope to your desired length – mine was about 18 inches (71.12 centimeters). Glue the bead caps onto the rope ends, and attach the smaller jump rings. Add a larger jump ring and a clasp. 


I tend to wear a lot of black and darker shades, so this is a fun way for me to incorporate more color into my life. The pink was an unconventional decision on my part, but I’m into it! Hope you are, too.