
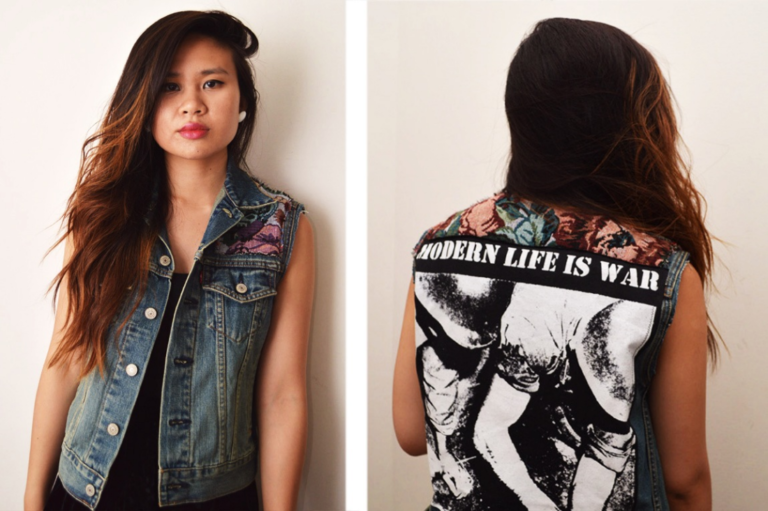
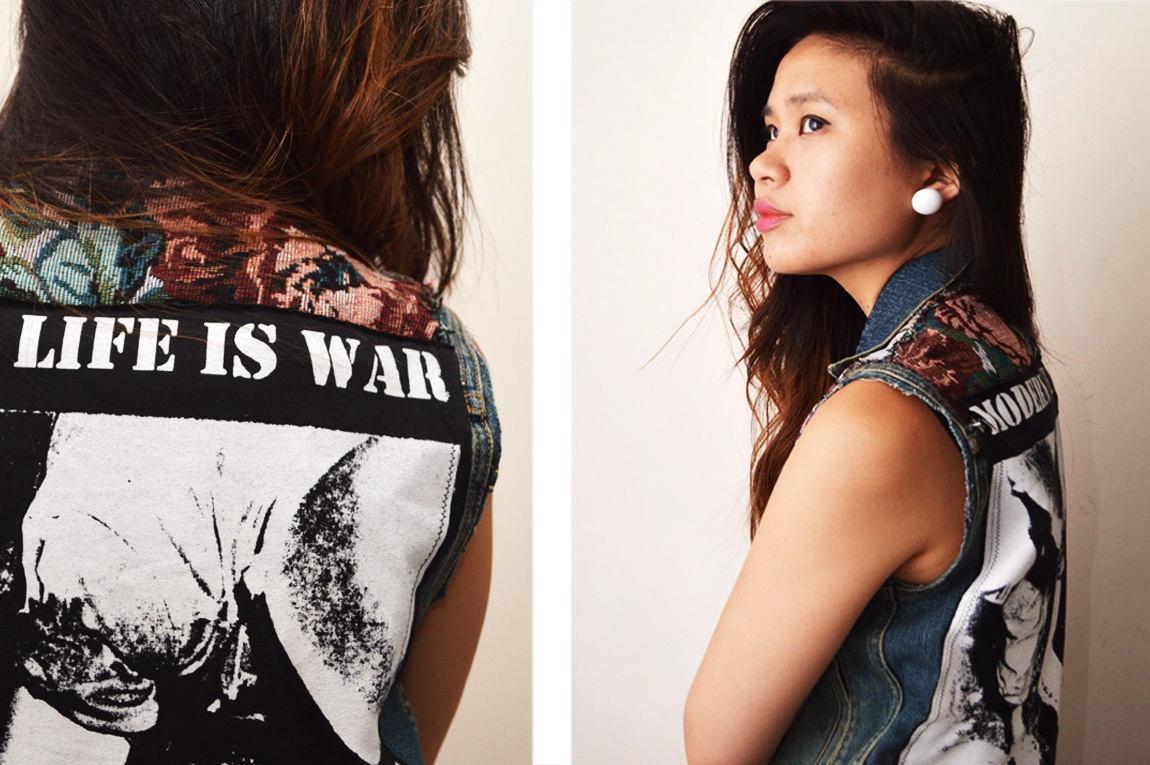
This week’s inspiration is none other than granny chic tapestry prints. Designers such as Rag & Bone and Dolce and Gabanna have both sent tapestry prints down the runway, while such patterns can be spotted in an array of street style photographs. As promised, I created a project that presents this granny-inspired style in an edgy, up-to-date way.
I combined some tapestry fabric (found at Jo-Ann Fabric & Craft Stores) with a hardcore band shirt (Modern Life is War). They were active until 2008 then made a comeback last year. I’ve owned this shirt for a while, but never really wore it much since it was too big for me. Thanks to a $10 Goodwill find (a Levi’s denim jacket) and some sewing, I was able to add some edginess to some floral granny fabric.
See how I made it, below!
.JPG)

Supplies:
- Denim Vest
- (To cut a denim jacket into a vest, simply cut off the sleeves using the shoulder seam as a guide)
- Graphic/Band T-Shirt
- Tapestry Fabric (1/4 of a yard will be more than enough)
- Fabric Scissors
- Matching Thread
- Sewing Machine, Straight Pins (not shown)
- Liquid Seam Sealant, such as Fray Check (optional, but recommended)
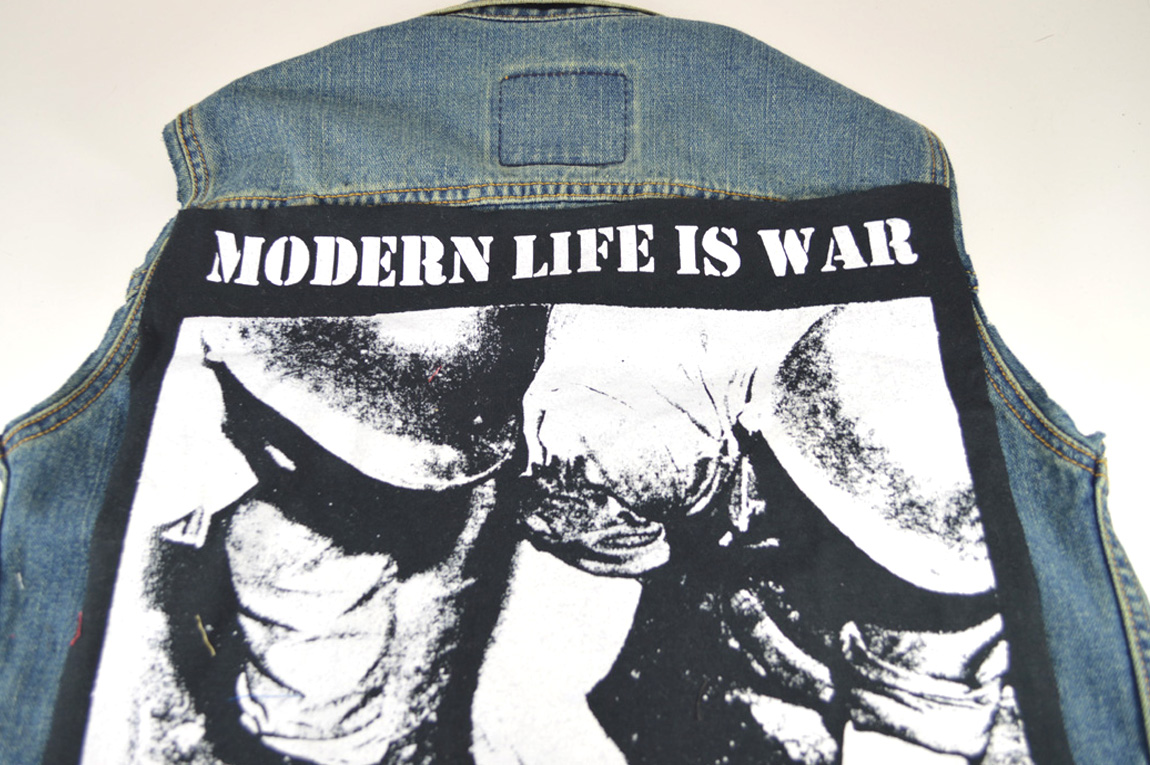
1) Trim the graphic to fit the back of your denim jacket. I made it so that it would fit the back panel, right below the upper back panel seam.
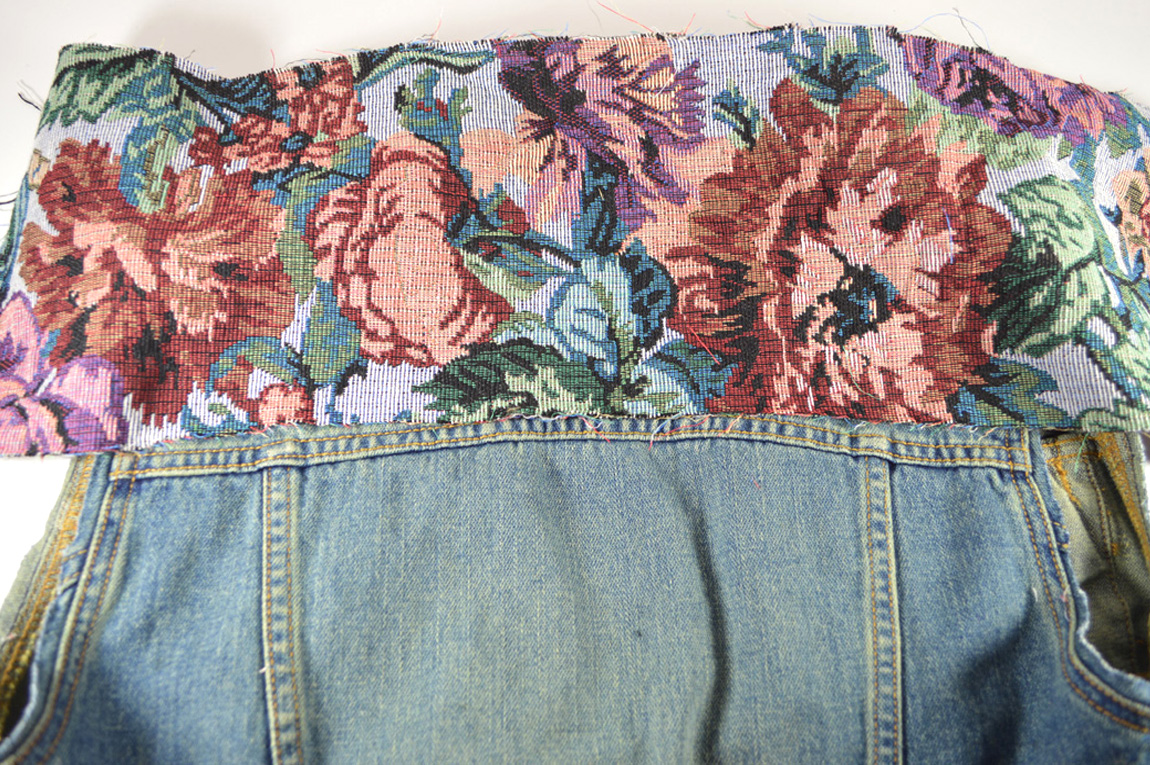
2) Cut a tapestry rectangle to fit the upper back panel, above the seam, as shown above.

The corners of the fabric rectangle will overlap the shoulder curve, as shown above/below.

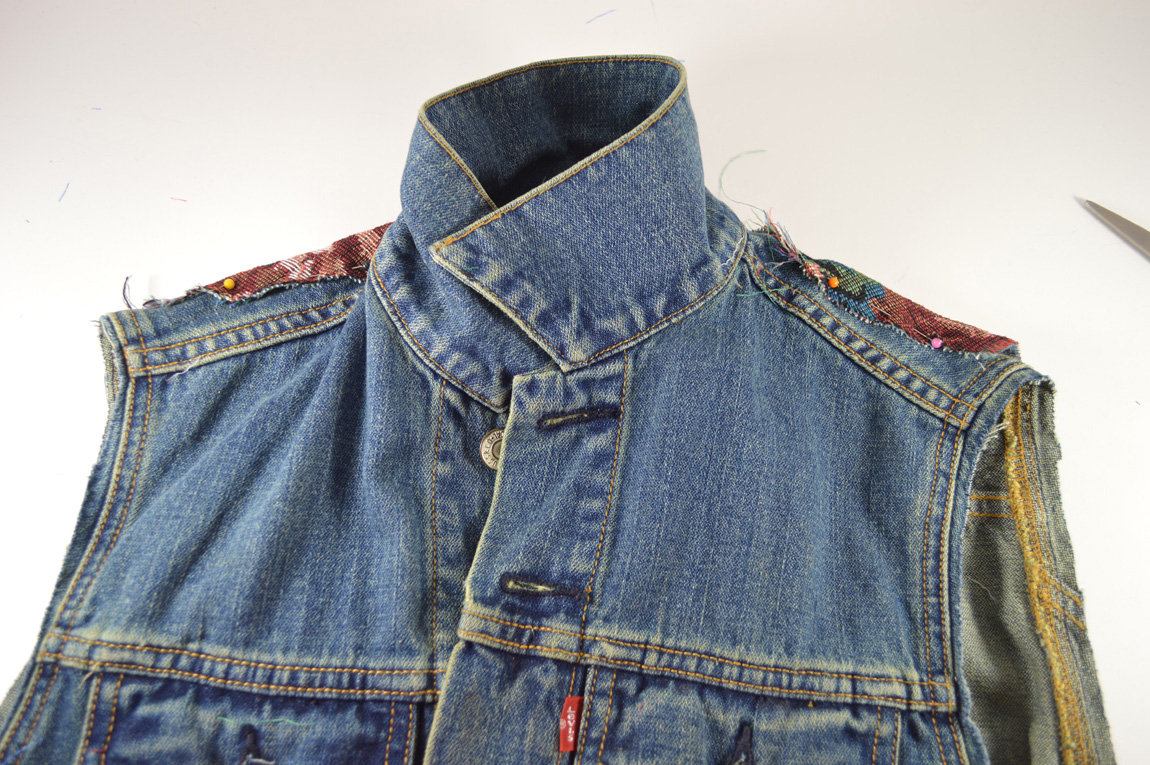
4) Trim the corner to line up with the shoulder seam. As always, cut less than needed – meaning, leave a little extra just in case. I left a little extra fabric, which it is covering the shoulder seam (you can see it peeking out near the arm hole!)

5) For ease and consistency, take the rectangle and fold it like above.

6) Trim the other corner, using the cut corner as a guide.

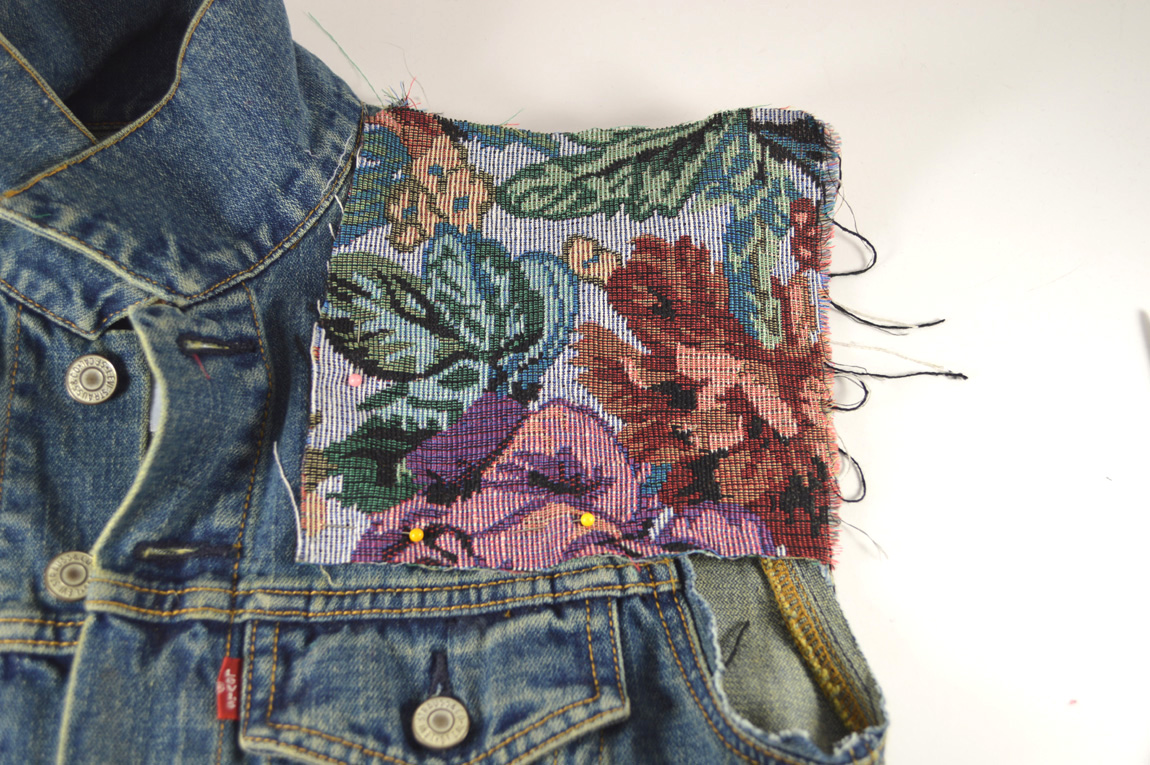
7) Lay the tapestry fabric back on the upper back panel, pinning in place. Cut the curve right under the collar, as shown above. This may be a little tricky, so take your time! If it’s not perfect, don’t stress too much – the vest’s collar will cover the cut edge of the fabric.
8) When pinned in place, your vest will look a little something like this from the front side.

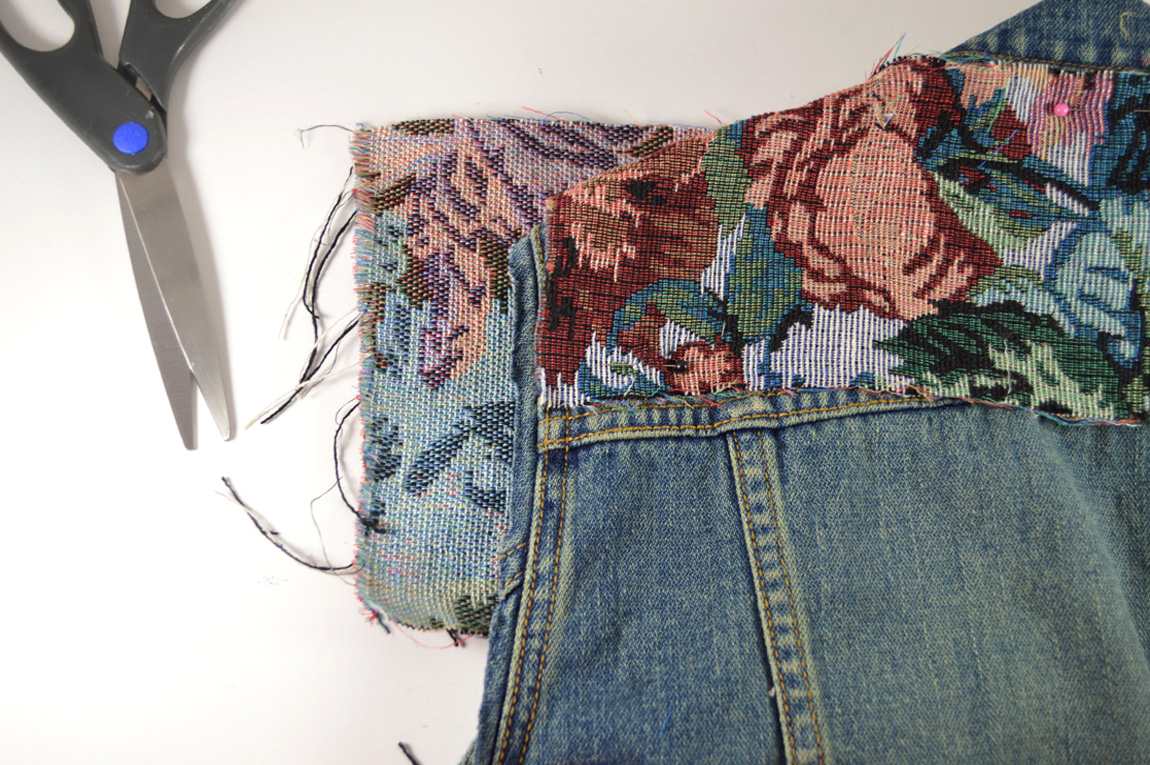
9) Cut a smaller rectangle to cover the shoulder panel on one side of the vest.
10) Trim so that it stops right at the pocket seam, as shown above. Pin in place…
11) … a trim along the arm hole. I found that turning this over (above) and using the arm hole as a guide worked more efficiently.

12) Repeat on the opposite side. Don’t forget to pin everything in place!

13) The shoulders will be a bit awkward, with the front rectangle’s corner overlapping.
14) Cut the front rectangle at a corner, so that it lines up with the diagonal shoulder seam. Again, leave a little extra fabric. You can always trim down, but you can’t add more back.

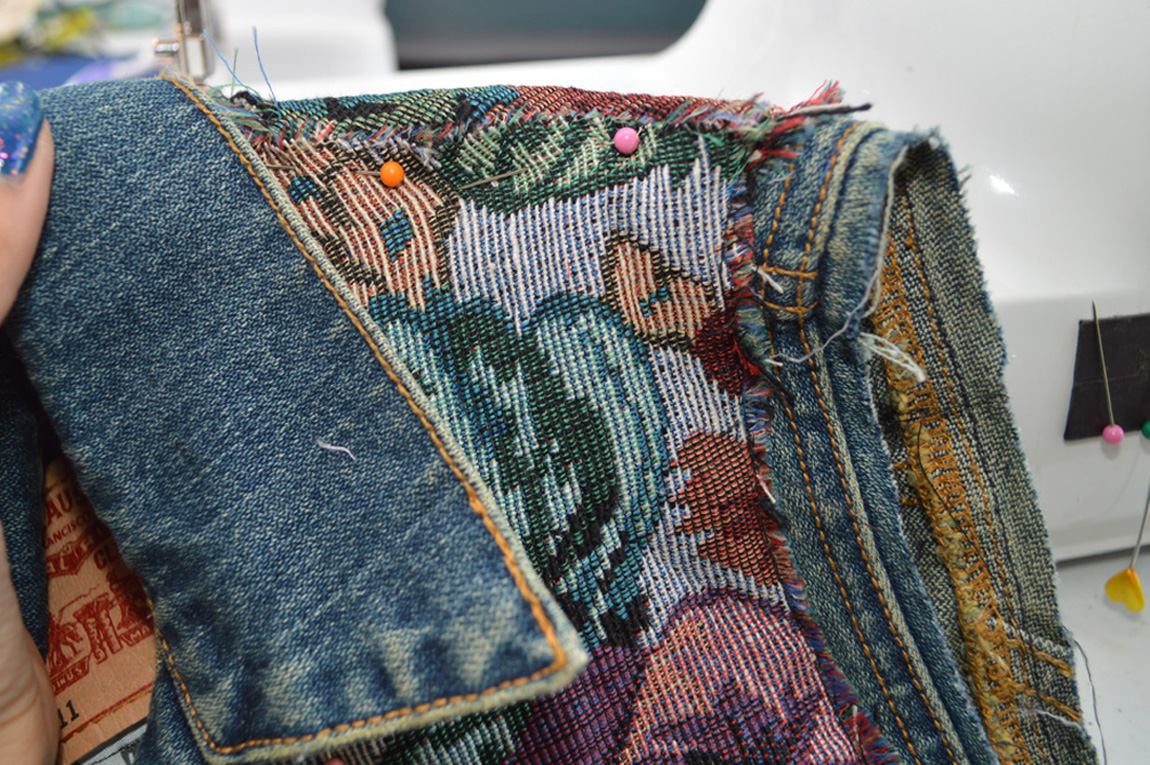
15) Sew everything in place! You’ll most likely need to lay the vest flat and slip the entirety of it through the sewing machine’s foot in order to get to where you need to sew.

16) Tip: Once you get to the end/corner, cut the thread then fully re-position the vest. This will be much easier than maneuvering around corners and rotating the vest while stitching.

17) Don’t forget to sew down the diagonal seam of both shoulders.

18) Adding the graphic t’s back panel will be a piece of cake. Simply stitch down all four sides, and you’re good to go.

The steps may seem a bit complicated , especially around the shoulders, but taking your time is key. It’s also not a bad idea to buy more tapestry fabric than you think you’ll need, so you can always start over if needed. Or just make more vests.
If you can’t find tapestry fabric, you can always use thrifted curtain or a blazer. A placemat would have the perfect amount of material. It sounds tacky, but it’s basically the same kind of fabric. Just use your imagination and don’t hesitate to give unconventional materials a chance.
xx K