

This necklace DIY will probably cost you less than a cup of coffee – which is probably a good thing if you’re a coffee addict like myself. Although…count on me to be the weird one to not even think of coffee when I saw these coffee stirrers 🙂
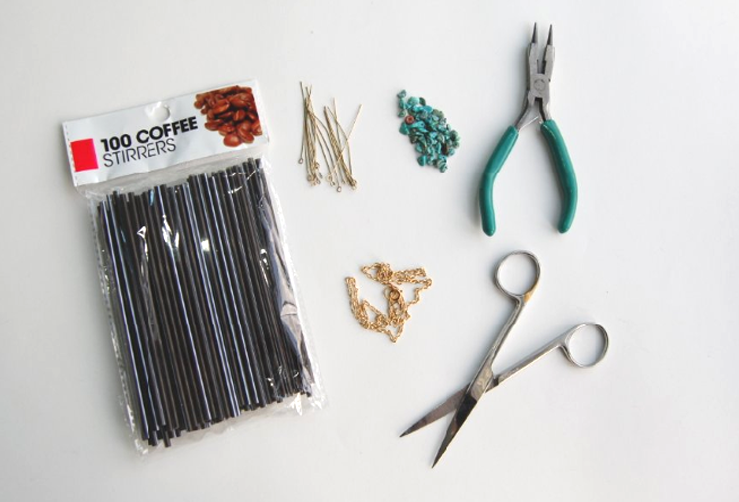
Supplies:
– Coffee stirrers; I used less than 10
– Head or eye pins
– Jump rings
– Beads of your choice
– Chain; I used about 38 inches
– Jewelry pliers and scissors
– Metallic spray paint
– Styrofoam or cardboard box
-Pen

Metallic gold spray paint.
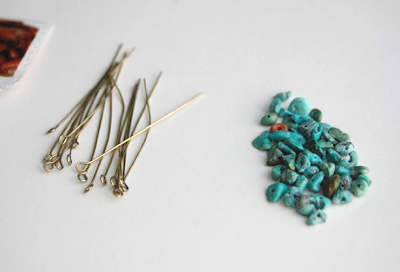
I used brass eye pins and turquoise stone chips. If you use head pins, you’ll have to create a loop with your jewelry pliers on one end before using them. You can also use thick wire as a substitute. As for the beads, I used turquoise stone chips, but you can use whatever you want – just make sure they’re bigger than the hole of your straws.
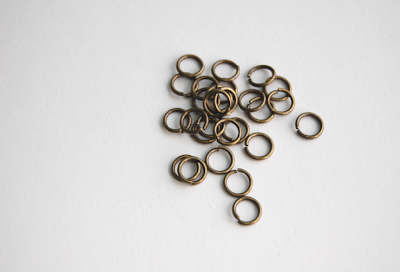
I realized about halfway through that jump rings would make this DIY much easier, so I recommend using them.

1) Using a pen, poke holes in the box or Styrofoam. I used an old gift box; I kind of had to play with the pen a bit in order to make holes that were big enough for the straws, but small enough so that they didn’t fall through.

2) Insert the coffee stirrers into the holes. By placing them vertically, the paint will distribute along the straws evenly.

3) Spray paint away! I did this outside. I can only imagine what my neighbors thought I was doing…it looks like some weird science project at this point.
Let dry according the can’s directions. This will most likely be around 24 hours.

4) When they’re dry, they should look something like this.

5) Cut the straws into pieces slightly less than 1 inch. You can make them shorter if you’d like, or longer if your head/eye pins are long as well.

6) If you’re using eye pins, they already look like this. If you’re using head pins or wire, create a loop with your jewelry pliers.
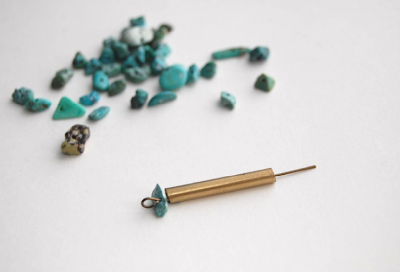
7) Slide on a bead, a straw piece, then another bead. Create another loop at the end of this.
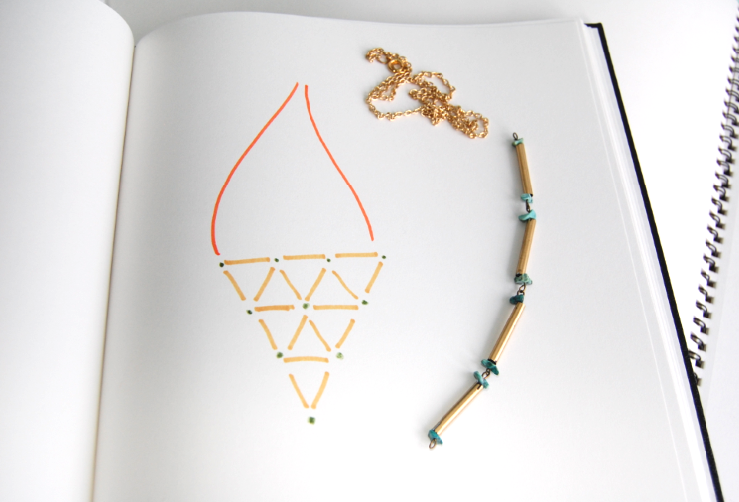
8) I recommend drawing out some kind of pattern before starting to connect the pieces. Or, you’re more than welcome to use the one I made. The orange represents the chain, the yellow represents the straw pieces, and the green dots represent the jump rings.
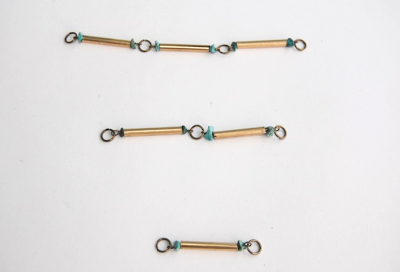
9) I started off with making the three horizontal rows, then followed the pattern above.

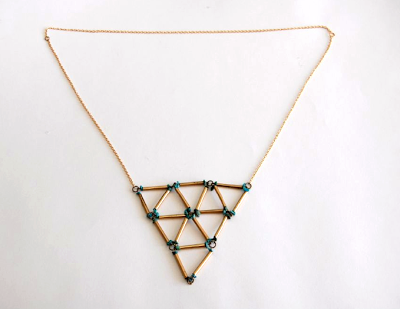
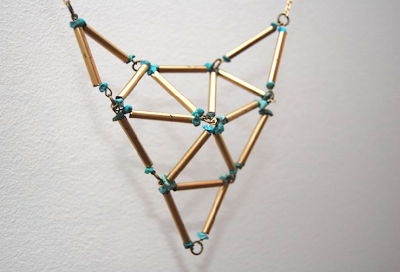
10) Finished pendant.
11) Attach the chain to the jump rings on both sides – and you’re done!
The pendant will most likely fold like this (or something like it) when you wear it, but I kind of like it that way.
You can always use regular plastic straws if you’d like. But again, just make sure the beads you use are bigger than the straws’ holes. I have so many coffee stirrers left, and it’s kind of impractical to use them at home when I make coffee, when I can just use a spoon…..so I’m sure you’ll see these resurface in future DIY projects. I already have a few ideas brewing in my head.I suppose you can always just snag a few coffee stirrers at your local cafe, if you don’t want to buy an entire pack. Just don’t tell them I suggested that. (<< I hope my barista friends don’t see this!)
Also, please check out Socks for Japan for an innovative way to help out those affected by the earthquake and tsunami.
xo,
kirsten