
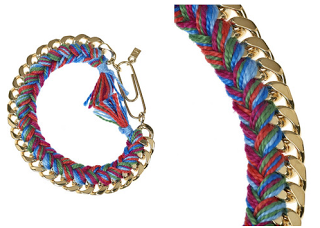
The latest jewelry trends seem to consist of mixed media: fabric or ribbon weaved in and out of chains of all different colors and thicknesses. I loved this braided chain bracelet by Aurélie Bidermann; strands of thread at incorporated into a curb chain, so that the chain is essentially the third strand of the braid. This particular bracelet is $385 on net-a-porter.com … here’s the DIY way, for much cheaper!
Inspiration:
Supplies:
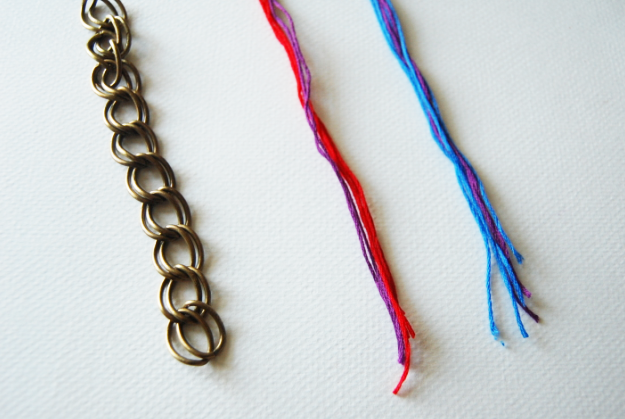
– Thick curb chain (I used brass chain from Michael’s, $2.99)
– Embroidery thread, of your color choice(s).
– Clasp, charms, jump rings
– Jewelry pliers, clear nail polish


1) Measure a length of chain that will fit comfortably around your wrist. Then cut 6 strands of embroidery thread that are three times the length of your wrist. These 6 strands will count as one set. Repeat this to make another one, so that you have two sets. (I chose 3 colors, so I used 2 red/2 blue/2 purple in each set)
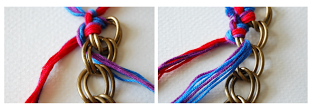
 For the sake of this tutorial though, I separated the strands – let’s clall them Red/Purple and Blue/Purple! It will be much easier to follow along this way.

2) Tie the strands together, then string Blue/Purple under & through one end of the chain.

3) Red/Purple goes over Blue/Purple, then under and through the chain.

4) Red/Purple goes over the chain, and Blue/Purple goes over Red/Purple.
5) Then Blue/Purple under and through the chain….

6) Red/Purple goes over and through the chain. Keep repeating until you’re done!
*Depending on how thick/wide your chain is, you may need more or less embroidery thread. The original by Bidermann only had the thread wrapping around each link once. I had a much wider chain, so the thread wrapped around each link three times.

7) Tie it off, trim it down if you’d like, add a few dots of clear nail polish to secure the knots. Add some charms and a clasp.

All done!
High End Cost: $385
DIY Cost: About $3
Xo, Kirsten